1. 简介
本 Codelab 介绍了 WorkManager 的一些进阶概念,内容基于后台使用 WorkManager Codelab 中的基础知识。
有助于您熟悉如何使用 WorkManager 的其他资源:
- WorkManager 指南
- 博客系列:WorkManager 简介
- 2019 年 Android 开发者峰会上的 WorkManager 主题演讲:WorkManager:深入探索高级知识
- WorkManager - MAD 技巧系列
构建内容
在本 Codelab 中,您将构建 Blur-O-Matic,该应用可对照片和图片进行模糊处理,并将处理后的照片和图片保存到文件中。如果您已完成使用 WorkManager 处理后台工作 Codelab,就会发现这是一个类似的示例应用(唯一的区别是,在本示例应用中,您可以从图库中选择您自己的图片进行模糊处理)。在本示例应用中,您将在代码中添加一些功能:
- 自定义配置
- 在执行工作的过程中通过 Progress API 更新界面
- 测试工作器
所需条件
在本 Codelab 中,您需要使用最新的稳定版 Android Studio。
您还应熟悉如何使用 LiveData、ViewModel 和 View Binding。如果您没有使用过这些类,请参阅“Android 生命周期感知型组件”Codelab(专门介绍了 ViewModel 和 LiveData)或“带 View 的 Room”Codelab(架构组件简介)。
如果遇到困难
如果您在本 Codelab 中遇到困难,或者想查看代码的最终状态,可以
如果愿意,您也可以从 GitHub 克隆完整的 WorkManager Codelab:
$ git clone -b advanced https://github.com/googlecodelabs/android-workmanager
2. 准备工作
第 1 步 - 下载代码
点击下方的链接以下载完成本 Codelab 所需的代码:
如果愿意,您也可以从 GitHub 克隆相应 Codelab:
$ git clone -b advanced_start https://github.com/googlecodelabs/android-workmanager
第 2 步 - 运行应用
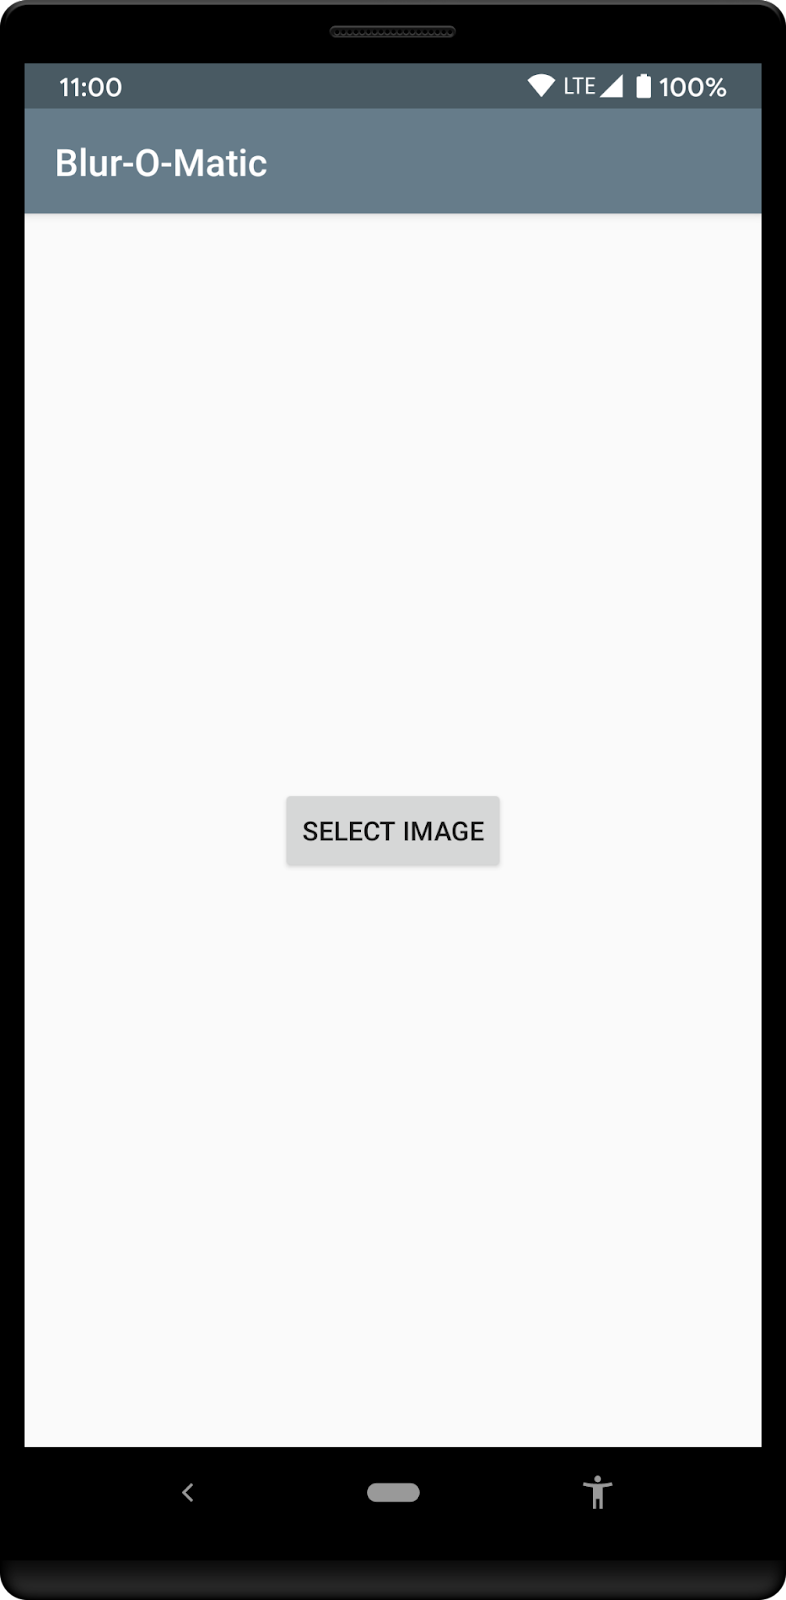
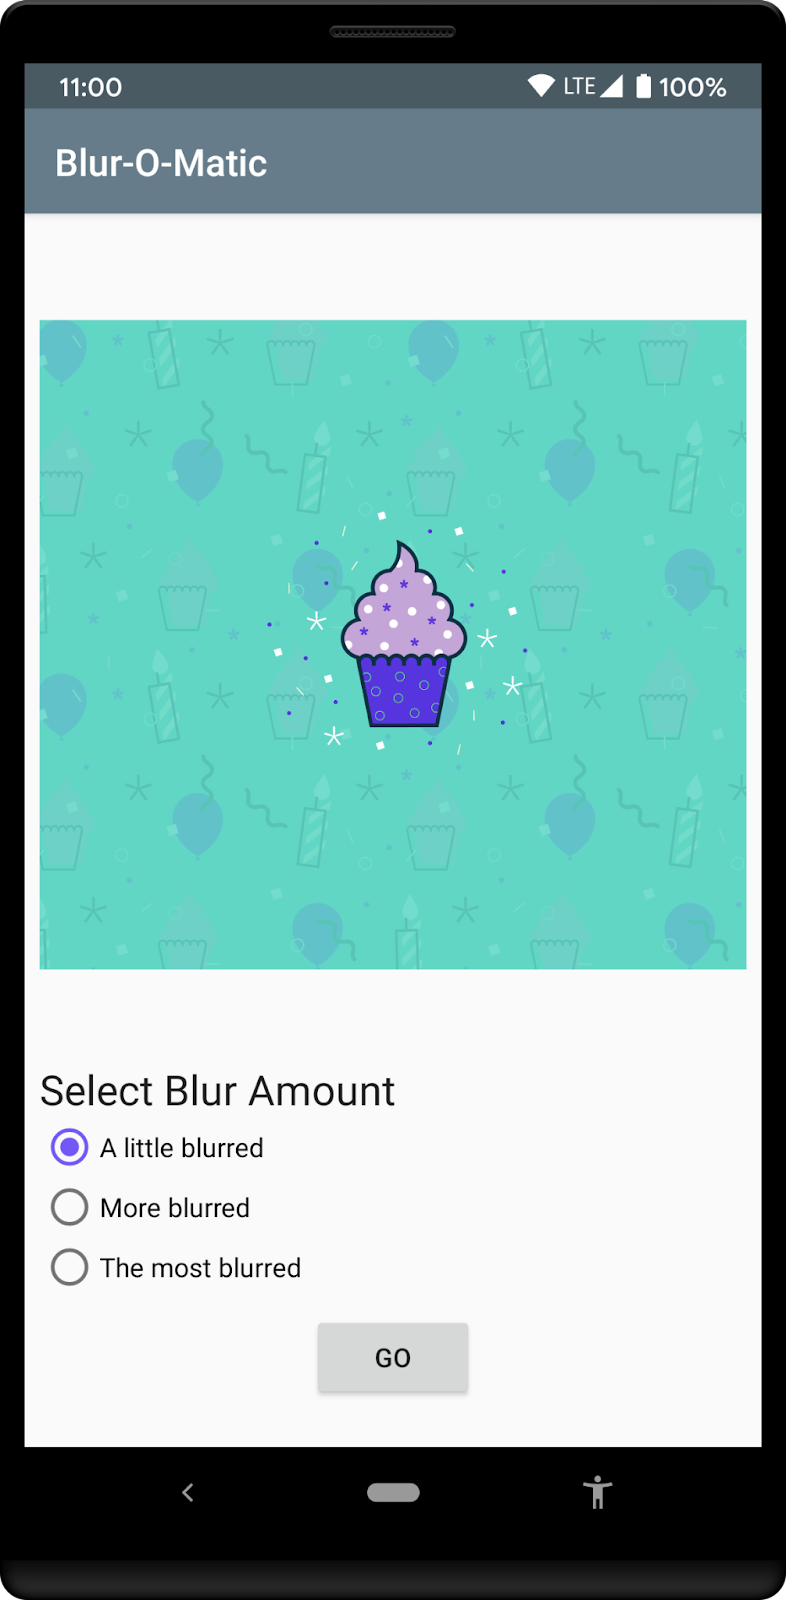
运行应用,您应该会看到下方的 2 个屏幕。请务必在系统提示时授予应用对您的照片的访问权限。
|
|
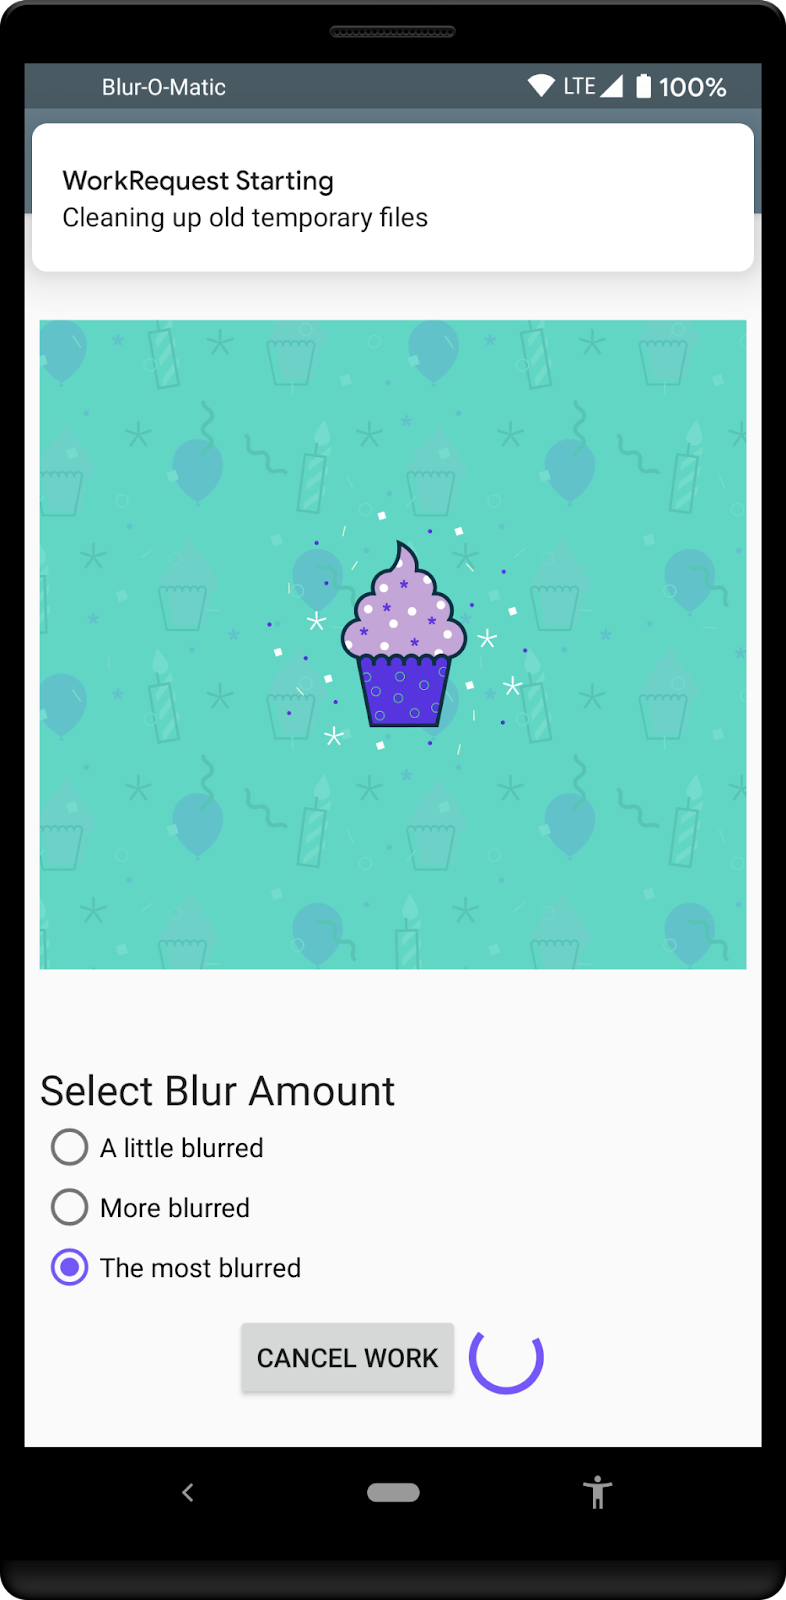
您可以选择一张图片并进入下一屏幕,然后,您可通过该屏幕上的单选按钮选择要对图片模糊处理的程度。按 Go 按钮即可对图片进行模糊处理并保存。在模糊处理的过程中,应用会显示一个 Cancel 按钮,点击此按钮可停止对图片的处理。
初始代码包含以下内容:
WorkerUtils:这个类包含实际进行模糊处理所需的代码,并包含之后您会用于显示Notifications以及减慢应用运行速度的一些便捷方法。BlurApplication:这个应用类包含一个简单的onCreate()方法,该方法用于针对调试 build 初始化 Timber 日志记录系统。BlurActivity:此 activity 用于显示图片以及添加用于选择模糊程度的单选按钮。BlurViewModel:此视图模型用于存储显示BlurActivity所需的所有数据,也将是您使用 WorkManager 启动后台工作的类。Workers/CleanupWorker:此工作器将始终删除临时文件(如果存在)。Workers/BlurWorker:此工作器会对通过 URI 传递为输入数据的图片进行模糊处理,并返回临时文件的 URI。Workers/SaveImageToFileWorker:此工作器将临时图片的 URI 作为输入数据,并返回最终文件的 URI。Constants:一个静态类,其中包含您在学习本 Codelab 期间会用到的一些常量。SelectImageActivity:第一个 activity,供您选择图片。res/activity_blur.xml和res/activity_select.xml:各个 activity 的布局文件。
您将在以下类中更改代码:BlurApplication、BlurActivity、BlurViewModel 和 BlurWorker。
3. 将 WorkManager 添加到您的应用
WorkManager 需要使用以下 Gradle 依赖项,这些依赖项已包含在文件中:
app/build.gradle
dependencies {
    implementation "androidx.work:work-runtime-ktx:$versions.work"
}
您应该在 WorkManager 版本页面上获取最新版 work-runtime,并部署最新稳定版或使用下面的版本:
build.gradle
versions.work = "2.7.1"
请务必点击 Sync Now,将您的项目与更改后的 Gradle 文件同步。
4. 添加 WorkManager 的自定义配置
在此步骤中,您将向应用添加自定义配置,以针对调试 build 修改 WorkManager 日志记录级别。
第 1 步 - 停用默认初始化
如自定义 WorkManager 配置和初始化一文中所述,您必须在 AndroidManifest.xml 文件中停用默认初始化,方法是移除默认情况下自动从 WorkManager 库合并的节点。
如需移除此节点,您可以向 AndroidManifest.xml 添加一个新的 provider 节点,如下所示:
AndroidManifest.xml
<application

...

    <provider
        android:name="androidx.work.impl.WorkManagerInitializer"
        android:authorities="${applicationId}.workmanager-init"
        tools:node="remove" />
</application>
您还需要在清单中添加 tools 命名空间,包含这些更改的完整文件将如下所示:
AndroidManifest.xml
<?xml version="1.0" encoding="utf-8"?>
<!-- Copyright 2020 Google LLC.
   SPDX-License-Identifier: Apache-2.0 -->

<manifest package="com.example.background"
    xmlns:android="http://schemas.android.com/apk/res/android"
    xmlns:tools="http://schemas.android.com/tools">

    <uses-permission android:name="android.permission.INTERNET" />
    <uses-permission android:name="android.permission.READ_EXTERNAL_STORAGE" />
    <uses-permission android:name="android.permission.WRITE_EXTERNAL_STORAGE" />

    <application
        android:name=".BlurApplication"
        android:allowBackup="true"
        android:icon="@mipmap/ic_launcher"
        android:label="@string/app_name"
        android:roundIcon="@mipmap/ic_launcher_round"
        android:supportsRtl="true"
        android:theme="@style/AppTheme">

        <activity android:name=".SelectImageActivity">
            <intent-filter>
                <action android:name="android.intent.action.MAIN" />
                <category android:name="android.intent.category.LAUNCHER" />
            </intent-filter>
        </activity>

        <activity android:name=".BlurActivity" />

        <!-- ADD THE FOLLOWING NODE -->
        <provider
            android:name="androidx.work.impl.WorkManagerInitializer"
            android:authorities="${applicationId}.workmanager-init"
            tools:node="remove" />
    </application>
</manifest>
第 2 步 - 将 Configuration.Provider 添加到 Application 类
您可以通过在 Application 类中实现 WorkManager 的 Configuration.Provider 接口来使用按需初始化。应用首次使用 getInstance(context) 获取 WorkManager 的实例时,WorkManager 会通过 getWorkManagerConfiguration() 返回的配置自行初始化。
BlurApplication.kt
class BlurApplication : Application(), Configuration.Provider {

    override fun getWorkManagerConfiguration(): Configuration =

        Configuration.Builder()
                     .setMinimumLoggingLevel(android.util.Log.DEBUG)
                     .build()
...
}
完成此项更改后,WorkManager 将在日志记录为 DEBUG 的前提下运行。
更好的选择是仅针对应用的调试 build 对 WorkManager 进行此设置,方法如下:
BlurApplication.kt
class BlurApplication() : Application(), Configuration.Provider {

    override fun getWorkManagerConfiguration(): Configuration {
        return if (BuildConfig.DEBUG) {
            Configuration.Builder()
                    .setMinimumLoggingLevel(android.util.Log.DEBUG)
                    .build()
        } else {
            Configuration.Builder()
                    .setMinimumLoggingLevel(android.util.Log.ERROR)
                    .build()
        }
    }

...
}
完整的 BlurApplication.kt 将变为:
BlurApplication.kt
/* Copyright 2020 Google LLC.
   SPDX-License-Identifier: Apache-2.0 */

package com.example.background

import android.app.Application
import androidx.work.Configuration
import timber.log.Timber
import timber.log.Timber.DebugTree

class BlurApplication() : Application(), Configuration.Provider {

    override fun getWorkManagerConfiguration(): Configuration {
        return if (BuildConfig.DEBUG) {
            Configuration.Builder()
                    .setMinimumLoggingLevel(android.util.Log.DEBUG)
                    .build()
        } else {
            Configuration.Builder()
                    .setMinimumLoggingLevel(android.util.Log.ERROR)
                    .build()
        }
    }

    override fun onCreate() {
        super.onCreate()
        if (BuildConfig.DEBUG) {
            Timber.plant(DebugTree())
        }
    }
}
第 3 步 - 在调试模式下运行应用
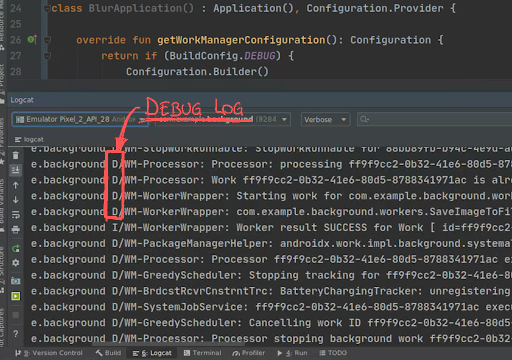
现已将 WorkManager 配置为在调试 build 中记录来自 WorkManager 库的所有消息。
运行应用后,您可以在 Android Studio 的 logcat 标签页上查看日志:
第 4 步 - 可配置的参数
WorkManager 中有关 Configuration.Builder 的参考指南提供了完整的参数列表。请特别注意另外两个参数:
WorkerFactoryJobId的范围
修改 WorkerFactory 后可向工作器的构造函数添加其他参数。如需详细了解如何实现自定义 WorkerFactory,请参阅自定义 WorkManager 一文。若要在应用中同时使用 WorkManager 和 JobScheduler API,最好自定义 JobId 的范围,以免这两个 API 使用同一 JobId 范围。
分享 WorkManager 的进度信息
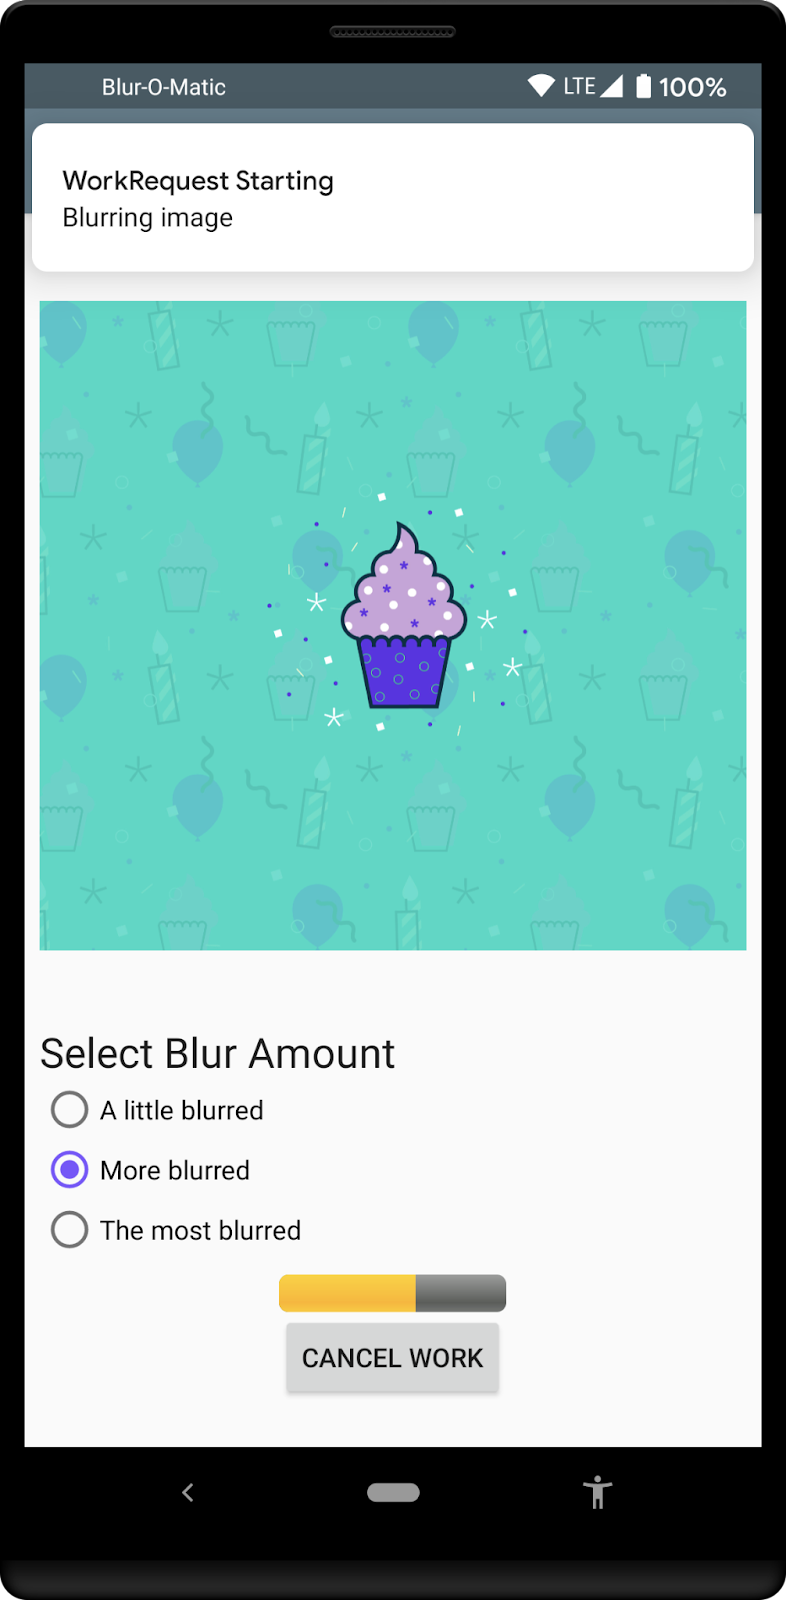
WorkManager v2.3 新增了一项功能:使用 setProgressAsync() 或 setProgress()(通过 CoroutineWorker 使用时)将工作器中的进度信息分享给应用。可通过 WorkInfo 观察此信息,将此信息用于在界面中为用户提供反馈。工作器达到最终状态(SUCCEEDED、FAILED 或 CANCELLED)后,系统就会清除进度数据。如需详细了解如何发布和监听进度信息,请参阅观察工作器的中间进度。
您要做的就是在界面中添加进度条,添加后,应用在前台运行时,用户便可以查看模糊处理的进度。最终呈现的效果如下所示:
第 1 步 - 修改 ProgressBar
如需修改布局中的 ProgressBar,您需要删除 android:indeterminate="true" 参数、添加 style="@android:style/Widget.ProgressBar.Horizontal", 样式并将初始值设置为 android:progress="0"。您还需要将 LinearLayout 的方向设置为 "vertical":
app/src/main/res/layout/activity_blur.xml
<LinearLayout
    android:layout_width="wrap_content"
    android:layout_height="wrap_content"
    android:orientation="vertical">
    <ProgressBar
        android:id="@+id/progress_bar"
        style="@android:style/Widget.ProgressBar.Horizontal"
        android:layout_width="match_parent"
        android:layout_height="wrap_content"
        android:progress="0"
        android:visibility="gone"
        android:layout_gravity="center_horizontal"
        />

    <Button
        android:id="@+id/cancel_button"
        android:layout_width="wrap_content"
        android:layout_height="wrap_content"
        android:text="@string/cancel_work"
        android:visibility="gone"
        />
</LinearLayout>
需要进行的另一项更改是确保 ProgressBar 从初始位置重新启动。您可以通过更新 BlurActivity.kt 文件中的 showWorkFinished() 函数来实现此目的。
app/src/main/java/com/example/background/BlurActivity.kt
/**
 * Shows and hides views for when the Activity is done processing an image
 */
private fun showWorkFinished() {
    with(binding) {
        progressBar.visibility = View.GONE
        cancelButton.visibility = View.GONE
        goButton.visibility = View.VISIBLE
        progressBar.progress = 0 // <-- ADD THIS LINE
    }
}
第 2 步 - 观察 ViewModel 中的进度信息
BlurViewModel 文件中已有观察者,可检查工作链何时完成。请添加新的观察者以观察 BlurWorker 发布的进度信息。
首先,在 Constants.kt 文件的末尾添加几个常量以便跟踪此信息:
app/src/main/java/com/example/background/Constants.kt
// Progress Data Key
const val PROGRESS = "PROGRESS"
const val TAG_PROGRESS = "TAG_PROGRESS"
然后在 BlurViewModel.kt 文件中将此代码添加到 BlurWorker 的 WorkRequest,以便检索其 WorkInfo。您可以通过 WorkInfo 检索工作器的进度信息:
app/src/main/java/com/example/background/BlurViewModel.kt
// Add WorkRequests to blur the image the number of times requested
for (i in 0 until blurLevel) {
    val blurBuilder = OneTimeWorkRequestBuilder<BlurWorker>()

    // Input the Uri if this is the first blur operation
    // After the first blur operation the input will be the output of previous
    // blur operations.
    if (i == 0) {
        blurBuilder.setInputData(createInputDataForUri())
    }

    blurBuilder.addTag(TAG_PROGRESS) // <-- ADD THIS
    continuation = continuation.then(blurBuilder.build())
}
在 BlurViewModel.kt 文件中添加新的 LiveData 以跟踪此 WorkRequest,并在 init 块中初始化 LiveData:
app/src/main/java/com/example/background/BlurViewModel.kt
class BlurViewModel(application: Application) : AndroidViewModel(application) {

    internal var imageUri: Uri? = null
    internal var outputUri: Uri? = null
    internal val outputWorkInfoItems: LiveData<List<WorkInfo>>
    internal val progressWorkInfoItems: LiveData<List<WorkInfo>> // <-- ADD THIS
    private val workManager: WorkManager = WorkManager.getInstance(application)

    init {
        // This transformation makes sure that whenever the current work Id changes the WorkStatus
        // the UI is listening to changes
        outputWorkInfoItems = workManager.getWorkInfosByTagLiveData(TAG_OUTPUT)
        progressWorkInfoItems = workManager.getWorkInfosByTagLiveData(TAG_PROGRESS) // <-- ADD THIS
    }

...
}
第 3 步 - 观察 Activity 中的 LiveData
您现已可以使用 BlurActivity 中的 LiveData 观察已发布的所有进度信息。首先,在 onCreate() 方法的末尾注册新的 LiveData 观察者:
app/src/main/java/com/example/background/BlurActivity.kt
// Show work status
viewModel.outputWorkInfoItems.observe(this, outputObserver())

// ADD THE FOLLOWING LINES
// Show work progress
viewModel.progressWorkInfoItems.observe(this, progressObserver())
现在,您可以检查观察者中收到的 WorkInfo 以确定是否有进度信息,然后相应地更新 ProgressBar:
app/src/main/java/com/example/background/BlurActivity.kt
private fun progressObserver(): Observer<List<WorkInfo>> {
    return Observer { listOfWorkInfo ->
        if (listOfWorkInfo.isNullOrEmpty()) {
            return@Observer
        }

        listOfWorkInfo.forEach { workInfo ->
            if (WorkInfo.State.RUNNING == workInfo.state) {
                val progress = workInfo.progress.getInt(PROGRESS, 0)
                binding.progressBar.progress = progress
            }
        }

    }
}
第 4 步 - 发布来自 BlurWorker 的进度信息
显示进度信息所需的各项现已准备就绪。接下来便是将实际发布进度信息这一操作添加到 BlurWorker。
此示例只是在 doWork() 函数中模拟了某个耗时较长的进程,以便在特定时间内发布进度信息。
此处的更改是将单个延迟替换为 10 个较小的延迟,以便在每次迭代时设置新的进度:
app/src/main/java/com/example/background/workers/BlurWorker.kt
override fun doWork(): Result {
    val appContext = applicationContext

    val resourceUri = inputData.getString(KEY_IMAGE_URI)

    makeStatusNotification("Blurring image", appContext)
    // sleep()
    (0..100 step 10).forEach {
        setProgressAsync(workDataOf(PROGRESS to it))
        sleep()
    }

...
}
由于原始延迟时间为 3 秒,因此最好将延迟时间缩短至原来的十分之一,即 0.3 秒:
app/src/main/java/com/example/background/Constants.kt
// const val DELAY_TIME_MILLIS: Long = 3000
const val DELAY_TIME_MILLIS: Long = 300
第 5 步 - 运行
现在运行应用时应该会显示由 BlurWorker 的消息填充的进度条。
5. 测试 WorkManager
测试是每个应用的重要组成部分,在引入 WorkManager 等库时,提供有助于轻松测试代码的工具至关重要。
除了 WorkManager,我们还提供了有助于您轻松测试工作器的一些帮助程序。如需详细了解如何创建针对工作器的测试,请参阅有关测试的 WorkManager 文档。
在本 Codelab 的这一部分,我们将介绍一些适用于 Worker 类的测试,并展示一些常见的使用场景。
首先,我们希望通过简单的方式来设置测试,为此,可以创建一个用于设置 WorkManager 的 TestRule:
- 添加依赖项
- 创建
WorkManagerTestRule和TestUtils - 创建针对
CleanupWorker的测试 - 创建针对
BlurWorker的测试
假设您已在项目中创建 AndroidTest 文件夹,则需要添加一些要在测试中使用的依赖项:
app/build.gradle
androidTestImplementation "androidx.arch.core:core-testing:2.1.0"
androidTestImplementation "androidx.test.ext:junit:1.1.3"
androidTestImplementation "androidx.test:rules:1.4.0"
androidTestImplementation "androidx.test:runner:1.4.0"
androidTestImplementation "androidx.work:work-testing:$versions.work"
现在,我们可以开始通过 TestRule 将各项组合在一起,以便在测试中使用:
app/src/androidTest/java/com/example/background/workers/WorkManagerTestRule.kt
/* Copyright 2020 Google LLC.
   SPDX-License-Identifier: Apache-2.0 */

package com.example.background.workers

import android.content.Context
import android.util.Log
import androidx.test.platform.app.InstrumentationRegistry
import androidx.work.Configuration
import androidx.work.WorkManager
import androidx.work.testing.SynchronousExecutor
import androidx.work.testing.WorkManagerTestInitHelper
import org.junit.rules.TestWatcher
import org.junit.runner.Description

class WorkManagerTestRule : TestWatcher() {
    lateinit var targetContext: Context
    lateinit var testContext: Context
    lateinit var configuration: Configuration
    lateinit var workManager: WorkManager

    override fun starting(description: Description?) {
        targetContext = InstrumentationRegistry.getInstrumentation().targetContext
        testContext = InstrumentationRegistry.getInstrumentation().context
        configuration = Configuration.Builder()
                // Set log level to Log.DEBUG to make it easier to debug
                .setMinimumLoggingLevel(Log.DEBUG)
                // Use a SynchronousExecutor here to make it easier to write tests
                .setExecutor(SynchronousExecutor())
                .build()

        // Initialize WorkManager for instrumentation tests.
        WorkManagerTestInitHelper.initializeTestWorkManager(targetContext, configuration)
        workManager = WorkManager.getInstance(targetContext)
    }
}
由于我们需要使用将运行测试的设备上的测试图片,因此可以创建几个要在测试中使用的辅助函数:
app/src/androidTest/java/com/example/background/workers/TestUtils.kt
/* Copyright 2020 Google LLC.
   SPDX-License-Identifier: Apache-2.0 */

package com.example.background.workers

import android.content.Context
import android.graphics.BitmapFactory
import android.net.Uri
import com.example.background.OUTPUT_PATH
import java.io.BufferedInputStream
import java.io.BufferedOutputStream
import java.io.File
import java.io.FileNotFoundException
import java.io.FileOutputStream
import java.util.UUID

/**
 * Copy a file from the asset folder in the testContext to the OUTPUT_PATH in the target context.
 * @param testCtx android test context
 * @param targetCtx target context
 * @param filename source asset file
 * @return Uri for temp file
 */
@Throws(Exception::class)
fun copyFileFromTestToTargetCtx(testCtx: Context, targetCtx: Context, filename: String): Uri {
    // Create test image
    val destinationFilename = String.format("blur-test-%s.png", UUID.randomUUID().toString())
    val outputDir = File(targetCtx.filesDir, OUTPUT_PATH)
    if (!outputDir.exists()) {
        outputDir.mkdirs()
    }
    val outputFile = File(outputDir, destinationFilename)

    val bis = BufferedInputStream(testCtx.assets.open(filename))
    val bos = BufferedOutputStream(FileOutputStream(outputFile))
    val buf = ByteArray(1024)
    bis.read(buf)
    do {
        bos.write(buf)
    } while (bis.read(buf) != -1)
    bis.close()
    bos.close()

    return Uri.fromFile(outputFile)
}

/**
 * Check if a file exists in the given context.
 * @param testCtx android test context
 * @param uri for the file
 * @return true if file exist, false if the file does not exist of the Uri is not valid
 */
fun uriFileExists(targetCtx: Context, uri: String?): Boolean {
    if (uri.isNullOrEmpty()) {
        return false
    }

    val resolver = targetCtx.contentResolver

    // Create a bitmap
    try {
        BitmapFactory.decodeStream(
                resolver.openInputStream(Uri.parse(uri)))
    } catch (e: FileNotFoundException) {
        return false
    }
    return true
}
完成这项工作后,便可以开始编写测试。
首先测试 CleanupWorker,确定其是否会删除文件。为此,请在测试中复制设备上的测试图片,然后执行 CleanupWorker,检查该图片是否还在设备上。
app/src/androidTest/java/com/example/background/workers/CleanupWorkerTest.kt
/* Copyright 2020 Google LLC.
   SPDX-License-Identifier: Apache-2.0 */

package com.example.background.workers

import androidx.arch.core.executor.testing.InstantTaskExecutorRule
import androidx.work.OneTimeWorkRequestBuilder
import androidx.work.WorkInfo
import org.hamcrest.CoreMatchers.`is`
import org.junit.Assert.assertThat
import org.junit.Rule
import org.junit.Test

class CleanupWorkerTest {

    @get:Rule
    var instantTaskExecutorRule = InstantTaskExecutorRule()
    @get:Rule
    var wmRule = WorkManagerTestRule()

    @Test
    fun testCleanupWork() {
        val testUri = copyFileFromTestToTargetCtx(
                wmRule.testContext, wmRule.targetContext, "test_image.png")
        assertThat(uriFileExists(wmRule.targetContext, testUri.toString()), `is`(true))

        // Create request
        val request = OneTimeWorkRequestBuilder<CleanupWorker>().build()

        // Enqueue and wait for result. This also runs the Worker synchronously
        // because we are using a SynchronousExecutor.
        wmRule.workManager.enqueue(request).result.get()
        // Get WorkInfo
        val workInfo = wmRule.workManager.getWorkInfoById(request.id).get()

        // Assert
        assertThat(uriFileExists(wmRule.targetContext, testUri.toString()), `is`(false))
        assertThat(workInfo.state, `is`(WorkInfo.State.SUCCEEDED))
    }
}
您已可以通过 Android Studio 中的“Run”菜单运行此测试,也可以使用测试类左侧的绿色矩形运行此测试。
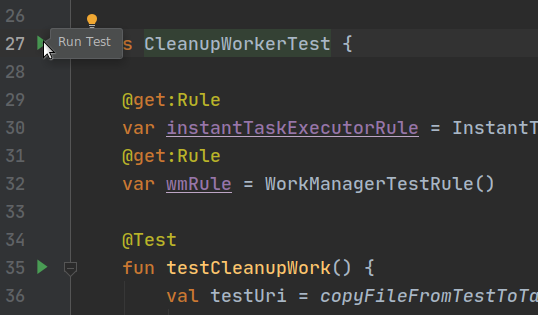
此外,您还可以使用项目根文件夹中的 ./gradlew cAT 命令通过命令行运行测试。
测试应该会正确执行。
接下来便可以测试 BlurWorker。此工作器需要处理带有图片 URI 的输入数据,因此我们可以构建两项测试:一项用于检查工作器在没有输入 URI 时是否会失败;另一项用于实际处理输入图片。
app/src/androidTest/java/com/example/background/workers/BlurWorkerTest.kt
/* Copyright 2020 Google LLC.
   SPDX-License-Identifier: Apache-2.0 */

package com.example.background.workers

import androidx.arch.core.executor.testing.InstantTaskExecutorRule
import androidx.work.OneTimeWorkRequestBuilder
import androidx.work.WorkInfo
import androidx.work.workDataOf
import org.hamcrest.CoreMatchers.`is`
import org.junit.Assert.assertThat
import org.junit.Rule
import com.example.background.KEY_IMAGE_URI
import org.junit.Test

class BlurWorkerTest {

    @get:Rule
    var instantTaskExecutorRule = InstantTaskExecutorRule()
    @get:Rule
    var wmRule = WorkManagerTestRule()

    @Test
    fun testFailsIfNoInput() {
        // Define input data

        // Create request
        val request = OneTimeWorkRequestBuilder<BlurWorker>().build()

        // Enqueue and wait for result. This also runs the Worker synchronously
        // because we are using a SynchronousExecutor.
        wmRule.workManager.enqueue(request).result.get()
        // Get WorkInfo
        val workInfo = wmRule.workManager.getWorkInfoById(request.id).get()

        // Assert
        assertThat(workInfo.state, `is`(WorkInfo.State.FAILED))
    }

    @Test
    @Throws(Exception::class)
    fun testAppliesBlur() {
        // Define input data
        val inputDataUri = copyFileFromTestToTargetCtx(
                wmRule.testContext,
                wmRule.targetContext,
                "test_image.png")
        val inputData = workDataOf(KEY_IMAGE_URI to inputDataUri.toString())

        // Create request
        val request = OneTimeWorkRequestBuilder<BlurWorker>()
                .setInputData(inputData)
                .build()

        // Enqueue and wait for result. This also runs the Worker synchronously
        // because we are using a SynchronousExecutor.
        wmRule.workManager.enqueue(request).result.get()
        // Get WorkInfo
        val workInfo = wmRule.workManager.getWorkInfoById(request.id).get()
        val outputUri = workInfo.outputData.getString(KEY_IMAGE_URI)

        // Assert
        assertThat(uriFileExists(wmRule.targetContext, outputUri), `is`(true))
        assertThat(workInfo.state, `is`(WorkInfo.State.SUCCEEDED))
    }
}
这两项测试应该都会成功运行。
6. 恭喜
恭喜!您已学完 Blur-O-Matic 应用的相关知识,且已了解如何执行以下操作:
- 创建自定义配置
- 发布工作器中的进度信息
- 在界面中显示工作器的进度
- 为工作器编写测试
您的“工作”非常出色!如需查看代码的最终状态以及所有更改,请参阅:
如果愿意,您也可以从 GitHub 克隆 WorkManager 的 Codelab:
$ git clone -b advanced https://github.com/googlecodelabs/android-workmanager
WorkManager 具有许多功能,本 Codelab 中介绍的功能只是其中的一小部分。如需了解更多功能,请参阅 WorkManager 文档。

