1. 提供資料給小工具
本程式碼研究室會說明如何建構小工具的資料來源。
概念與設定
在程式碼研究室的最後,您會學到如何將資料提供給 Wear OS 上的錶面小工具。
概念
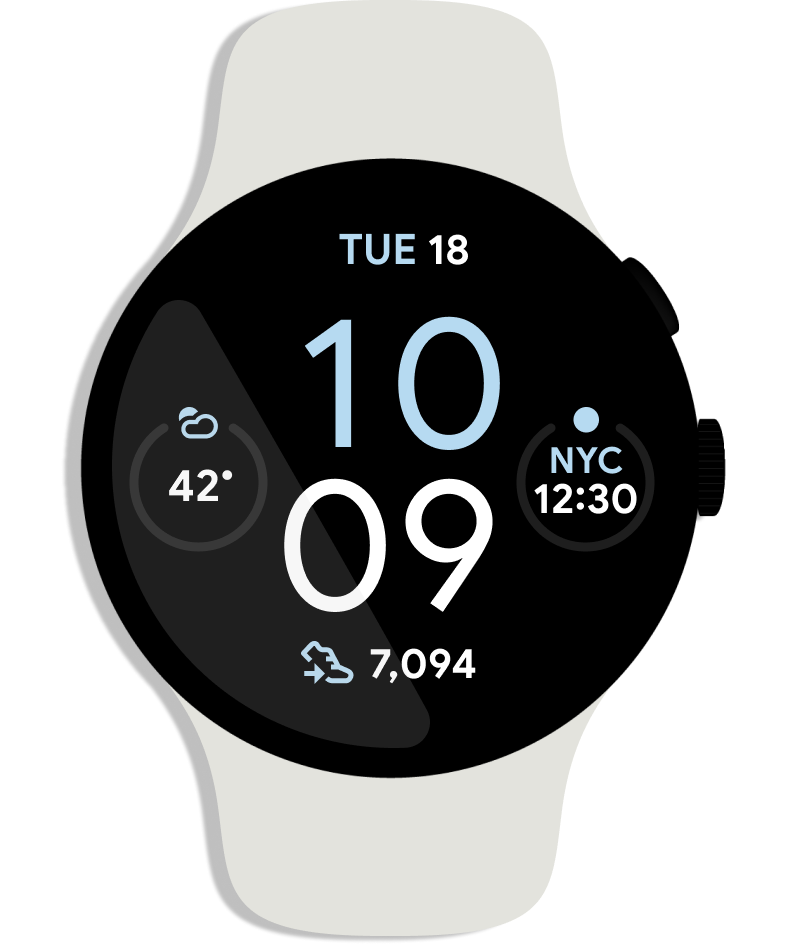
小工具是小時與分鐘以外的錶面功能。以下圖為例,錶面上包含了四個小工具。
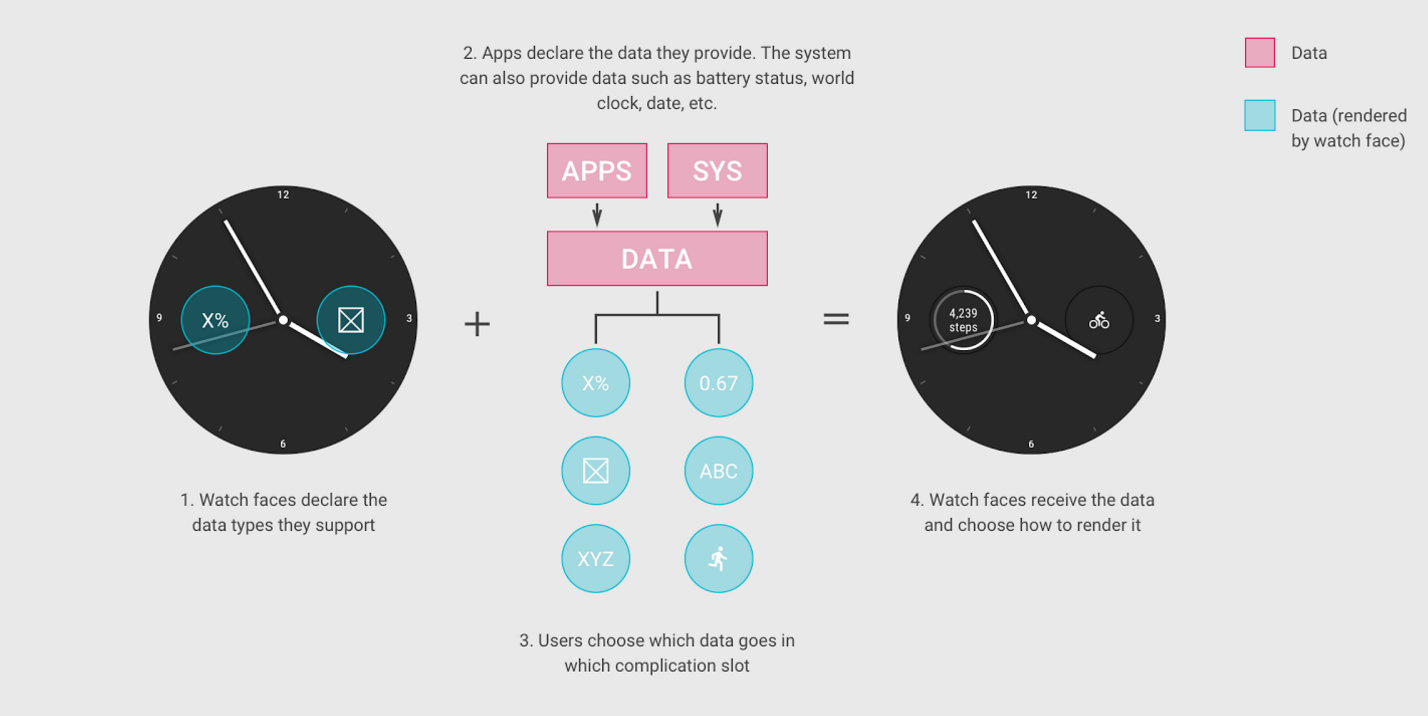
Complications API 適用於錶面和資料來源應用程式:
- 小工具資料來源提供了電池電量、天氣、步數等資料。
- 錶面開發人員可以在錶面上的小工具中顯示這些資料
- 使用者會選取小工具所需的資料來源
在本程式碼研究室中,我們會說明如何建立小工具資料來源。如果您也想將小工具新增到錶面,請參閱錶面範例。
立即開始!
複製範例專案存放區
為了協助您迅速上手,我們為您準備了要建構的專案,其中包含了程式碼研究室所需的基本程式碼和應用程式設定。
如果您已安裝 Git,請執行下列指令。(如要檢查 Git 是否已安裝,請在終端機/指令列中輸入 git --version,然後確認 Git 是否正常運作):
git clone https://github.com/android/codelab-complications-data-source.git
如果您沒有 Git,可以將專案下載為 ZIP 檔案:
匯入專案
啟動 Android Studio,然後在歡迎畫面中選取「Open an existing Android Studio project」。開啟專案目錄,然後在「complications-data-source」目錄中按兩下 build.gradle 檔案。
如果您處於「Android」Android檢視畫面,專案視窗左上角應會顯示一組資料夾圖示,類似於下方螢幕截圖。(如果您處於「Project」檢視畫面,展開「complications-data-source」專案即可查看資料夾組合圖示。)

資料夾圖示有兩種,分別代表一個模組。請注意,第一次開啟專案時,Android Studio 可能需要花幾秒的時間在背景中編譯專案。此時,Android Studio 底部的狀態列會顯示旋轉圖示:

請待程序完成後再變更程式碼,讓 Android Studio 可以取得所有必要元件。
瞭解範例專案
您已完成設定,現在可以開始將資料提供給小工具了。我們先從 base 模組開始。您要在每個步驟中將程式碼新增到 base。
您可以將程式碼研究室中的 complete 模組做為參考依據,用來檢查自己的操作 (如果遇到問題,也可以做為參考)。
資料來源的主要元件總覽
ComplicationTapBroadcastReceiver- 用來透過PendingIntent更新小工具資料的類別。CustomComplicationDataSourceService- 用來向小工具提供資料的類別。這個檔案位於base/java/com/example/android/wearable/complicationsdatasource目錄中。在 Android Studio,該檔案位於base/java/com.example.android.wearable.complicationsdatasource下。我們的工作主要會使用該類別的四種方法:onComplicationActivated- 在透過資料啟動小工具時進行呼叫。getPreviewData- 編輯器使用者介面中所用小工具的預覽資料 (通常只是靜態內容)。onComplicationRequest- 大部分工作皆採用這個方法。只要活動中的小工具需要您來源的更新資料時,系統就會呼叫此方法。onComplicationDeactivated- 在小工具停用時進行呼叫。
模擬器設定
如需設定 Wear OS 模擬器的相關說明,請參閱「建立並執行穿戴式應用程式」頁面的「啟動模擬器並執行 Wear 應用程式」一節。
執行範例專案
在智慧手錶上執行應用程式。
- 請連結 Wear OS 裝置或啟動模擬器。
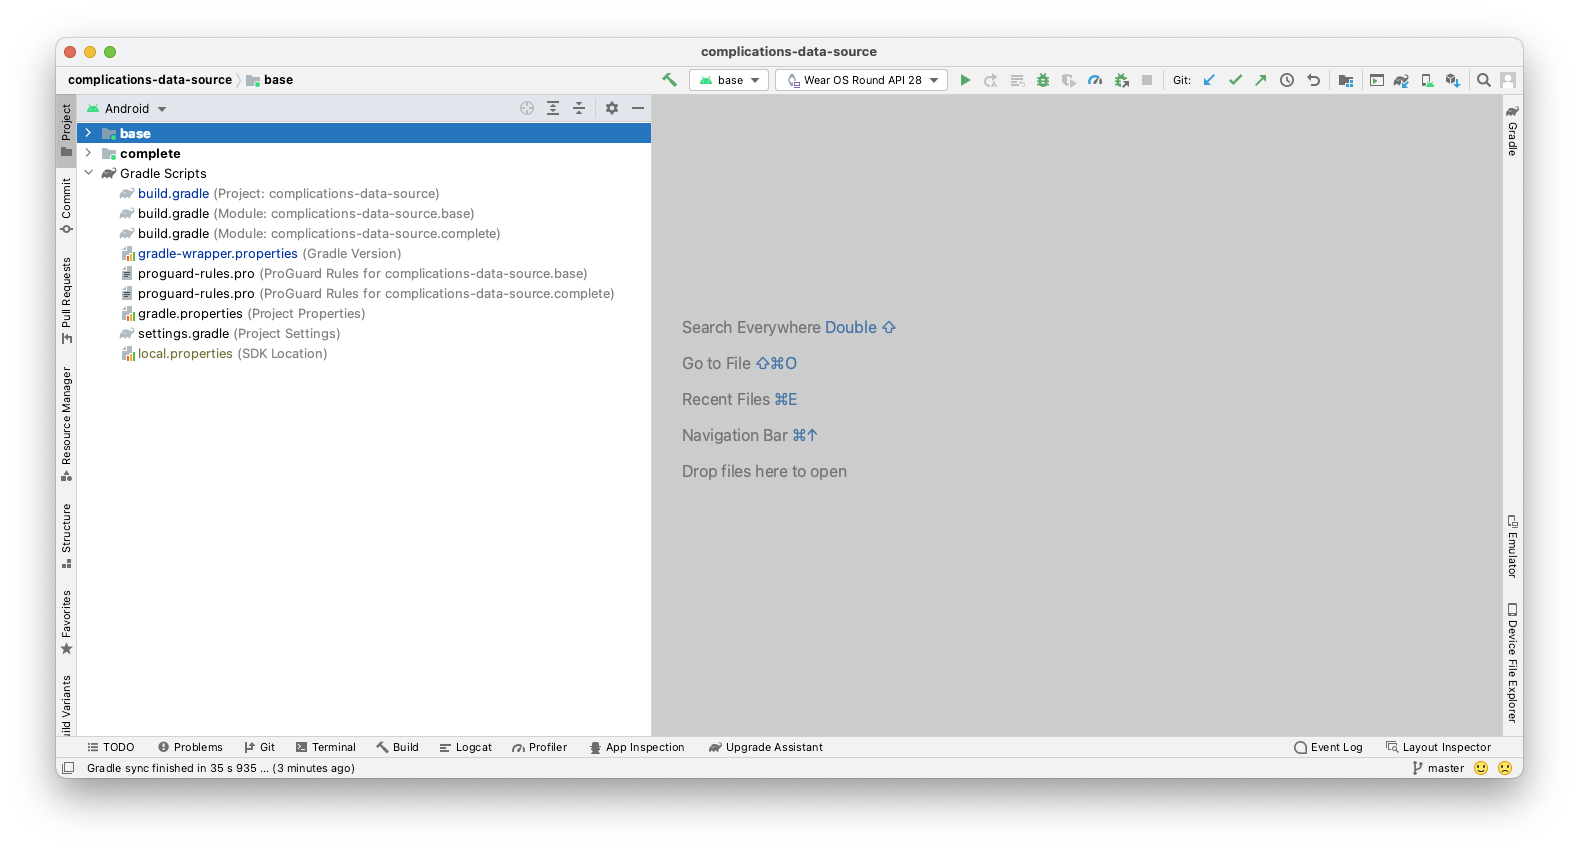
- 在工具列中,從下拉式選取器中選取「base」設定,然後按一下旁邊的綠色三角形 (Run) 按鈕:
- 如果出現下列錯誤訊息 (錯誤啟動活動),請變更預設的啟動
Activity(請參閱下方操作說明)。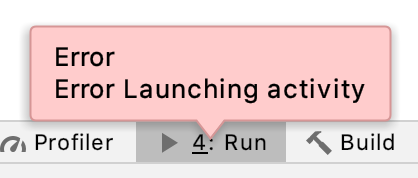
反之,如果在啟動應用程式時收到使用 Activity 的提示,請選擇「Do not launch Activity」。
- 如要變更預設啟動
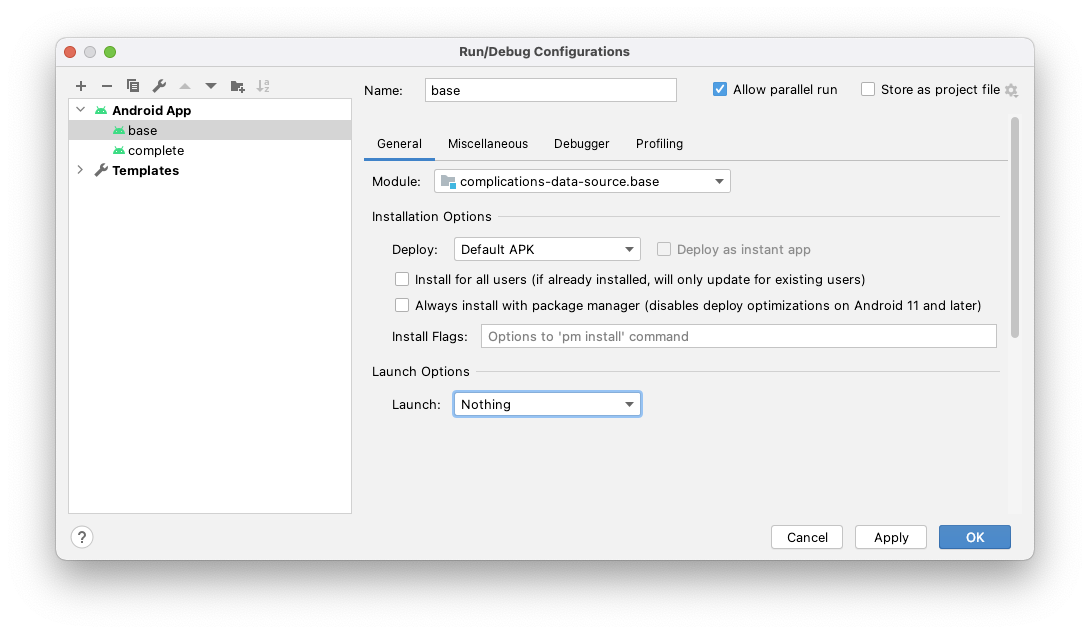
Activity(如有需要,並在上一步執行),請按一下綠色箭頭左邊的下拉式選取器,然後按一下「edit configurations」。

選取「base」,就會看到類似下方的視窗。選取「Launch Options」部分下方的「Nothing」,然後按一下「Run」。之後,如果想嘗試啟動其他模組,也需按上述方法操作。
- 選取您的 Android 裝置或模擬器,然後按一下「OK」。系統會在 Wear OS 裝置或模擬器上安裝服務。
- 服務在幾秒後就會建構好,並可用於部署。Android Studio 底部的狀態列會顯示旋轉圖示。
- 如果 Android Studio 左下方的「Build」分頁中未顯示此圖示,選取該分頁即可查看安裝進度。安裝程序結束時,畫面上應該會顯示「Build: completed successfully」的訊息。

- 選擇錶面來選取小工具。在本範例中,我們選擇了「Elements Digital」,但您的智慧手錶未必提供此選項。
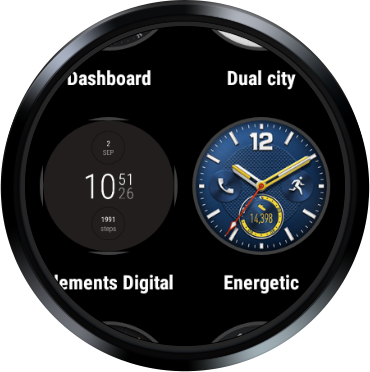
請注意,由於這是您第一次執行這個錶面,因此必須從「Add more watch faces」中選取該錶面。選好之後,錶面就會以選項的形式與此選項一併顯示。
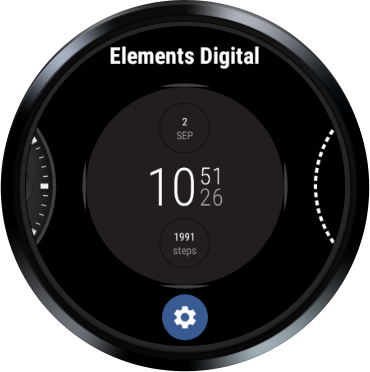
- 現在,您所選的錶面應該會顯示在「Favorite」選單上 (請參閱下圖)。按一下底部的齒輪圖示。
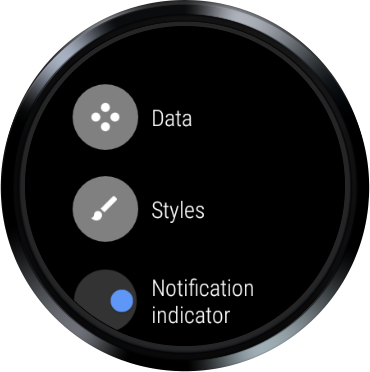
- 請為這個錶面選取「Data」。您目前使用的自訂錶面可能會有所不同。
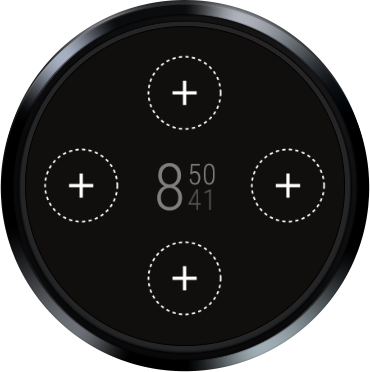
- 選取任何位置,也就是任何「+」(小工具)。
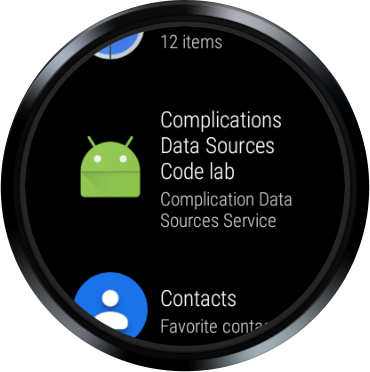
- 最後,向下捲動並選取「Comlics Data Source Codelab」服務 (選好之後,您可能要向左滑動數次或用手掌蓋住裝置來結束)。
- 輸出內容中應會顯示「
onComplicationActivated()」和「onComplicationRequest()」記錄訊息 (但小工具位置中不會顯示任何內容)。 - 如果您沒有看到記錄訊息,請按工具列上的綠色三角形按鈕,嘗試再次部署錶面。
- 如果您不清楚如何查看
Log資料,請按一下 Android Studio 底部標示「6: Logcat」的分頁標籤。將下拉式選單設為裝置/模擬器和套件名稱com.example.android.wearable.complicationsdatasource(螢幕截圖如下)。

「等一等!我選取的資料區未顯示任何內容!」別擔心,我們尚未提供任何資料。我們會在下一個步驟中新增這項資訊。
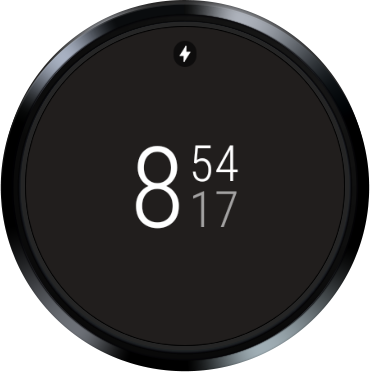
在某些手錶上,Elements 錶面已啟用小工具,因此您的智慧手錶上可能會填滿了小工具。此外,如果模擬器上顯示帶刪除線的雲朵,而不是飛機圖示,您也不必擔心。使用這個程式碼研究室無需連線到手機或網際網路。
摘要
您在此步驟中瞭解到:
- Wear OS 以及向小工具提供資料背後的概念
- 關於起點 (base 模組) 的基本知識
- 部署及執行錶面
下一步
開始提供一些資料吧!
2. 提供簡短文字資料
程式碼步驟 2
在這個步驟中,我們會開始提供資料。小工具接受多種資料類型。在這個步驟中,我們會傳回簡短文字資料類型。
如果您對此處說明的概念仍感到困惑,請隨時參閱 complete 模組,瞭解這些步驟的實作方法。
指定資料來源支援的資料類型
開啟 AndroidManifest.xml 檔案並,然後查看服務 CustomComplicationDataSourceService。請留意意圖篩選器:
<action android:name=
    "android.support.wearable.complications.ACTION_COMPLICATION_UPDATE_REQUEST"/>
此篩選器會告知系統,您的服務會擴充 ComplicationDataSourceService 或 SuspendingComplicationDataSourceService (支援 Kotlin 協同程式的變數),並且可為小工具傳送資料。
接下來是 meta-data 元素,用於指定支援的資料類型。在本範例中,我們支援 Small_IMAGE,但在這個步驟中必須改成 SHORT_TEXT。將第一個 meta-data 元素變更為下列內容:
<meta-data
    android:name="android.support.wearable.complications.SUPPORTED_TYPES"
    android:value="SHORT_TEXT"/>
提供資料
如前文所述,啟用資料來源時就會呼叫 onComplicationActivated()。此次就非常適合執行任何在每次啟動時都要做一次的基本設定。在本程式碼研究室中,我們的範例相對簡單,因此不會這麼做。
有效的小工具會在 onComplicationRequest() 呼叫中要求更新的資料。
onComplicationRequest() 方法會因為下列各種原因而觸發:
- 使用中的錶面小工具改為使用這個來源
- 使用這個來源的小工具改為使用中的狀態
- 您透過
ComplicationDataSourceUpdateRequester.requestUpdate()或ComplicationDataSourceUpdateRequester.requestUpdateAll()觸發了來自自己類別的更新。 - 您在資訊清單中指定的時間範圍已過
開啟 CustomComplicationDataSourceService .kt,然後將遊標往下移至 onComplicationRequest() 方法。刪除「return null」行,然後在初始 Log.d() 呼叫底下複製並貼上下列程式碼:
// Retrieves your data, in this case, we grab an incrementing number from Datastore.
val number: Int = applicationContext.dataStore.data
    .map { preferences ->
        preferences[TAP_COUNTER_PREF_KEY] ?: 0
    }
    .first()

val numberText = String.format(Locale.getDefault(), "%d!", number)
在這個範例中,我們會從代表資料的 DataStore 擷取儲存的 int,這就能輕鬆呼叫資料庫。
與 DataStore 互動時,您需要有協同程式來收集所產生的 Flow。您會發現,onComplicationRequest() 是 suspend 函式,所以我們可以單獨透過 Flow 收集資料,而不必啟動協同程式。
擷取整數值後,我們會將其轉換為簡單的字串,並準備轉換為 ComplicationData 物件,也就是小工具能理解的資料類型。
接著,複製程式碼並貼到剛才新增的程式碼底下。
return when (request.complicationType) {

    ComplicationType.SHORT_TEXT -> ShortTextComplicationData.Builder(
        text = PlainComplicationText.Builder(text = numberText).build(),
        contentDescription = PlainComplicationText
            .Builder(text = "Short Text version of Number.").build()
    )
        .build()

    else -> {
        if (Log.isLoggable(TAG, Log.WARN)) {
            Log.w(TAG, "Unexpected complication type ${request.complicationType}")
        }
        null
    }
}
在此程式碼中,我們會根據小工具類型傳回 ComplicationData 物件;也就是說,我們會傳回資料類型 SHORT_TEXT 的 ShortTextComplicationData (ComplicationData 子類別)。
特定資料類型可能會包含不同欄位。舉例來說,SHORT_TEXT 可能只有一段文字、標題和文字,或是單色圖片和文字 (都應包含無障礙功能的內容說明)。
在這個範例中,我們只會設定必填欄位,不會設定選填欄位。如要進一步瞭解這些類型和欄位,請參閱我們的文件。
您可能會好奇為何要使用 when 陳述式建立資料。在後續步驟中,我們會根據系統要求的類型,支援各種形式的資料。如果現在使用 when 陳述式,我們日後就可以輕鬆新增資料類型 (LONG_TEXT、RANGED_VALUE 等)。
最後,如果我們不支援資料類型,則會傳回空值。
最終的方法應如下所示:
override suspend fun onComplicationRequest(request: ComplicationRequest): ComplicationData? {
    Log.d(TAG, "onComplicationRequest() id: ${request.complicationInstanceId}")

    // Retrieves your data, in this case, we grab an incrementing number from Datastore.
    val number: Int = applicationContext.dataStore.data
        .map { preferences ->
            preferences[TAP_COUNTER_PREF_KEY] ?: 0
        }
        .first()

    val numberText = String.format(Locale.getDefault(), "%d!", number)

    return when (request.complicationType) {

        ComplicationType.SHORT_TEXT -> ShortTextComplicationData.Builder(
            text = PlainComplicationText.Builder(text = numberText).build(),
            contentDescription = PlainComplicationText
                .Builder(text = "Short Text version of Number.").build()
        )
            .build()

        else -> {
            if (Log.isLoggable(TAG, Log.WARN)) {
                Log.w(TAG, "Unexpected complication type ${request.complicationType}")
            }
            null
        }
    }
}
再次執行應用程式
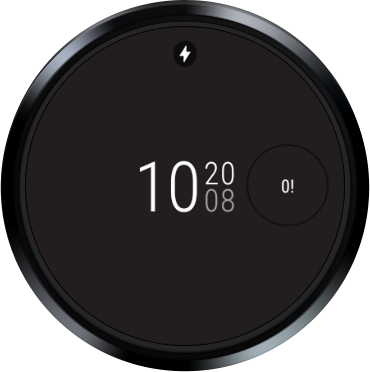
在第一步中,您學會了在裝置或模擬器上安裝小工具資料服務。現在讓我們再做一次!安裝應用程式並重新選取小工具,即滑動錶面、選取齒輪、前往同一個小工具並選取「Complications Data Source Codelab」。畫面應如下所示:
摘要
這個步驟讓您瞭解到:
- 如何指定來源可支援的資料類型
- 當使用中的小工具正在使用資料時,應多久要求資料一次
- 在哪裡向 Wear OS 提供資料
下一步
讓我們試試支援其他資料類型。
3. 觸發小工具資料更新
程式碼步驟 3
在這個步驟中,我們會在使用者輕觸小工具時觸發資料更新作業。
如果您對此處說明的概念仍感到困惑,請隨時參閱 complete 模組,瞭解這些步驟的實作方法。
指定小工具重新整理資料的頻率
開啟 AndroidManifest.xml 檔案,然後再次檢查 CustomComplicationDataSourceService 服務。
請注意 meta-data 元素中的 UPDATE_PERIOD_SECONDS 欄位。此欄位用於指定您希望資料來源啟用時,系統更新資料的頻率。
此欄位目前已設為 600 秒 (10 分鐘)。我們想要更新小工具來回應使用者的動作,因此需要提高更新頻率。雖然我們可以縮短這個週期,但如果只有短短數分數,系統可能無法觸發更新。
「推送形式」是更好的做法,能告知系統在資料變更時準確更新。
將更新頻率籨 600 改為 0,即表示在資料變更時直接對系統進行連線偵測 (ping),而不是仰賴定期更新。請注意,中繼資料是必要項目。
<meta-data
    android:name="android.support.wearable.complications.UPDATE_PERIOD_SECONDS"
    android:value="0"/>
通知系統有新的小工具資料
開啟 ComplicationTapBroadcastReceiver.kt。這個 BroadcastReceiver 類別會在觸發時更新小工具資料。(請注意,我們只會將資料儲存到 DataStore)。
這個類別還提供了建構 PendingIntent 的輔助方法 (以 BroadcastReceiver 的形式觸發)。
現在,onReceive() 方法會從意圖中擷取資料來源和小工具 ID,並更新 DataStore 中的整數。我們需要告知小工具資料已更新。
請找到 onReceive() 方法底下的部分。在最後一個區塊上方,您會看到一則「Request an update for the...」的註解。請複製並貼上註解下方的程式碼。
// Request an update for the complication that has just been tapped, that is,
// the system call onComplicationUpdate on the specified complication data
// source.
val complicationDataSourceUpdateRequester =
    ComplicationDataSourceUpdateRequester.create(
        context = context,
        complicationDataSourceComponent = dataSource
    )
complicationDataSourceUpdateRequester.requestUpdate(complicationId)
這個程式碼會告知 Wear OS 小工具的資料已更新。系統需要三項資料才能運作:
- context -
Context可做為onReceive()方法的引數。 - complicationDataSourceComponent - 小工具的
DataSource會以Extra附帶資料的形式,從PendingIntent傳遞,進而觸發此BroadcastReceiver。 - complicationId - 錶面為小工具位置指派的不重複整數。
int會以Extra附帶資料的形式,從PendingIntent傳遞,進而觸發此BroadcastReceiver。
這個步驟完成了,最終方法應如下所示:
override fun onReceive(context: Context, intent: Intent) {

    // Retrieve complication values from Intent's extras.
    val extras = intent.extras ?: return
    val dataSource = extras.getParcelable<ComponentName>(EXTRA_DATA_SOURCE_COMPONENT) ?: return
    val complicationId = extras.getInt(EXTRA_COMPLICATION_ID)

    // Required when using async code in onReceive().
    val result = goAsync()

    // Launches coroutine to update the DataStore counter value.
    scope.launch {
        try {
            context.dataStore.edit { preferences ->
                val currentValue = preferences[TAP_COUNTER_PREF_KEY] ?: 0

                // Update data for complication.
                val newValue = (currentValue + 1) % MAX_NUMBER

                preferences[TAP_COUNTER_PREF_KEY] = newValue
            }

            // Request an update for the complication that has just been tapped, that is,
            // the system call onComplicationUpdate on the specified complication data
            // source.
            val complicationDataSourceUpdateRequester =
                ComplicationDataSourceUpdateRequester.create(
                    context = context,
                    complicationDataSourceComponent = dataSource
                )
            complicationDataSourceUpdateRequester.requestUpdate(complicationId)
        } finally {
            // Always call finish, even if cancelled
            result.finish()
        }
    }
}
將輕觸動作新增到小工具
我們的 BroadcastReceiver 不僅會更新資料,也會通知系統有新資料 (請參閱上一步)。我們需要將輕觸動作新增到小工具,才能觸發 BroadcastReceiver。
開啟 CustomComplicationDataSourceService.kt 並向下移至 onComplicationRequest() 方法。
在第一個 Log.d() 陳述式與從 DataStore 擷取到的整數之間,複製/貼上下列程式碼:
// Create Tap Action so that the user can trigger an update by tapping the complication.
val thisDataSource = ComponentName(this, javaClass)
// We pass the complication id, so we can only update the specific complication tapped.
val complicationPendingIntent =
    ComplicationTapBroadcastReceiver.getToggleIntent(
        this,
        thisDataSource,
        request.complicationInstanceId
    )
記得在上一步中,我們需要有資料來源和小工具 ID 這兩項資料才能讓 BroadcastReceiver 運作。在此處,我們將兩項資料做為 Extra 透過 PendingIntent 傳遞。
接下來,我們需要將 PendingIntent 指派給小工具的輕觸事件。
找出 ST 的 When 陳述式,並在 .build() 呼叫上方新增這行程式碼。
.setTapAction(complicationPendingIntent)
程式碼區塊會如下所示。
ComplicationType.SHORT_TEXT -> ShortTextComplicationData.Builder(
    text = PlainComplicationText.Builder(text = numberText).build(),
    contentDescription = PlainComplicationText
        .Builder(text = "Short Text version of Number.").build()
)
    .setTapAction(complicationPendingIntent)
    .build()
這個步驟只會新增這一行程式碼,.setTapAction() 方法會將新的 PendingIntent 指派給小工具的輕觸動作。
這一步完成了,最終的方法應如下所示:
override suspend fun onComplicationRequest(request: ComplicationRequest): ComplicationData? {
    Log.d(TAG, "onComplicationRequest() id: ${request.complicationInstanceId}")

    // Create Tap Action so that the user can trigger an update by tapping the complication.
    val thisDataSource = ComponentName(this, javaClass)
    // We pass the complication id, so we can only update the specific complication tapped.
    val complicationPendingIntent =
        ComplicationTapBroadcastReceiver.getToggleIntent(
            this,
            thisDataSource,
            request.complicationInstanceId
        )

    // Retrieves your data, in this case, we grab an incrementing number from Datastore.
    val number: Int = applicationContext.dataStore.data
        .map { preferences ->
            preferences[TAP_COUNTER_PREF_KEY] ?: 0
        }
        .first()

    val numberText = String.format(Locale.getDefault(), "%d!", number)

    return when (request.complicationType) {

        ComplicationType.SHORT_TEXT -> ShortTextComplicationData.Builder(
            text = PlainComplicationText.Builder(text = numberText).build(),
            contentDescription = PlainComplicationText
                .Builder(text = "Short Text version of Number.").build()
        )
            .setTapAction(complicationPendingIntent)
            .build()

        else -> {
            if (Log.isLoggable(TAG, Log.WARN)) {
                Log.w(TAG, "Unexpected complication type ${request.complicationType}")
            }
            null
        }
    }
}
再次執行應用程式
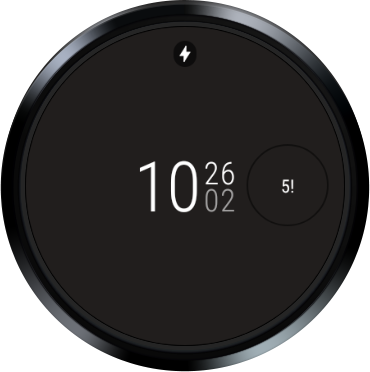
安裝應用程式並重新選取小工具,即滑動錶面、選取齒輪、前往同一個小工具,然後選取「Complications Data Source Codelab」來源。您應會看到與先前相同的內容。不過,您現在可以輕觸小工具,資料隨即便會更新。
摘要
這個步驟讓您瞭解到:
- 如何通知系統您的小工具資料已更新
- 如何將
PendingIntent與小工具的輕觸動作建立關聯
下一步
讓我們試試支援其他資料類型。
4. 提供長文字資料
程式碼步驟 4
在向小工具提供資料時,建議您支援更多資料類型,並瞭解不同資料類型在小工具中的顯示效果。
指定其他支援的資料類型
再次開啟 AndroidManifest.xml 檔案,然後查看 CustomComplicationDataSourceService 服務的宣告。
將 SUPPORTED_TYPES 這個 meta-data 元素從 SHORT_TEXT 變更為 LONG_TEXT。變更應如下所示:
<meta-data
    android:name="android.support.wearable.complications.SUPPORTED_TYPES"
    android:value="LONG_TEXT"/>
新增對長文字的支援
開啟 CustomComplicationDataSourceService.kt,向下移到 onComplicationRequest() 方法中的 when 陳述式,然後在 TYPE_SHORT_TEXT 案例的結尾和預設案例下方新增下列程式碼。
ComplicationType.LONG_TEXT -> LongTextComplicationData.Builder(
    text = PlainComplicationText.Builder(text = "Number: $numberText").build(),
    contentDescription = PlainComplicationText
        .Builder(text = "Long Text version of Number.").build()
)
    .setTapAction(complicationPendingIntent)
    .build()
when 陳述式應如下所示:
return when (request.complicationType) {

    ComplicationType.SHORT_TEXT -> ShortTextComplicationData.Builder(
        text = PlainComplicationText.Builder(text = numberText).build(),
        contentDescription = PlainComplicationText
            .Builder(text = "Short Text version of Number.").build()
    )
        .setTapAction(complicationPendingIntent)
        .build()

    ComplicationType.LONG_TEXT -> LongTextComplicationData.Builder(
        text = PlainComplicationText.Builder(text = "Number: $numberText").build(),
        contentDescription = PlainComplicationText
            .Builder(text = "Long Text version of Number.").build()
    )
        .setTapAction(complicationPendingIntent)
        .build()

    else -> {
        if (Log.isLoggable(TAG, Log.WARN)) {
            Log.w(TAG, "Unexpected complication type ${request.complicationType}")
        }
        null
    }
}
您可能已經發現,我們只是用新的格式重新封包相同的資料。我們來看看結果。
如何查看進度及偵錯
請安裝您的服務,但這次請先選擇底部板位小工具,再選擇小工具服務來源:
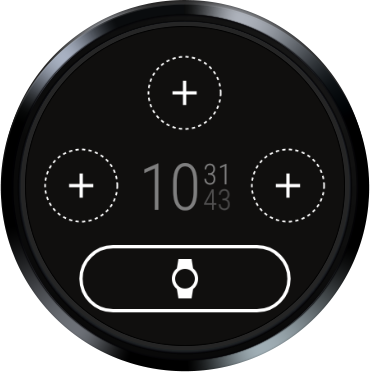
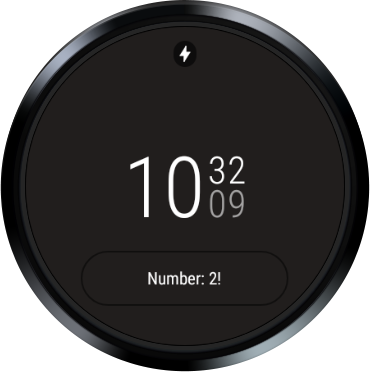
您應看到以下圖像。請注意,每個小工具都會儲存在不同的鍵中,因此如果您在多個位置設定小工具,可能會看到不同的值:
摘要
您在此步驟中瞭解到:
- 如何變更及支援不同的小工具資料類型
下一步
在整合之前,我們想要額外支援一種資料類型。
5. 提供範圍文字資料
程式碼步驟 5
在向小工具提供資料時,讓我們繼續探索如何支援更多類型的資料。
指定其他支援的資料類型
再次開啟 AndroidManifest.xml 檔案,然後查看 CustomComplicationDataSourceService 服務。
將 SUPPORTED_TYPES 這個 meta-data 元素變更為 RANGED_VALUE。變更應如下所示:
<meta-data
    android:name="android.support.wearable.complications.SUPPORTED_TYPES"
    android:value="RANGED_VALUE"/>
新增對範圍值的支援
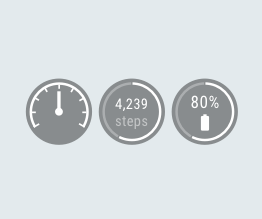
範圍值不僅能顯示文字,還能以圖像呈現最小值與最大值之間的距離。若要顯示裝置的剩餘電量,或是距離達成目標餘下的步數,這類小工具便十分實用。
開啟 CustomComplicationDataSourceService .kt,將游標向下移到 onComplicationRequest() 方法中的 when 陳述式,然後在 TYPE_LONG_TEXT 案例下方和預設案例上方新增這段程式碼:
ComplicationType.RANGED_VALUE -> RangedValueComplicationData.Builder(
    value = number.toFloat(),
    min = 0f,
    max = ComplicationTapBroadcastReceiver.MAX_NUMBER.toFloat(),
    contentDescription = PlainComplicationText
        .Builder(text = "Ranged Value version of Number.").build()
)
    .setText(PlainComplicationText.Builder(text = numberText).build())
    .setTapAction(complicationPendingIntent)
    .build()
您的 When 陳述式應如下所示:
return when (request.complicationType) {

    ComplicationType.SHORT_TEXT -> ShortTextComplicationData.Builder(
        text = PlainComplicationText.Builder(text = numberText).build(),
        contentDescription = PlainComplicationText
            .Builder(text = "Short Text version of Number.").build()
    )
        .setTapAction(complicationPendingIntent)
        .build()

    ComplicationType.LONG_TEXT -> LongTextComplicationData.Builder(
        text = PlainComplicationText.Builder(text = "Number: $numberText").build(),
        contentDescription = PlainComplicationText
            .Builder(text = "Long Text version of Number.").build()
    )
        .setTapAction(complicationPendingIntent)
        .build()

    ComplicationType.RANGED_VALUE -> RangedValueComplicationData.Builder(
        value = number.toFloat(),
        min = 0f,
        max = ComplicationTapBroadcastReceiver.MAX_NUMBER.toFloat(),
        contentDescription = PlainComplicationText
            .Builder(text = "Ranged Value version of Number.").build()
    )
        .setText(PlainComplicationText.Builder(text = numberText).build())
        .setTapAction(complicationPendingIntent)
        .build()

    else -> {
        if (Log.isLoggable(TAG, Log.WARN)) {
            Log.w(TAG, "Unexpected complication type ${request.complicationType}")
        }
        null
    }
}
再次強調,我們只是用新的格式重新封包相同的資料。我們來看看結果。
如何查看進度及偵錯
請安裝您的服務,然後選擇其他位置。

現在畫面應如下所示:
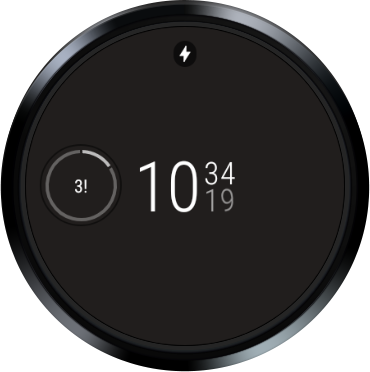
您會看到一個以數字為中心的圓圈,其中突顯了相當於 3/20 的數字。
摘要
您在此步驟中瞭解到:
- 如何變更及支援不同的小工具資料類型
下一步
我們會透過所有資料類型的變化版本來總結本程式碼研究室。
6. 提供所有三種資料類型
程式碼步驟 6
我們的小工具資料來源現在支援三種資料變化版本 (RANGED_VALUE、SHORT_TEXT 和 LONG_TEXT)。
在最後一個步驟中,我們會通知系統支援所有三種變化版本。
指定多個支援的資料類型
再次開啟 AndroidManifest.xml 檔案,然後查看 CustomComplicationDataSourceService 服務。
將 SUPPORTED_TYPES 這個 meta-data 元素變更為 RANGED_VALUE,SHORT_TEXT,LONG_TEXT。變更應如下所示:
<meta-data
    android:name="android.support.wearable.complications.SUPPORTED_TYPES"
    android:value="RANGED_VALUE,SHORT_TEXT,LONG_TEXT"/>
查看進度
安裝服務。
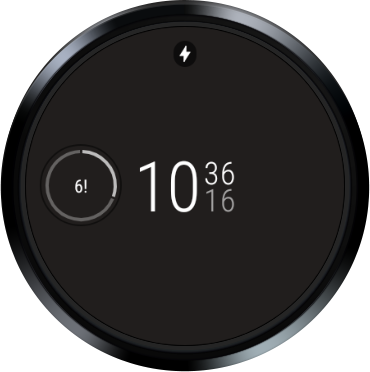
在本範例中,錶面會優先顯示範圍資料類型,而不是短類型和長類型。但如果小工具僅支援短文字類型,那麼錶面仍會顯示資料,因此它支援所有三種資料類型。請注意,錶面本身就會指定小工具支援的資料類型,還有這些類型的偏好順序。
摘要
您在此步驟中瞭解到:
- 支援多種小工具資料類型
7. 大功告成!接下來要做什麼?
您可以在小工具中支援更多資料類型 (包括小圖像、大圖像和圖示)。不妨自行實作其中的一些類型,充實這個程式碼研究室的內容。
如要進一步瞭解如何開發錶面的小工具以及建立小工具資料來源,請參閱錶面小工具
如要進一步瞭解如何開發 Wear OS 錶面,請前往 https://developer.android.com/training/wearables/watch-faces/index.html
