
1. 소개 및 설정
이 Codelab에서는 Jetpack Compose로 만든 UI를 테스트하는 방법을 알아봅니다. 격리 테스트, 디버깅 테스트, 시맨틱 트리, 동기화를 알아보면서 첫 번째 테스트를 작성합니다.
필요한 항목
- 최신 Android 스튜디오
- Kotlin 지식
- Compose에 관한 기본 이해(예:
@Composable주석) - 수정자에 관한 기본 지식
- 선택사항: 이 Codelab 전에 Jetpack Compose 기본사항 Codelab을 먼저 들어 보세요.
이 Codelab의 코드(Rally) 확인
이 Codelab의 기반으로 Rally 머티리얼 연구를 사용하게 됩니다. android-compose-codelabs GitHub 저장소에서 확인할 수 있습니다. 클론하려면 다음을 실행합니다.
git clone https://github.com/android/codelab-android-compose.git
다운로드가 완료되면 TestingCodelab 프로젝트를 엽니다.
또는 zip 파일 두 개를 다운로드할 수 있습니다.
TestingCodelab 폴더를 열면 Rally라는 앱이 포함되어 있습니다.
프로젝트 구조 확인
Compose 테스트는 계측 테스트입니다. 즉, 테스트를 실행하려면 기기(실제 기기 또는 에뮬레이터)가 필요합니다.
Rally에는 이미 일부 계측 UI 테스트가 포함되어 있습니다. androidTest 소스 세트에서 확인할 수 있습니다.

이 디렉터리는 새 테스트를 배치할 디렉터리입니다. 자유롭게 AnimatingCircleTests.kt 파일을 살펴보고 Compose 테스트가 어떻게 표시되는지 알아보세요.
Rally는 이미 구성되어 있지만 새 프로젝트에서 Compose 테스트를 사용 설정하는 데 필요한 것은 관련 모듈의 build.gradle 파일에 있는 테스트 종속 항목입니다.
androidTestImplementation "androidx.compose.ui:ui-test-junit4:$version"

debugImplementation "androidx.compose.ui:ui-test-manifest:$rootProject.composeVersion"
자유롭게 앱을 실행하면서 앱을 익힙니다.
2. 테스트 대상
개요, 계좌, 청구서와 같은 탭 행이 포함된 Rally의 탭 표시줄에 중점을 둡니다. 컨텍스트에서 다음과 같이 표시됩니다.

이 Codelab에서는 탭 바의 UI를 테스트합니다.
이는 다음과 같이 여러 의미일 수 있습니다.
- 탭에 원하는 아이콘과 텍스트가 표시되는지 테스트합니다.
- 애니메이션이 사양과 일치하는지 테스트합니다.
- 트리거된 탐색 이벤트가 정확한지 테스트합니다.
- 다양한 상태에서 UI 요소의 배치 및 거리를 테스트합니다.
- 탭 바의 스크린샷을 찍어 이전 스크린샷과 비교합니다.
구성요소를 테스트하는 방법이나 양에 관한 정확한 규칙은 없습니다. 위에 나열된 모든 작업을 실행할 수 있습니다. 이 Codelab에서는 다음을 확인하여 상태 로직이 정확한지 테스트합니다.
- 탭은 선택된 경우에만 라벨을 표시합니다.
- 활성 화면은 선택된 탭을 정의합니다.
3. 간단한 UI 테스트 만들기
TopAppBarTest 파일 만들기
AnimatingCircleTests.kt(app/src/androidTest/com/example/compose/rally)와 같은 폴더에 새 파일을 만들고 이름을 TopAppBarTest.kt로 지정합니다.
Compose는 createComposeRule()을 호출하여 가져올 수 있는 ComposeTestRule과 함께 제공됩니다. 이 규칙을 사용하면 테스트 중인 Compose 콘텐츠를 설정하고 이와 상호작용할 수 있습니다.
ComposeTestRule 추가
package com.example.compose.rally

import androidx.compose.ui.test.junit4.createComposeRule
import org.junit.Rule

class TopAppBarTest {

    @get:Rule
    val composeTestRule = createComposeRule()

    // TODO: Add tests
}
격리 테스트
Compose 테스트에서는 예를 들어 Espresso를 사용하여 Android 뷰 환경에서 실행하는 방식과 유사하게 앱의 기본 활동을 시작할 수 있습니다. createAndroidComposeRule을 사용하면 됩니다.
// Don't copy this over

@get:Rule
val composeTestRule = createAndroidComposeRule(RallyActivity::class.java)
그러나 Compose를 사용하면 구성요소를 격리 테스트하여 작업을 상당히 간소화할 수 있습니다. 테스트에 사용할 Compose UI 콘텐츠를 선택할 수 있습니다. ComposeTestRule의 setContent 메서드로 실행되며 어디에서나 호출할 수 있습니다(단 한 번만).
// Don't copy this over

class TopAppBarTest {

    @get:Rule
    val composeTestRule = createComposeRule()

    @Test
    fun myTest() {
        composeTestRule.setContent {
            Text("You can set any Compose content!")
        }
    }
}
TopAppBar를 테스트하려고 하므로 거기에 집중해보겠습니다. setContent 내에서 RallyTopAppBar를 호출하고 Android 스튜디오가 매개변수의 이름을 완성하도록 합니다.
import androidx.compose.ui.test.junit4.createComposeRule
import com.example.compose.rally.ui.components.RallyTopAppBar
import org.junit.Rule
import org.junit.Test

class TopAppBarTest {

    @get:Rule
    val composeTestRule = createComposeRule()

    @Test
    fun rallyTopAppBarTest() {
        composeTestRule.setContent {
            RallyTopAppBar(
                allScreens = ,
                onTabSelected = { /*TODO*/ },
                currentScreen =
            )
        }
    }
}
테스트 가능한 컴포저블의 중요성
RallyTopAppBar는 제공하기 쉬운 매개변수 세 개를 사용하므로 Google이 제어하는 가짜 데이터를 전달할 수 있습니다. 예를 들면 다음과 같습니다.
    @Test
    fun rallyTopAppBarTest() {
        val allScreens = RallyScreen.values().toList()
        composeTestRule.setContent {
            RallyTopAppBar(
                allScreens = allScreens,
                onTabSelected = { },
                currentScreen = RallyScreen.Accounts
            )
        }
        Thread.sleep(5000)
    }
또한 sleep()을 추가하여 무슨 일이 일어나고 있는지 확인할 수 있습니다. rallyTopAppBarTest를 마우스 오른쪽 버튼으로 클릭하고 'Run rallyTopAppBarTest()...'를 클릭합니다.
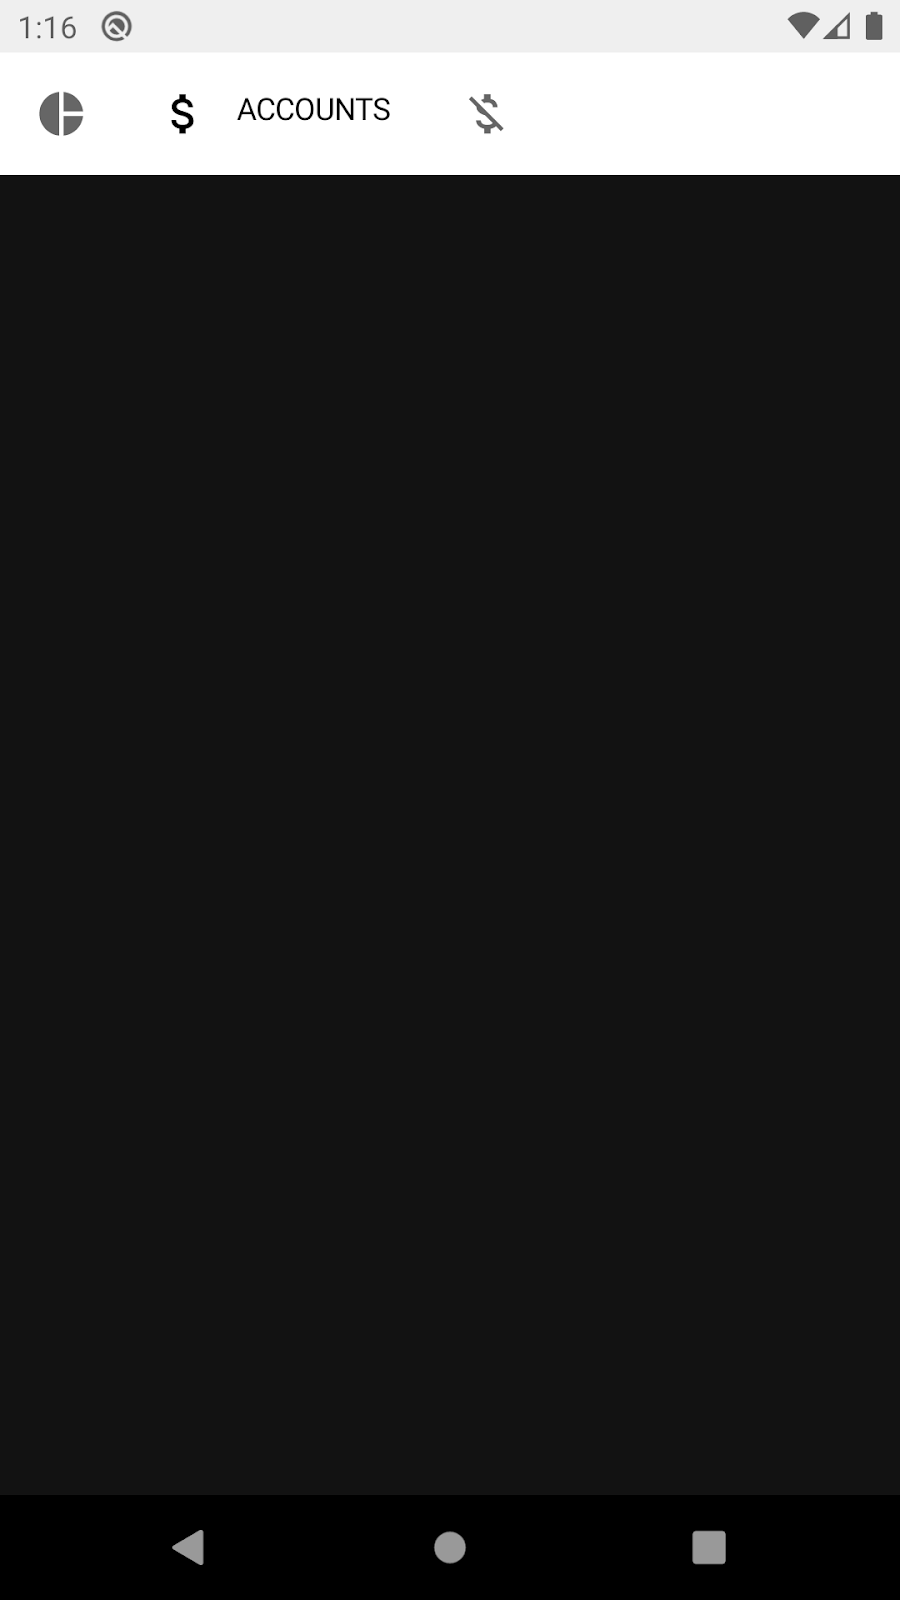
테스트에서 상단 앱 바가 5초 동안 표시되지만 예상한 모양이 아닙니다. 밝은 테마가 포함되어 있습니다.
상단 앱 바가 MaterialTheme 내에 있을 것으로 예상되는 머티리얼 구성요소를 사용하여 빌드되었기 때문입니다. 그러지 않으면 '기준' 스타일 색상으로 돌아갑니다.
MaterialTheme에는 좋은 기본값이 있으므로 다운되지 않습니다. 테마를 테스트하거나 스크린샷을 찍지 않을 것이므로 이를 생략하고 기본 밝은 테마로 작업할 수 있습니다. RallyTopAppBar를 RallyTheme으로 자유롭게 래핑하여 문제를 해결하세요.
탭이 선택되었는지 확인
UI 요소 찾기, 속성 확인, 작업 실행은 다음 패턴에 따라 테스트 규칙을 통해 실행됩니다.
composeTestRule{.finder}{.assertion}{.action}
이 테스트에서는 '계좌'라는 단어를 찾아 선택된 탭의 라벨이 표시되는지 확인합니다.
사용 가능한 도구를 파악하려면 Compose 테스트 요약본 또는 테스트 패키지 참고 문서를 사용하는 것이 좋습니다. 이 상황에 도움이 될 수 있는 파인더와 어설션을 찾습니다. 예: onNodeWithText, onNodeWithContentDescription, isSelected, hasContentDescription, assertIsSelected 등
각 탭에는 다양한 콘텐츠 설명이 있습니다.
- 개요
- 계정
- 청구서
이를 확인한 상태에서 Thread.sleep(5000)을 콘텐츠 설명을 찾아 그 존재를 어설션하는 문으로 바꿉니다.
import androidx.compose.ui.test.assertIsSelected
import androidx.compose.ui.test.onNodeWithContentDescription
...

@Test
fun rallyTopAppBarTest_currentTabSelected() {
    val allScreens = RallyScreen.values().toList()
    composeTestRule.setContent {
        RallyTopAppBar(
            allScreens = allScreens,
            onTabSelected = { },
            currentScreen = RallyScreen.Accounts
        )
    }

    composeTestRule
        .onNodeWithContentDescription(RallyScreen.Accounts.name)
        .assertIsSelected()
}
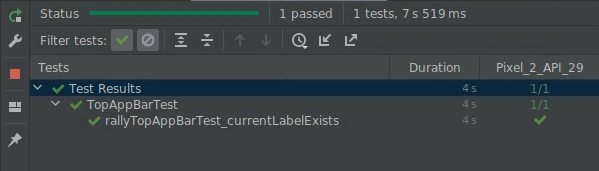
이제 테스트를 다시 실행하면 녹색 테스트가 표시됩니다.
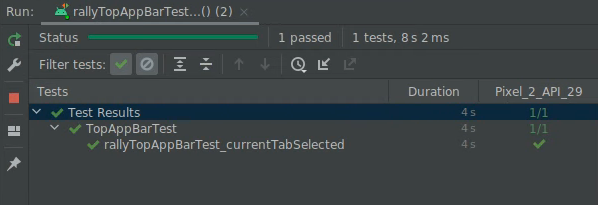
수고하셨습니다. 첫 번째 Compose 테스트를 작성했습니다. 격리 테스트를 하는 방법과 파인더 및 어설션을 사용하는 방법을 알아봤습니다.
간단한 작업이었지만 구성요소(콘텐츠 설명, 선택된 속성)에 관한 사전 지식이 필요했습니다. 다음 단계에서 사용 가능한 속성을 검사하는 방법을 알아봅니다.
4. 디버깅 테스트
이 단계에서는 현재 탭의 라벨이 대문자로 표시되는지 확인합니다.
가능한 해결 방법은 텍스트를 찾아 그것이 존재한다는 어설션을 시도하는 것입니다.
import androidx.compose.ui.test.onNodeWithText
...

@Test
fun rallyTopAppBarTest_currentLabelExists() {
    val allScreens = RallyScreen.values().toList()
    composeTestRule.setContent {
        RallyTopAppBar(
            allScreens = allScreens,
            onTabSelected = { },
            currentScreen = RallyScreen.Accounts
        )
    }

    composeTestRule
        .onNodeWithText(RallyScreen.Accounts.name.uppercase())
        .assertExists()
}
그러나 테스트를 실행하면 실패합니다. 😱
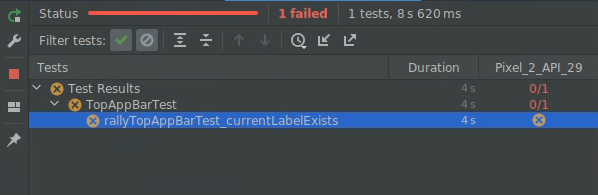
이 단계에서는 시맨틱 트리를 사용하여 이를 디버그하는 방법을 알아봅니다.
시맨틱 트리
Compose 테스트는 시맨틱 트리라는 구조를 사용하여 화면에서 요소를 찾아 속성을 읽습니다. 이는 접근성 서비스에서도 사용하는 구조로, TalkBack과 같은 서비스에서 읽을 수 있게 되어 있습니다.
노드에서 printToLog 함수를 사용하여 시맨틱 트리를 출력할 수 있습니다. 테스트에 새 줄을 추가합니다.
import androidx.compose.ui.test.onRoot
import androidx.compose.ui.test.printToLog
...

fun rallyTopAppBarTest_currentLabelExists() {
    val allScreens = RallyScreen.values().toList()
    composeTestRule.setContent {
        RallyTopAppBar(
            allScreens = allScreens,
            onTabSelected = { },
            currentScreen = RallyScreen.Accounts
        )
    }

    composeTestRule.onRoot().printToLog("currentLabelExists")

    composeTestRule
        .onNodeWithText(RallyScreen.Accounts.name.uppercase())
        .assertExists() // Still fails
}
이제 테스트를 실행하고 Android 스튜디오에서 Logcat을 확인합니다(currentLabelExists를 찾을 수 있음).
...com.example.compose.rally D/currentLabelExists: printToLog:
    Printing with useUnmergedTree = 'false'
    Node #1 at (l=0.0, t=63.0, r=1080.0, b=210.0)px
     |-Node #2 at (l=0.0, t=63.0, r=1080.0, b=210.0)px
       [SelectableGroup]
       MergeDescendants = 'true'
        |-Node #3 at (l=42.0, t=105.0, r=105.0, b=168.0)px
        | Role = 'Tab'
        | Selected = 'false'
        | StateDescription = 'Not selected'
        | ContentDescription = 'Overview'
        | Actions = [OnClick]
        | MergeDescendants = 'true'
        | ClearAndSetSemantics = 'true'
        |-Node #6 at (l=189.0, t=105.0, r=468.0, b=168.0)px
        | Role = 'Tab'
        | Selected = 'true'
        | StateDescription = 'Selected'
        | ContentDescription = 'Accounts'
        | Actions = [OnClick]
        | MergeDescendants = 'true'
        | ClearAndSetSemantics = 'true'
        |-Node #11 at (l=552.0, t=105.0, r=615.0, b=168.0)px
          Role = 'Tab'
          Selected = 'false'
          StateDescription = 'Not selected'
          ContentDescription = 'Bills'
          Actions = [OnClick]
          MergeDescendants = 'true'
          ClearAndSetSemantics = 'true'
시맨틱 트리를 살펴보면 상단 앱 바의 탭인 하위 요소 3개가 포함된 SelectableGroup이 있는 것을 확인할 수 있습니다. 결과적으로 'ACCOUNTS' 값을 가진 text 속성이 없어 테스트가 실패합니다. 그러나 각 탭에 대한 콘텐츠 설명은 있습니다. 이 속성이 RallyTopAppBar.kt 내부의 RallyTab 컴포저블에서 설정되는 방식을 확인할 수 있습니다.
private fun RallyTab(text: String...)
...
    Modifier
        .clearAndSetSemantics { contentDescription = text }
이 수정자는 하위 요소에서 속성을 삭제하고 자체 콘텐츠 설명을 설정하므로 'ACCOUNTS'가 아닌 'Accounts'가 표시됩니다.
파인더 onNodeWithText를 onNodeWithContentDescription으로 바꾸고 테스트를 다시 실행합니다.
fun rallyTopAppBarTest_currentLabelExists() {
    val allScreens = RallyScreen.values().toList()
    composeTestRule.setContent {
        RallyTopAppBar(
            allScreens = allScreens,
            onTabSelected = { },
            currentScreen = RallyScreen.Accounts
        )
    }

    composeTestRule
        .onNodeWithContentDescription(RallyScreen.Accounts.name)
        .assertExists()
}
수고하셨습니다. 테스트를 수정했고 ComposeTestRule, 격리 테스트, 파인더, 어설션, 시맨틱 트리를 사용한 디버깅에 관해 알아봤습니다.
안타깝게도 이 테스트는 그다지 유용하지 않습니다. 시맨틱 트리를 자세히 살펴보면 탭 선택 여부와 관계없이 세 탭의 콘텐츠 설명이 모두 있습니다. 좀 더 깊이 들어가야 합니다.
5. 병합 및 병합 해제 시맨틱 트리
시맨틱 트리는 항상 최대한 간결하려고 하므로 관련 있는 정보만 표시합니다.
예를 들어 TopAppBar에서는 아이콘과 라벨이 다른 노드가 아니어도 됩니다. '개요' 노드를 살펴보세요.

        |-Node #3 at (l=42.0, t=105.0, r=105.0, b=168.0)px
        | Role = 'Tab'
        | Selected = 'false'
        | StateDescription = 'Not selected'
        | ContentDescription = 'Overview'
        | Actions = [OnClick]
        | MergeDescendants = 'true'
        | ClearAndSetSemantics = 'true'
이 노드에는 selectable 구성요소에 관해 특별히 정의된 속성(예: Selected, Role)과 전체 탭에 관한 콘텐츠 설명이 있습니다. 이러한 속성은 간단한 테스트에 매우 유용한 상위 수준의 속성입니다. 아이콘이나 텍스트에 관한 세부정보는 중복되므로 표시되지 않습니다.
Compose는 Text와 같은 일부 컴포저블에서 이러한 시맨틱 속성을 자동으로 노출합니다. 이러한 속성을 맞춤설정하고 병합하여 하나 이상의 하위 요소로 이루어진 단일 구성요소를 나타낼 수도 있습니다. 예를 들어 Text 컴포저블을 포함하는 Button을 나타낼 수 있습니다. 속성 MergeDescendants = 'true'는 이 노드에 하위 요소가 있지만 병합되었다고 알려줍니다. 테스트에서 종종 모든 노드에 액세스해야 합니다.
탭 내부 Text가 표시되는지 확인하려면 useUnmergedTree = true를 onRoot 파인더에 전달하는 병합되지 않은 시맨틱 트리를 쿼리하면 됩니다.
@Test
fun rallyTopAppBarTest_currentLabelExists() {
    val allScreens = RallyScreen.values().toList()
    composeTestRule.setContent {
        RallyTopAppBar(
            allScreens = allScreens,
            onTabSelected = { },
            currentScreen = RallyScreen.Accounts
        )
    }

    composeTestRule.onRoot(useUnmergedTree = true).printToLog("currentLabelExists")


}
이제 Logcat의 출력이 약간 더 길어집니다.
    Printing with useUnmergedTree = 'true'
    Node #1 at (l=0.0, t=63.0, r=1080.0, b=210.0)px
     |-Node #2 at (l=0.0, t=63.0, r=1080.0, b=210.0)px
       [SelectableGroup]
       MergeDescendants = 'true'
        |-Node #3 at (l=42.0, t=105.0, r=105.0, b=168.0)px
        | Role = 'Tab'
        | Selected = 'false'
        | StateDescription = 'Not selected'
        | ContentDescription = 'Overview'
        | Actions = [OnClick]
        | MergeDescendants = 'true'
        | ClearAndSetSemantics = 'true'
        |-Node #6 at (l=189.0, t=105.0, r=468.0, b=168.0)px
        | Role = 'Tab'
        | Selected = 'true'
        | StateDescription = 'Selected'
        | ContentDescription = 'Accounts'
        | Actions = [OnClick]
        | MergeDescendants = 'true'
        | ClearAndSetSemantics = 'true'
        |  |-Node #9 at (l=284.0, t=105.0, r=468.0, b=154.0)px
        |    Text = 'ACCOUNTS'
        |    Actions = [GetTextLayoutResult]
        |-Node #11 at (l=552.0, t=105.0, r=615.0, b=168.0)px
          Role = 'Tab'
          Selected = 'false'
          StateDescription = 'Not selected'
          ContentDescription = 'Bills'
          Actions = [OnClick]
          MergeDescendants = 'true'
          ClearAndSetSemantics = 'true'
노드 #3에는 여전히 하위 요소가 없습니다.
        |-Node #3 at (l=42.0, t=105.0, r=105.0, b=168.0)px
        | Role = 'Tab'
        | Selected = 'false'
        | StateDescription = 'Not selected'
        | ContentDescription = 'Overview'
        | Actions = [OnClick]
        | MergeDescendants = 'true'
        | ClearAndSetSemantics = 'true'
그러나 선택된 탭인 노드 6에는 하위 요소가 하나 있으므로 'Text' 속성이 표시됩니다.
        |-Node #6 at (l=189.0, t=105.0, r=468.0, b=168.0)px
        | Role = 'Tab'
        | Selected = 'true'
        | StateDescription = 'Selected'
        | ContentDescription = 'Accounts'
        | Actions = [OnClick]
        | MergeDescendants = 'true'
        |  |-Node #9 at (l=284.0, t=105.0, r=468.0, b=154.0)px
        |    Text = 'ACCOUNTS'
        |    Actions = [GetTextLayoutResult]
원하는 정확한 동작을 확인하려면 상위 요소가 콘텐츠 설명 'Accounts'가 포함된 노드인 'ACCOUNTS' 텍스트가 있는 노드를 찾는 일치자를 작성합니다.
Compose 테스트 요약본을 다시 확인하고 이 일치자를 작성하는 방법을 찾아보세요. 일치자와 함께 and 및 or과 같은 부울 연산자를 사용할 수 있습니다.
모든 파인더에는 useUnmergedTree라는 매개변수가 있습니다. true로 설정하여 병합되지 않은 트리를 사용합니다.
해결 방법을 보지 않고 테스트를 작성해보세요.
솔루션
import androidx.compose.ui.test.hasParent
import androidx.compose.ui.test.hasText
...

@Test
fun rallyTopAppBarTest_currentLabelExists() {
    val allScreens = RallyScreen.values().toList()
    composeTestRule.setContent {
        RallyTopAppBar(
            allScreens = allScreens,
            onTabSelected = { },
            currentScreen = RallyScreen.Accounts
        )
    }

    composeTestRule
        .onNode(
            hasText(RallyScreen.Accounts.name.uppercase()) and
            hasParent(
                hasContentDescription(RallyScreen.Accounts.name)
            ),
            useUnmergedTree = true
        )
        .assertExists()
}
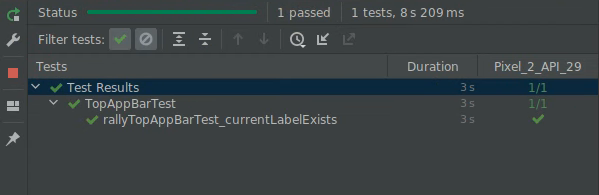
다음과 같이 실행해보세요.
수고하셨습니다. 이 단계에서는 속성 병합과 병합된 시맨틱 트리 및 병합되지 않은 시맨틱 트리를 알아봤습니다.
6. 동기화
작성하는 모든 테스트는 테스트 대상과 적절하게 동기화되어야 합니다. 예를 들어 onNodeWithText와 같은 파인더를 사용하면 테스트에서는 시맨틱 트리를 쿼리하기 전에 앱이 유휴 상태가 될 때까지 대기합니다. 동기화를 사용하지 않으면 테스트는 표시하기 전에 요소를 찾거나 불필요하게 대기할 수 있습니다.
이 단계에서는 앱을 실행할 때 다음과 같은 개요 화면을 사용합니다.
알림 카드에 적용된 반복해서 깜박이는 애니메이션으로 이 요소에 주목하게 됩니다.
OverviewScreenTest라는 다른 테스트 클래스를 만들고 다음 콘텐츠를 추가합니다.
package com.example.compose.rally

import androidx.compose.ui.test.assertIsDisplayed
import androidx.compose.ui.test.junit4.createComposeRule
import androidx.compose.ui.test.onNodeWithText
import com.example.compose.rally.ui.overview.OverviewBody
import org.junit.Rule
import org.junit.Test

class OverviewScreenTest {

    @get:Rule
    val composeTestRule = createComposeRule()

    @Test
    fun overviewScreen_alertsDisplayed() {
        composeTestRule.setContent {
            OverviewBody()
        }

        composeTestRule
            .onNodeWithText("Alerts")
            .assertIsDisplayed()
    }
}
이 테스트를 실행하면 완료되지 않는다는 것을 알 수 있습니다(30초 후에 시간 초과됨).
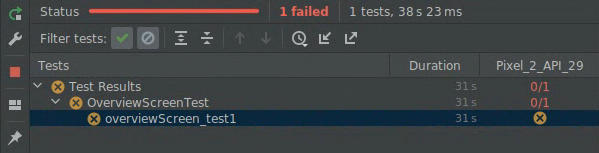
오류는 다음과 같습니다.
androidx.compose.ui.test.junit4.android.ComposeNotIdleException: Idling resource timed out: possibly due to compose being busy.
IdlingResourceRegistry has the following idling resources registered:
- [busy] androidx.compose.ui.test.junit4.android.ComposeIdlingResource@d075f91
기본적으로 Compose가 영구적으로 사용 중이므로 앱을 테스트와 동기화할 방법이 없다는 의미입니다.
이미 짐작했겠지만 문제는 무한으로 깜박이는 애니메이션입니다. 앱이 유휴 상태가 아니므로 테스트를 계속할 수 없습니다.
무한 애니메이션의 구현을 살펴보겠습니다.
app/src/main/java/com/example/compose/rally/ui/overview/OverviewBody.kt
var currentTargetElevation by remember {  mutableStateOf(1.dp) }
LaunchedEffect(Unit) {
    // Start the animation
    currentTargetElevation = 8.dp
}
val animatedElevation = animateDpAsState(
    targetValue = currentTargetElevation,
    animationSpec = tween(durationMillis = 500),
    finishedListener = {
        currentTargetElevation = if (currentTargetElevation > 4.dp) {
            1.dp
        } else {
            8.dp
        }
    }
)
Card(elevation = animatedElevation.value) { ... }
이 코드는 기본적으로 애니메이션이 완료(finishedListener)될 때까지 대기한 다음 다시 실행됩니다.
이 테스트를 수정하는 한 가지 방법은 개발자 옵션에서 애니메이션을 사용 중지하는 것입니다. 이 방법은 View 환경에서 문제 해결을 위해 널리 사용되는 방법의 하나입니다.
Compose에서는 애니메이션 API가 테스트 가능성을 염두에 두고 설계되었으므로 올바른 API를 사용하여 문제를 해결할 수 있습니다. animateDpAsState 애니메이션을 다시 시작하는 대신 무한 애니메이션을 사용할 수 있습니다.
OverviewScreen의 코드를 적절한 API로 바꿉니다.
import androidx.compose.animation.core.RepeatMode
import androidx.compose.animation.core.VectorConverter
import androidx.compose.animation.core.animateValue
import androidx.compose.animation.core.infiniteRepeatable
import androidx.compose.animation.core.rememberInfiniteTransition
import androidx.compose.animation.core.tween
import androidx.compose.ui.unit.Dp
...

    val infiniteElevationAnimation = rememberInfiniteTransition()
    val animatedElevation: Dp by infiniteElevationAnimation.animateValue(
        initialValue = 1.dp,
        targetValue = 8.dp,
        typeConverter = Dp.VectorConverter,
        animationSpec = infiniteRepeatable(
            animation = tween(500),
            repeatMode = RepeatMode.Reverse
        )
    )
    Card(elevation = animatedElevation) {
테스트를 실행하면 이제 통과됩니다.
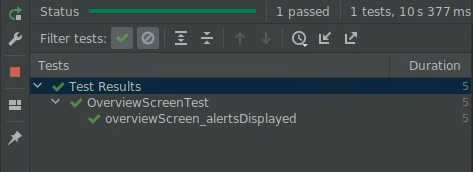
수고하셨습니다. 이 단계에서는 동기화와 애니메이션이 테스트에 미칠 수 있는 영향을 알아봤습니다.
7. 연습(선택사항)
이 단계에서는 작업(테스트 요약본 참고)을 사용하여 RallyTopAppBar의 다른 탭을 클릭하면 선택 항목이 변경되는지 확인합니다.
힌트:
- 테스트 범위에는
RallyApp이 소유한 상태가 포함되어야 합니다. - 동작이 아닌 상태를 확인합니다. 호출된 객체와 방법에 의존하는 대신 UI 상태에 어설션을 사용합니다.
이 연습에는 해결 방법이 제공되지 않습니다.
8. 다음 단계
수고하셨습니다. Jetpack Compose에서 테스트를 완료했습니다. 이제 Compose UI를 위한 좋은 테스트 전략을 만드는 기본 구성요소가 있습니다.
테스트 및 Compose에 관한 자세한 내용은 다음 리소스를 참고하세요.
- 테스트 문서에는 파인더, 어설션, 작업 및 일치자뿐 아니라 동기화 메커니즘, 시간 조작 등에 관한 자세한 내용이 나와 있습니다.
- 테스트 요약본을 북마크에 추가하세요.
- Rally 샘플은 간단한 스크린샷 테스트 클래스와 함께 제공됩니다. 자세한 내용은
AnimatingCircleTests.kt파일을 참고하세요. - Android 앱 테스트에 관한 일반적인 지침은 다음 세 가지 Codelab을 참고하세요.
- GitHub의 Compose 샘플 저장소에는 UI 테스트가 포함된 여러 앱이 있습니다.
- Jetpack Compose 과정에는 Compose를 시작하는 데 도움이 되는 리소스 목록이 표시됩니다.
즐거운 테스트가 되기를 바랍니다.