1. 准备工作
此 Codelab 提供了实践指导,可帮助您掌握实现视图拖放功能的基础知识。您将学习如何在应用内和不同应用之间拖放视图,还将学习如何在应用内甚至不同应用之间实现拖放互动。此 Codelab 将指导您使用 DropHelper 实现拖放,使用 ShadowBuilder 自定义拖动期间的视觉反馈,添加跨应用拖动权限,以及实现通用内容接收器。
前提条件
为完成此 Codelab,您需要:
- 拥有构建 Android 应用的经验。
- 拥有使用 activity、fragment、视图绑定和 xml-layout 的经验。
实践内容
创建一款具有以下功能的简单应用:
- 使用
DragStartHelper和DropHelper实现拖放功能 - 更改 ShadowBuilder
- 添加跨应用拖动权限
- 实现富媒体内容接收器,以便实现通用方案
所需条件
- Android Studio Jellyfish 或更高版本
- Android 设备或模拟器
2. 拖放事件
拖放过程可以视为由 4 个阶段构成的事件,包括:
- 开始:系统响应用户的拖动手势,开始执行拖放操作。
- 继续:用户继续拖动,当进入目标视图时,DragShadowBuilder 会启动。
- 完成:用户在放置目标区域的边界框内释放拖动操作。
- 退出:系统发送信号以结束拖放操作。
系统在 DragEvent 对象中发送拖动事件。DragEvent 对象可以包含以下数据
ActionType:基于拖放事件的生命周期事件的事件操作值。例如ACTION_DRAG_STARTED,ACTION_DROP等。ClipData:要拖动的数据,封装在ClipData对象中。ClipDescription:有关ClipData对象的元信息。Result:拖放操作的结果。X:拖动对象当前位置的 x 坐标。Y:拖动对象当前位置的 y 坐标。
3. 设置
创建一个新项目,然后选择“Empty Views Activity”模板:
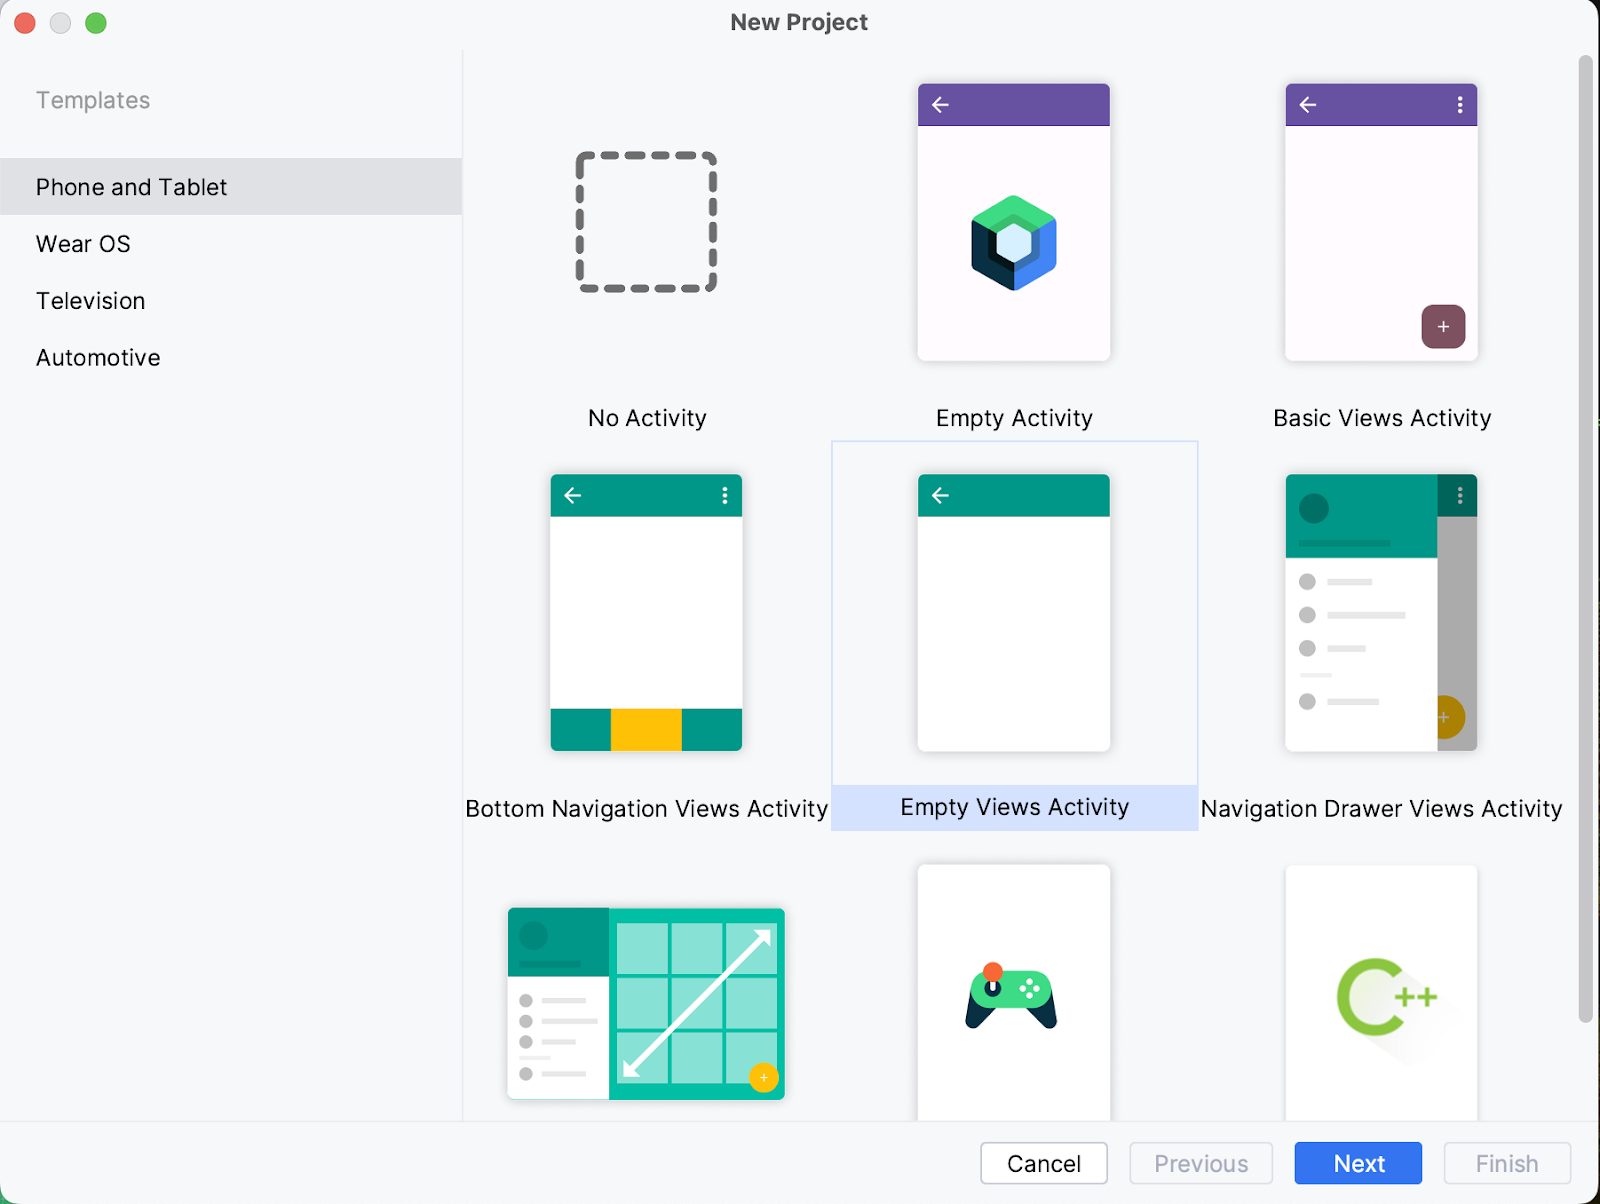
将所有参数保留为默认值。让项目同步并编入索引。您会看到 MainActivity.kt 以及视图 activity_main.xml 已经创建完成。
4. 使用视图的拖放
在 string.xml 中,添加一些字符串值
<resources>
    <string name="app_name">DragAndDropCodelab</string>
    <string name="drag_image">Drag Image</string>
    <string name="drop_image">drop image</string>
 </resources>
打开 activity_main.xml 源文件,并修改布局以添加两个 ImageViews,一个用作拖动来源,另一个用作放置目标。
<?xml version="1.0" encoding="utf-8"?>
<androidx.constraintlayout.widget.ConstraintLayout xmlns:android="http://schemas.android.com/apk/res/android"
    xmlns:app="http://schemas.android.com/apk/res-auto"
    xmlns:tools="http://schemas.android.com/tools"
    android:layout_width="match_parent"
    android:layout_height="match_parent"
    tools:context=".MainActivity">

    <TextView
        android:id="@+id/tv_greeting"
        android:layout_width="wrap_content"
        android:layout_height="wrap_content"
        app:layout_constraintBottom_toTopOf="@id/iv_source"
        app:layout_constraintLeft_toLeftOf="parent"
        app:layout_constraintRight_toRightOf="parent"
        app:layout_constraintTop_toTopOf="parent" />

    <ImageView
        android:id="@+id/iv_source"
        android:layout_width="match_parent"
        android:layout_height="wrap_content"
        android:contentDescription="@string/drag_image"
        app:layout_constraintBottom_toTopOf="@id/iv_target"
        app:layout_constraintLeft_toLeftOf="parent"
        app:layout_constraintRight_toRightOf="parent"
        app:layout_constraintTop_toBottomOf="@id/tv_greeting" />

    <ImageView
        android:id="@+id/iv_target"
        android:layout_width="match_parent"
        android:layout_height="wrap_content"
        android:contentDescription="@string/drop_image"
        app:layout_constraintBottom_toBottomOf="parent"
        app:layout_constraintLeft_toLeftOf="parent"
        app:layout_constraintRight_toRightOf="parent"
        app:layout_constraintTop_toBottomOf="@id/iv_source" />
</androidx.constraintlayout.widget.ConstraintLayout>
在 build.gradle.kts 中,启用视图绑定
buildFeatures{
   viewBinding = true
}
在 build.gradle.kts 中,添加 Glide 的依赖项
dependencies {
    implementation("com.github.bumptech.glide:glide:4.16.0")
    annotationProcessor("com.github.bumptech.glide:compiler:4.16.0")

    //other dependencies
}
在 string.xml 中添加图片网址和问候语文本
<string name="greeting">Drag and Drop</string>
<string name="target_url">https://services.google.com/fh/files/misc/qq2.jpeg</string>
<string name="source_url">https://services.google.com/fh/files/misc/qq10.jpeg</string>
在 MainActivity.kt 中,初始化视图
class MainActivity : AppCompatActivity() {
   val binding by lazy(LazyThreadSafetyMode.NONE) {
       ActivityMainBinding.inflate(layoutInflater)
   }

   override fun onCreate(savedInstanceState: Bundle?) {
       super.onCreate(savedInstanceState)
       setContentView(binding.root)
       binding.tvGreeting.text = getString(R.string.greeting)
       Glide.with(this).asBitmap()
           .load(getString(R.string.source_url))
           .into(binding.ivSource)
       Glide.with(this).asBitmap()
           .load(getString(R.string.target_url))
           .into(binding.ivTarget)
   }
}
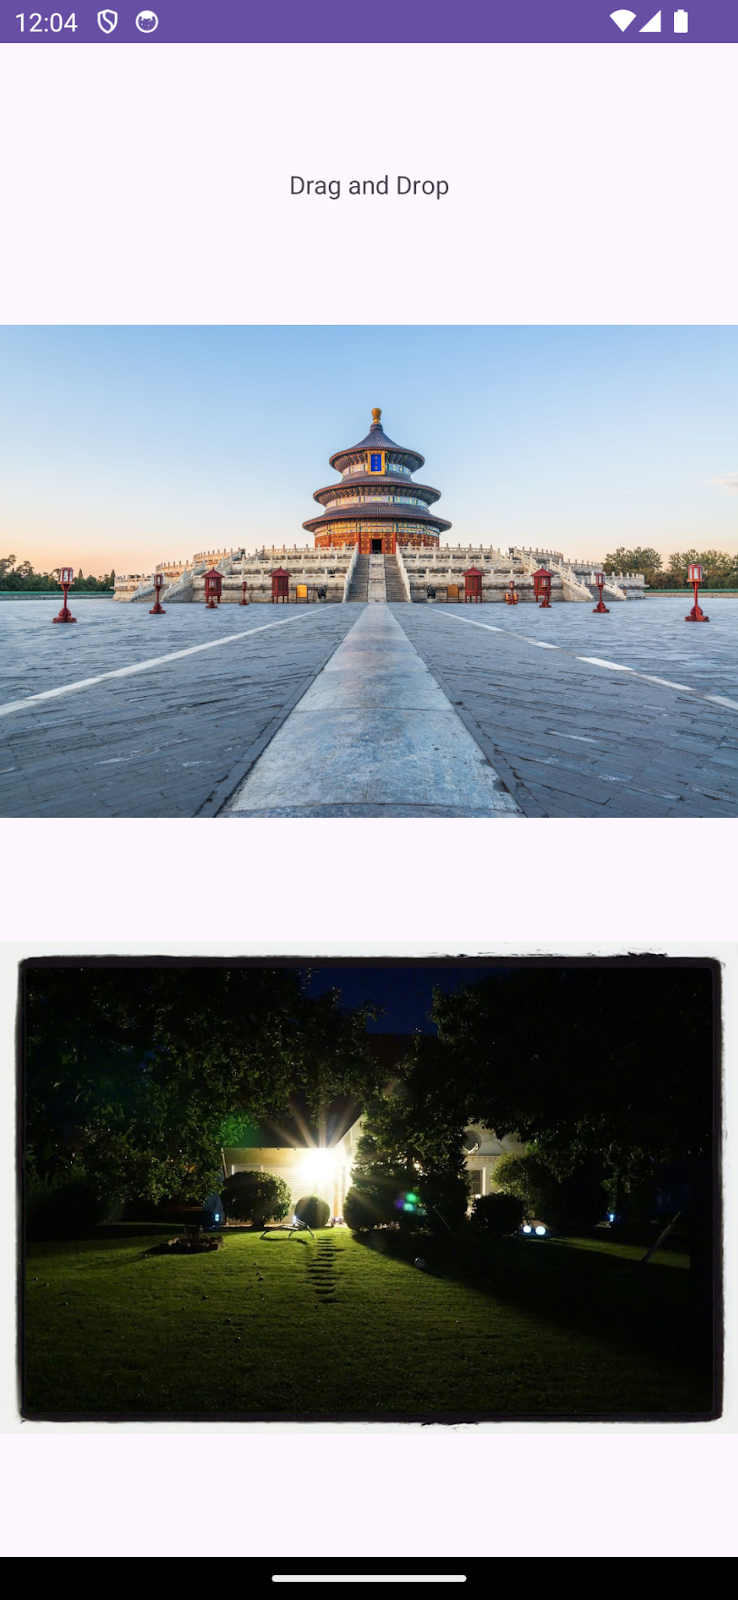
在此状态下,您的应用应显示问候语文本和两张垂直方向的图片。
5. 使视图可拖动
如需使特定视图可拖动,视图必须针对拖动手势实现 startDragAndDrop() 方法。
我们来为 onLongClickListener 实现一个在用户对视图发起拖动时进行的回调。
draggableView.setOnLongClickListener{ v ->
   //drag logic here
   true
}
即使视图不可长按,此回调也会使其成为可长按视图。返回值为布尔值。True 表示拖动操作是由回调消耗的。
准备 ClipData:要拖动的数据
我们来定义要放置的数据。数据可以是任何类型,从简单文本到视频均可。此数据封装在 ClipData 对象中。ClipData 对象包含一个或多个复杂的 ClipItem
使用 ClipDescription 中定义的不同 MIME 类型。
我们要拖动来源视图的图片网址。ClipData 有 3 个主要组件
- 标签:向用户显示所拖动内容的简单文本
- MIME 类型:正在拖动的内容的 MimeType
- ClipItem:封装在
ClipData.Item对象中要拖动的内容
下面创建 ClipData。
val label = "Dragged Image Url"
val clipItem = ClipData.Item(v.tag as? CharSequence)
val mimeTypes = arrayOf(ClipDescription.MIMETYPE_TEXT_PLAIN)
val draggedData = ClipData(
   label, mimeTypes, clipItem
)
开始拖放
现在,我们已准备好要拖动的数据,开始拖动。为此,我们将使用 startDragAndDrop
startDragAndDrop 方法采用 4 个参数
- 数据:以
ClipData.形式拖动的数据。 - shadowBuilder:用于为视图构建阴影的 DragShadowBuilder。
- myLocalState:包含拖放操作本地数据的对象。将拖动事件调度给同一 activity 中的视图时,可通过 DragEvent.getLocalState() 获取此对象。
- 标志:用于控制拖放操作的标志。
调用此函数后,系统会根据 View.DragShadowBuilder 类绘制拖动阴影。系统拥有拖动阴影后,会通过将事件发送到已实现 OnDragListener 接口的可见视图来启动拖放操作。
v.startDragAndDrop(
   draggedData,
   View.DragShadowBuilder(v),
   null,
   0
)
至此,我们已经为拖动操作配置了视图,并设置了要拖动的数据。最终实现如下所示。
fun setupDrag(draggableView: View) {
   draggableView.setOnLongClickListener { v ->
       val label = "Dragged Image Url"
       val clipItem = ClipData.Item(v.tag as? CharSequence)
       val mimeTypes = arrayOf(ClipDescription.MIMETYPE_TEXT_PLAIN)
       val draggedData = ClipData(
           label, mimeTypes, clipItem
       )
       v.startDragAndDrop(
           draggedData,
           View.DragShadowBuilder(v),
           null,
           0
       )
   }
}
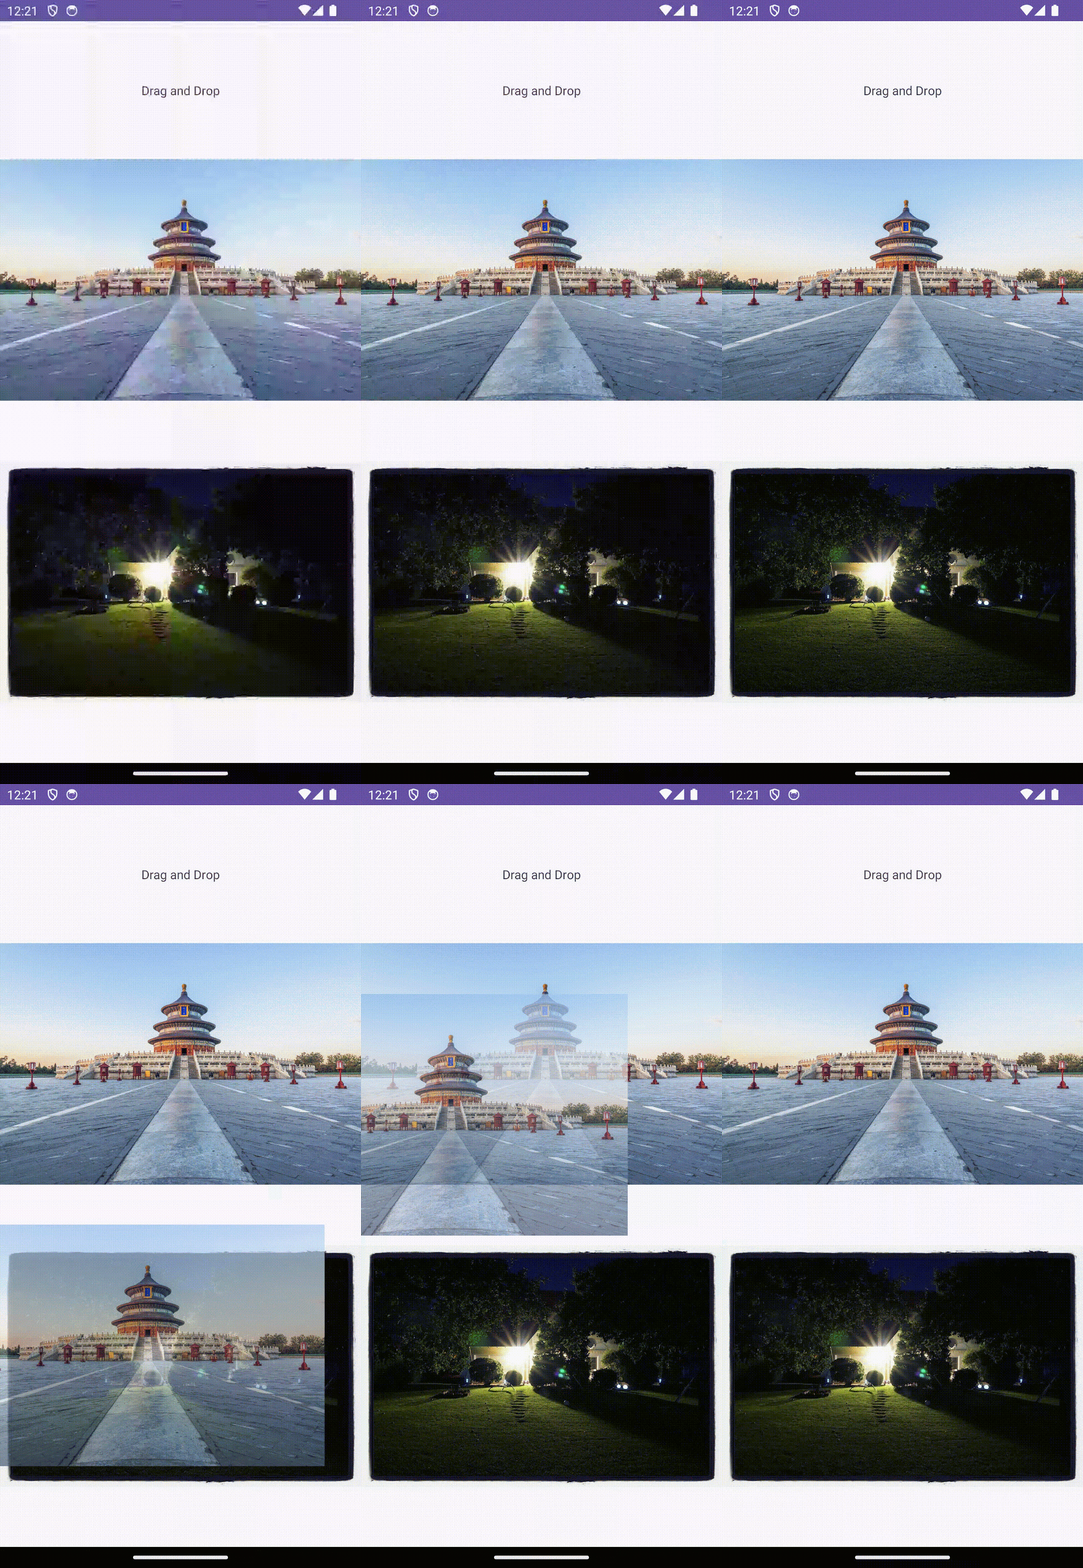
在此阶段,您应能够通过长按来拖动视图。
让我们继续配置放置的视图。
6. 为 DropTarget 配置视图
由于视图已实现 OnDragListener 接口,因此可以作为放置目标。
让我们配置第二个图片视图,使其成为放置目标。
private fun setupDrop(dropTarget: View) {
   dropTarget.setOnDragListener { v, event ->
       // handle drag events here
       true
   }
}
我们将替换 OnDragListener 接口的 onDrag 方法。onDrag 方法有 2 个参数。
- 已收到拖动事件的视图
- 拖动事件的事件对象
如果拖动事件处理成功,此方法会返回 true,否则返回 false。
DragEvent
DragEvent 表示系统在拖放操作的不同阶段传输的数据包。该数据包封装有关操作本身和所涉及数据的重要信息。
根据拖放操作所处的阶段,DragEvent 具有不同的拖动操作
ACTION_DRAG_STARTED:表示拖放操作开始。ACTION _DRAG_LOCATION:表示用户已在进入的状态(即不在目标放置区域的边界内)释放拖动。ACTION_DRAG_ENTERED:表示拖动的视图位于目标放置视图的边界内。ACTION_DROP:表示用户已在目标放置区域释放拖动操作。ACTION_DRAG_ENDED:表示拖放操作已完成。ACTION_DRAG_EXITED:表示拖放操作已结束。
验证 DragEvent
如果 ACTION_DRAG_STARTED 事件满足所有约束条件,您可以选择继续拖放操作。例如,在本示例中,我们可以检查传入数据的类型是否正确。
DragEvent.ACTION_DRAG_STARTED -> {
   Log.d(TAG, "ON DRAG STARTED")
   if (event.clipDescription.hasMimeType(ClipDescription.MIMETYPE_TEXT_PLAIN)) {
       (v as? ImageView)?.alpha = 0.5F
       v.invalidate()
       true
   } else {
       false
   }
}
在此示例中,我们检查了事件中的 ClipDescription 是否具有可接受的 MIME 类型。如果是,我们将提供视觉信号来表示这一情况并返回 true,表示系统正在处理拖动的数据。否则,我们会返回 false,表示放置目标视图正在舍弃拖动。
处理放置数据
在 ACTION_DROP 事件中,我们可以选择如何处理放置的数据。在此示例中,我们将提取已添加到 ClipData 的网址作为文本。我们将此图片从网址放入目标图片视图
DragEvent.ACTION_DROP -> {
   Log.d(TAG, "On DROP")
   val item: ClipData.Item = event.clipData.getItemAt(0)
   val dragData = item.text
   Glide.with(this).load(item.text).into(v as ImageView)
   (v as? ImageView)?.alpha = 1.0F
   true
}
除了处理放置操作外,我们还可以配置当用户在目标放置视图的边界框内拖动视图时会发生什么,以及当用户将视图拖出目标区域时会发生什么。
让我们添加一些视觉提示,指示拖动的内容进入目标区域
DragEvent.ACTION_DRAG_ENTERED -> {
   Log.d(TAG, "ON DRAG ENTERED")
   (v as? ImageView)?.alpha = 0.3F
   v.invalidate()
   true
}
此外,添加更多视觉提示,指示用户将视图拖出目标放置视图的边界框。
DragEvent.ACTION_DRAG_EXITED -> {
   Log.d(TAG, "ON DRAG EXISTED")
   (v as? ImageView)?.alpha = 0.5F
   v.invalidate()
   true
}
添加更多视觉提示,指示拖放操作已完成
DragEvent.ACTION_DRAG_ENDED -> {
   Log.d(TAG, "ON DRAG ENDED")
   (v as? ImageView)?.alpha = 1.0F
   true
}
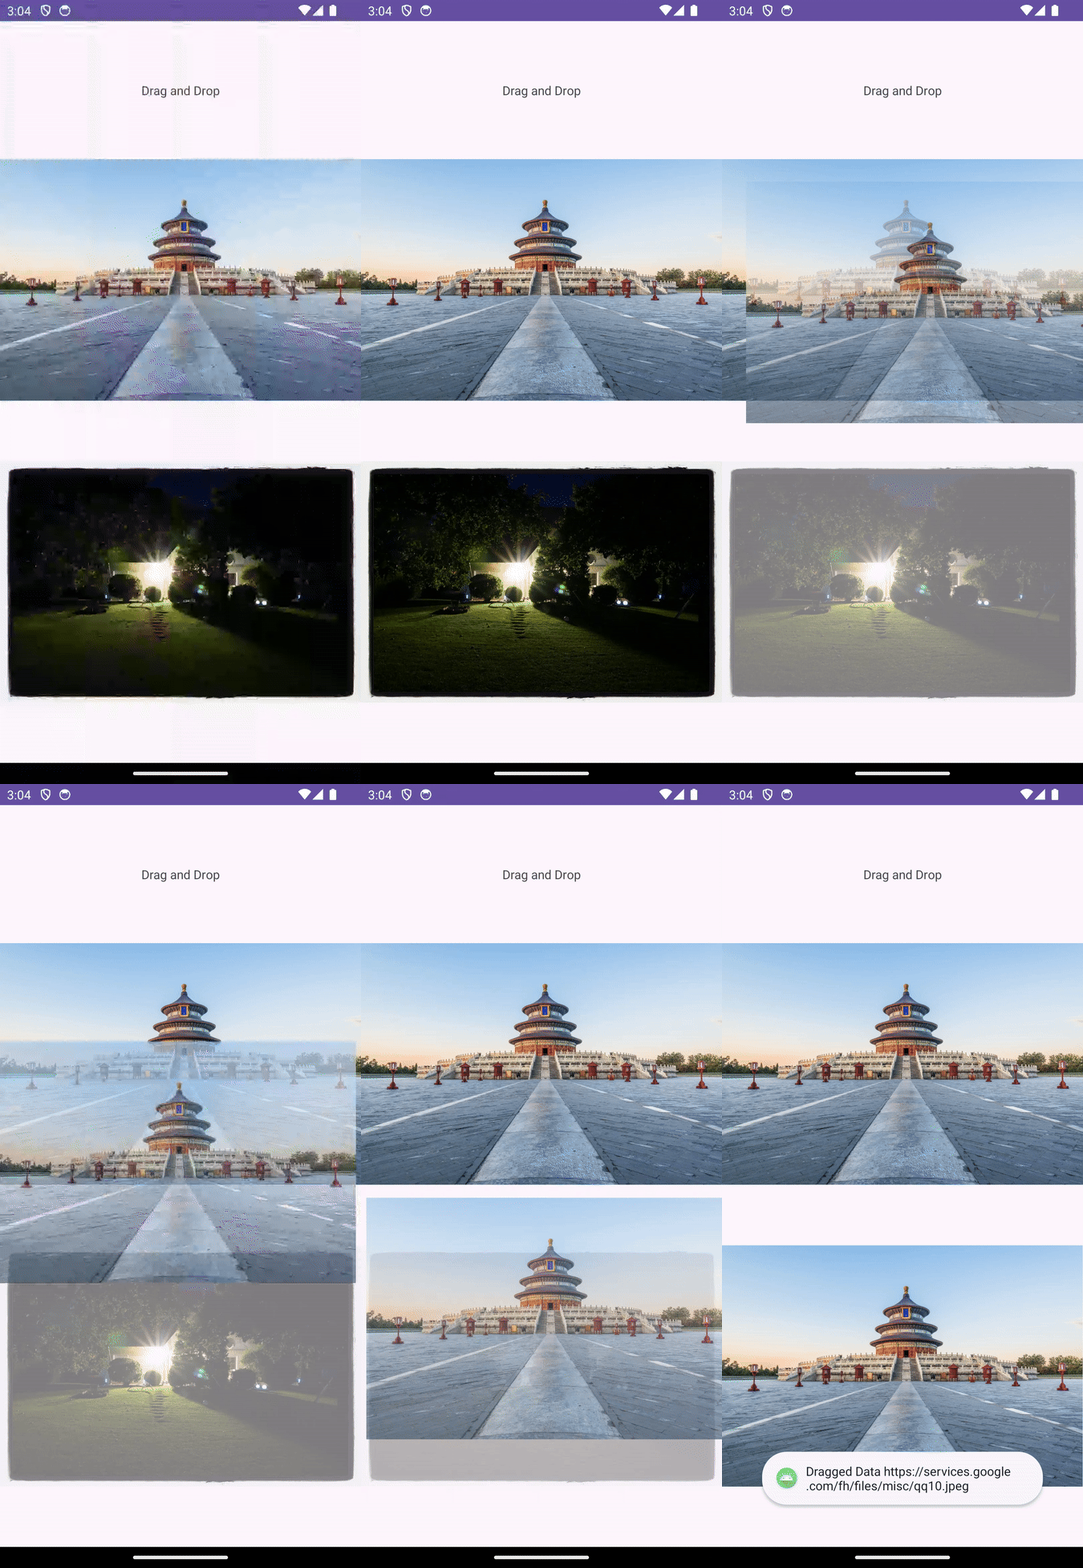
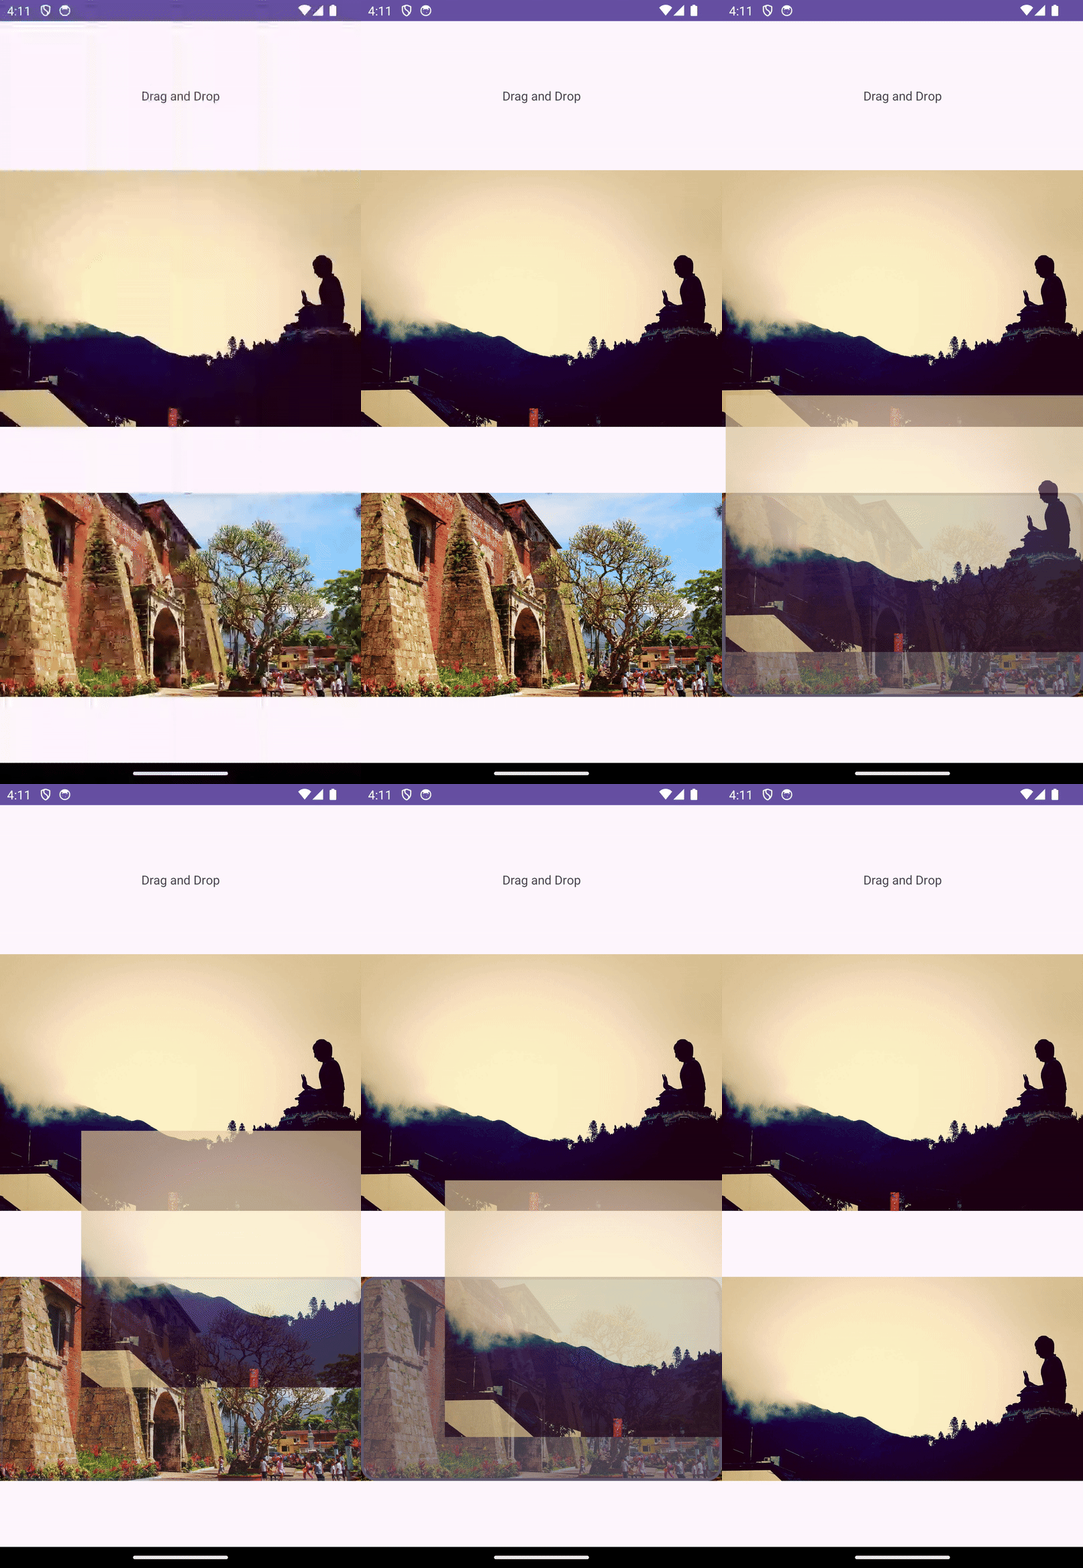
在此阶段,您应该能够将图片拖动到目标图片视图,放置完成后,目标 ImageView 的图片将反映相应更改
7. 在多窗口模式下拖放
内容可以从一个应用拖动到另一个给定的应用,应用通过多窗口模式共享屏幕。启用跨应用拖放的实现方式相同,只是我们必须在拖动时添加标志,并在放置时添加权限
配置拖动期间的标志
还记得,startDragAndDrop 有一个指定标志的参数,该参数用于控制拖放操作。
v.startDragAndDrop(
   draggedData,
   View.DragShadowBuilder(v),
   null,
   View.DRAG_FLAG_GLOBAL or View.DRAG_FLAG_GLOBAL_URI_READ
)
View.DRAG_FLAG_GLOBAL 表示拖动可以跨越窗口边界,View.DRAG_FLAG_GLOBAL_URI_READ 表示拖动接收方能够读取内容 URI。
要使放置目标能够读取来自其他应用的拖动数据,放置目标视图必须声明读取权限。
val dropPermission = requestDragAndDropPermissions(event)
此外,在处理完拖动的数据后释放权限。
dropPermission.release()
拖动内容的最终处理如下所示
DragEvent.ACTION_DROP -> {
   Log.d(TAG, "On DROP")
   val dropPermission = requestDragAndDropPermissions(event)
   val item: ClipData.Item = event.clipData.getItemAt(0)
   val dragData = item.text
   Glide.with(this).load(item.text).into(v as ImageView)
   (v as? ImageView)?.alpha = 1.0F
   dropPermission.release()
   true
}
在此阶段,您应该能够将此图片拖动到另一个应用,以及正确处理从其他应用中拖动的数据。
8. 拖放库
Jetpack 提供了 DragAndDrop 库,以简化拖放操作的实现。
让我们在 build.gradle.kts 中添加依赖项,以使用 DragAndDrop 库
implementation("androidx.draganddrop:draganddrop:1.0.0")
在本练习中,创建一个名为 DndHelperActivity.kt 的单独 activity,该 activity 包含 2 个垂直形式的 ImageView,其中一个用作拖动来源,另一个用作放置目标。
修改 strings.xml 以添加字符串资源。
<string name="greeting_1">DragStartHelper and DropHelper</string>
<string name="target_url_1">https://services.google.com/fh/files/misc/qq9.jpeg</string>
<string name="source_url_1">https://services.google.com/fh/files/misc/qq8.jpeg</string>
更新 activity_dnd_helper.xml 以包含 ImageView
<?xml version="1.0" encoding="utf-8"?>
<androidx.constraintlayout.widget.ConstraintLayout xmlns:android="http://schemas.android.com/apk/res/android"
   xmlns:app="http://schemas.android.com/apk/res-auto"
   xmlns:tools="http://schemas.android.com/tools"
   android:layout_width="match_parent"
   android:layout_height="match_parent"
   android:padding="24dp"
   tools:context=".DnDHelperActivity">

   <TextView
       android:id="@+id/tv_greeting"
       android:layout_width="wrap_content"
       android:layout_height="wrap_content"
       app:layout_constraintBottom_toTopOf="@id/iv_source"
       app:layout_constraintLeft_toLeftOf="parent"
       app:layout_constraintRight_toRightOf="parent"
       app:layout_constraintTop_toTopOf="parent" />

   <ImageView
       android:id="@+id/iv_source"
       android:layout_width="match_parent"
       android:layout_height="wrap_content"
       android:contentDescription="@string/drag_image"
       app:layout_constraintBottom_toTopOf="@id/iv_target"
       app:layout_constraintLeft_toLeftOf="parent"
       app:layout_constraintRight_toRightOf="parent"
       app:layout_constraintTop_toBottomOf="@id/tv_greeting" />

   <ImageView
       android:id="@+id/iv_target"
       android:layout_width="match_parent"
       android:layout_height="wrap_content"
       android:contentDescription="@string/drop_image"
       app:layout_constraintBottom_toBottomOf="parent"
       app:layout_constraintLeft_toLeftOf="parent"
       app:layout_constraintRight_toRightOf="parent"
       app:layout_constraintTop_toBottomOf="@id/iv_source" />
</androidx.constraintlayout.widget.ConstraintLayout>
最后,初始化 DnDHelperActivity.kt 中的视图
class DnDHelperActivity : AppCompatActivity() {
   private val binding by lazy(LazyThreadSafetyMode.NONE) {
       ActivityMainBinding.inflate(layoutInflater)
   }

   override fun onCreate(savedInstanceState: Bundle?) {
       super.onCreate(savedInstanceState)
       setContentView(binding.root)
       binding.tvGreeting.text = getString(R.string.greeting)
       Glide.with(this).asBitmap()
           .load(getString(R.string.source_url_1))
           .into(binding.ivSource)
       Glide.with(this).asBitmap()
           .load(getString(R.string.target_url_1))
           .into(binding.ivTarget)
       binding.ivSource.tag = getString(R.string.source_url_1)
   }
}
请务必更新 AndroidManifest.xml,以将 DndHelperActivity 设为启动器 activity
<activity
   android:name=".DnDHelperActivity"
   android:exported="true">
   <intent-filter>
       <action android:name="android.intent.action.MAIN" />
       <category android:name="android.intent.category.LAUNCHER" />
   </intent-filter>
</activity>
DragStartHelper
之前,我们已通过实现 onLongClickListener 及调用 startDragAndDrop 将视图配置为可拖动。DragStartHelper 通过提供实用程序方法来简化实现
DragStartHelper(draggableView)
{ view: View, _: DragStartHelper ->
   // prepare clipData

   // startDrag and Drop
}.attach()
DragStartHelper 将要拖动的视图作为参数。此处我们已实现了 OnDragStartListener 方法,在该方法中,我们将准备 clipdata 并开始拖放操作。
最终实现如下所示。
DragStartHelper(draggableView)
{ view: View, _: DragStartHelper ->
   val item = ClipData.Item(view.tag as? CharSequence)
   val dragData = ClipData(
       view.tag as? CharSequence,
       arrayOf(ClipDescription.MIMETYPE_TEXT_PLAIN),
       item
   )
   view.startDragAndDrop(
       dragData,
       View.DragShadowBuilder(view),
       null,
       0
   )
}.attach()
DropHelper
DropHelper 通过提供名为 configureView 的实用程序方法来简化目标放置视图的配置。
configureView 采用 4 个参数
- activity:当前的 activity
- dropTarget:正在配置的视图
- mimeTypes:要放置的数据内容的 MIME 类型
OnReceiveContentListener接口:用于处理放置的数据
自定义放置目标的突出显示效果。
DropHelper.configureView(
   This, // Current Activity
   dropTarget,
   arrayOf("text/*"),
   DropHelper.Options.Builder().build()
) {
   // handle the dropped data
}
OnRecieveContentListener 接收放置的内容。它有两个参数
- View:正在放置内容的位置
- Payload:要放置的实际内容
private fun setupDrop(dropTarget: View) {
   DropHelper.configureView(
       this,
       dropTarget,
       arrayOf("text/*"),
   ) { _, payload: ContentInfoCompat ->
       // TODO: step through clips if one cannot be loaded
       val item = payload.clip.getItemAt(0)
       val dragData = item.text
       Glide.with(this)
           .load(dragData)
           .centerCrop().into(dropTarget as ImageView)
       // Consume payload by only returning remaining items
       val (_, remaining) = payload.partition { it == item }
       remaining
   }
}
在此阶段,您应能够使用 DragStartHelper 和 DropHelper 拖放数据。
配置放置区域的突出显示效果
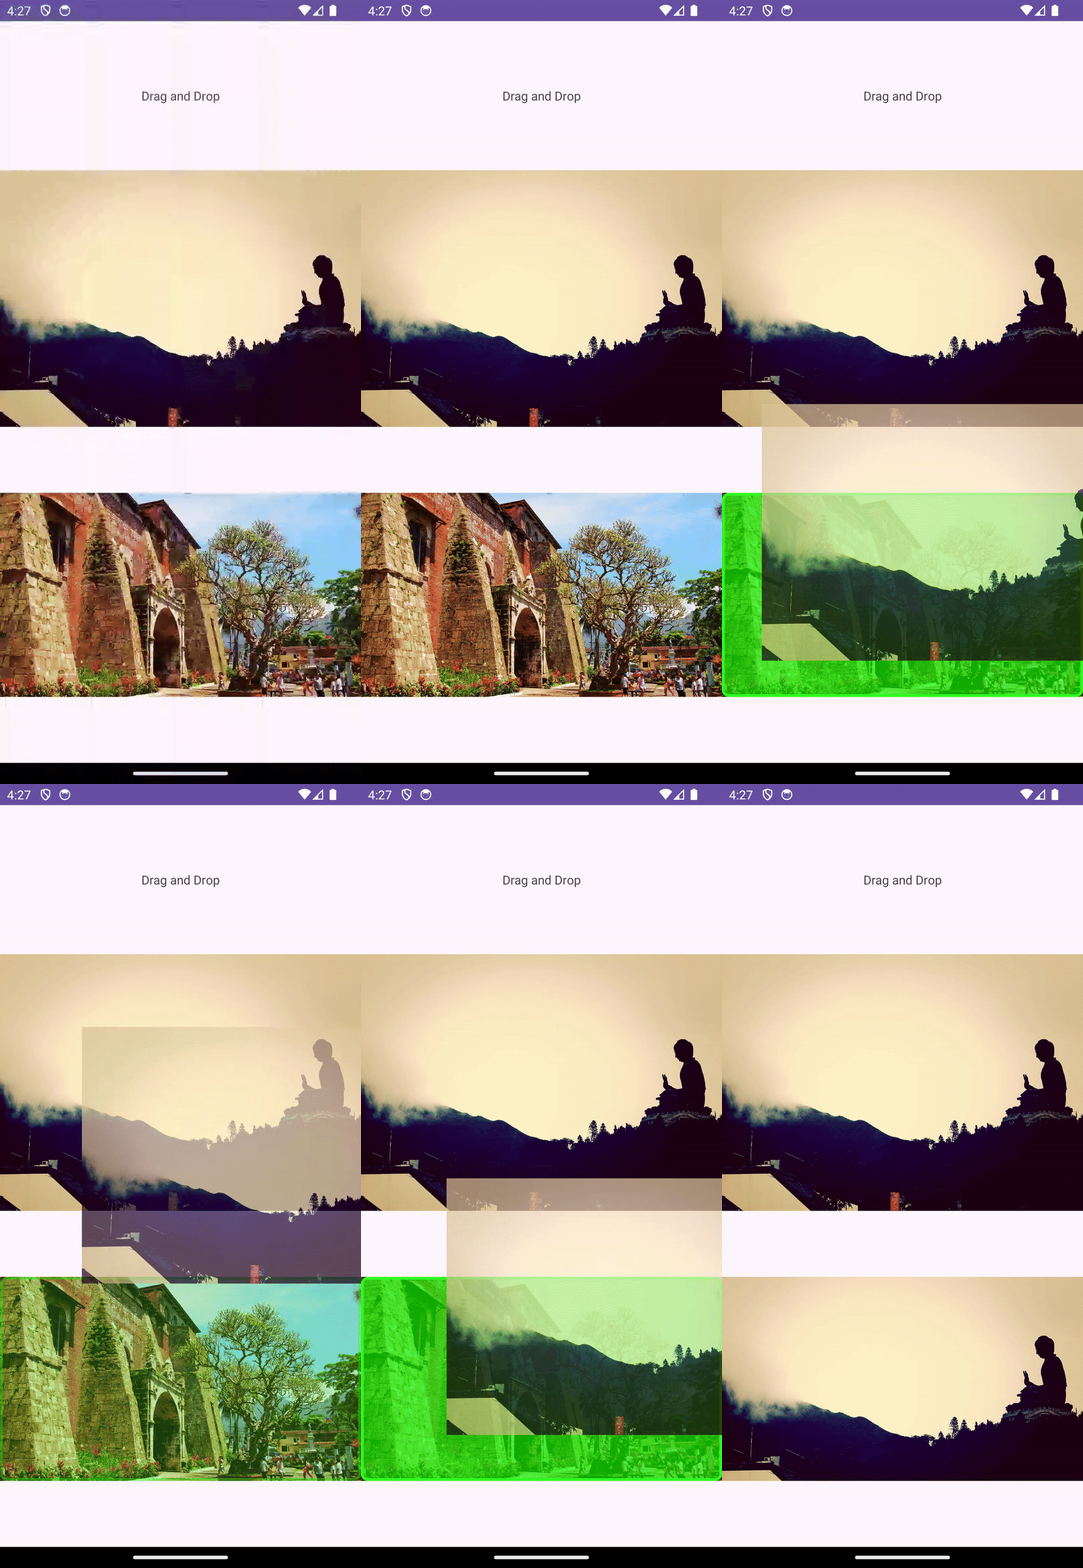
如您所见,当拖动的内容进入放置区域时,放置区域会突出显示。借助 DropHelper.Options,我们可以自定义当拖动的内容进入视图边界时放置区域如何突出显示。
DropHelper.Options 可用于配置放置目标区域的突出显示颜色和突出显示圆角半径。
DropHelper.Options.Builder()
   .setHighlightColor(getColor(R.color.green))
   .setHighlightCornerRadiusPx(16)
   .build()
这些选项应作为参数从 DropHelper 传递给 configureView 方法。
private fun setupDrop(dropTarget: View) {
   DropHelper.configureView(
       this,
       dropTarget,
       arrayOf("text/*"),
       DropHelper.Options.Builder()
           .setHighlightColor(getColor(R.color.green))
           .setHighlightCornerRadiusPx(16)
           .build(),
   ) { _, payload: ContentInfoCompat ->
       // TODO: step through clips if one cannot be loaded
       val item = payload.clip.getItemAt(0)
       val dragData = item.text
       Glide.with(this)
           .load(dragData)
           .centerCrop().into(dropTarget as ImageView)
       // Consume payload by only returning remaining items
       val (_, remaining) = payload.partition { it == item }
       remaining
   }
}
拖放时,您应能够看到突出显示颜色和半径。
9. 接收富媒体内容
OnReceiveContentListener 是用于接收富媒体内容(包括文本、HTML、图片、视频等)的统一 API。您可以通过键盘、拖放或剪贴板将内容插入到视图中。为每个输入机制维护回调较为麻烦。您可以使用 OnReceiveContentListener 通过单一 API 接收文本、标记、音频、视频、图片等内容。OnReceiveContentListener API 会通过创建一个要实现的单一 API 来整合这些不同的代码路径,这样您就可以专注于特定应用的逻辑,而让平台处理其余的工作:
在本练习中,创建一个名为 ReceiveRichContentActivity.kt 的单独 activity,该 activity 包含 2 个垂直形式的 ImageView,其中一个用作拖动来源,另一个用作放置目标。
修改 strings.xml 以添加字符串资源。
<string name="greeting_2">Rich Content Receiver</string>
<string name="target_url_2">https://services.google.com/fh/files/misc/qq1.jpeg</string>
<string name="source_url_2">https://services.google.com/fh/files/misc/qq3.jpeg</string>
更新 activity_receive_rich_content.xml 以包含 ImageView
<?xml version="1.0" encoding="utf-8"?>
<androidx.constraintlayout.widget.ConstraintLayout xmlns:android="http://schemas.android.com/apk/res/android"
   xmlns:app="http://schemas.android.com/apk/res-auto"
   xmlns:tools="http://schemas.android.com/tools"
   android:layout_width="match_parent"
   android:layout_height="match_parent"
   tools:context=".ReceiveRichContentActivity">

   <TextView
       android:id="@+id/tv_greeting"
       android:layout_width="wrap_content"
       android:layout_height="wrap_content"
       app:layout_constraintBottom_toTopOf="@id/iv_source"
       app:layout_constraintLeft_toLeftOf="parent"
       app:layout_constraintRight_toRightOf="parent"
       app:layout_constraintTop_toTopOf="parent" />

   <ImageView
       android:id="@+id/iv_source"
       android:layout_width="320dp"
       android:layout_height="wrap_content"
       android:contentDescription="@string/drag_image"
       app:layout_constraintBottom_toTopOf="@id/iv_target"
       app:layout_constraintLeft_toLeftOf="parent"
       app:layout_constraintRight_toRightOf="parent"
       app:layout_constraintTop_toBottomOf="@id/tv_greeting" />

   <ImageView
       android:id="@+id/iv_target"
       android:layout_width="320dp"
       android:layout_height="wrap_content"
       android:contentDescription="@string/drop_image"
       app:layout_constraintBottom_toBottomOf="parent"
       app:layout_constraintLeft_toLeftOf="parent"
       app:layout_constraintRight_toRightOf="parent"
       app:layout_constraintTop_toBottomOf="@id/iv_source" />
</androidx.constraintlayout.widget.ConstraintLayout>
最后,初始化 ReceiveRichContentActivity.kt 中的视图
class ReceiveRichContentActivity : AppCompatActivity() {
   private val binding by lazy(LazyThreadSafetyMode.NONE) {
       ActivityReceiveRichContentBinding.inflate(layoutInflater)
   }
   override fun onCreate(savedInstanceState: Bundle?) {
       super.onCreate(savedInstanceState)
       setContentView(binding.root)
       binding.tvGreeting.text = getString(R.string.greeting_2)
       Glide.with(this).asBitmap()
           .load(getString(R.string.source_url_2))
           .into(binding.ivSource)
       Glide.with(this).asBitmap()
           .load(getString(R.string.target_url_2))
           .into(binding.ivTarget)
       binding.ivSource.tag = getString(R.string.source_url_2)
   }
}
请务必更新 AndroidManifest.xml 以将 DndHelperActivity 设为启动器 activity
<activity
   android:name=".ReceiveRichContentActivity"
   android:exported="true">
   <intent-filter>
       <action android:name="android.intent.action.MAIN" />
       <category android:name="android.intent.category.LAUNCHER" />
   </intent-filter>
</activity>
我们先创建一个实现 OnReceiveContentListener. 的回调
val listener = OnReceiveContentListener { view, payload ->
   val (textContent, remaining) =
       payload.partition { item: ClipData.Item -> item.text != null }
   if (textContent != null) {
       val clip = textContent.clip
       for (i in 0 until clip.itemCount) {
           val currentText = clip.getItemAt(i).text
           Glide.with(this)
               .load(currentText)
               .centerCrop().into(view as ImageView)
       }
   }
   remaining
}
我们在此处实现了接口 OnRecieveContentListener。onRecieveContent 方法有 2 个参数
- 正在接收数据的当前视图
- 来自键盘、拖动操作或剪贴板的数据载荷,格式为
ContentInfoCompat
此方法会返回未处理的载荷。
这里我们使用“分区”方法将载荷分成文本内容和其他内容。我们根据需求处理文本数据,并返回剩余载荷
让我们来处理要拖动的数据。
val listener = OnReceiveContentListener { view, payload ->
   val (textContent, remaining) =
       payload.partition { item: ClipData.Item -> item.text != null }
   if (textContent != null) {
       val clip = textContent.clip
       for (i in 0 until clip.itemCount) {
           val currentText = clip.getItemAt(i).text
           Glide.with(this)
               .load(currentText)
               .centerCrop().into(view as ImageView)
       }
   }
   remaining
}
现在,监听器已准备就绪。我们将此监听器添加到目标视图。
ViewCompat.setOnReceiveContentListener(
   binding.ivTarget,
   arrayOf("text/*"),
   listener
)
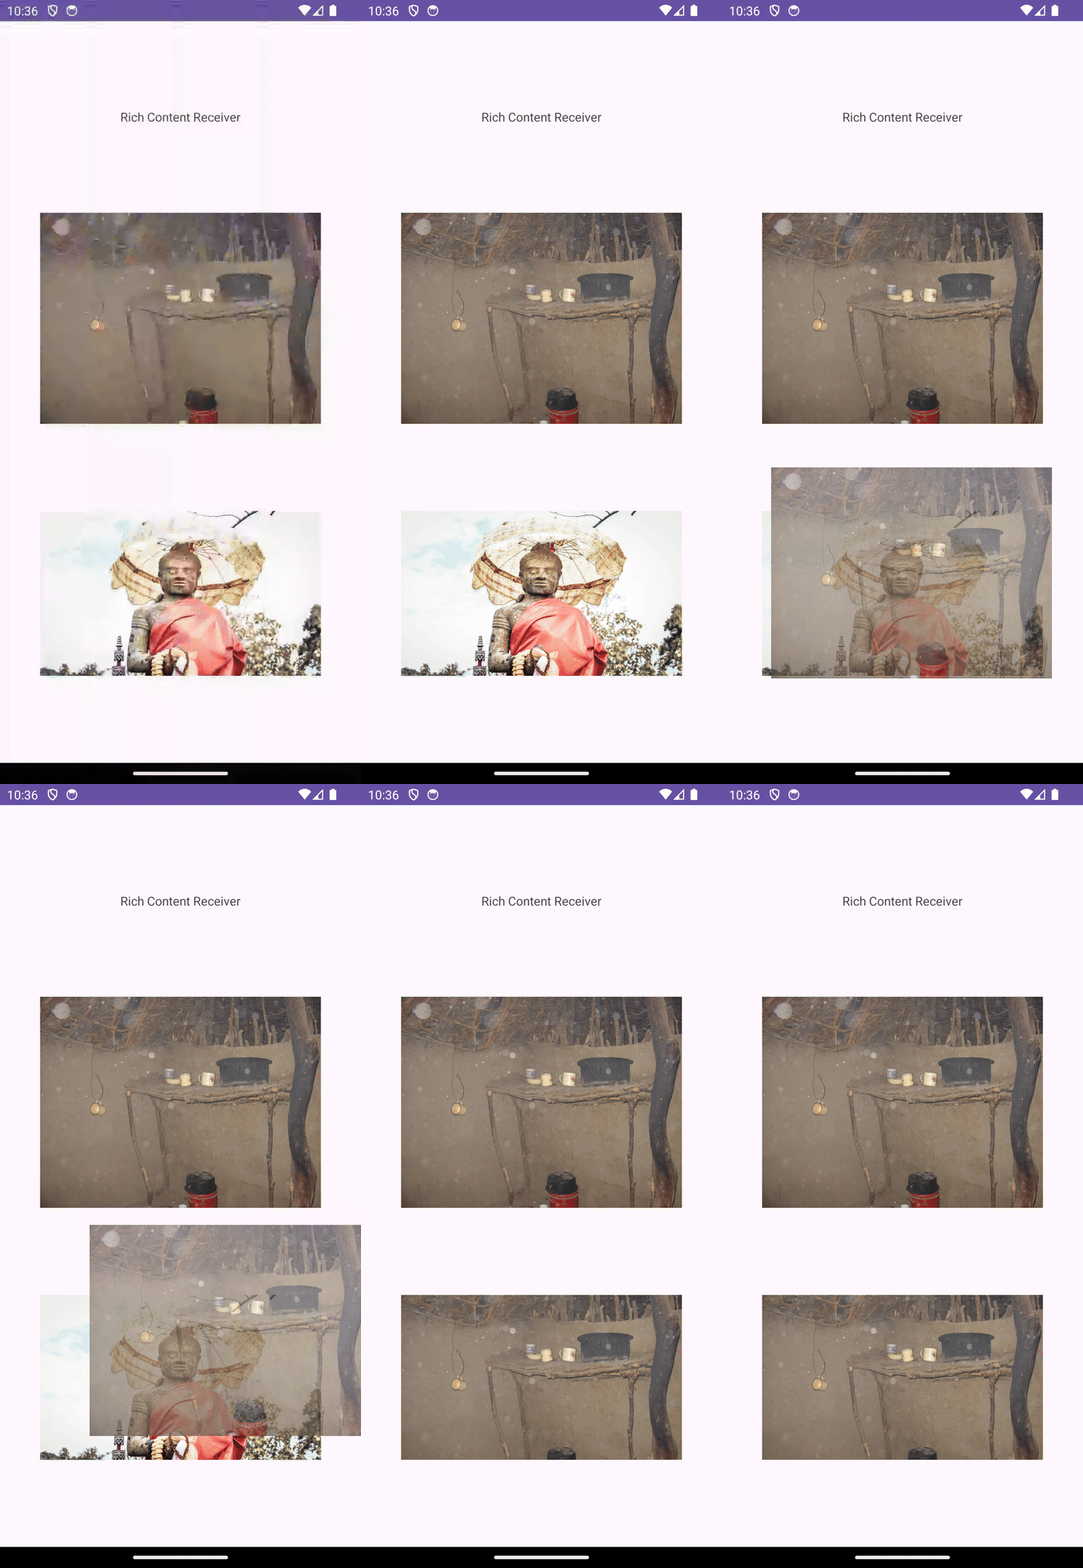
在此阶段,您应能够拖动图片并将其放置至目标区域。放置完成后,拖动的图片应替换放置目标视图中的原始图片。
10. 恭喜!
现在,您已经可以熟练地为 Android 应用实现拖放功能。通过完成此 Codelab,您已经学习了如何在 Android 应用中以及跨不同应用创建互动式拖放功能,从而提升用户体验和功能。您学习了
- 拖放基础知识:了解拖放事件的 4 个阶段(开始、继续、完成和退出)以及 DragEvent 对象中的关键数据。
- 启用拖放:通过处理 DragEvent,使视图可拖动,并放置到目标视图中
- 在多窗口模式下拖放:通过设置适当的标志和权限来启用跨应用拖放。
- 使用 DragAndDrop 库:使用 Jetpack 库简化拖放实现
- 接收富媒体内容:能够使用统一的 API 处理通过各种方法输入的多种类型的内容(文本、图片、视频等)。
