レッスン 1: コンポーズ可能な関数
Jetpack Compose は、コンポーズ可能な関数に基づいて構築されています。コンポーズ可能な関数を使用すると、UI の外観とデータの依存関係を指定することにより、アプリの UI をプログラムで定義できます。UI の構築プロセス(要素の初期化や親へのアタッチなど)に注意を払う必要はありません。コンポーズ可能な関数は、関数名に @Composable アノテーションを追加するだけで作成できます。

テキスト要素を追加する
最初に、の最新版をダウンロードしてください。 Android Studio でアプリを作成し、[New Project] を選択してアプリを作成し、 [Phone and Tablet] カテゴリで、[Empty Activity] を選択します。 アプリに「ComposeTutorial」という名前を付け、[Finish] をクリックします。デフォルト テンプレートにはすでにいくつかの Compose 要素が含まれていますが、このチュートリアルでは段階的に要素を作成します。
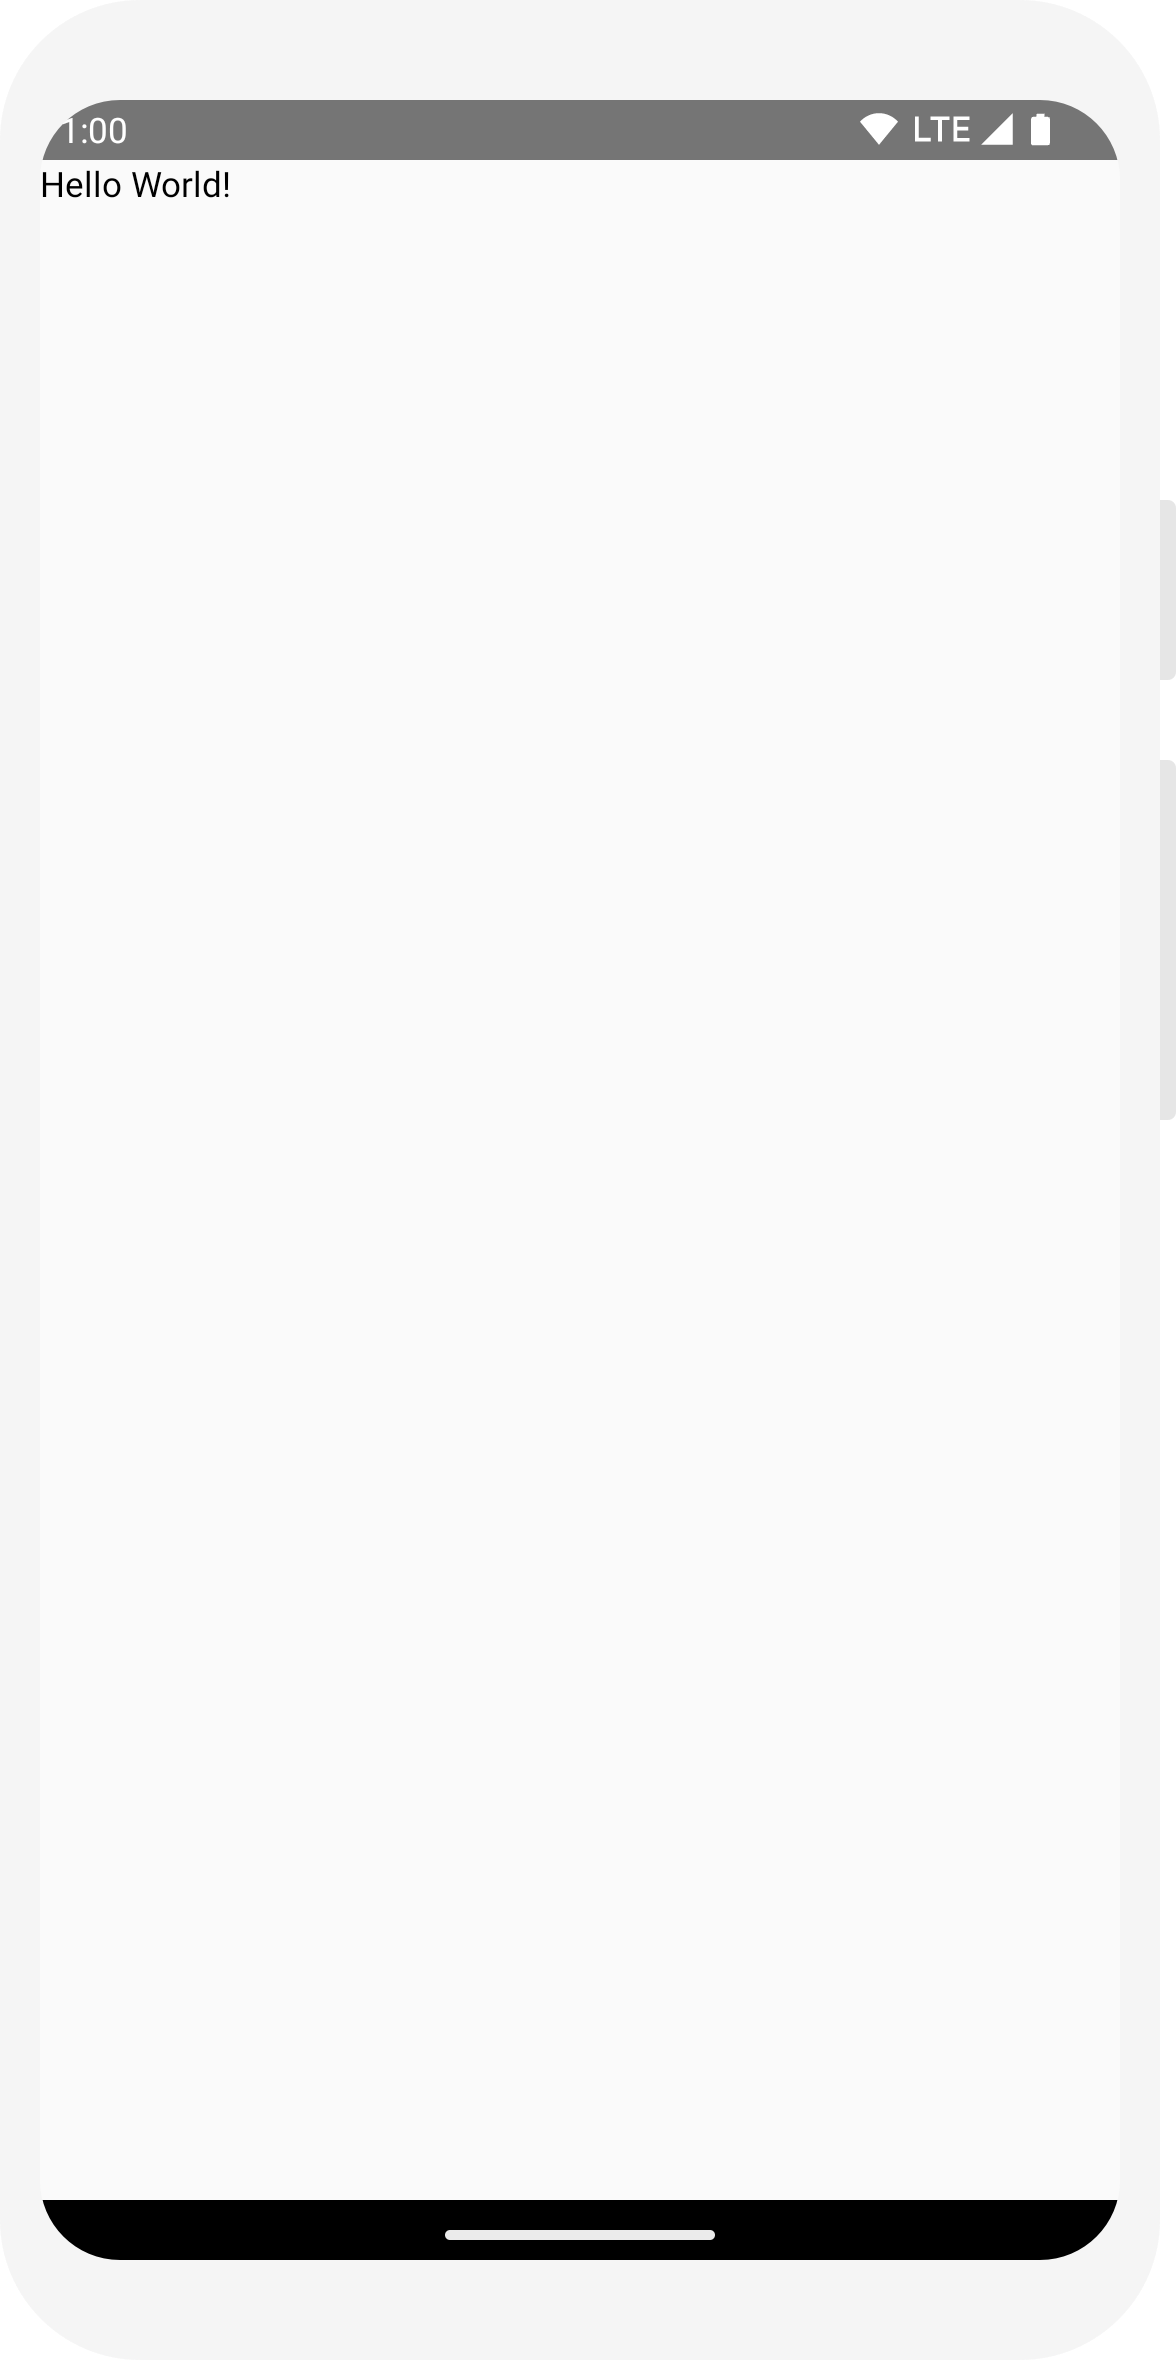
まず、onCreate メソッド内にテキスト要素を追加して、「Hello world!」というテキストを表示します。そのためには、content ブロックを定義し、コンポーズ可能な関数 Text を呼び出します。setContent ブロックでは、コンポーズ可能な関数が呼び出されるアクティビティのレイアウトを定義します。コンポーズ可能な関数は、他のコンポーズ可能な関数からのみ呼び出すことができます。
Jetpack Compose は、Kotlin コンパイラ プラグインを使用して、これらのコンポーズ可能な関数をアプリの UI 要素に変換します。たとえば、Compose UI ライブラリで定義されているコンポーズ可能な関数 Text は、画面上にテキストラベルを表示します。
import android.os.Bundle
import androidx.activity.ComponentActivity
import androidx.activity.compose.setContent
import androidx.compose.material3.Text

class MainActivity : ComponentActivity() {
    override fun onCreate(savedInstanceState: Bundle?) {
        super.onCreate(savedInstanceState)
        setContent {
            Text("Hello world!")
        }
    }
}
コンポーズ可能な関数を定義する
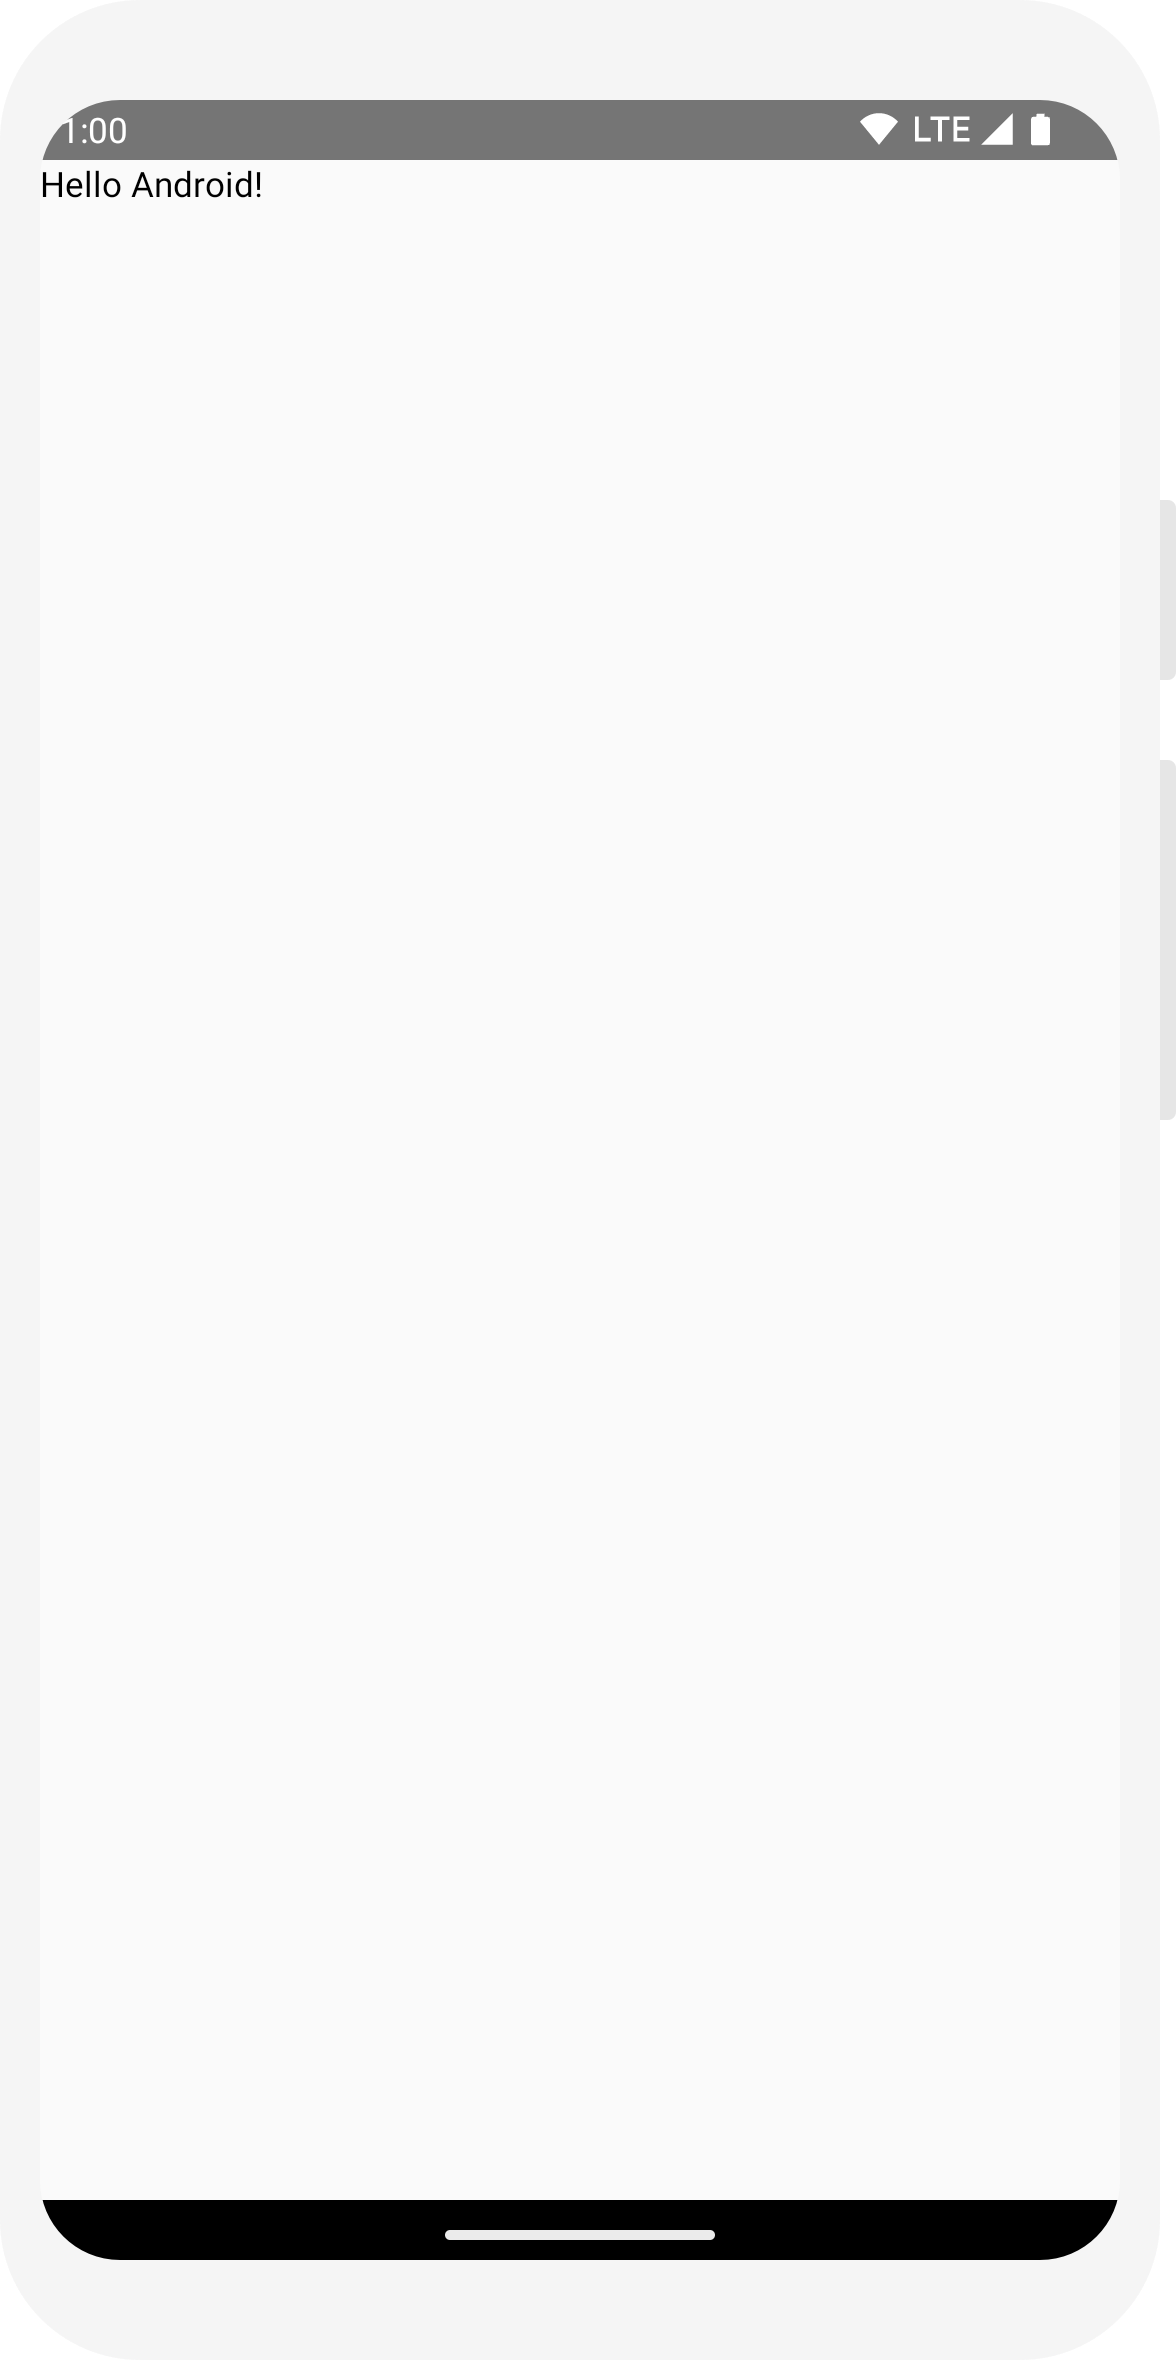
関数をコンポーズ可能にするには、@Composable アノテーションを追加します。これを試すには、名前を受け取り、その名前を使用してテキスト要素を構成する MessageCard 関数を定義します。
// ...
import androidx.compose.runtime.Composable

class MainActivity : ComponentActivity() {
    override fun onCreate(savedInstanceState: Bundle?) {
        super.onCreate(savedInstanceState)
        setContent {
            MessageCard("Android")
        }
    }
}

@Composable
fun MessageCard(name: String) {
    Text(text = "Hello $name!")
}
Android Studio で関数をプレビューする
@Preview アノテーションを使用すると、アプリをビルドして Android デバイスまたはエミュレータにインストールしなくても、Android Studio 内でコンポーズ可能な関数をプレビューできます。アノテーションは、パラメータを受け取らないコンポーズ可能な関数で使用する必要があります。したがって、MessageCard 関数を直接プレビューすることはできません。代わりに、PreviewMessageCard という 2 番目の関数を作成します。この関数は、適切なパラメータで MessageCard を呼び出します。@Composable の前に @Preview アノテーションを追加します。
// ...
import androidx.compose.ui.tooling.preview.Preview

@Composable
fun MessageCard(name: String) {
    Text(text = "Hello $name!")
}

@Preview
@Composable
fun PreviewMessageCard() {
    MessageCard("Android")
}

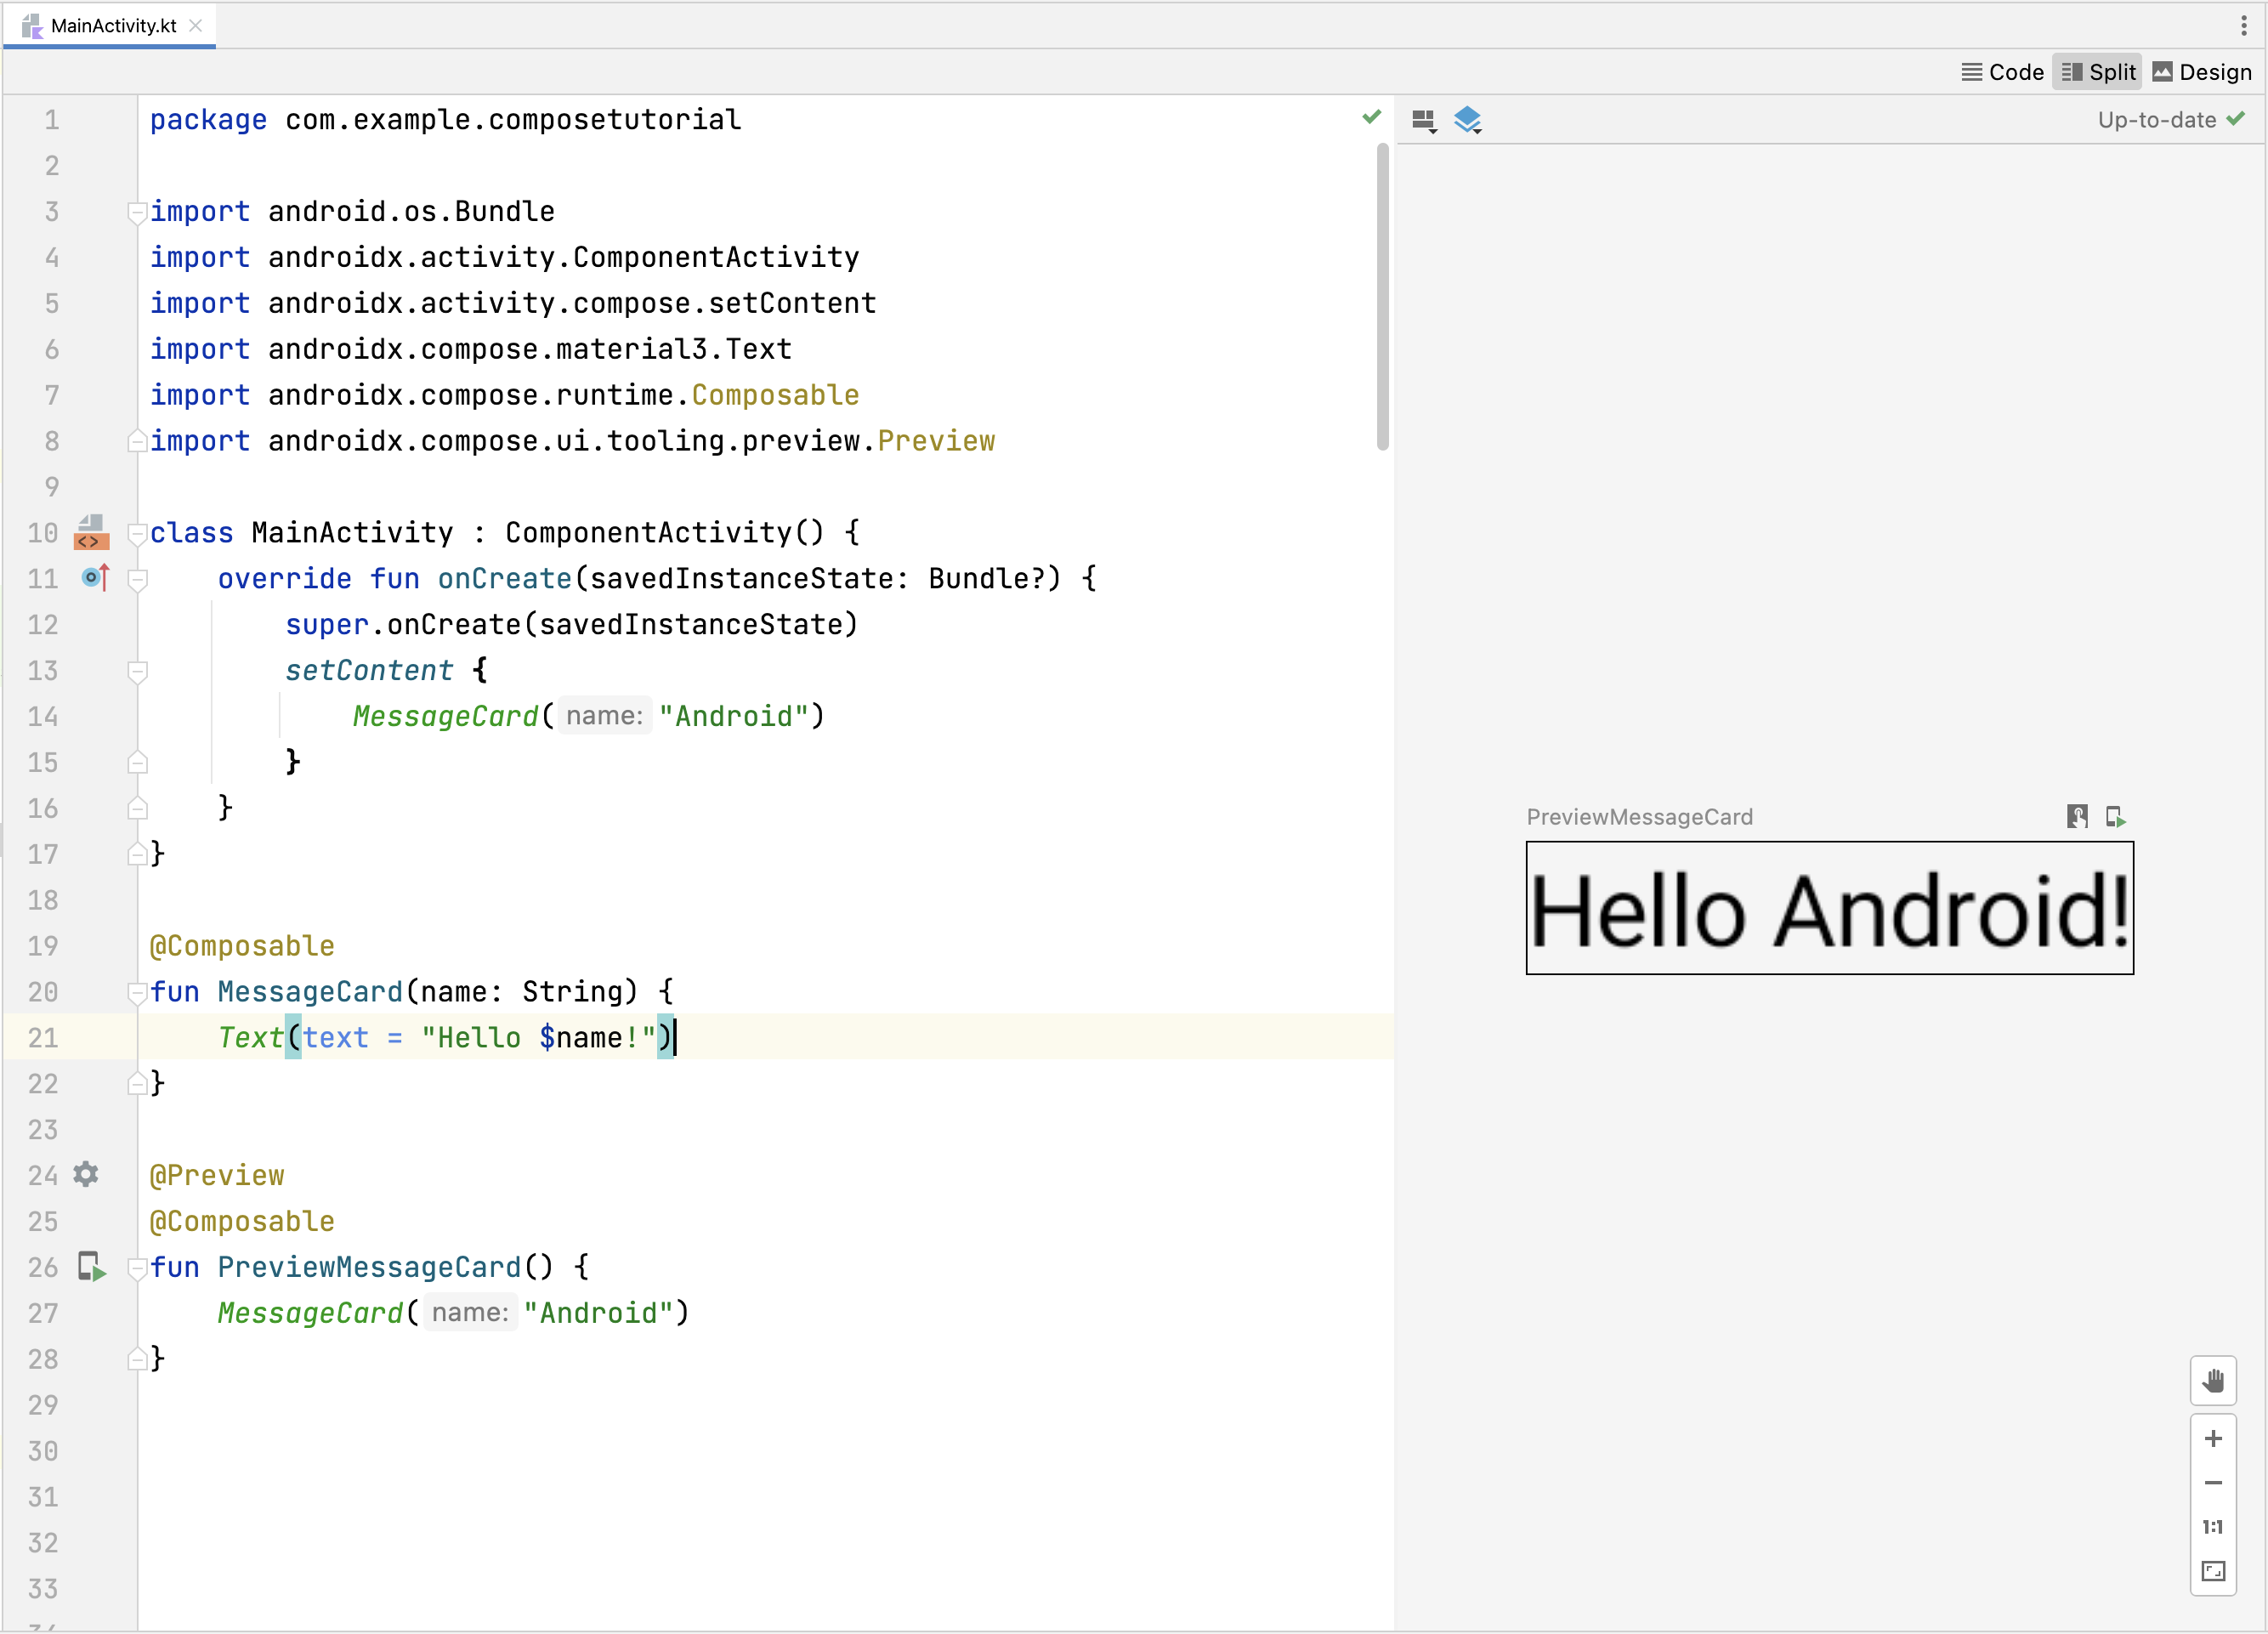
プロジェクトを再ビルドします。新しい PreviewMessageCard 関数はどこからも呼び出されないのでアプリ自体に変更はありませんが、分割(デザイン / コード)ビューをクリックすると展開できるプレビュー ウィンドウが Android Studio に追加されます。このウィンドウには、@Preview アノテーションが付いているコンポーズ可能な関数によって作成された UI 要素のプレビューが表示されます。プレビュー ウィンドウの上部にある更新ボタンをクリックすると、プレビューを随時更新できます。
import android.os.Bundle
import androidx.activity.ComponentActivity
import androidx.activity.compose.setContent
import androidx.compose.material3.Text

class MainActivity : ComponentActivity() {
    override fun onCreate(savedInstanceState: Bundle?) {
        super.onCreate(savedInstanceState)
        setContent {
            Text("Hello world!")
        }
    }
}

// ...
import androidx.compose.runtime.Composable

class MainActivity : ComponentActivity() {
    override fun onCreate(savedInstanceState: Bundle?) {
        super.onCreate(savedInstanceState)
        setContent {
            MessageCard("Android")
        }
    }
}

@Composable
fun MessageCard(name: String) {
    Text(text = "Hello $name!")
}

// ...
import androidx.compose.ui.tooling.preview.Preview

@Composable
fun MessageCard(name: String) {
    Text(text = "Hello $name!")
}

@Preview
@Composable
fun PreviewMessageCard() {
    MessageCard("Android")
}


複数のテキストを追加する
ここまでの作業で、最初のコンポーズ可能な関数とプレビューを作成しました。次は、Jetpack Compose のその他の機能を確認するため、アニメーションで展開できるメッセージのリストを表示するシンプルなメッセージ画面を作成します。
手始めに、メッセージのコンポーザブルをより充実させるために、作成者の名前とメッセージ コンテンツを表示します。まず、String の代わりに Message オブジェクトを受け入れるようにコンポーザブルのパラメータを変更し、MessageCard コンポーザブル内にもう一つの Text コンポーザブルを追加します。プレビューも必ず更新してください。
// ...

class MainActivity : ComponentActivity() {
    override fun onCreate(savedInstanceState: Bundle?) {
        super.onCreate(savedInstanceState)
        setContent {
            MessageCard(Message("Android", "Jetpack Compose"))
        }
    }
}

data class Message(val author: String, val body: String)

@Composable
fun MessageCard(msg: Message) {
    Text(text = msg.author)
    Text(text = msg.body)
}

@Preview
@Composable
fun PreviewMessageCard() {
    MessageCard(
        msg = Message("Lexi", "Hey, take a look at Jetpack Compose, it's great!")
    )
}
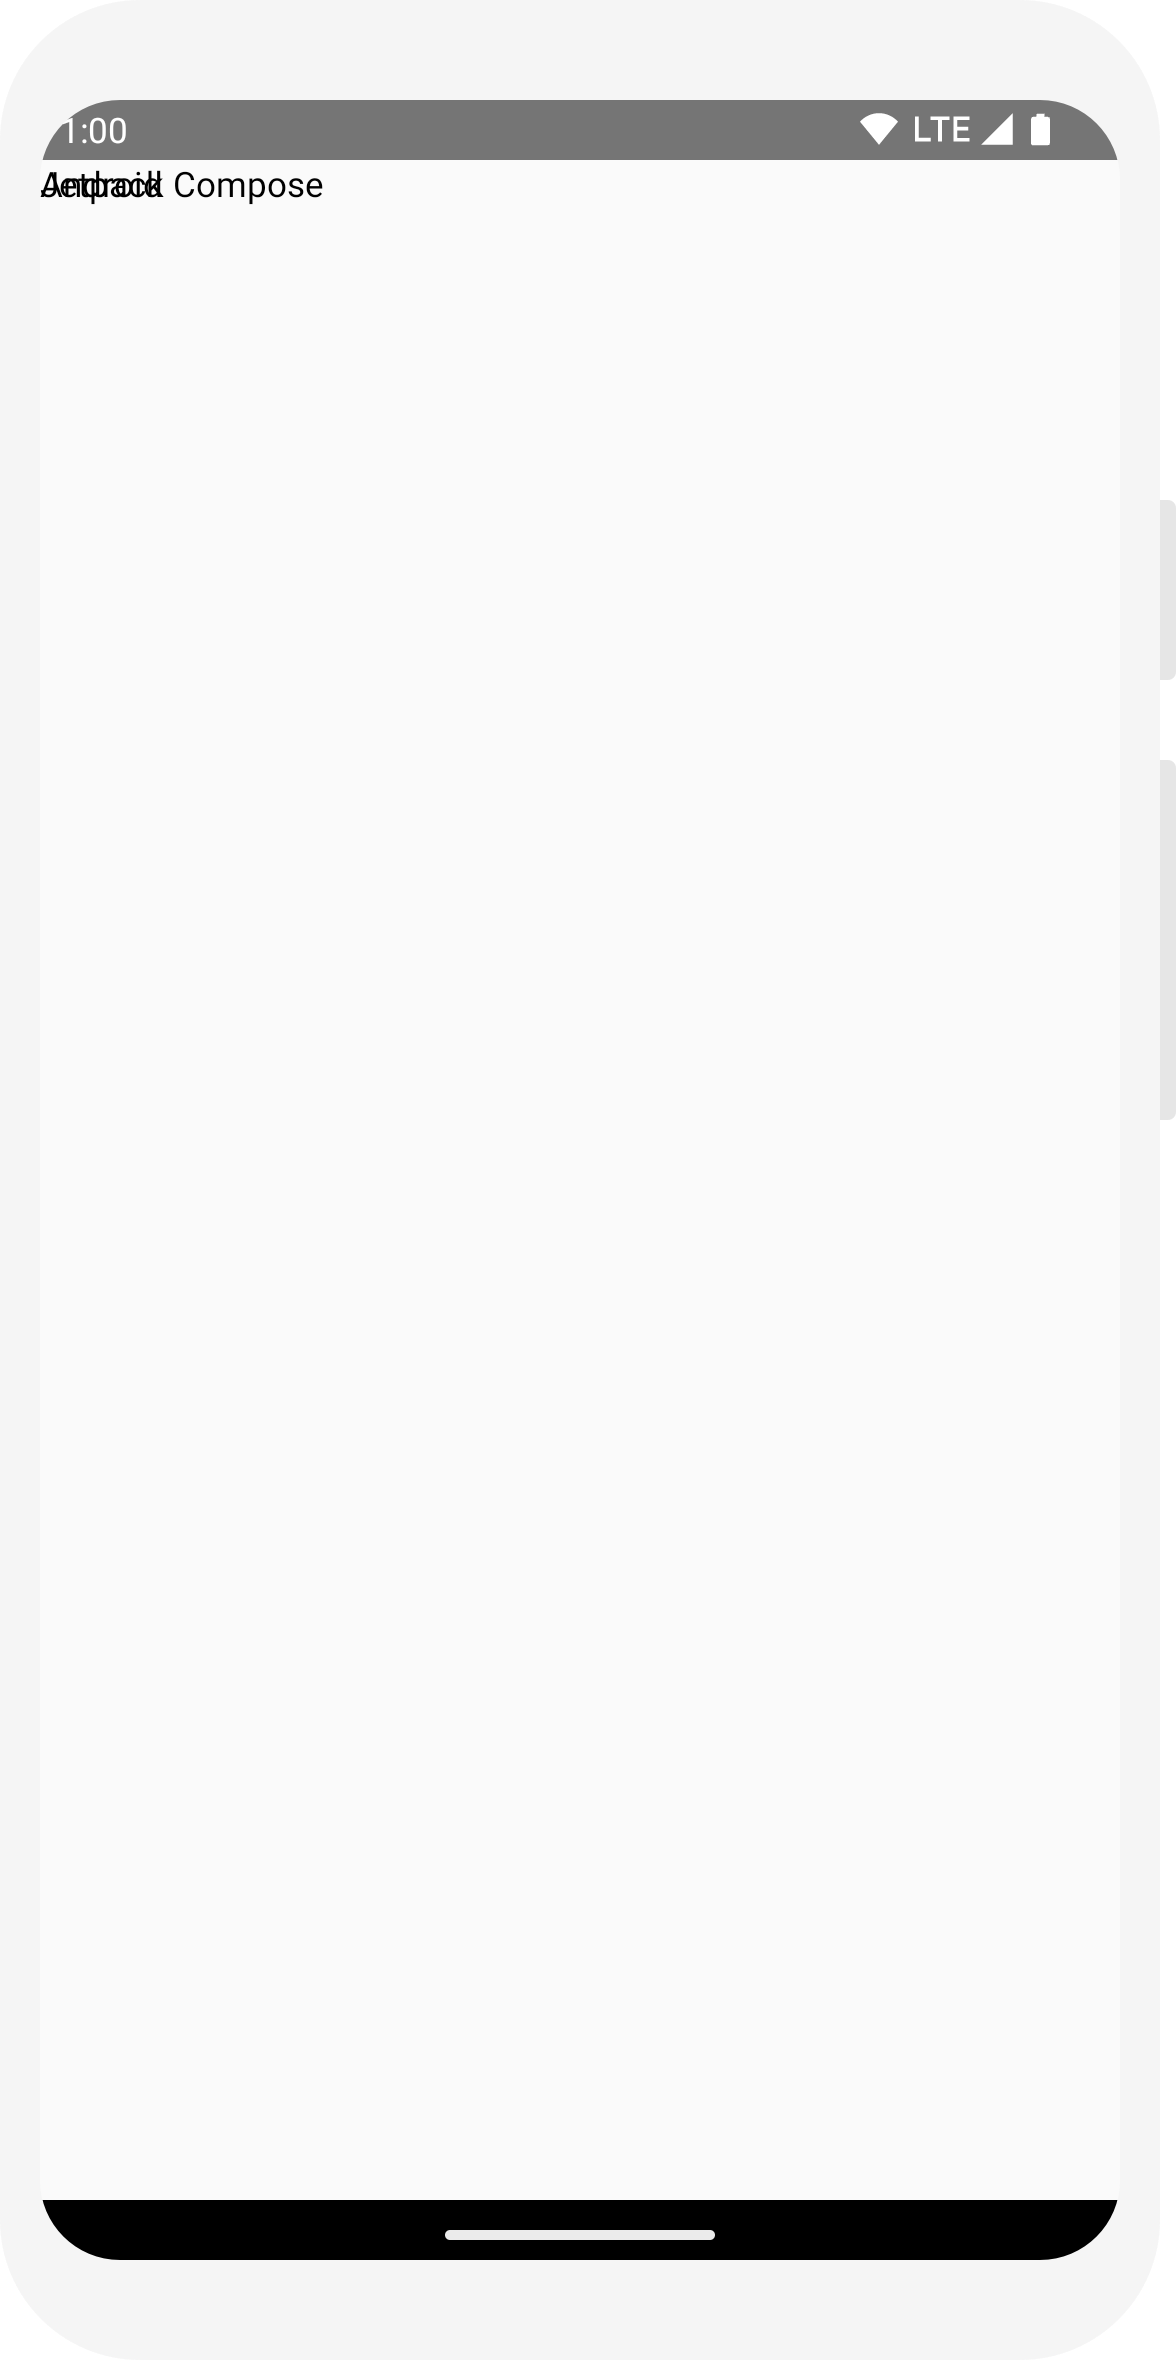
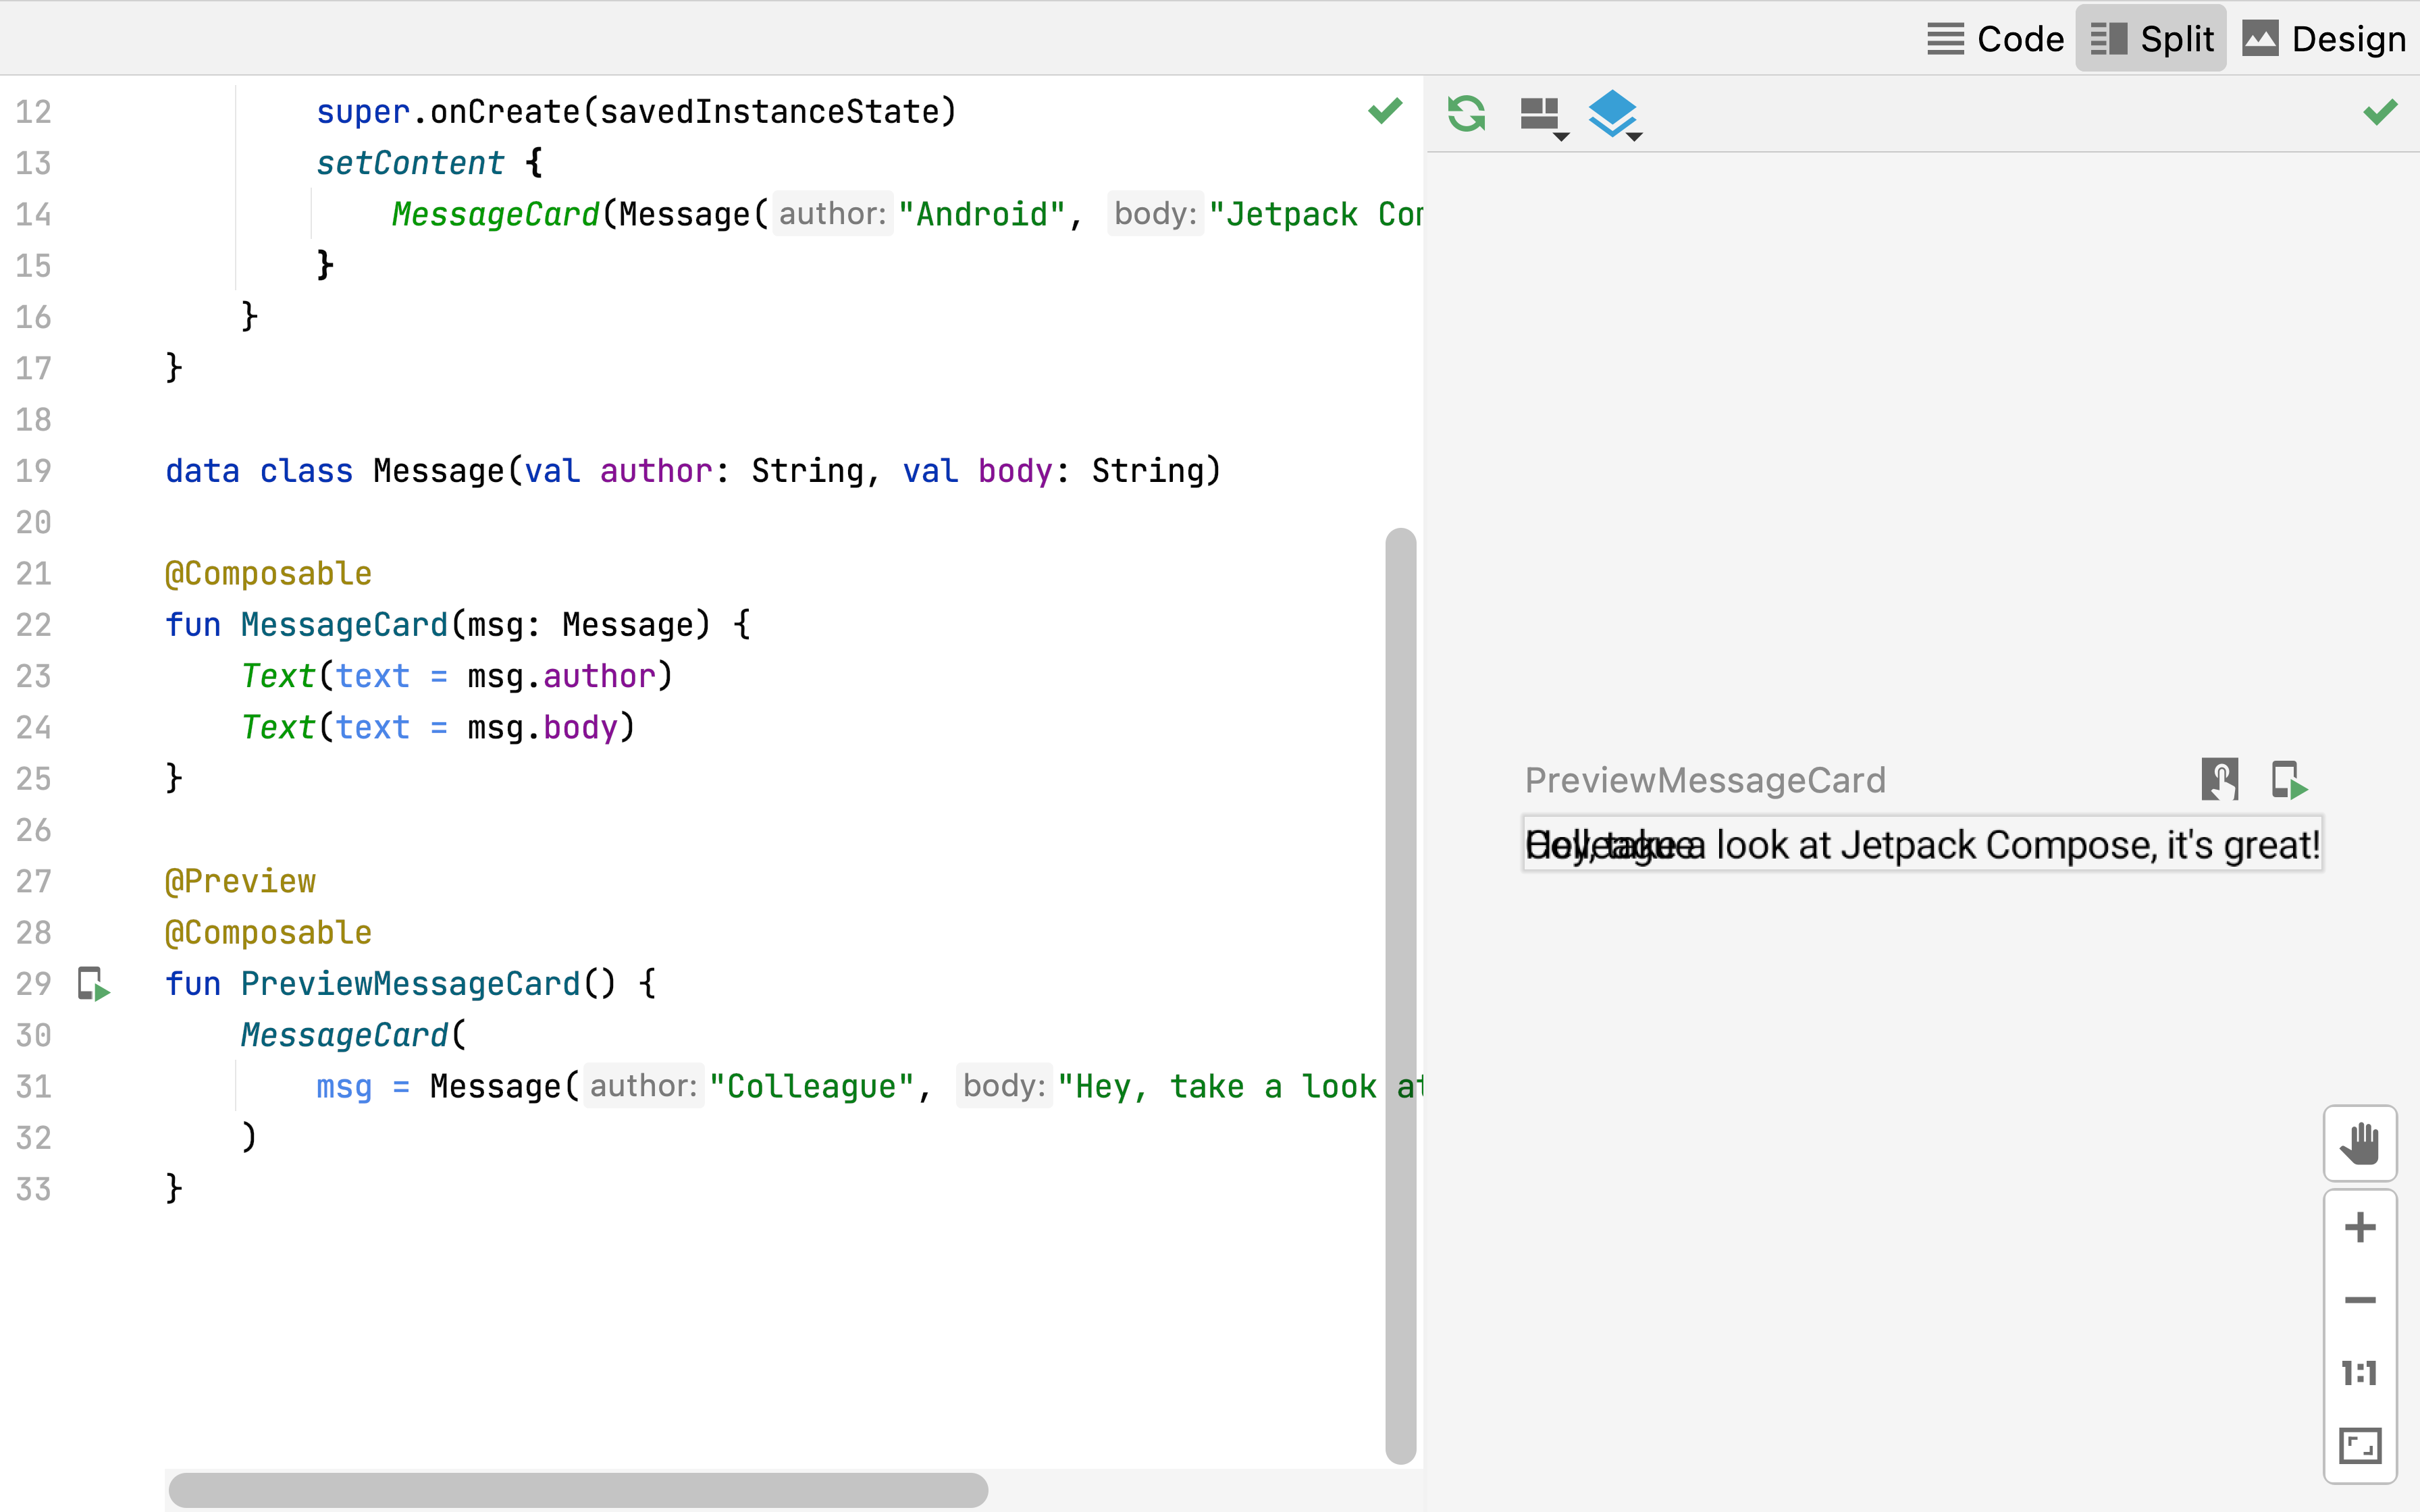
このコードは、コンテンツ ビュー内に 2 つのテキスト要素を作成します。しかし、テキスト要素をどう配置するかに関する情報を指定していないので、それらは重なって描画され、テキストを判読できません。
画像要素を追加する
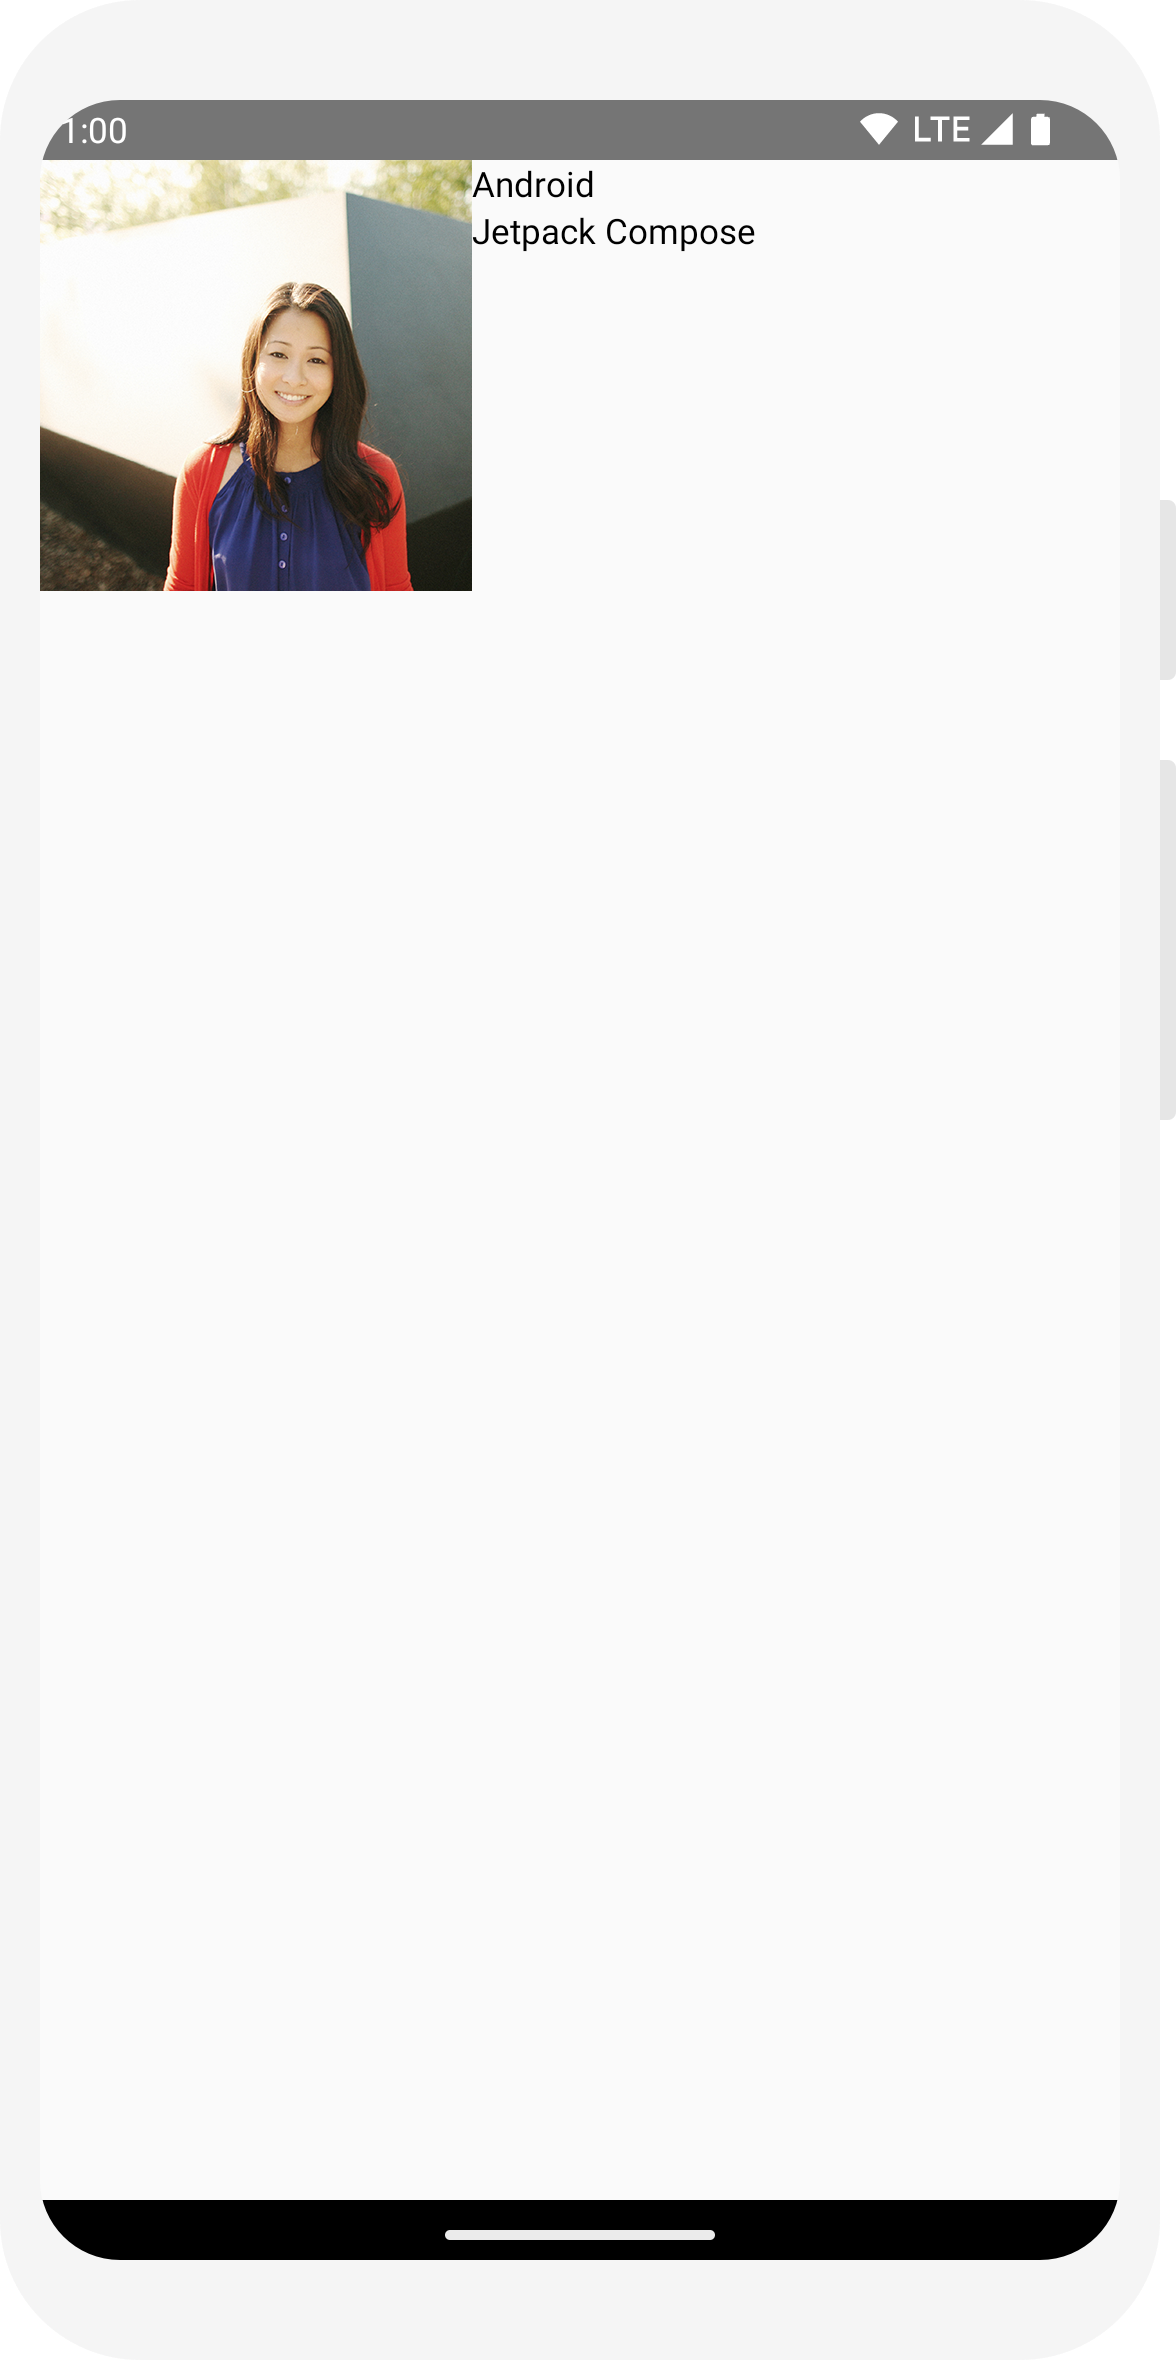
メッセージ カードをもっと充実させるために、送信者のプロフィール写真を追加しましょう。リソース マネージャー を使ってフォト ライブラリから画像をインポートするか、こちらの画像を使用します。適切に構造化設計され、内部に Image コンポーザブルを含んでいる Row コンポーザブルを追加します。
// ... import androidx.compose.foundation.Image import androidx.compose.foundation.layout.Row import androidx.compose.ui.res.painterResource @Composable fun MessageCard(msg: Message) { Row { Image( painter = painterResource(R.drawable.profile_picture), contentDescription = "Contact profile picture", ) Column { Text(text = msg.author) Text(text = msg.body) } } }
レイアウトを構成する
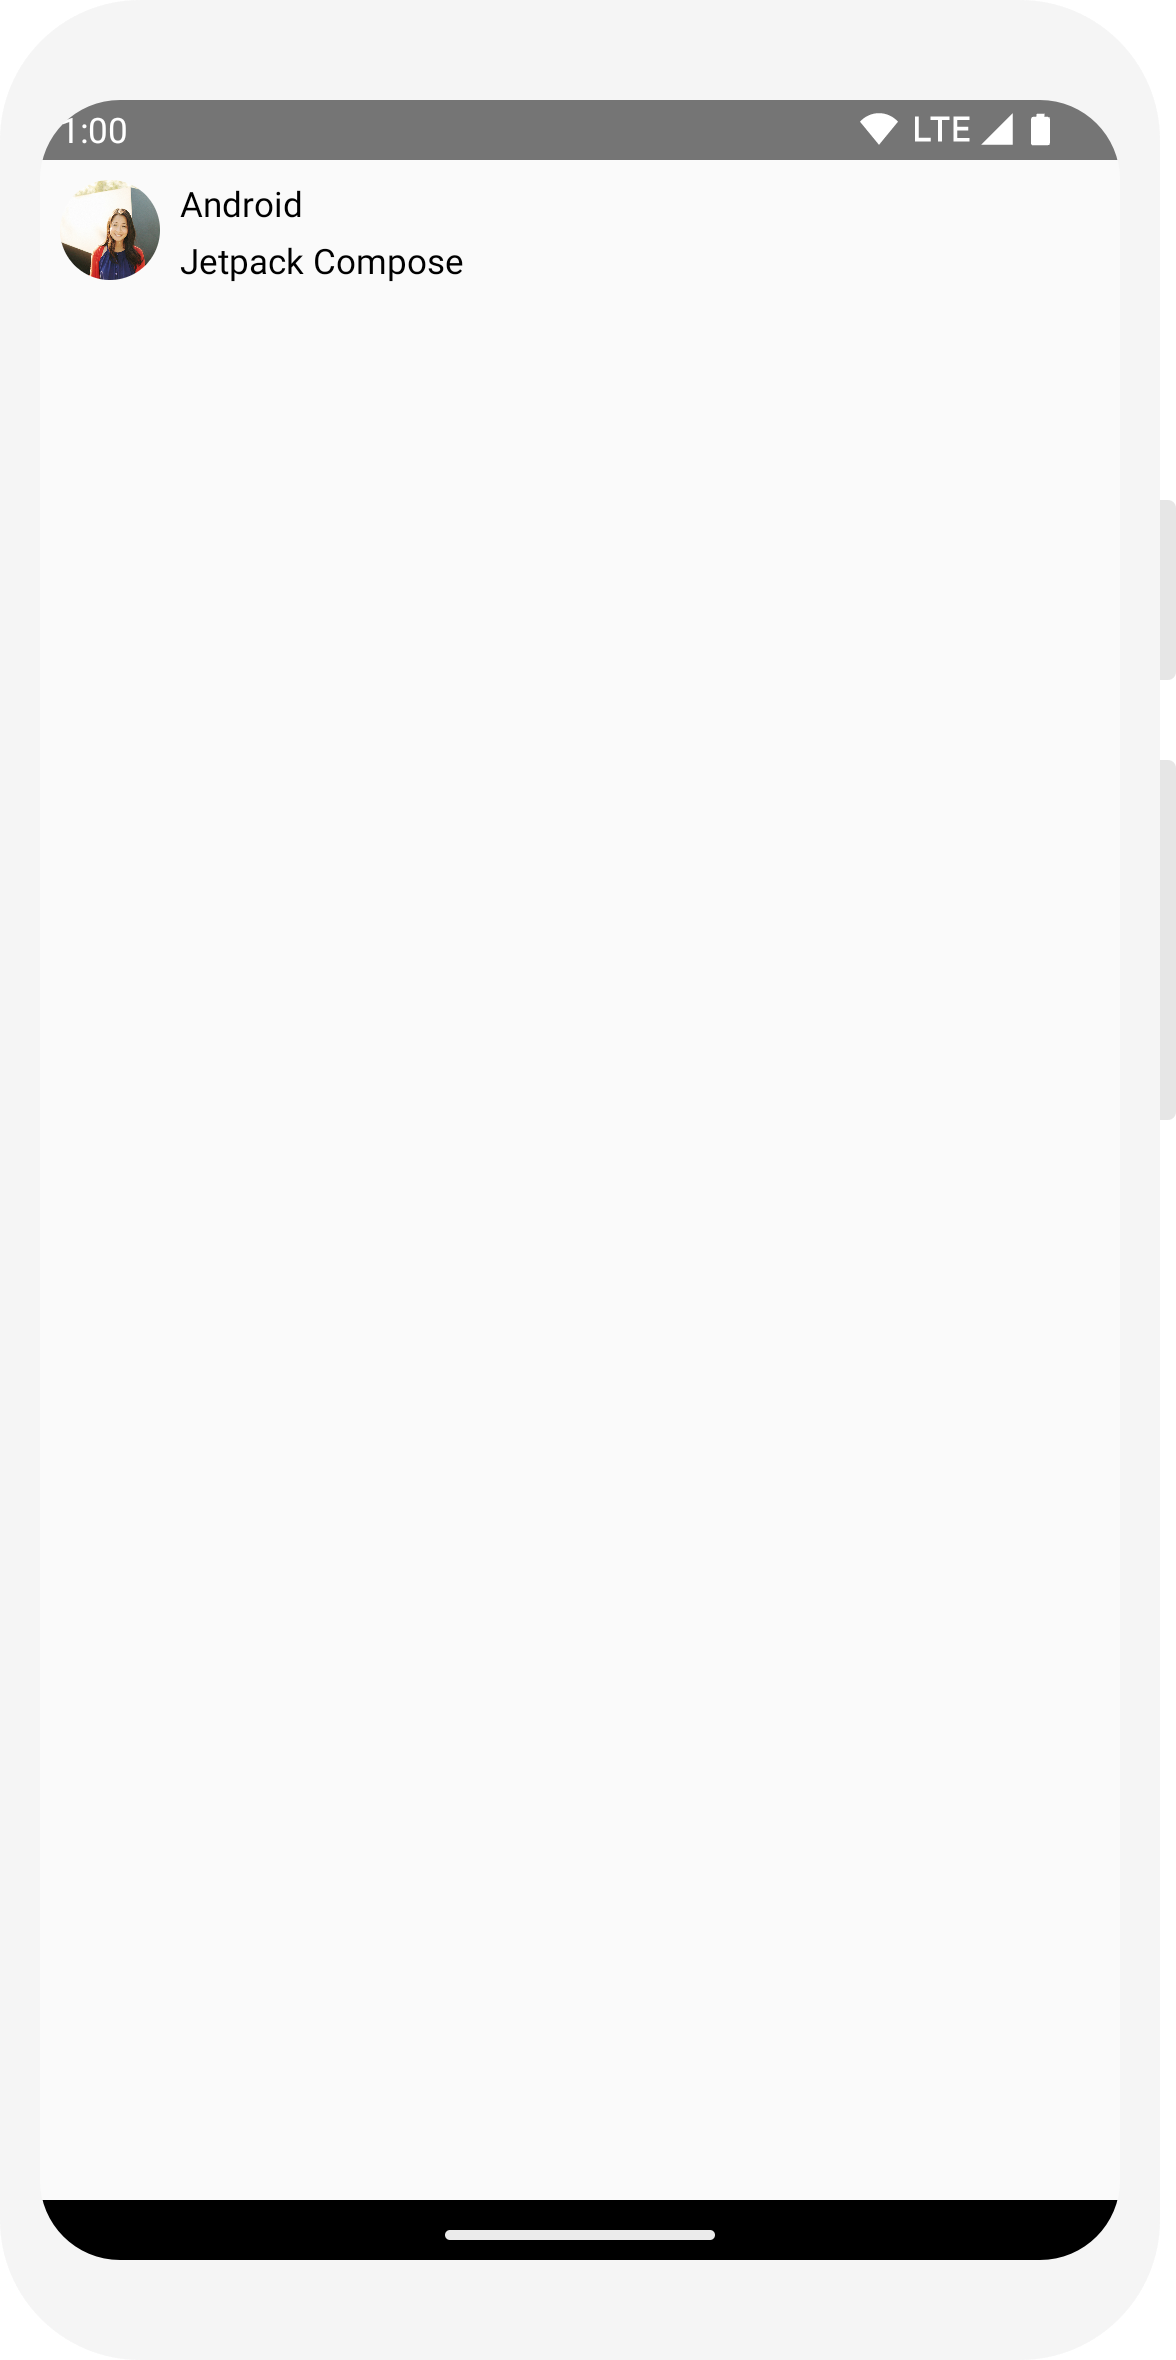
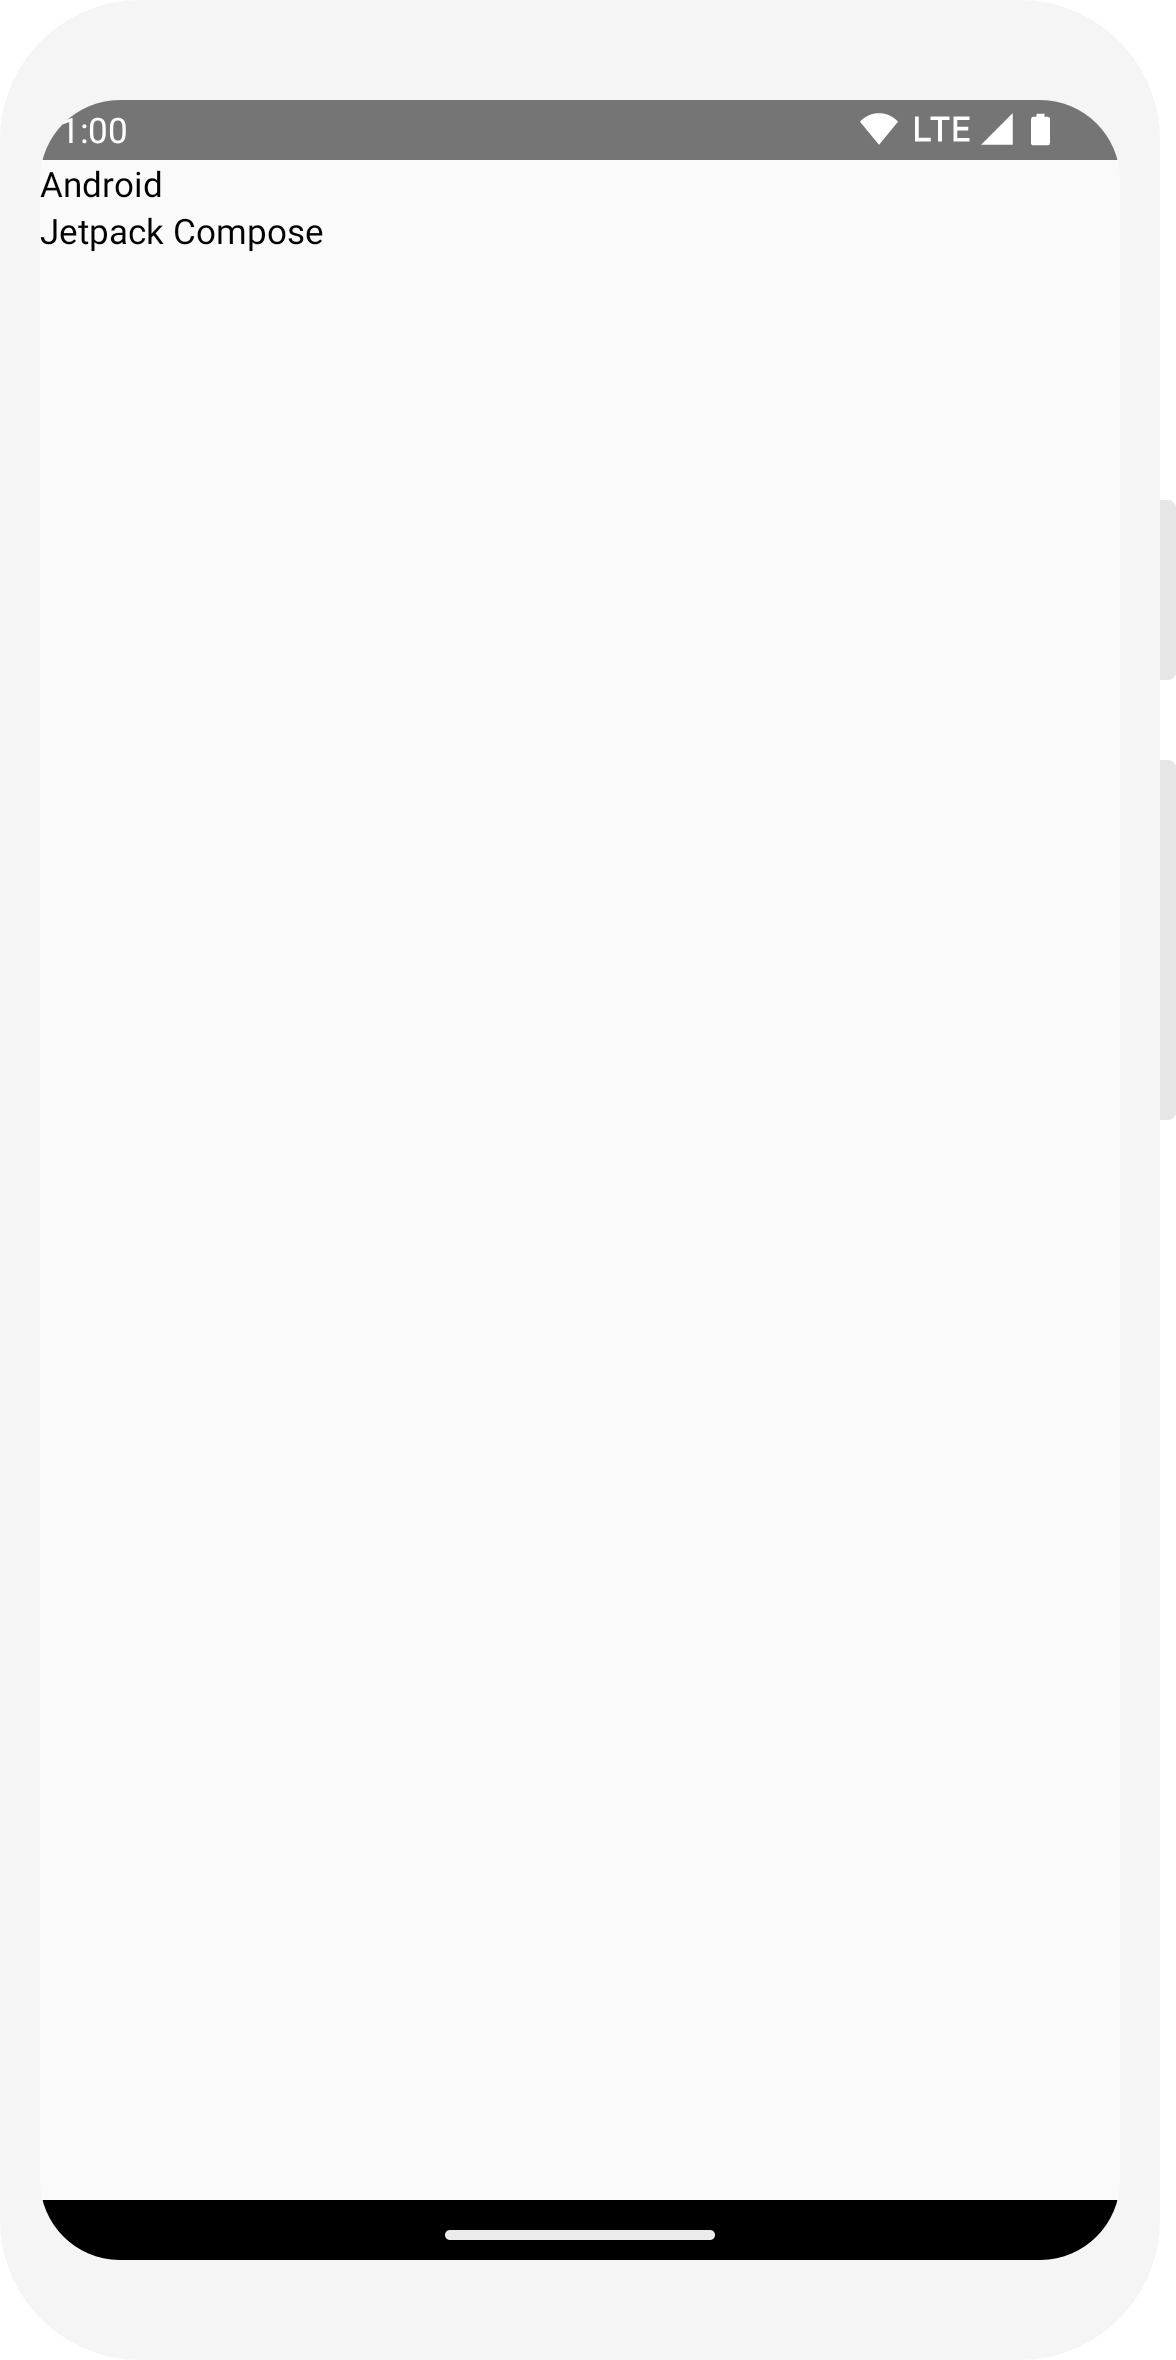
メッセージ レイアウトの構造は適切ですが、要素が適切に配置されておらず、画像が大きすぎます。コンポーザブルを装飾または構成するため、Compose は修飾子を使用します。修飾子により、コンポーザブルのサイズ、レイアウト、外観を変更したり、高度なインタラクション(要素をクリック可能にするなど)を追加したりできます。修飾子を連結すると、より充実したコンポーザブルを作成できます。修飾子をいくつか使用してレイアウトを改善します。
// ... import androidx.compose.foundation.layout.Spacer import androidx.compose.foundation.layout.height import androidx.compose.foundation.layout.padding import androidx.compose.foundation.layout.size import androidx.compose.foundation.layout.width import androidx.compose.foundation.shape.CircleShape import androidx.compose.ui.Modifier import androidx.compose.ui.draw.clip import androidx.compose.ui.unit.dp @Composable fun MessageCard(msg: Message) { // Add padding around our message Row(modifier = Modifier.padding(all = 8.dp)) { Image( painter = painterResource(R.drawable.profile_picture), contentDescription = "Contact profile picture", modifier = Modifier // Set image size to 40 dp .size(40.dp) // Clip image to be shaped as a circle .clip(CircleShape) ) // Add a horizontal space between the image and the column Spacer(modifier = Modifier.width(8.dp)) Column { Text(text = msg.author) // Add a vertical space between the author and message texts Spacer(modifier = Modifier.height(4.dp)) Text(text = msg.body) } } }
// ... class MainActivity : ComponentActivity() { override fun onCreate(savedInstanceState: Bundle?) { super.onCreate(savedInstanceState) setContent { MessageCard(Message("Android", "Jetpack Compose")) } } } data class Message(val author: String, val body: String) @Composable fun MessageCard(msg: Message) { Text(text = msg.author) Text(text = msg.body) } @Preview @Composable fun PreviewMessageCard() { MessageCard( msg = Message("Lexi", "Hey, take a look at Jetpack Compose, it's great!") ) }

// ...
import androidx.compose.foundation.layout.Column

@Composable
fun MessageCard(msg: Message) {
    Column {
        Text(text = msg.author)
        Text(text = msg.body)
    }
}
// ...
import androidx.compose.foundation.Image
import androidx.compose.foundation.layout.Row
import androidx.compose.ui.res.painterResource

@Composable
fun MessageCard(msg: Message) {
    Row {
        Image(
            painter = painterResource(R.drawable.profile_picture),
            contentDescription = "Contact profile picture",
        )

       Column {
            Text(text = msg.author)
            Text(text = msg.body)
        }

    }

}

// ...
import androidx.compose.foundation.layout.Spacer
import androidx.compose.foundation.layout.height
import androidx.compose.foundation.layout.padding
import androidx.compose.foundation.layout.size
import androidx.compose.foundation.layout.width
import androidx.compose.foundation.shape.CircleShape
import androidx.compose.ui.Modifier
import androidx.compose.ui.draw.clip
import androidx.compose.ui.unit.dp

@Composable
fun MessageCard(msg: Message) {
    // Add padding around our message
    Row(modifier = Modifier.padding(all = 8.dp)) {
        Image(
            painter = painterResource(R.drawable.profile_picture),
            contentDescription = "Contact profile picture",
            modifier = Modifier
                // Set image size to 40 dp
                .size(40.dp)
                // Clip image to be shaped as a circle
                .clip(CircleShape)
        )

        // Add a horizontal space between the image and the column
        Spacer(modifier = Modifier.width(8.dp))

        Column {
            Text(text = msg.author)
            // Add a vertical space between the author and message texts
            Spacer(modifier = Modifier.height(4.dp))
            Text(text = msg.body)
        }
    }
}

レッスン 3: マテリアル デザイン
Compose はマテリアル デザインの原則をサポートするために作られています。UI 要素の多くは、最初からマテリアル デザインを実装しています。このレッスンでは、マテリアル デザイン ウィジェットを使用してアプリのスタイルを設定します。

マテリアル デザインを使用する
メッセージのデザインにレイアウトが設定されましたが、まだ見栄えがよくありません。
Jetpack Compose には、すぐに使えるマテリアル デザイン 3 とその UI 要素の実装が用意されています。マテリアル デザインのスタイル設定を使用して、MessageCard コンポーザブルの外観を改善します。
まず、プロジェクト内で作成されたマテリアル テーマ ComposeTutorialTheme と Surface を使用して、MessageCard 関数をラップします。
これは、@Preview と setContent 関数の両方で行います。これにより、コンポーザブルはアプリのテーマで定義されているとおりにスタイルを継承することができ、アプリ内での一貫性が確保されます。
マテリアル デザインは、Color、Typography、Shape という 3 つの柱を中心に構築されています。それらを 1 つずつ追加します。
注: Empty Compose Activity テンプレートは、プロジェクト用のデフォルト テーマを生成します。このテーマにより、MaterialTheme をカスタマイズできます。プロジェクトに ComposeTutorial 以外の名前を付けた場合は、ui.theme サブパッケージ内の Theme.kt ファイルでカスタムテーマを見つけることができます。
// ...

class MainActivity : ComponentActivity() {
    override fun onCreate(savedInstanceState: Bundle?) {
        super.onCreate(savedInstanceState)
        setContent {
            ComposeTutorialTheme {
                Surface(modifier = Modifier.fillMaxSize()) {
                    MessageCard(Message("Android", "Jetpack Compose"))
                }
            }
        }
    }
}

@Preview
@Composable
fun PreviewMessageCard() {
    ComposeTutorialTheme {
        Surface {
            MessageCard(
                msg = Message("Lexi", "Take a look at Jetpack Compose, it's great!")
            )
        }
    }
}
色
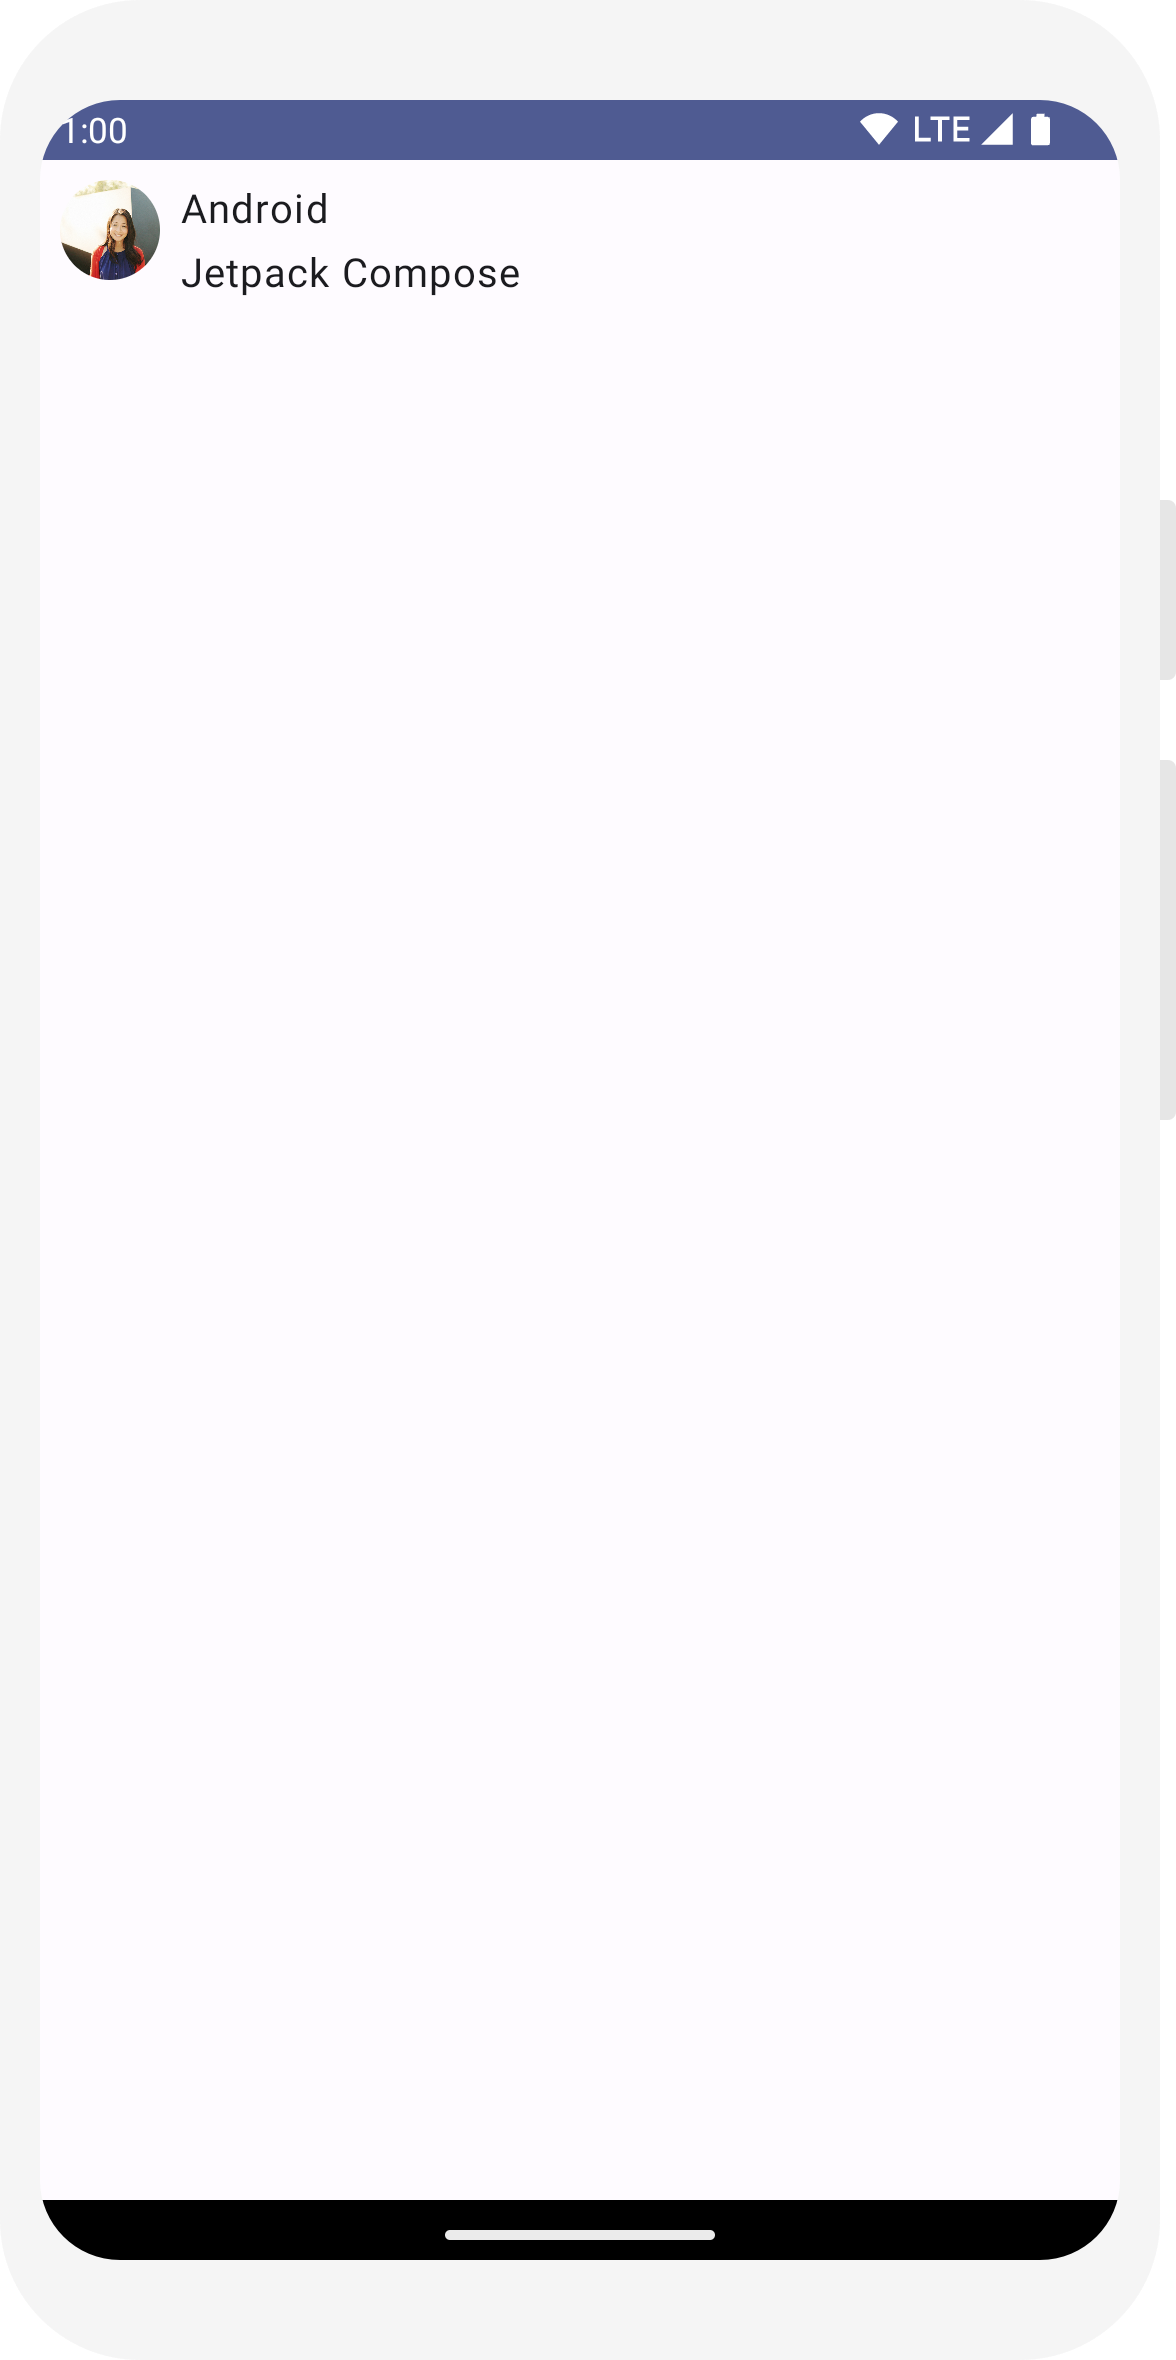
MaterialTheme.colorScheme を使用して、ラップされたテーマの色でスタイルを設定します。これらの値は、色が必要な場所であればどこでもテーマで使用できます。この例では、(デバイス環境設定で定義された)動的なテーマ設定色を使用しています。
これを変更するには、MaterialTheme.kt ファイルで dynamicColor を false に設定します。
タイトルのスタイルを設定し、画像に枠線を追加します。
// ...
import androidx.compose.foundation.border
import androidx.compose.material3.MaterialTheme

@Composable
fun MessageCard(msg: Message) {
   Row(modifier = Modifier.padding(all = 8.dp)) {
       Image(
           painter = painterResource(R.drawable.profile_picture),
           contentDescription = null,
           modifier = Modifier
               .size(40.dp)
               .clip(CircleShape)
               .border(1.5.dp, MaterialTheme.colorScheme.primary, CircleShape)
       )

       Spacer(modifier = Modifier.width(8.dp))

       Column {
           Text(
               text = msg.author,
               color = MaterialTheme.colorScheme.secondary
           )

           Spacer(modifier = Modifier.height(4.dp))
           Text(text = msg.body)
       }
   }
}
タイポグラフィ
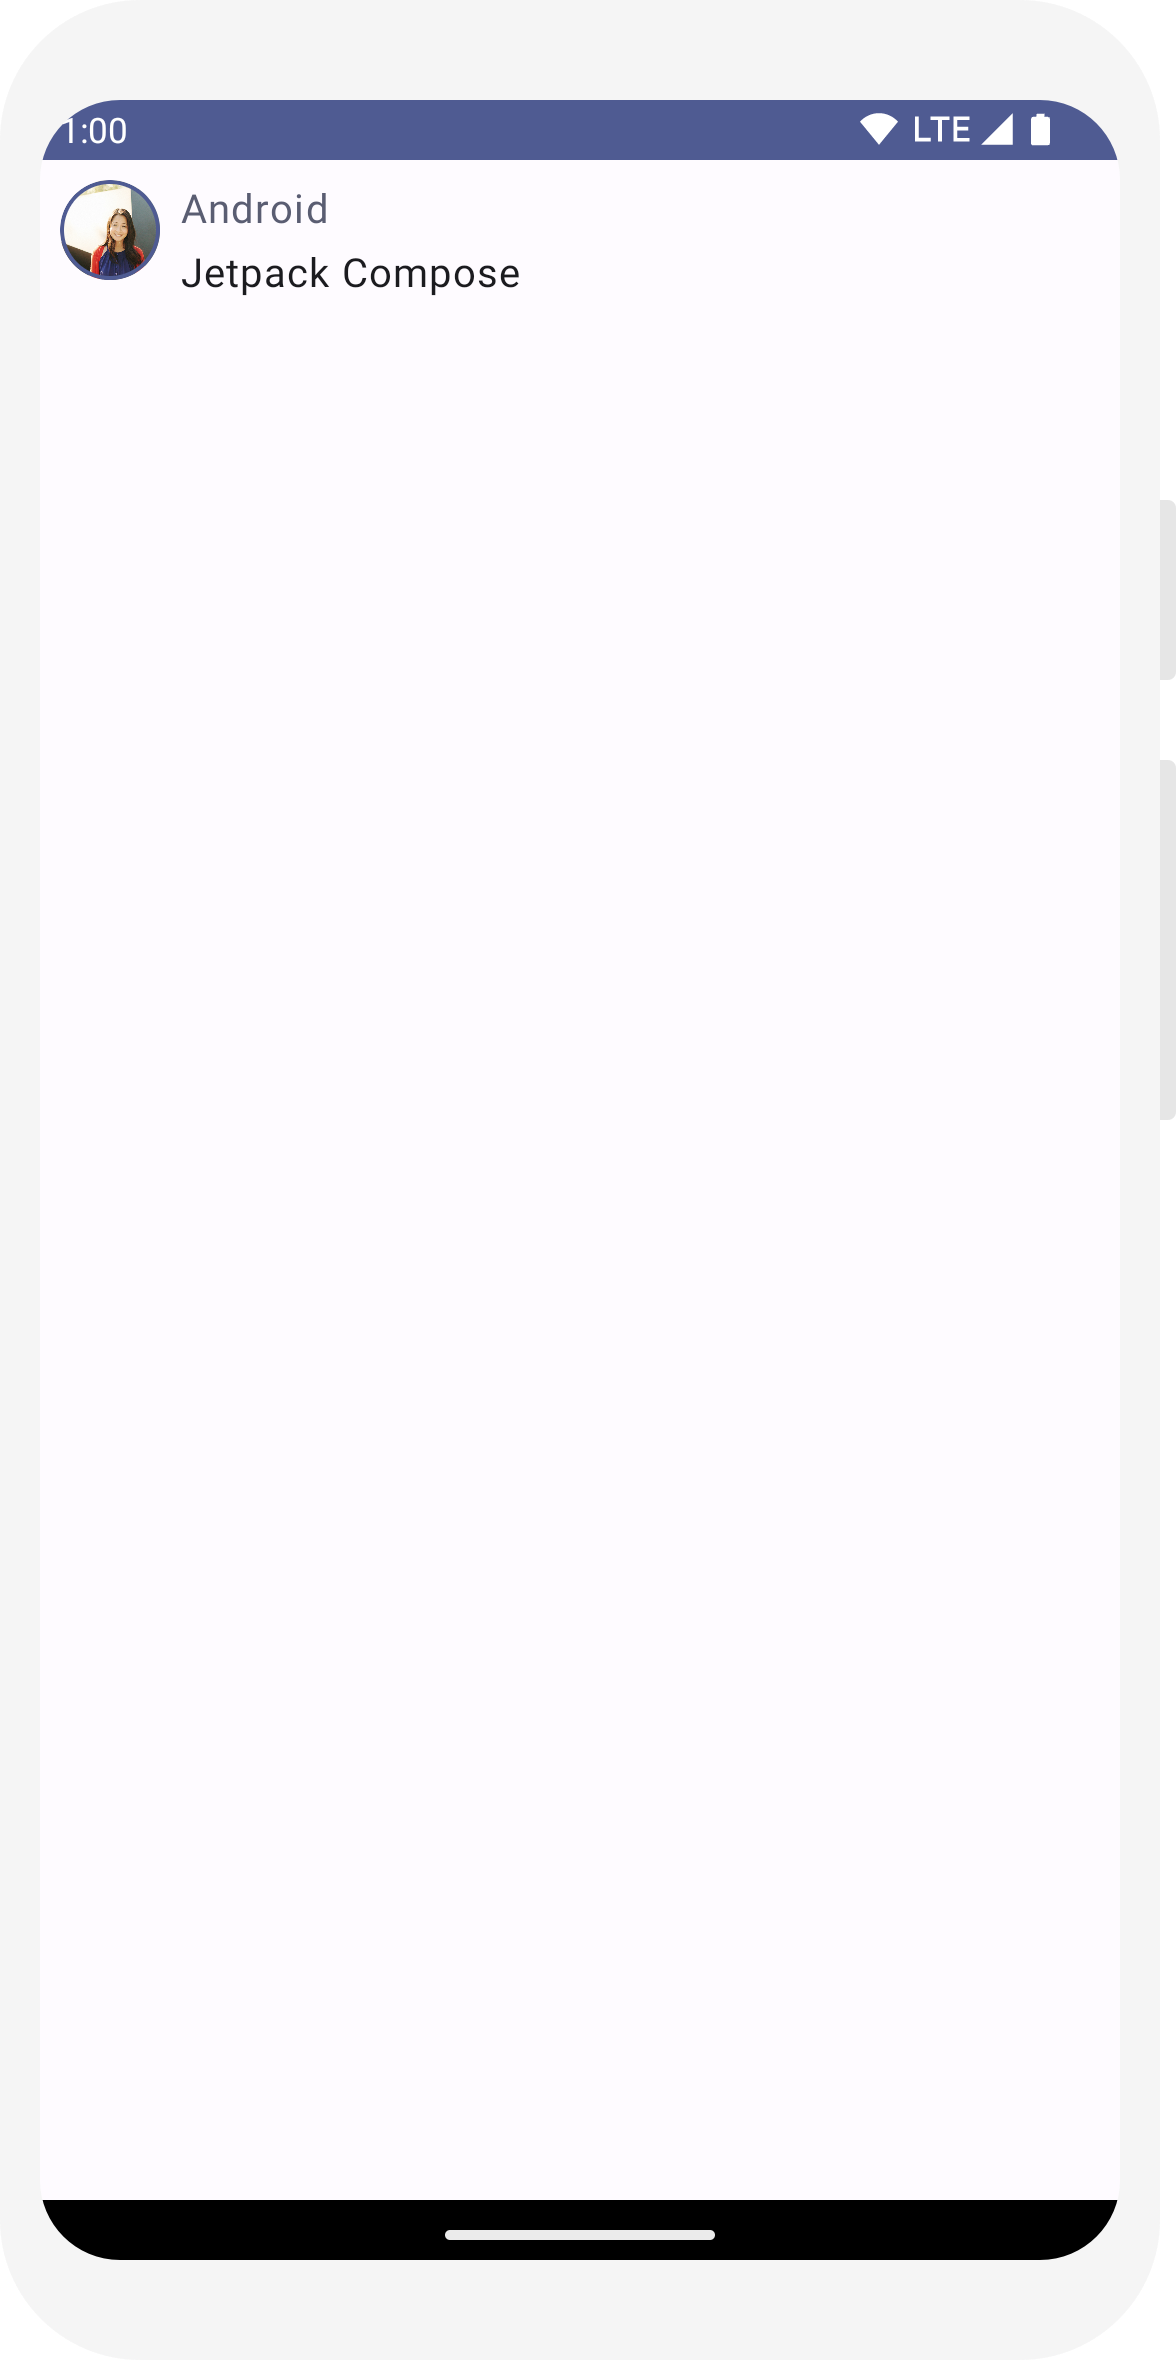
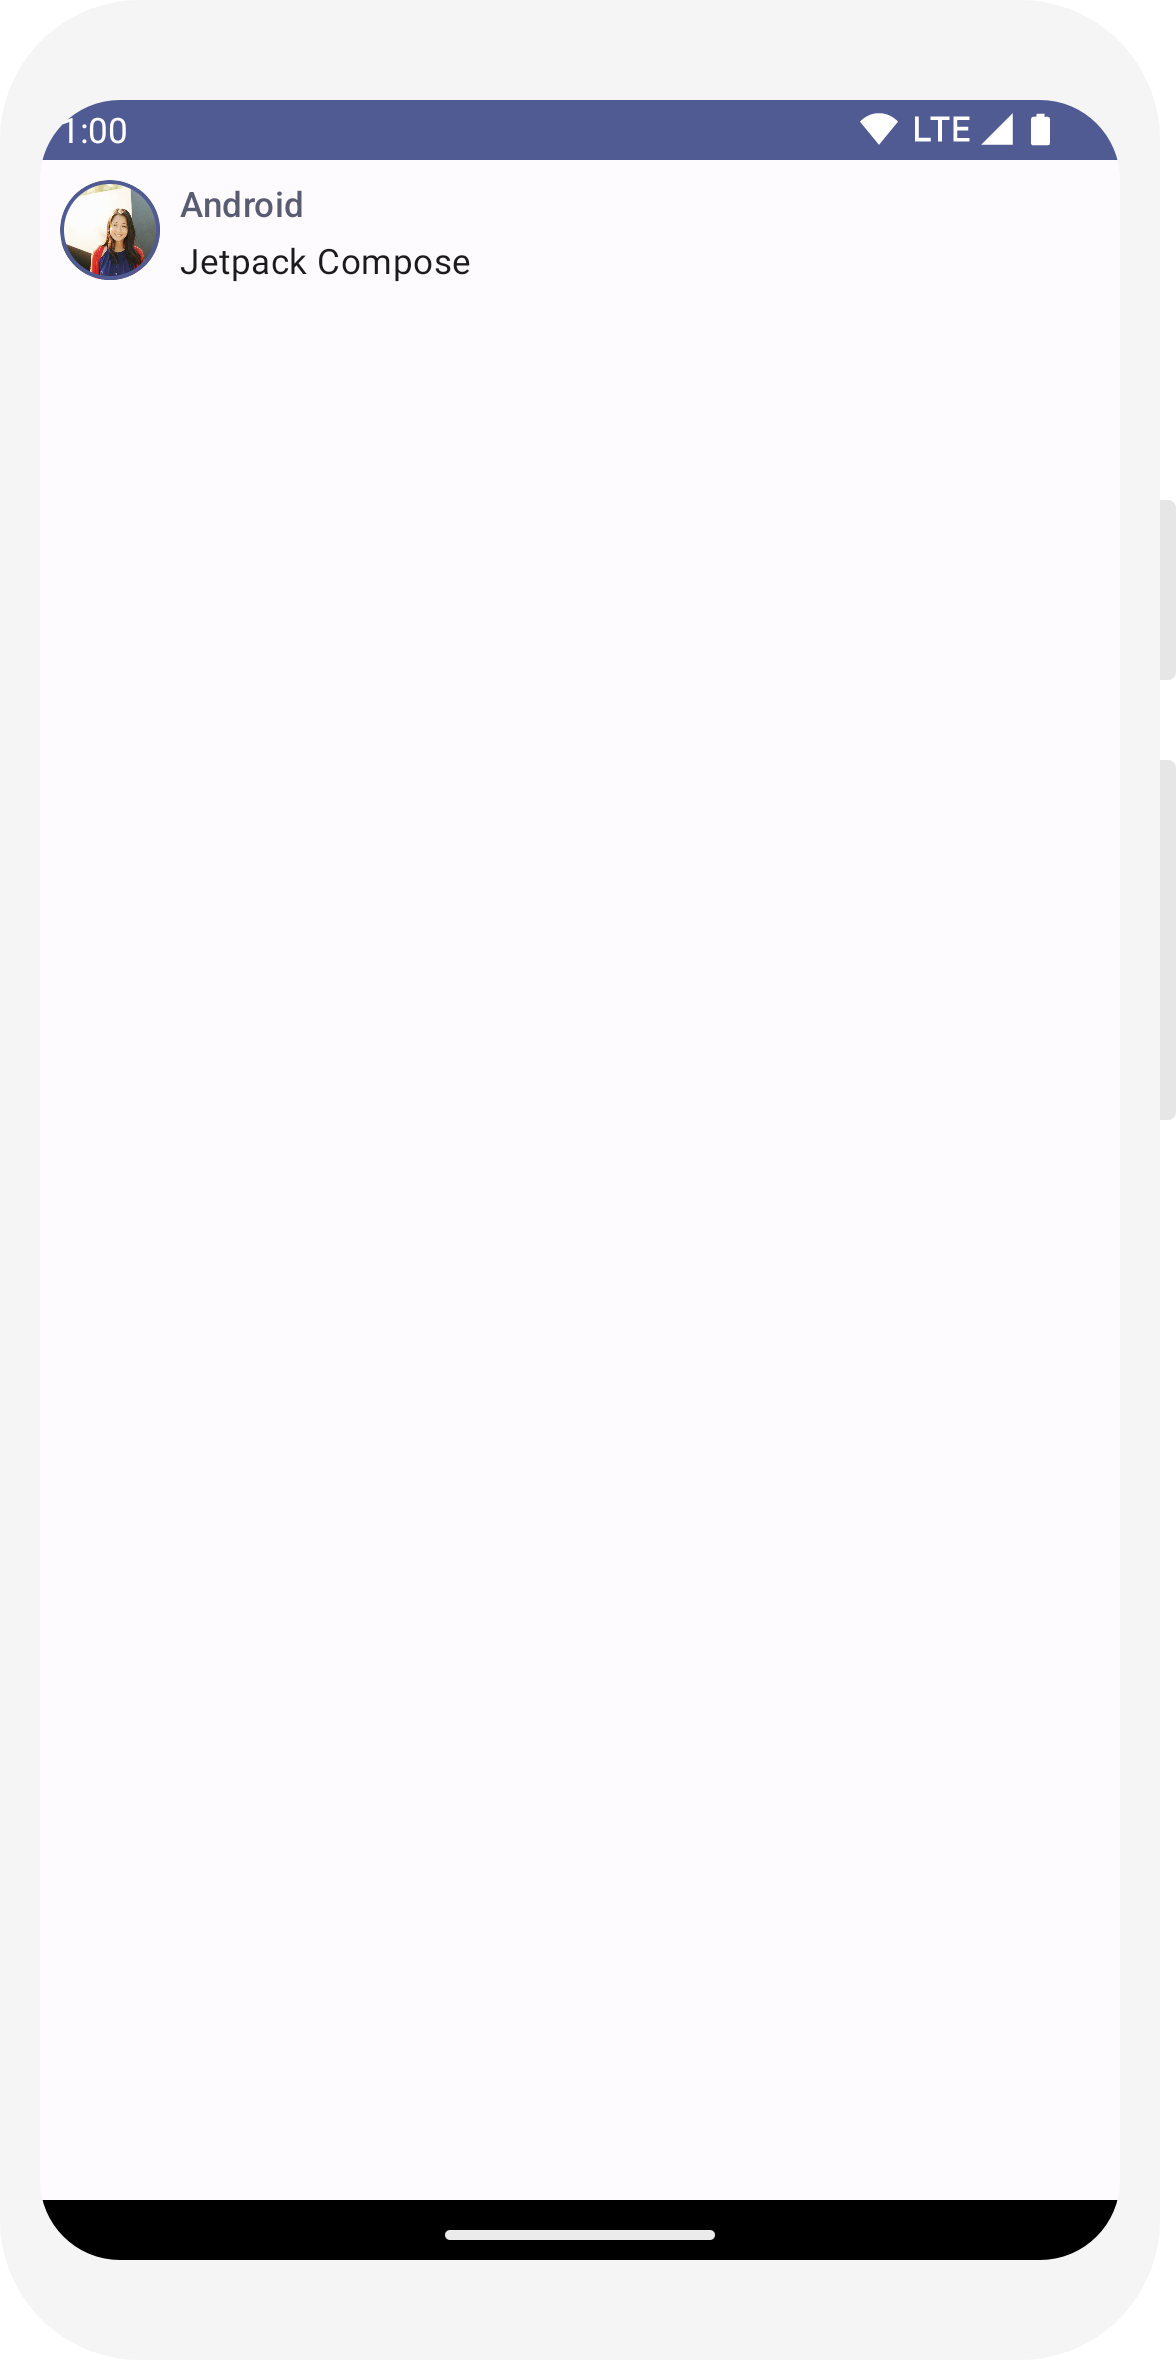
マテリアル タイポグラフィ スタイルは、Text コンポーザブルに追加するだけで、MaterialTheme で利用できます。
// ...

@Composable
fun MessageCard(msg: Message) {
   Row(modifier = Modifier.padding(all = 8.dp)) {
       Image(
           painter = painterResource(R.drawable.profile_picture),
           contentDescription = null,
           modifier = Modifier
               .size(40.dp)
               .clip(CircleShape)
               .border(1.5.dp, MaterialTheme.colorScheme.primary, CircleShape)
       )
       Spacer(modifier = Modifier.width(8.dp))

       Column {
           Text(
               text = msg.author,
               color = MaterialTheme.colorScheme.secondary,
               style = MaterialTheme.typography.titleSmall
           )

           Spacer(modifier = Modifier.height(4.dp))

           Text(
               text = msg.body,
               style = MaterialTheme.typography.bodyMedium
           )
       }
   }
}
形状
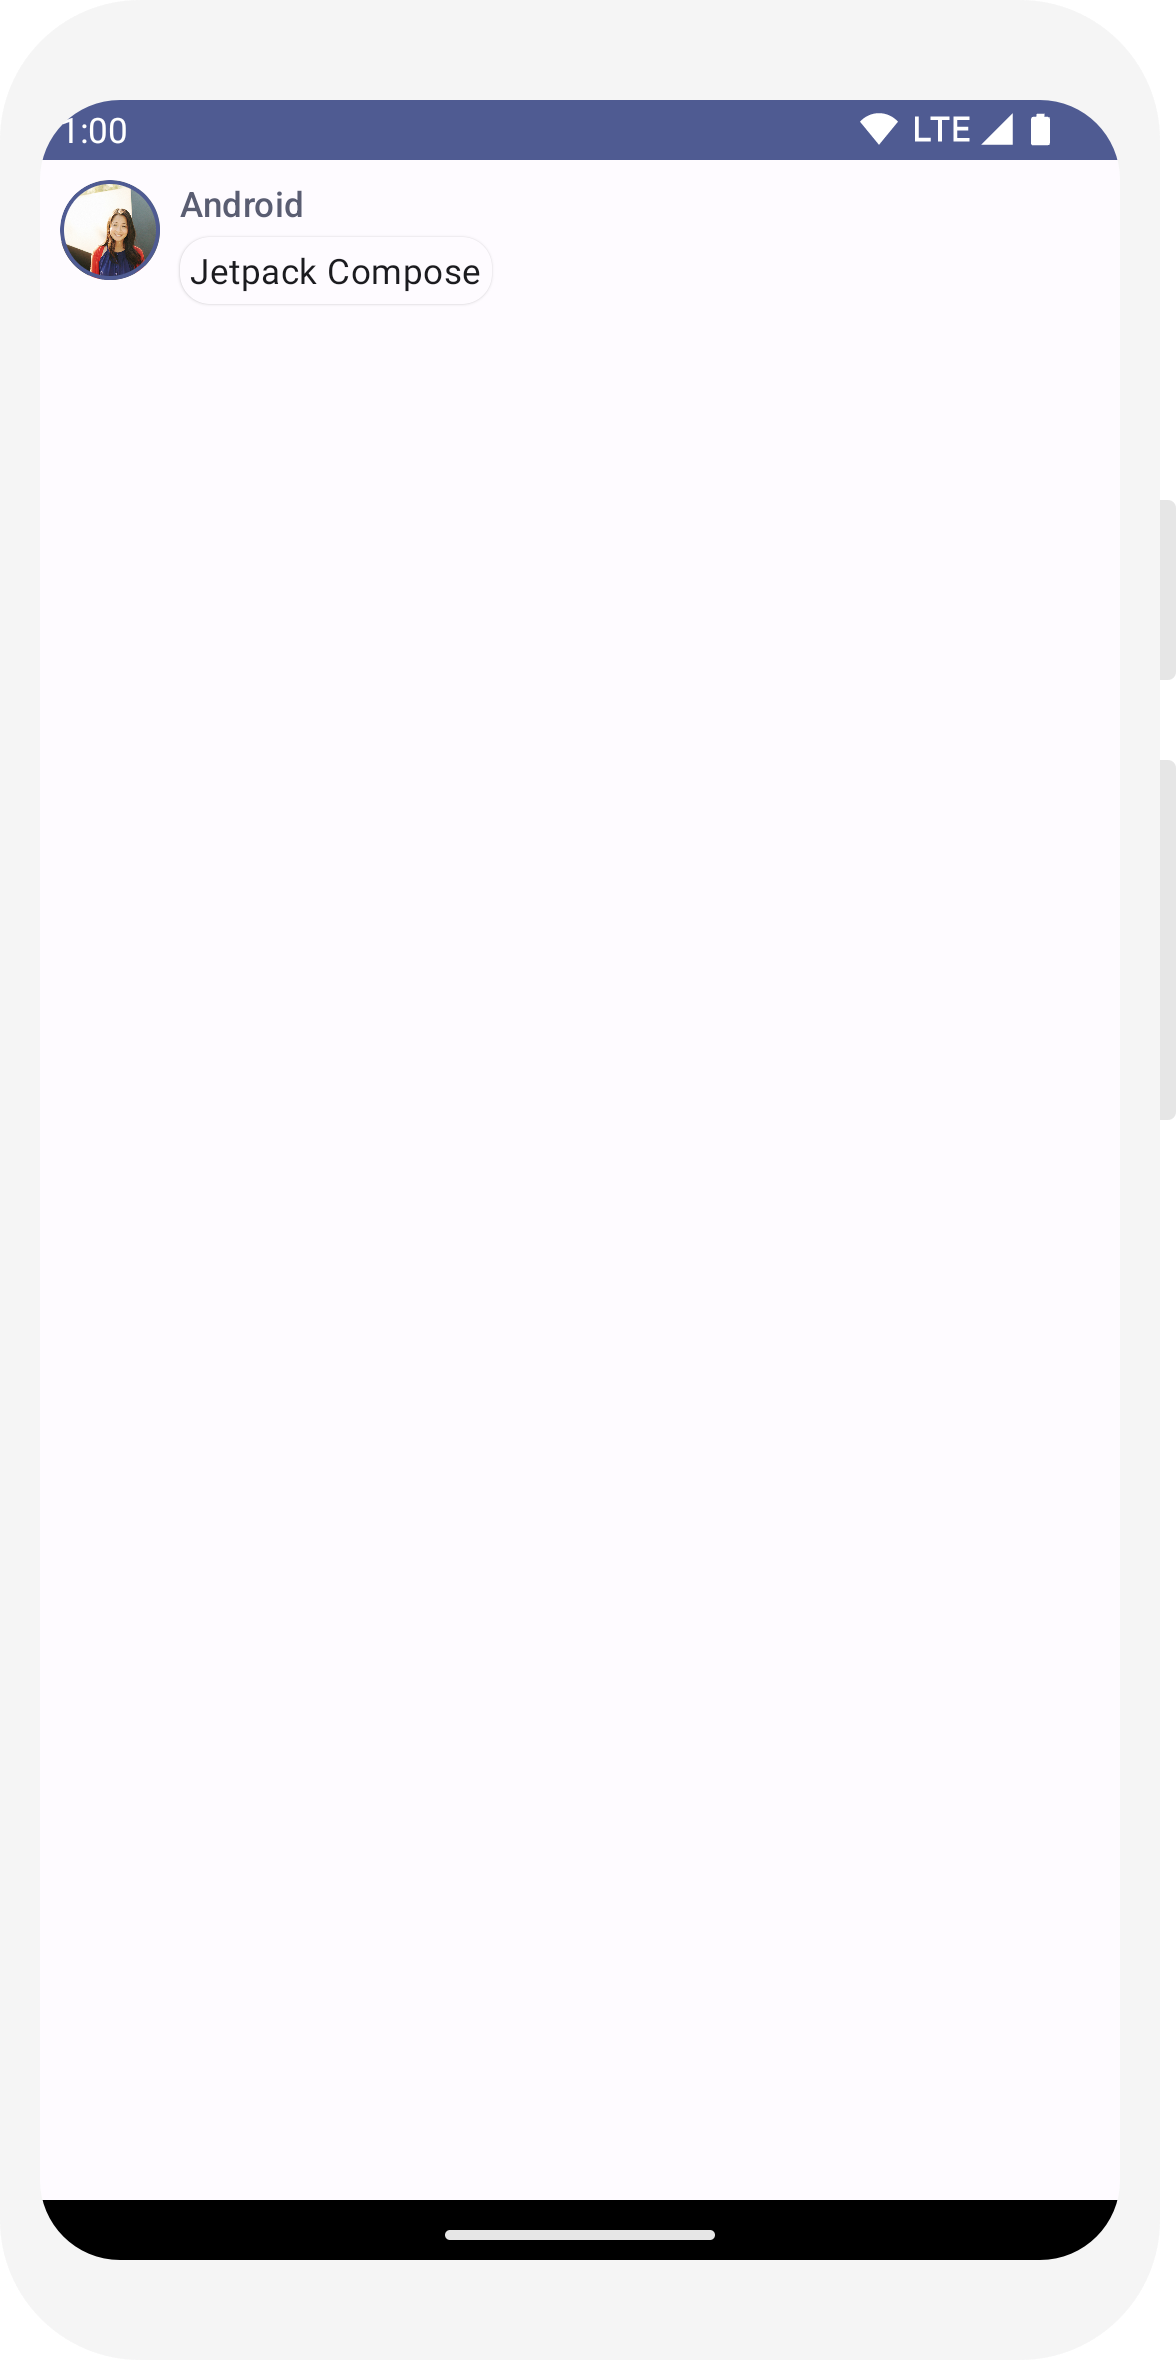
Shape を使用して最終的な仕上げを行います。まず、メッセージ本文のテキストを Surface コンポーザブルでラップします。これにより、メッセージ本文の形状と高度をカスタマイズできます。レイアウトを改善するため、パディングもメッセージに追加します。
// ...
import androidx.compose.material3.Surface

@Composable
fun MessageCard(msg: Message) {
   Row(modifier = Modifier.padding(all = 8.dp)) {
       Image(
           painter = painterResource(R.drawable.profile_picture),
           contentDescription = null,
           modifier = Modifier
               .size(40.dp)
               .clip(CircleShape)
               .border(1.5.dp, MaterialTheme.colorScheme.primary, CircleShape)
       )
       Spacer(modifier = Modifier.width(8.dp))

       Column {
           Text(
               text = msg.author,
               color = MaterialTheme.colorScheme.secondary,
               style = MaterialTheme.typography.titleSmall
           )

           Spacer(modifier = Modifier.height(4.dp))

           Surface(shape = MaterialTheme.shapes.medium, shadowElevation = 1.dp) {
               Text(
                   text = msg.body,
                   modifier = Modifier.padding(all = 4.dp),
                   style = MaterialTheme.typography.bodyMedium
               )
           }
       }
   }
}
ダークテーマを有効にする
ダークテーマ(または夜間モード)を有効にすると、特に夜間に画面の明るさが抑制され、デバイスのバッテリーを節約できます。マテリアル デザインのサポートにより、Jetpack Compose はデフォルトでダークテーマを処理できます。マテリアル デザイン カラーを使用した場合、テキストと背景は暗い背景に合わせて自動的に調整されます。
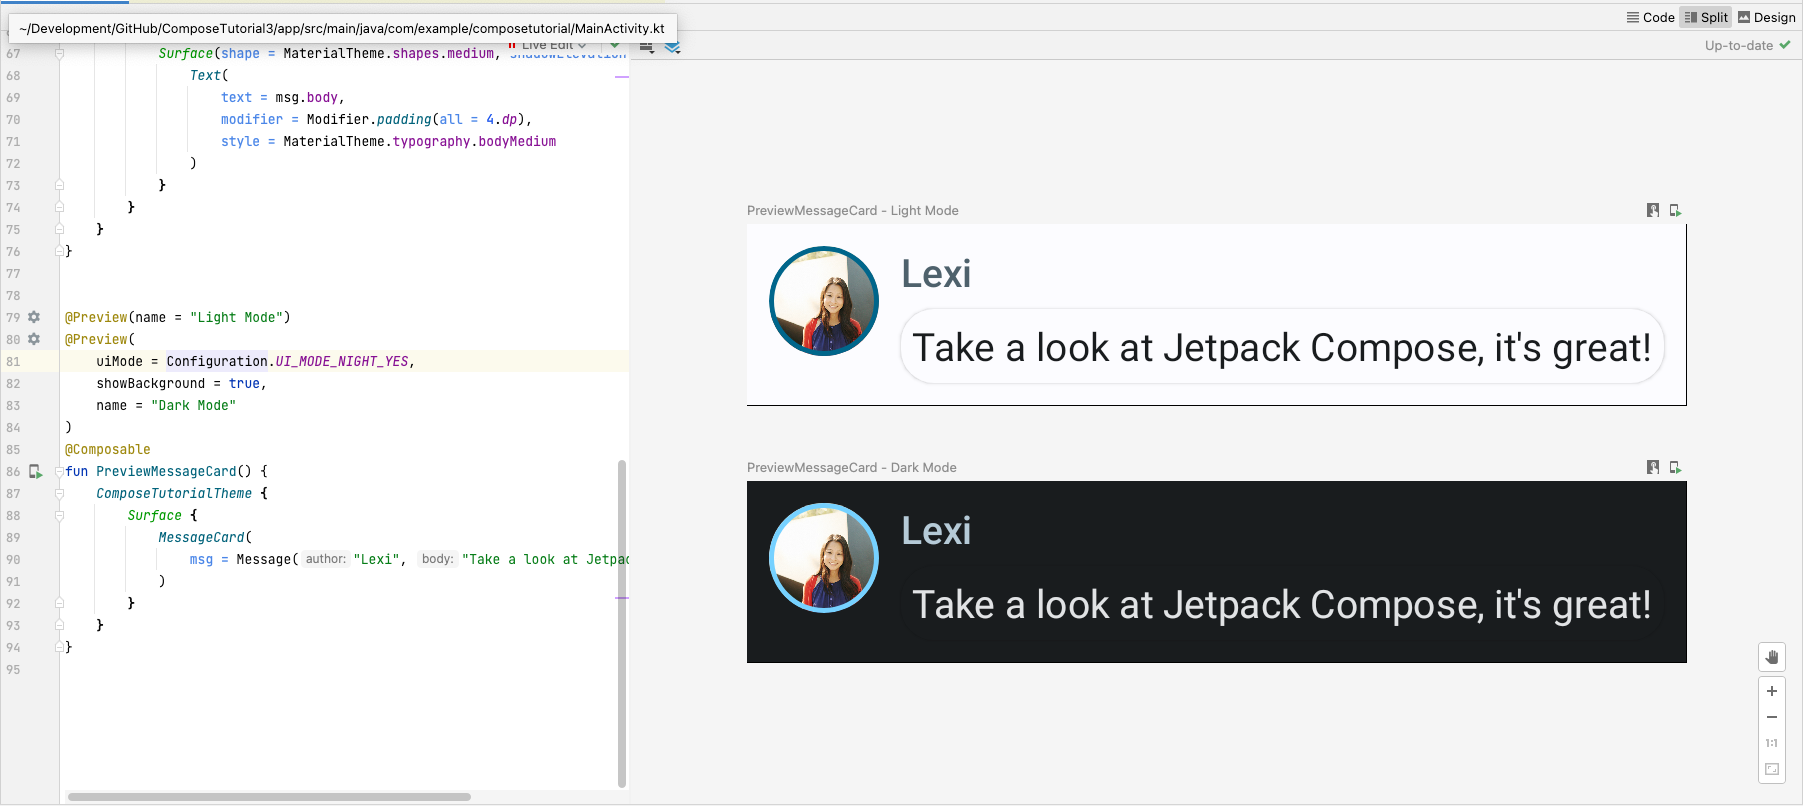
複数のプレビューをファイル内でそれぞれ別個の関数として作成したり、複数のアノテーションを同じ関数に追加したりできます。
新しいプレビュー アノテーションを追加して、夜間モードを有効にしましょう。
// ...
import android.content.res.Configuration

@Preview(name = "Light Mode")
@Preview(
    uiMode = Configuration.UI_MODE_NIGHT_YES,
    showBackground = true,
    name = "Dark Mode"
)
@Composable
fun PreviewMessageCard() {
   ComposeTutorialTheme {
    Surface {
      MessageCard(
        msg = Message("Lexi", "Hey, take a look at Jetpack Compose, it's great!")
      )
    }
   }
}
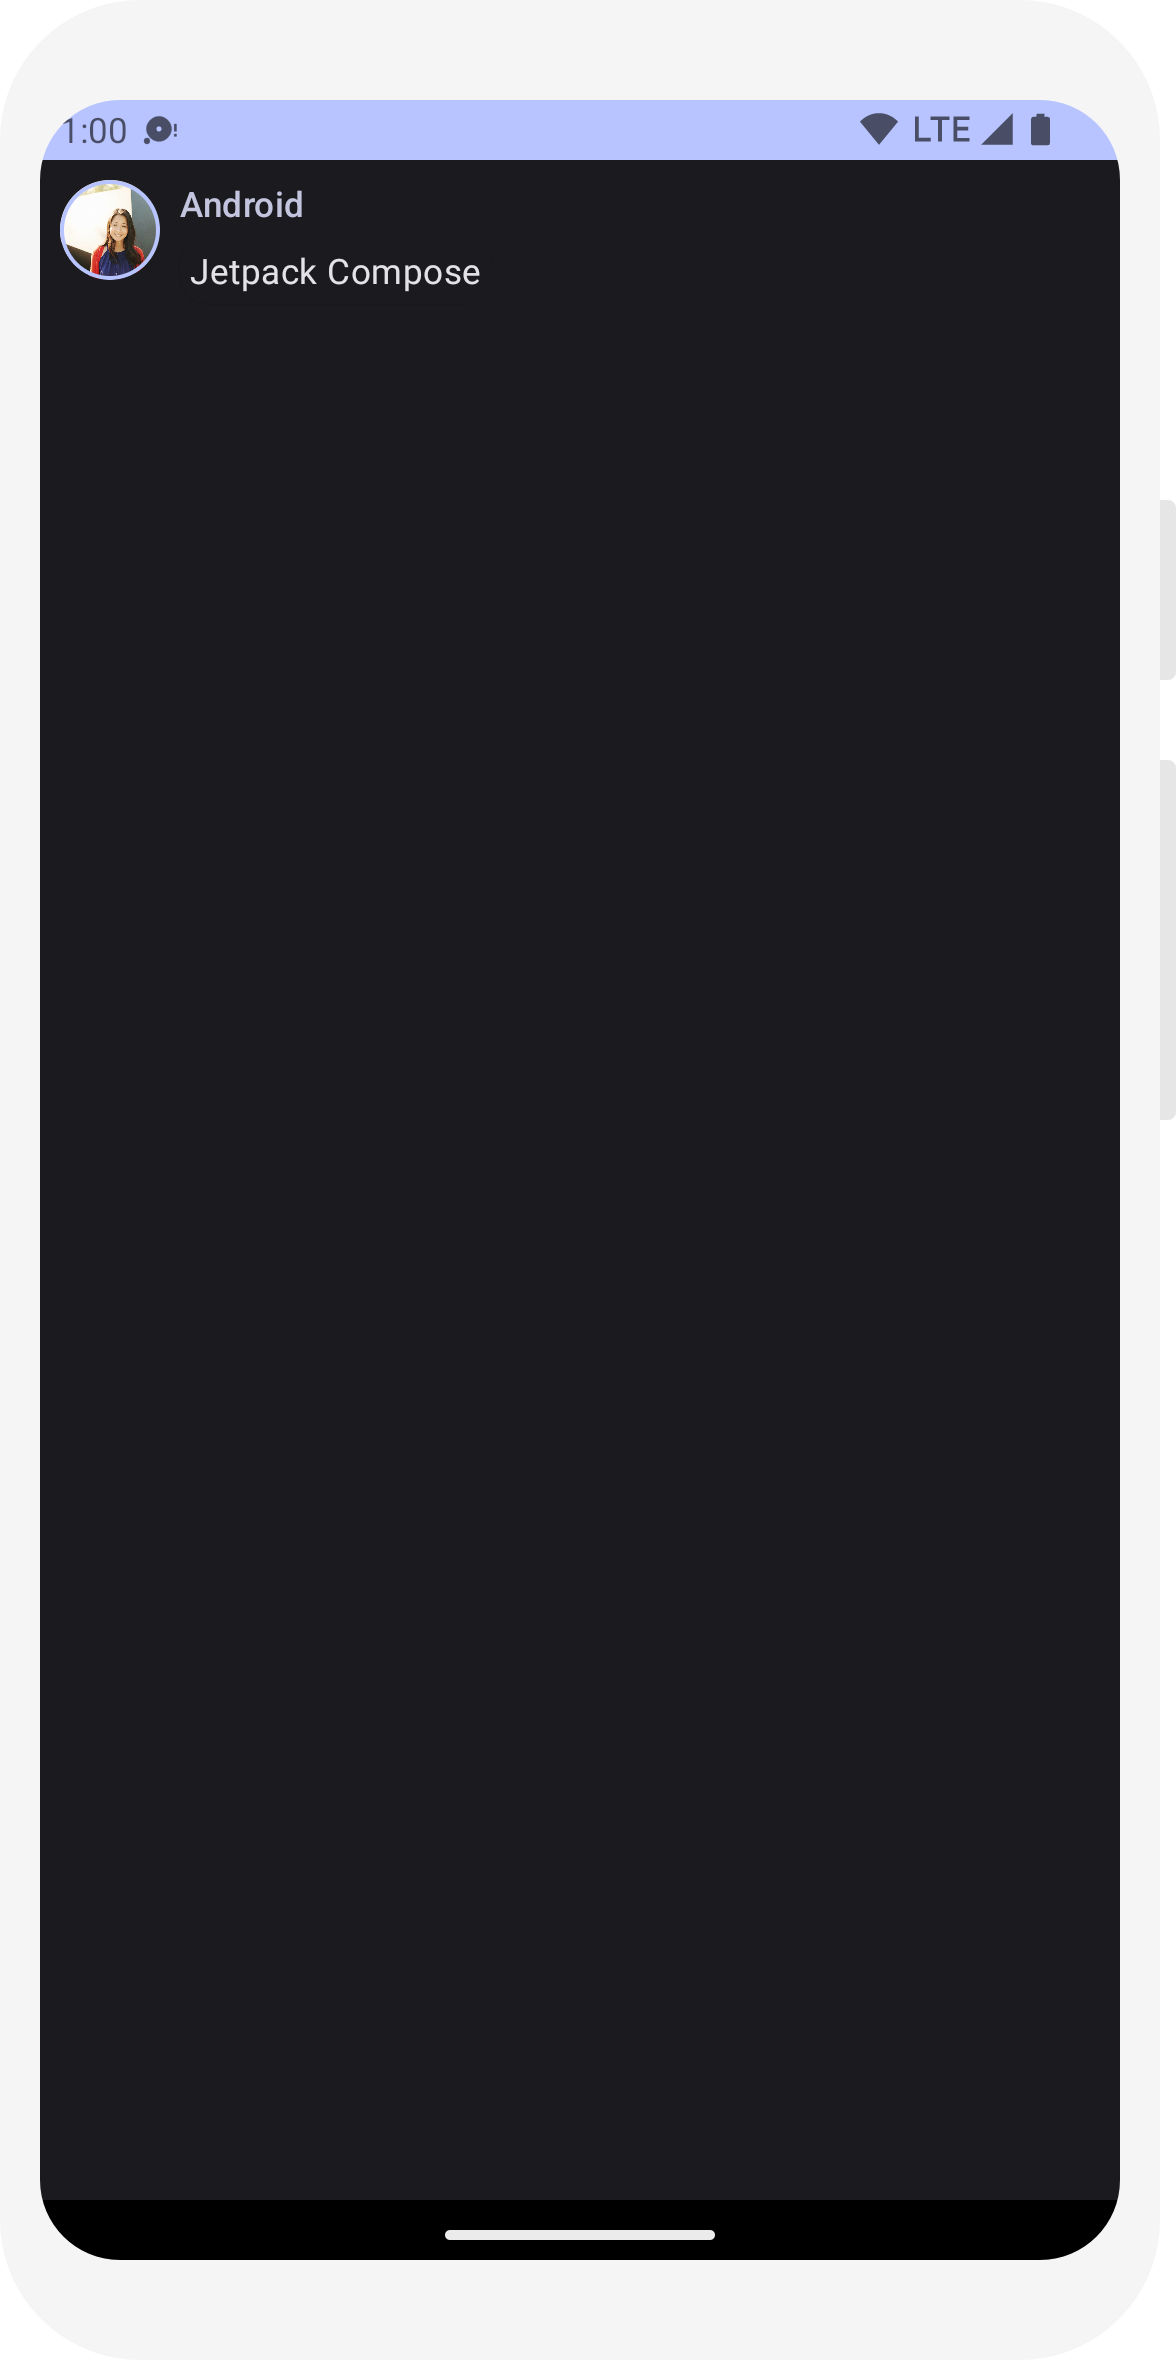
ライトテーマとダークテーマの色の選択は、IDE によって生成される Theme.kt ファイルで定義されます。
ここまでの作業で、1 つの画像と、スタイルが異なる 2 つのテキストを表示するメッセージ UI 要素を作成しました。この UI 要素はライトテーマとダークテーマの両方で適切に表示されます。
// ...
import android.content.res.Configuration

@Preview(name = "Light Mode")
@Preview(
    uiMode = Configuration.UI_MODE_NIGHT_YES,
    showBackground = true,
    name = "Dark Mode"
)
@Composable
fun PreviewMessageCard() {
   ComposeTutorialTheme {
    Surface {
      MessageCard(
        msg = Message("Lexi", "Hey, take a look at Jetpack Compose, it's great!")
      )
    }
   }
}

// ...

class MainActivity : ComponentActivity() {
    override fun onCreate(savedInstanceState: Bundle?) {
        super.onCreate(savedInstanceState)
        setContent {
            ComposeTutorialTheme {
                Surface(modifier = Modifier.fillMaxSize()) {
                    MessageCard(Message("Android", "Jetpack Compose"))
                }
            }
        }
    }
}

@Preview
@Composable
fun PreviewMessageCard() {
    ComposeTutorialTheme {
        Surface {
            MessageCard(
                msg = Message("Lexi", "Take a look at Jetpack Compose, it's great!")
            )
        }
    }
}

// ...
import androidx.compose.foundation.border
import androidx.compose.material3.MaterialTheme

@Composable
fun MessageCard(msg: Message) {
   Row(modifier = Modifier.padding(all = 8.dp)) {
       Image(
           painter = painterResource(R.drawable.profile_picture),
           contentDescription = null,
           modifier = Modifier
               .size(40.dp)
               .clip(CircleShape)
               .border(1.5.dp, MaterialTheme.colorScheme.primary, CircleShape)
       )

       Spacer(modifier = Modifier.width(8.dp))

       Column {
           Text(
               text = msg.author,
               color = MaterialTheme.colorScheme.secondary
           )

           Spacer(modifier = Modifier.height(4.dp))
           Text(text = msg.body)
       }
   }
}

// ...

@Composable
fun MessageCard(msg: Message) {
   Row(modifier = Modifier.padding(all = 8.dp)) {
       Image(
           painter = painterResource(R.drawable.profile_picture),
           contentDescription = null,
           modifier = Modifier
               .size(40.dp)
               .clip(CircleShape)
               .border(1.5.dp, MaterialTheme.colorScheme.primary, CircleShape)
       )
       Spacer(modifier = Modifier.width(8.dp))

       Column {
           Text(
               text = msg.author,
               color = MaterialTheme.colorScheme.secondary,
               style = MaterialTheme.typography.titleSmall
           )

           Spacer(modifier = Modifier.height(4.dp))

           Text(
               text = msg.body,
               style = MaterialTheme.typography.bodyMedium
           )
       }
   }
}

// ...
import androidx.compose.material3.Surface

@Composable
fun MessageCard(msg: Message) {
   Row(modifier = Modifier.padding(all = 8.dp)) {
       Image(
           painter = painterResource(R.drawable.profile_picture),
           contentDescription = null,
           modifier = Modifier
               .size(40.dp)
               .clip(CircleShape)
               .border(1.5.dp, MaterialTheme.colorScheme.primary, CircleShape)
       )
       Spacer(modifier = Modifier.width(8.dp))

       Column {
           Text(
               text = msg.author,
               color = MaterialTheme.colorScheme.secondary,
               style = MaterialTheme.typography.titleSmall
           )

           Spacer(modifier = Modifier.height(4.dp))

           Surface(shape = MaterialTheme.shapes.medium, shadowElevation = 1.dp) {
               Text(
                   text = msg.body,
                   modifier = Modifier.padding(all = 4.dp),
                   style = MaterialTheme.typography.bodyMedium
               )
           }
       }
   }
}

// ...
import android.content.res.Configuration

@Preview(name = "Light Mode")
@Preview(
    uiMode = Configuration.UI_MODE_NIGHT_YES,
    showBackground = true,
    name = "Dark Mode"
)
@Composable
fun PreviewMessageCard() {
   ComposeTutorialTheme {
    Surface {
      MessageCard(
        msg = Message("Lexi", "Hey, take a look at Jetpack Compose, it's great!")
      )
    }
   }
}

レッスン 4: リストとアニメーション
リストとアニメーションはアプリのあらゆる場所で使用されます。このレッスンでは、Compose を使用してリストを簡単に作成し、楽しいアニメーションを追加する方法を学びます。

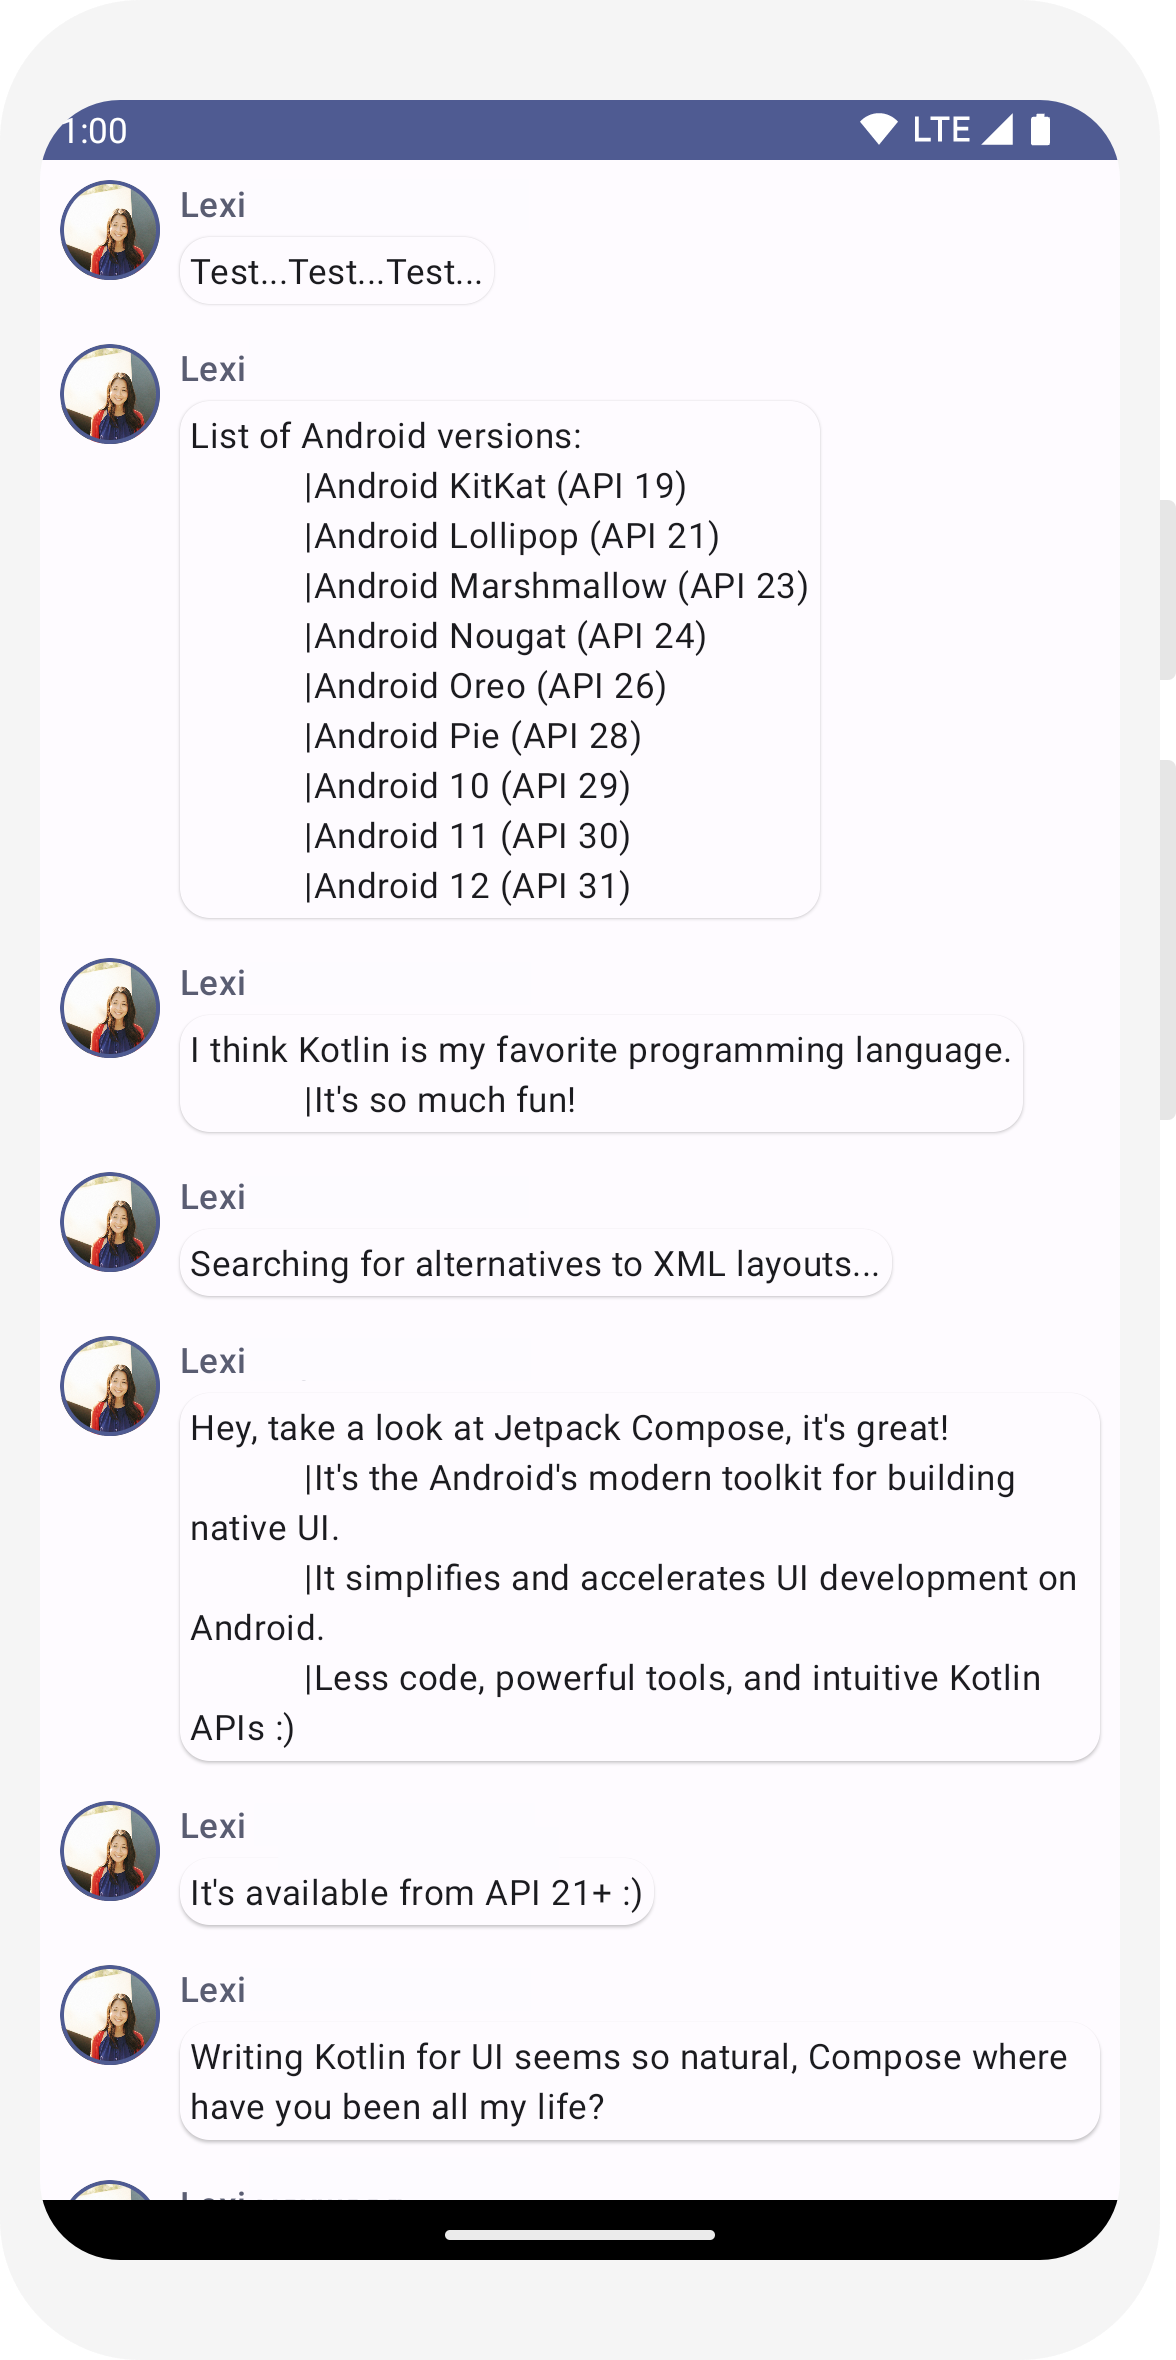
メッセージのリストを作成する
メッセージが 1 つしかないチャットは少々寂しいので、チャットに変更を加えて複数のメッセージを表示しましょう。複数のメッセージを表示する Conversation 関数を作成する必要があります。このユースケースでは、Compose の LazyColumn と LazyRow を使用します。これらのコンポーザブルは画面上に表示される要素のみをレンダリングするように設計されているので、長いリストで効果を発揮します。
以下のコード スニペットでは、LazyColumn に子として items が含まれています。それはパラメータとして List を受け取り、そのラムダは message という名前を付けたパラメータ(任意の名前を付けることができます)を受け取ります。このパラメータは Message のインスタンスです。簡単に言うと、このラムダは指定された List のアイテムごとに呼び出されます。サンプル データセットをプロジェクトにコピーして、会話をすばやくブートストラップできるようにします。
// ...
import androidx.compose.foundation.lazy.LazyColumn
import androidx.compose.foundation.lazy.items

@Composable
fun Conversation(messages: List<Message>) {
    LazyColumn {
        items(messages) { message ->
            MessageCard(message)
        }
    }
}

@Preview
@Composable
fun PreviewConversation() {
    ComposeTutorialTheme {
        Conversation(SampleData.conversationSample)
    }
}
メッセージの展開中にメッセージをアニメーション化する
サンプルアプリのチャットは次第に面白いものになりつつあります。次は、アニメーションの作成を楽しみましょう。コンテンツ サイズと背景色の両方をアニメーション化して、表示するメッセージをもっと長いテキストに展開する機能を追加します。このローカルの UI 状態を保存するには、メッセージが展開されているかどうかをトラッキングする必要があります。この状態変化をトラッキングするには、remember 関数と mutableStateOf 関数を使用します。
コンポーズ可能な関数は、remember を使用してローカルの状態をメモリに格納し、mutableStateOf に渡される値への変更をトラッキングすることが可能です。この状態を使用するコンポーザブル(およびその子)は、値が更新されると自動的に再描画されます。これを再コンポジションと呼びます。
Compose の状態 API(remember や mutableStateOf)を使用すると、状態の変更により UI が自動的に更新されます。
注: Kotlin を正しく使用するには、次のインポートを追加する必要があります。
委任プロパティの構文(by キーワード)。Alt+Enter キーまたは Option+Enter キーで追加する
できます。
      import androidx.compose.runtime.getValue
      import androidx.compose.runtime.setValue
// ...
import androidx.compose.foundation.clickable
import androidx.compose.runtime.getValue
import androidx.compose.runtime.mutableStateOf
import androidx.compose.runtime.remember
import androidx.compose.runtime.setValue

class MainActivity : ComponentActivity() {
   override fun onCreate(savedInstanceState: Bundle?) {
       super.onCreate(savedInstanceState)
       setContent {
           ComposeTutorialTheme {
               Conversation(SampleData.conversationSample)
           }
       }
   }
}

@Composable
fun MessageCard(msg: Message) {
    Row(modifier = Modifier.padding(all = 8.dp)) {
        Image(
            painter = painterResource(R.drawable.profile_picture),
            contentDescription = null,
            modifier = Modifier
                .size(40.dp)
                .clip(CircleShape)
                .border(1.5.dp, MaterialTheme.colorScheme.primary, CircleShape)
        )
        Spacer(modifier = Modifier.width(8.dp))

        // We keep track if the message is expanded or not in this
        // variable
        var isExpanded by remember { mutableStateOf(false) }

        // We toggle the isExpanded variable when we click on this Column
        Column(modifier = Modifier.clickable { isExpanded = !isExpanded }) {
            Text(
                text = msg.author,
                color = MaterialTheme.colorScheme.secondary,
                style = MaterialTheme.typography.titleSmall
            )

            Spacer(modifier = Modifier.height(4.dp))

            Surface(
                shape = MaterialTheme.shapes.medium,
                shadowElevation = 1.dp,
            ) {
                Text(
                    text = msg.body,
                    modifier = Modifier.padding(all = 4.dp),
                    // If the message is expanded, we display all its content
                    // otherwise we only display the first line
                    maxLines = if (isExpanded) Int.MAX_VALUE else 1,
                    style = MaterialTheme.typography.bodyMedium
                )
            }
        }
    }
}
以上により、メッセージをクリックしたときに、isExpanded に基づいてメッセージ コンテンツの背景を変更できるようになりました。コンポーザブルでクリック イベントを処理するには、clickable 修飾子を使用します。単に Surface の背景色を切り替えるのではなく、背景色をアニメーション化するには、その値を段階的に MaterialTheme.colorScheme.surface から MaterialTheme.colorScheme.primary(またはその逆)に変更します。そのためには、animateColorAsState 関数を使用します。最後に、animateContentSize 修飾子を使用して、メッセージ コンテナのサイズを滑らかにアニメーション化します。
// ...
import androidx.compose.animation.animateColorAsState
import androidx.compose.animation.animateContentSize

@Composable
fun MessageCard(msg: Message) {
    Row(modifier = Modifier.padding(all = 8.dp)) {
        Image(
            painter = painterResource(R.drawable.profile_picture),
            contentDescription = null,
            modifier = Modifier
                .size(40.dp)
                .clip(CircleShape)
                .border(1.5.dp, MaterialTheme.colorScheme.secondary, CircleShape)
        )
        Spacer(modifier = Modifier.width(8.dp))

        // We keep track if the message is expanded or not in this
        // variable
        var isExpanded by remember { mutableStateOf(false) }
        // surfaceColor will be updated gradually from one color to the other
        val surfaceColor by animateColorAsState(
            if (isExpanded) MaterialTheme.colorScheme.primary else MaterialTheme.colorScheme.surface,
        )

        // We toggle the isExpanded variable when we click on this Column
        Column(modifier = Modifier.clickable { isExpanded = !isExpanded }) {
            Text(
                text = msg.author,
                color = MaterialTheme.colorScheme.secondary,
                style = MaterialTheme.typography.titleSmall
            )

            Spacer(modifier = Modifier.height(4.dp))

            Surface(
                shape = MaterialTheme.shapes.medium,
                shadowElevation = 1.dp,
                // surfaceColor color will be changing gradually from primary to surface
                color = surfaceColor,
                // animateContentSize will change the Surface size gradually
                modifier = Modifier.animateContentSize().padding(1.dp)
            ) {
                Text(
                    text = msg.body,
                    modifier = Modifier.padding(all = 4.dp),
                    // If the message is expanded, we display all its content
                    // otherwise we only display the first line
                    maxLines = if (isExpanded) Int.MAX_VALUE else 1,
                    style = MaterialTheme.typography.bodyMedium
                )
            }
        }
    }
}
// ...
import androidx.compose.foundation.lazy.LazyColumn
import androidx.compose.foundation.lazy.items

@Composable
fun Conversation(messages: List<Message>) {
    LazyColumn {
        items(messages) { message ->
            MessageCard(message)
        }
    }
}

@Preview
@Composable
fun PreviewConversation() {
    ComposeTutorialTheme {
        Conversation(SampleData.conversationSample)
    }
}

// ...
import androidx.compose.foundation.clickable
import androidx.compose.runtime.getValue
import androidx.compose.runtime.mutableStateOf
import androidx.compose.runtime.remember
import androidx.compose.runtime.setValue

class MainActivity : ComponentActivity() {
   override fun onCreate(savedInstanceState: Bundle?) {
       super.onCreate(savedInstanceState)
       setContent {
           ComposeTutorialTheme {
               Conversation(SampleData.conversationSample)
           }
       }
   }
}

@Composable
fun MessageCard(msg: Message) {
    Row(modifier = Modifier.padding(all = 8.dp)) {
        Image(
            painter = painterResource(R.drawable.profile_picture),
            contentDescription = null,
            modifier = Modifier
                .size(40.dp)
                .clip(CircleShape)
                .border(1.5.dp, MaterialTheme.colorScheme.primary, CircleShape)
        )
        Spacer(modifier = Modifier.width(8.dp))

        // We keep track if the message is expanded or not in this
        // variable
        var isExpanded by remember { mutableStateOf(false) }

        // We toggle the isExpanded variable when we click on this Column
        Column(modifier = Modifier.clickable { isExpanded = !isExpanded }) {
            Text(
                text = msg.author,
                color = MaterialTheme.colorScheme.secondary,
                style = MaterialTheme.typography.titleSmall
            )

            Spacer(modifier = Modifier.height(4.dp))

            Surface(
                shape = MaterialTheme.shapes.medium,
                shadowElevation = 1.dp,
            ) {
                Text(
                    text = msg.body,
                    modifier = Modifier.padding(all = 4.dp),
                    // If the message is expanded, we display all its content
                    // otherwise we only display the first line
                    maxLines = if (isExpanded) Int.MAX_VALUE else 1,
                    style = MaterialTheme.typography.bodyMedium
                )
            }
        }
    }
}
// ...
import androidx.compose.animation.animateColorAsState
import androidx.compose.animation.animateContentSize

@Composable
fun MessageCard(msg: Message) {
    Row(modifier = Modifier.padding(all = 8.dp)) {
        Image(
            painter = painterResource(R.drawable.profile_picture),
            contentDescription = null,
            modifier = Modifier
                .size(40.dp)
                .clip(CircleShape)
                .border(1.5.dp, MaterialTheme.colorScheme.secondary, CircleShape)
        )
        Spacer(modifier = Modifier.width(8.dp))

        // We keep track if the message is expanded or not in this
        // variable
        var isExpanded by remember { mutableStateOf(false) }
        // surfaceColor will be updated gradually from one color to the other
        val surfaceColor by animateColorAsState(
            if (isExpanded) MaterialTheme.colorScheme.primary else MaterialTheme.colorScheme.surface,
        )

        // We toggle the isExpanded variable when we click on this Column
        Column(modifier = Modifier.clickable { isExpanded = !isExpanded }) {
            Text(
                text = msg.author,
                color = MaterialTheme.colorScheme.secondary,
                style = MaterialTheme.typography.titleSmall
            )

            Spacer(modifier = Modifier.height(4.dp))

            Surface(
                shape = MaterialTheme.shapes.medium,
                shadowElevation = 1.dp,
                // surfaceColor color will be changing gradually from primary to surface
                color = surfaceColor,
                // animateContentSize will change the Surface size gradually
                modifier = Modifier.animateContentSize().padding(1.dp)
            ) {
                Text(
                    text = msg.body,
                    modifier = Modifier.padding(all = 4.dp),
                    // If the message is expanded, we display all its content
                    // otherwise we only display the first line
                    maxLines = if (isExpanded) Int.MAX_VALUE else 1,
                    style = MaterialTheme.typography.bodyMedium
                )
            }
        }
    }
}
次のステップ
お疲れ様でした。Compose チュートリアルはこれで完了です。ここでは、画像とテキストを含む展開可能なアニメーション化されたメッセージのリストを効果的に表示するシンプルなチャット画面を構築しました。画面はマテリアル デザインの原則に従ってデザインされ、ダークテーマとプレビューが含まれておいます。そして、すべてが 100 行に満たないコードで作成されています。
これまでの学習内容は次のとおりです。
- コンポーズ可能な関数を定義する
- コンポーザブルにさまざまな要素を追加する
- レイアウト コンポーザブルを使用して UI コンポーネントを構造化する
- 修飾子を使用してコンポーザブルを拡張する
- 効果的なリストを作成する
- 状態をトラッキングし、変更する
- コンポーザブルにユーザー操作を追加する
- メッセージの展開中にメッセージをアニメーション化する
これらの手順について詳細を確認するには、下記のリソースをご覧ください。


