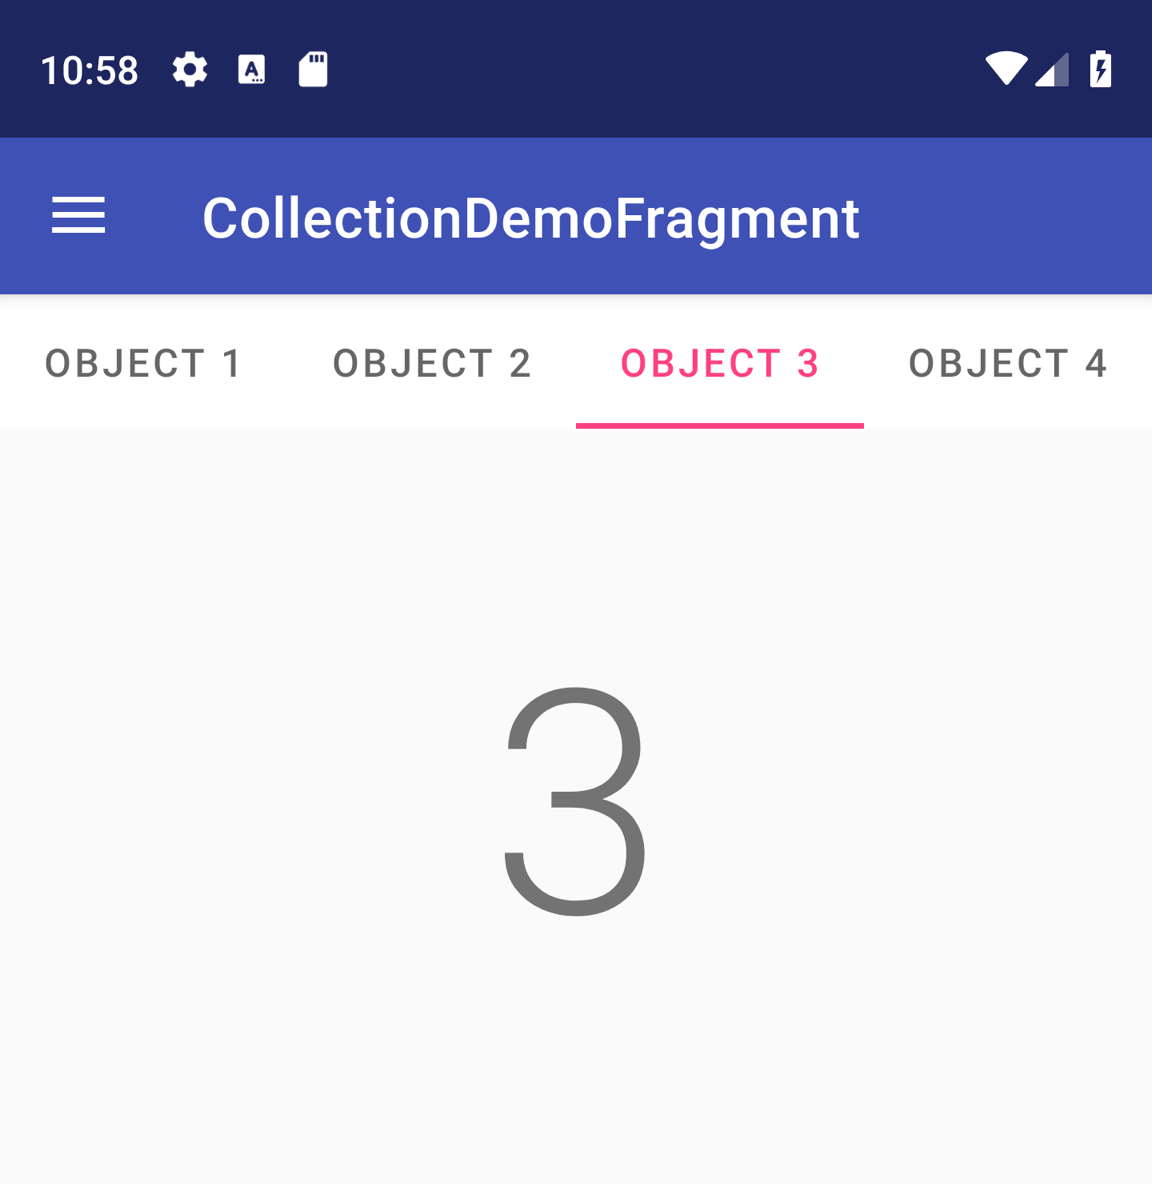
滑动视图允许您使用水平手指手势(即滑动)在同级子屏幕(例如标签页)之间进行导航。此导航模式也称为“水平分页”。
本主题介绍了如何创建具有滑动视图(以便在标签页之间切换)的标签页布局,以及如何显示标题条而不是标签页。
实现滑动视图
您可以使用 AndroidX 的 ViewPager2 widget 创建滑动视图。如需使用 ViewPager2 和标签页,您需要将 ViewPager2 和 Material 组件的依赖项添加到项目中。
如需使用 ViewPager2 设置布局,请将 <ViewPager2> 元素添加到 XML 布局中。例如,如果滑动视图中的每个页面都会使用整个布局,该布局将如下所示:
<androidx.viewpager2.widget.ViewPager2
    xmlns:android="http://schemas.android.com/apk/res/android"
    android:id="@+id/pager"
    android:layout_width="match_parent"
    android:layout_height="match_parent" />
如需插入代表各个页面的子视图,请将此布局挂接到 FragmentStateAdapter。下面演示了如何用它在一系列 Fragment 对象集合中滑动浏览对象:
Kotlin
class CollectionDemoFragment : Fragment() {
    // When requested, this adapter returns a DemoObjectFragment,
    // representing an object in the collection.
    private lateinit var demoCollectionAdapter: DemoCollectionAdapter
    private lateinit var viewPager: ViewPager2

    override fun onCreateView(
        inflater: LayoutInflater,
        container: ViewGroup?,
        savedInstanceState: Bundle?
    ): View? {
        return inflater.inflate(R.layout.collection_demo, container, false)
    }

    override fun onViewCreated(view: View, savedInstanceState: Bundle?) {
        demoCollectionAdapter = DemoCollectionAdapter(this)
        viewPager = view.findViewById(R.id.pager)
        viewPager.adapter = demoCollectionAdapter
    }
}

class DemoCollectionAdapter(fragment: Fragment) : FragmentStateAdapter(fragment) {

    override fun getItemCount(): Int = 100

    override fun createFragment(position: Int): Fragment {
        // Return a NEW fragment instance in createFragment(int).
        val fragment = DemoObjectFragment()
        fragment.arguments = Bundle().apply {
            // The object is just an integer.
            putInt(ARG_OBJECT, position + 1)
        }
        return fragment
    }
}

private const val ARG_OBJECT = "object"

// Instances of this class are fragments representing a single
// object in the collection.
class DemoObjectFragment : Fragment() {

    override fun onCreateView(
        inflater: LayoutInflater,
        container: ViewGroup?,
        savedInstanceState: Bundle?
    ): View {
        return inflater.inflate(R.layout.fragment_collection_object, container, false)
    }

    override fun onViewCreated(view: View, savedInstanceState: Bundle?) {
        arguments?.takeIf { it.containsKey(ARG_OBJECT) }?.apply {
            val textView: TextView = view.findViewById(android.R.id.text1)
            textView.text = getInt(ARG_OBJECT).toString()
        }
    }
}
Java
public class CollectionDemoFragment extends Fragment {
    // When requested, this adapter returns a DemoObjectFragment,
    // representing an object in the collection.
    DemoCollectionAdapter demoCollectionAdapter;
    ViewPager2 viewPager;

    @Nullable
    @Override
    public View onCreateView(@NonNull LayoutInflater inflater, @Nullable ViewGroup container,
            @Nullable Bundle savedInstanceState) {
        return inflater.inflate(R.layout.collection_demo, container, false);
    }

    @Override
    public void onViewCreated(@NonNull View view, @Nullable Bundle savedInstanceState) {
        demoCollectionAdapter = new DemoCollectionAdapter(this);
        viewPager = view.findViewById(R.id.pager);
        viewPager.setAdapter(demoCollectionAdapter);
    }
}

public class DemoCollectionAdapter extends FragmentStateAdapter {
    public DemoCollectionAdapter(Fragment fragment) {
        super(fragment);
    }

    @NonNull
    @Override
    public Fragment createFragment(int position) {
        // Return a NEW fragment instance in createFragment(int).
        Fragment fragment = new DemoObjectFragment();
        Bundle args = new Bundle();
        // The object is just an integer.
        args.putInt(DemoObjectFragment.ARG_OBJECT, position + 1);
        fragment.setArguments(args);
        return fragment;
    }

    @Override
    public int getItemCount() {
        return 100;
    }
}

// Instances of this class are fragments representing a single
// object in the collection.
public class DemoObjectFragment extends Fragment {
    public static final String ARG_OBJECT = "object";

    @Nullable
    @Override
    public View onCreateView(@NonNull LayoutInflater inflater, @Nullable ViewGroup container,
            @Nullable Bundle savedInstanceState) {
        return inflater.inflate(R.layout.fragment_collection_object, container, false);
    }

    @Override
    public void onViewCreated(@NonNull View view, @Nullable Bundle savedInstanceState) {
        Bundle args = getArguments();
        ((TextView) view.findViewById(android.R.id.text1))
                .setText(Integer.toString(args.getInt(ARG_OBJECT)));
    }
}
下面几部分将介绍如何添加标签页,以帮助简化页面之间的导航。
使用 TabLayout 添加标签页
TabLayout 提供了一种横向显示标签页的方式。当与 ViewPager2 结合使用时,TabLayout 可以提供一种熟悉的界面,让用户在滑动视图中浏览各个页面。

TabLayout。
如需在 ViewPager2 中加入 TabLayout,请在 <ViewPager2> 元素上方添加 <TabLayout> 元素:
<LinearLayout xmlns:android="http://schemas.android.com/apk/res/android"
    android:layout_width="match_parent"
    android:layout_height="match_parent"
    android:orientation="vertical">

    <com.google.android.material.tabs.TabLayout
        android:id="@+id/tab_layout"
        android:layout_width="match_parent"
        android:layout_height="wrap_content" />

    <androidx.viewpager2.widget.ViewPager2
        android:id="@+id/pager"
        android:layout_width="match_parent"
        android:layout_height="0dp"
        android:layout_weight="1" />

</LinearLayout>
接下来,创建 TabLayoutMediator 以将 TabLayout 与 ViewPager2 相关联,并执行附加操作,如下所示:
Kotlin
class CollectionDemoFragment : Fragment() {
    ...
    override fun onViewCreated(view: View, savedInstanceState: Bundle?) {
        val tabLayout = view.findViewById(R.id.tab_layout)
        TabLayoutMediator(tabLayout, viewPager) { tab, position ->
            tab.text = "OBJECT ${(position + 1)}"
        }.attach()
    }
    ...
}
Java
public class CollectionDemoFragment extends Fragment {
    ...
    @Override
    public void onViewCreated(@NonNull View view, @Nullable Bundle savedInstanceState) {
        TabLayout tabLayout = view.findViewById(R.id.tab_layout);
        new TabLayoutMediator(tabLayout, viewPager,
                (tab, position) -> tab.setText("OBJECT " + (position + 1))
        ).attach();
    }
    ...
}
如需了解标签页布局的其他设计准则,请参阅适用于标签页的 Material Design 文档。
其他资源
如需详细了解 ViewPager2,请参阅下面列出的其他资源。
示例
- GitHub 上的 ViewPager2 示例

