This documentation walks you through using the Android XR Emulator and the Layout Inspector in Android Studio for building an XR app.
Android Studio includes the following new features for XR:
- Android XR Emulator
- XR Support in Layout Inspector
Android XR Emulator
The Android XR Emulator provides a virtualized XR device for testing and debugging your XR apps in Android Studio. It emulates an XR device, allowing you to experience your app in a 3D spatial environment. This lets you build your apps without the need for physical hardware during early development stages, streamlining your workflow and accelerating iteration.
If this is your first time using an emulator with Android Studio, consider reviewing general documentation for the Android emulator.
Launch the Android XR Emulator
After installing the Android XR Emulator, click the Run button in Device Manager on the device.
Enable the mouse and keyboard
Currently, the emulator supports only mouse and keyboard input. When using the emulator, make sure the keyboard and mouse icon is selected.
Once you've done this, you can start interacting with various elements within the virtual space by moving the mouse over the emulator window.
Look and move around in the virtual environment
The Android XR emulator renders application elements in a virtual 3D environment. Use the following controls to change the direction of your view, pan, dolly, rotate, and reset:
Pan: Click and drag the mouse to move up, down, and side to side. This will allow viewing the emulator contents from different angles |
|
Dolly: Click and drag the mouse to move closer or farther from the objects in view |
|
Rotate: Click and drag the mouse to pivot your view in that direction |
|
Reset: Click this button to return the emulator to the default view |
You can also use the following keyboard shortcuts to move around in the virtual environment. To use these while using mouse and keyboard input, hold the Option key (macOS) or Alt key (Windows).
- W (or up arrow key): Move forward in your current view.
- A (or left arrow key): Side-step left.
- S: (or down arrow key): Move backward.
- D (or right arrow key): Side-step right.
- Q: Move vertically downward.
- E: Move vertically upward.
Enable passthrough mode
Use the following menu option to enable or disable a simulated passthrough environment.
When enabled, passthrough mode will display a simulated indoor environment. Use this mode to test applications in mixed reality.
Other Emulator Controls
Power: Simulates powering the device on or off |
|
Volume: Simulates volume control |
|
Screenshot: Takes a screenshot of the current state of the device |
|
Android 3 button control: Simulates the back, Home, and Overview buttons |
Troubleshooting
Check the release notes for any known issues and workarounds.
If you encounter a problem that is not a known issue, view the support page for instructions on getting help and reporting issues.
Including a crash report or a bug report will help us better understand the issue. Screenshots and recordings also provide additional details needed. The instructions in this section explain how to upload a crash report and use adb to generate a bug report.
Use the Android Studio Layout Inspector with an XR app
Once you have started building your spatial panels and orbiters, you can inspect your layout with the Android Studio Layout Inspector. If you are unfamiliar with the Layout Inspector, see our guide on layout debugging.
Follow these steps to use the Layout Inspector with your Android XR app:
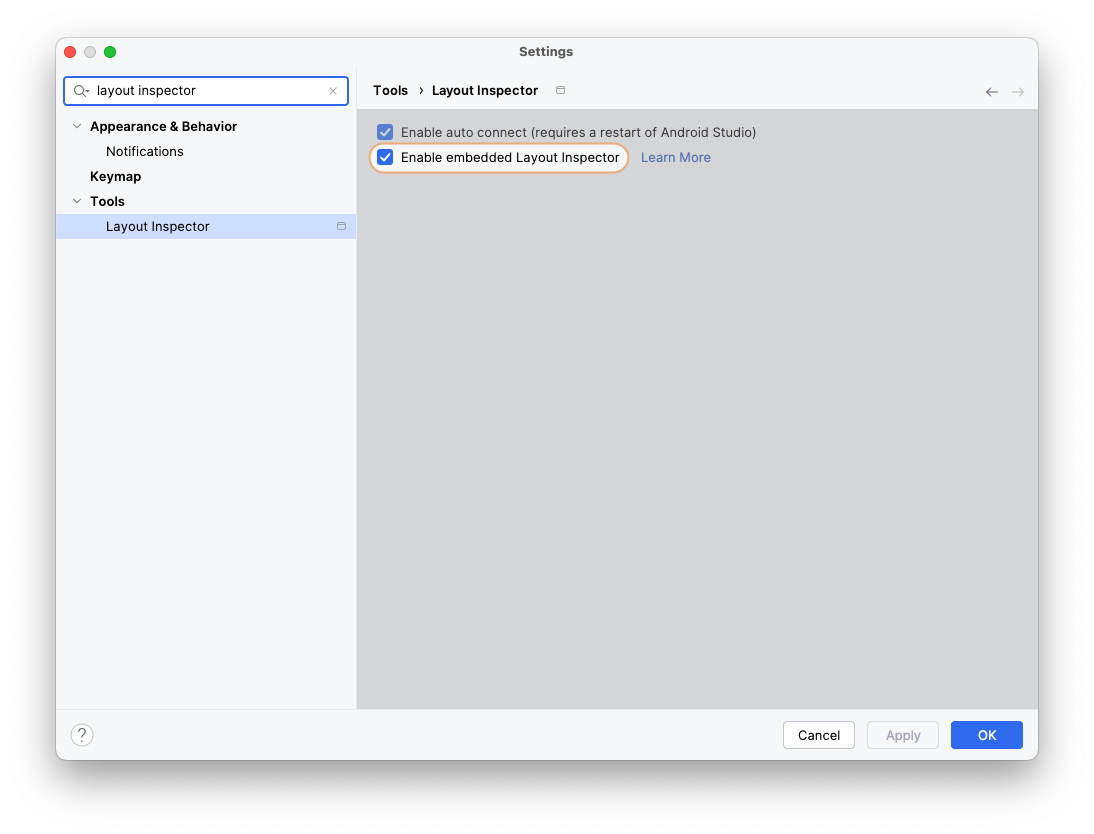
- With your project open in Android Studio, ensure that the embedded Layout Inspector is disabled (uncheck the option and restart Android Studio).
- Run your app.
- Once the application deployment has completed, choose Tools > Layout Inspector.
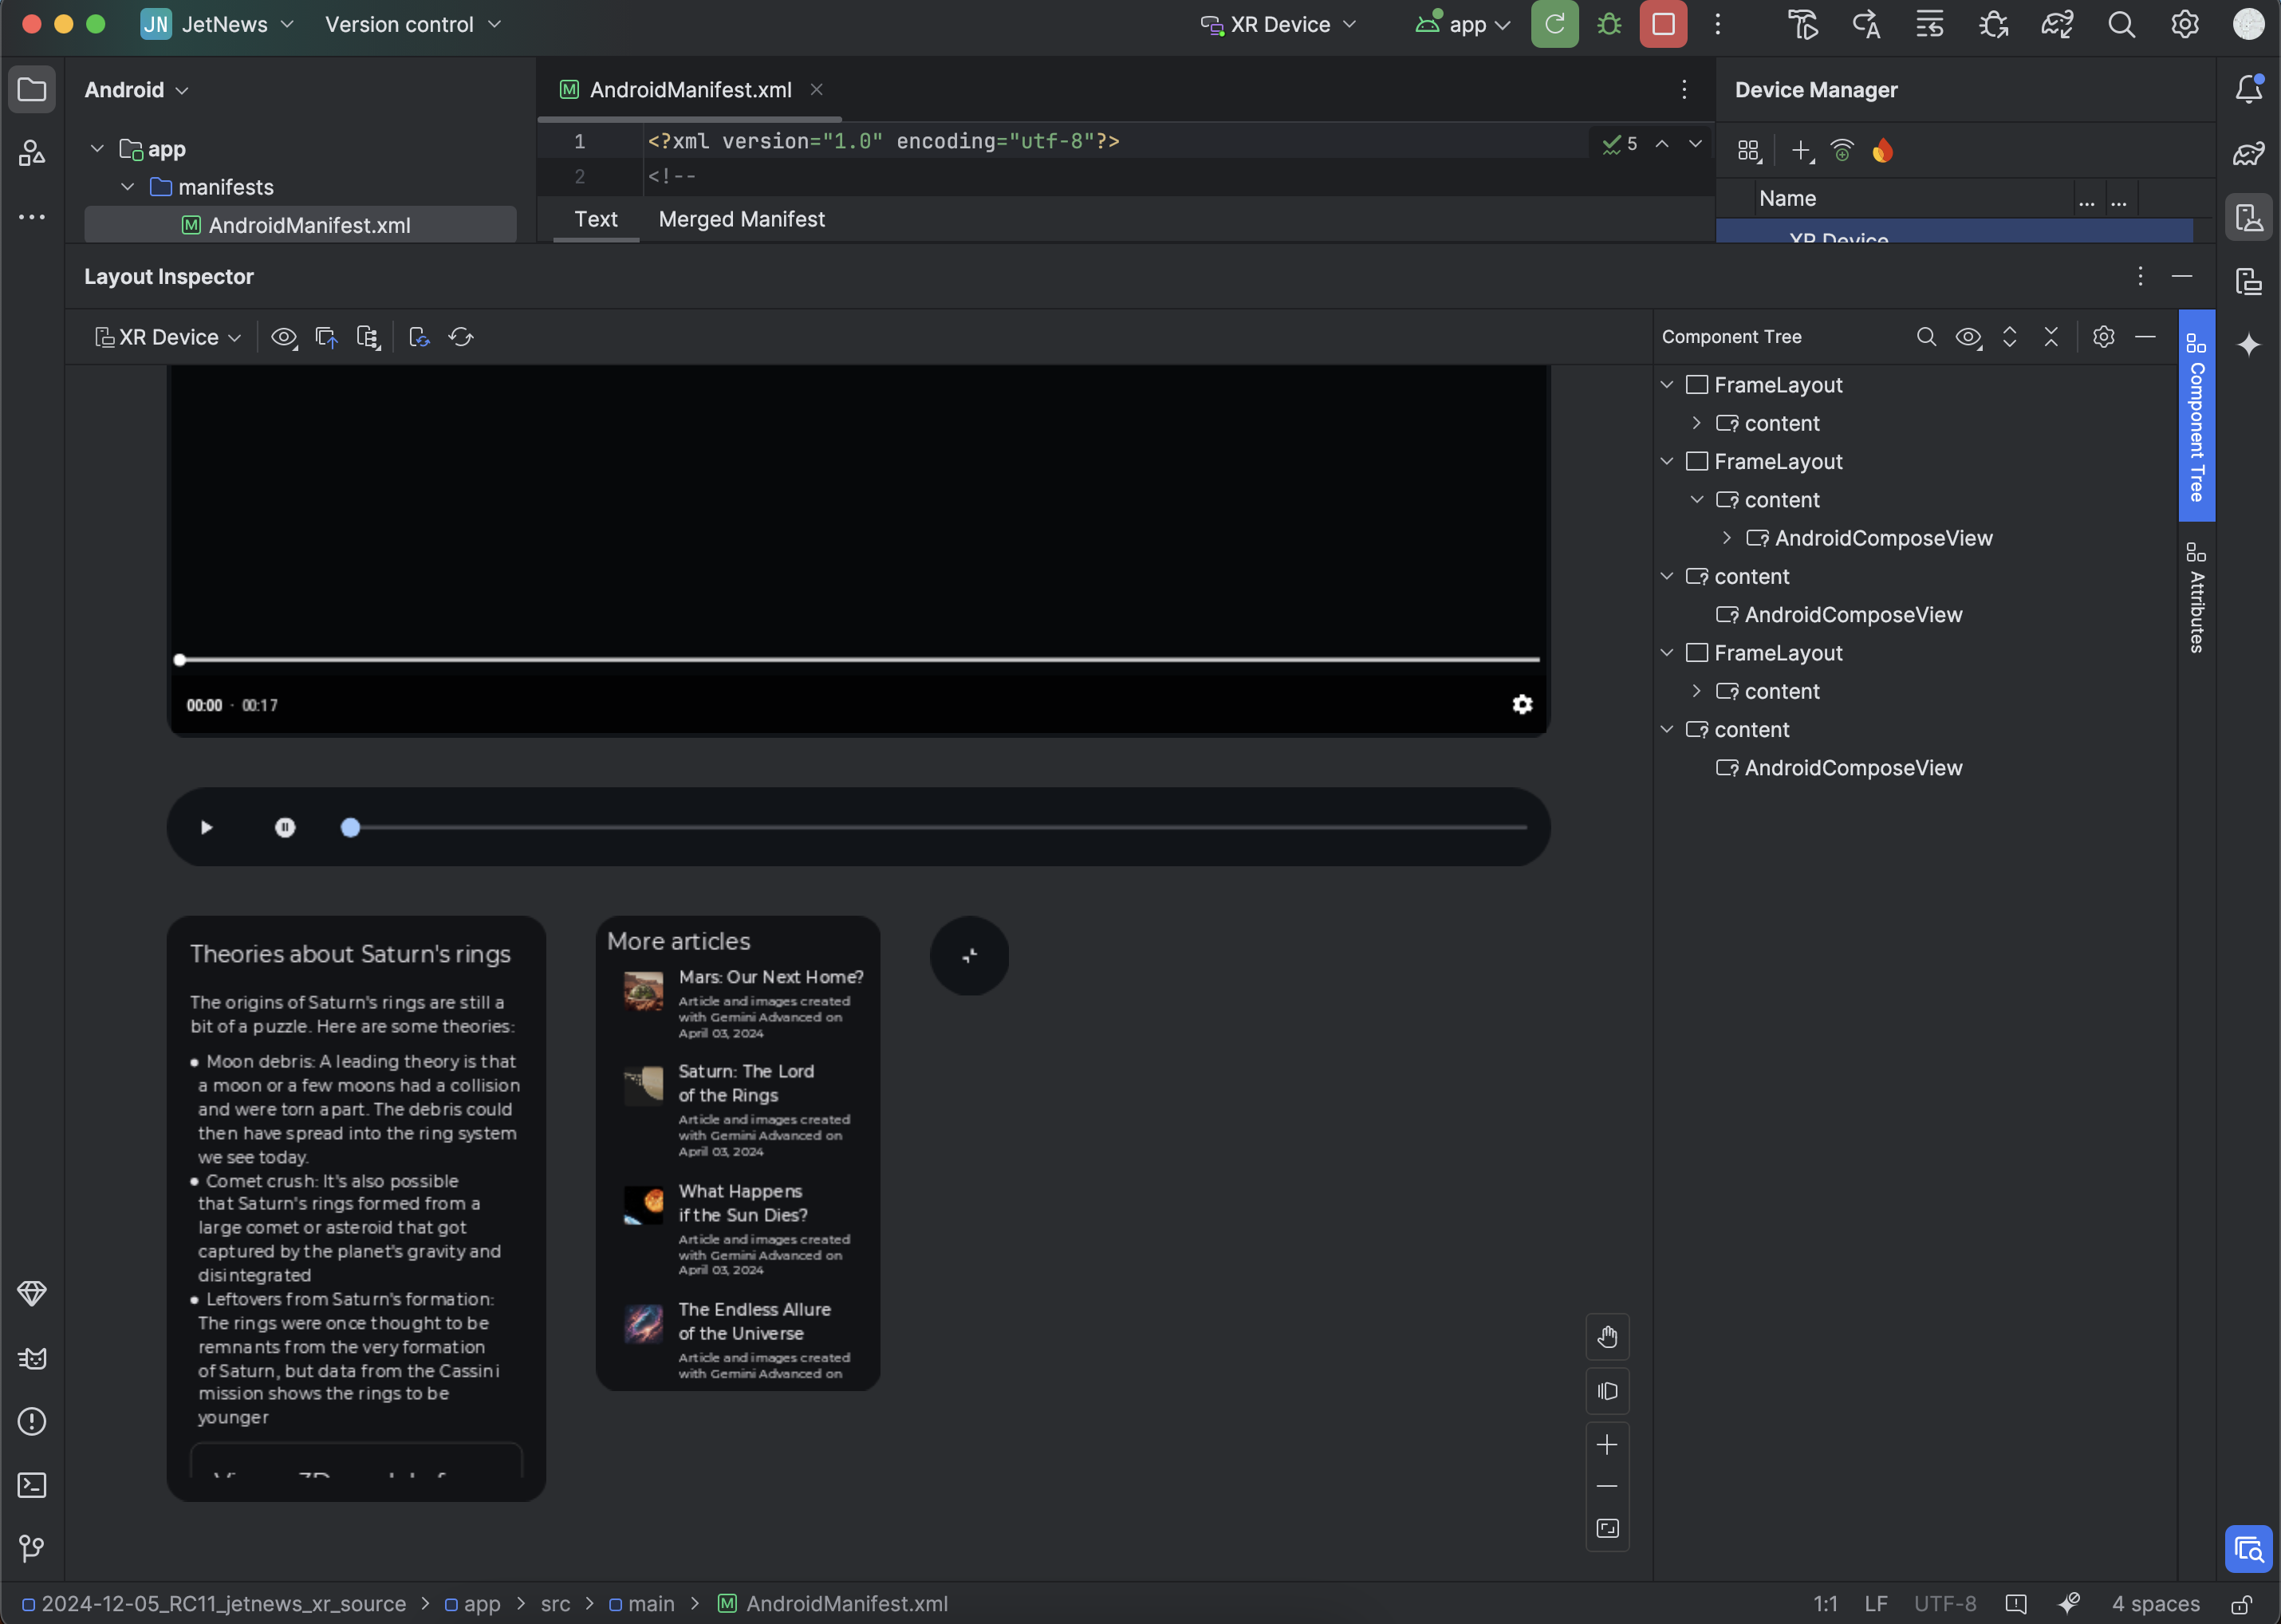
This Layout Inspector will open in an embedded window. After a few seconds, the preview displays on the left and the component tree displays on the right. Orbiters and panels appear as separate objects beneath your main content.
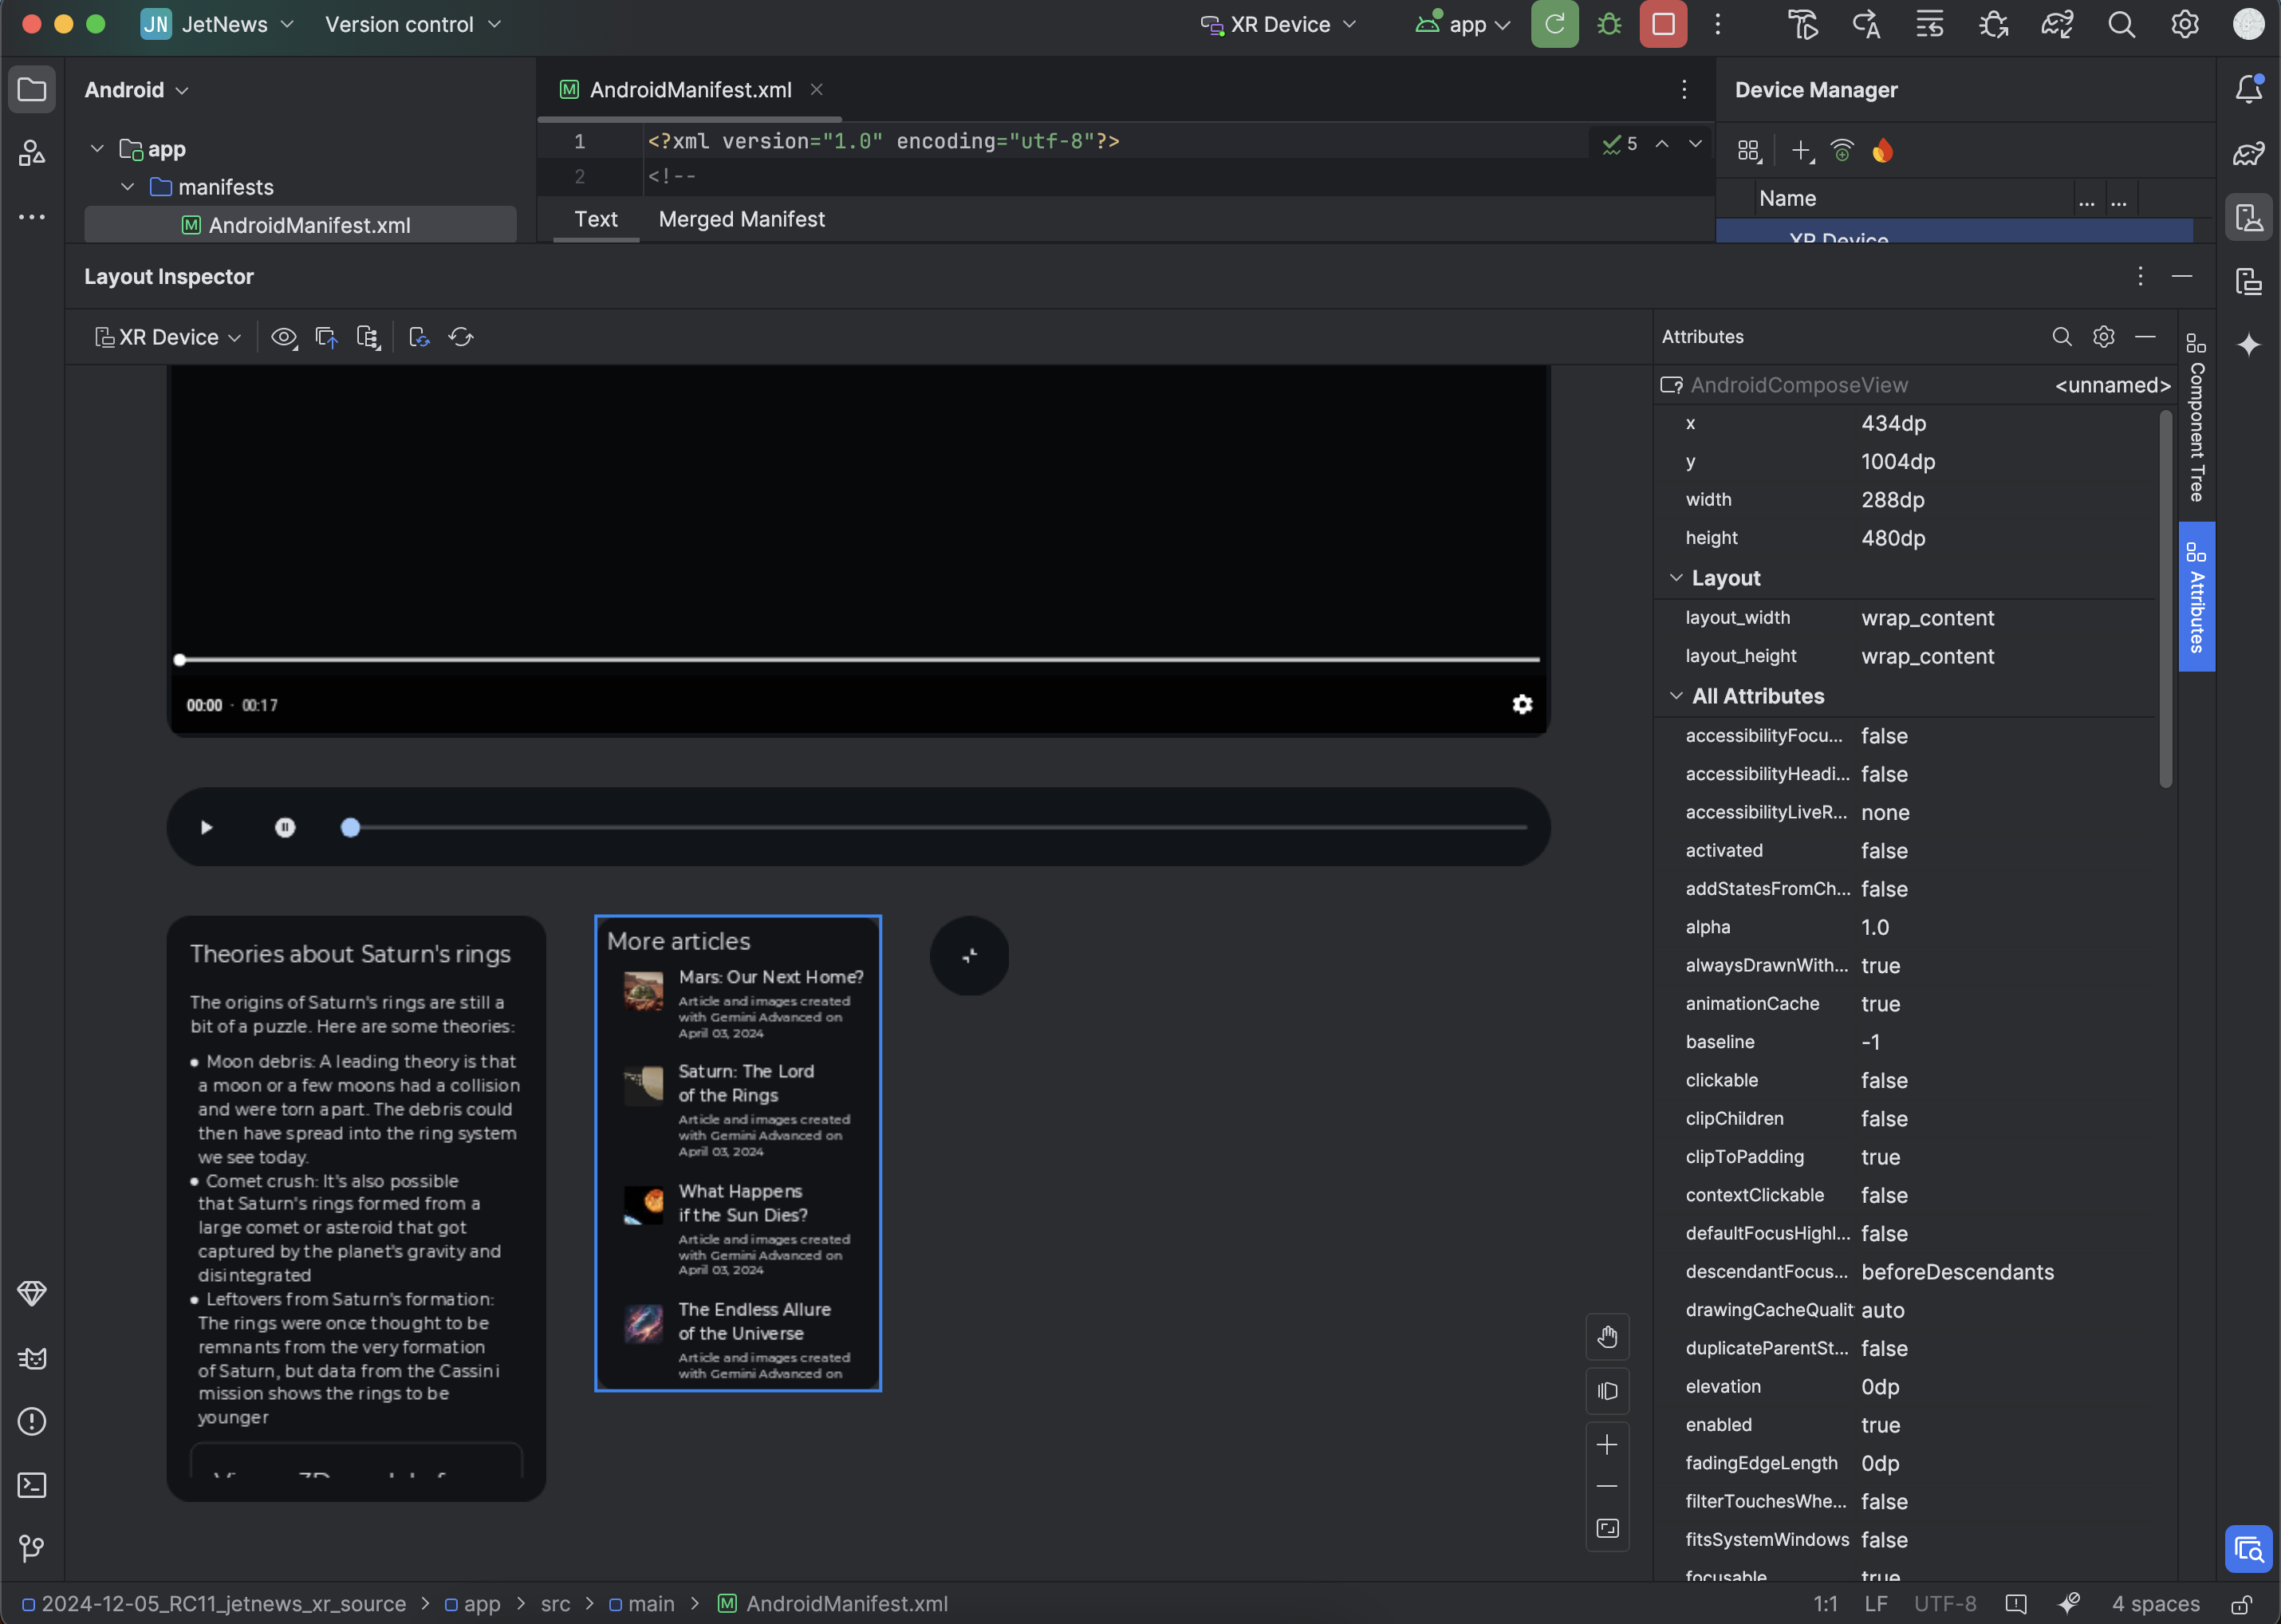
Now, you can interact with your app in the emulator. If you want to inspect any component, click it on the preview or in the component tree.
You can see the component attributes by clicking the attributes tab on the right corner.
Enable Usage Statistics to help improve Android Studio for XR
Consider enabling usage statistics and sending feedback to help us improve these tools. Because this is a canary version of Android Studio, many of these features are still under development.
Click Settings > Appearance & Behavior > System Settings > Data Sharing, and ensure that Send usage statistics to google is selected.