測試與資料流通訊的單元或模組的方式,取決於接受測試的主體是否將資料流做為輸入內容或輸出內容。
- 如果受測試的主體觀測到資料流,則能在可透過測試控制的假依附元件內產生資料流。
- 如果單元或模組會公開資料流,您就可以讀取和驗證測試中的資料流發出的一個或多個項目。
建立假生產者
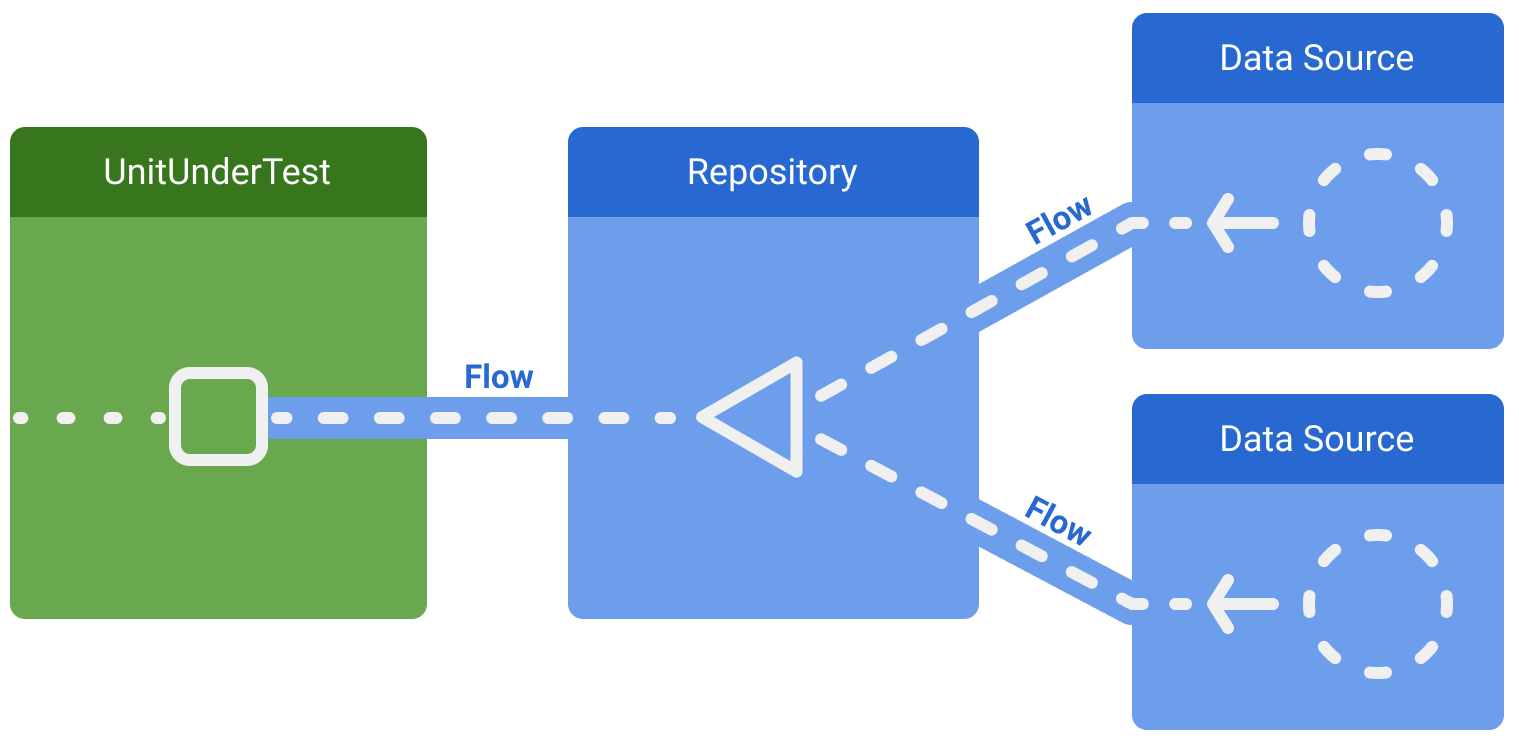
如果受測試的主體是資料流的消費者,一種常見的測試方式是,以假的實作取代生產者。例如,假設某個類別會觀測存放區,而該存放區會從正式環境中的兩個資料來源擷取資料:

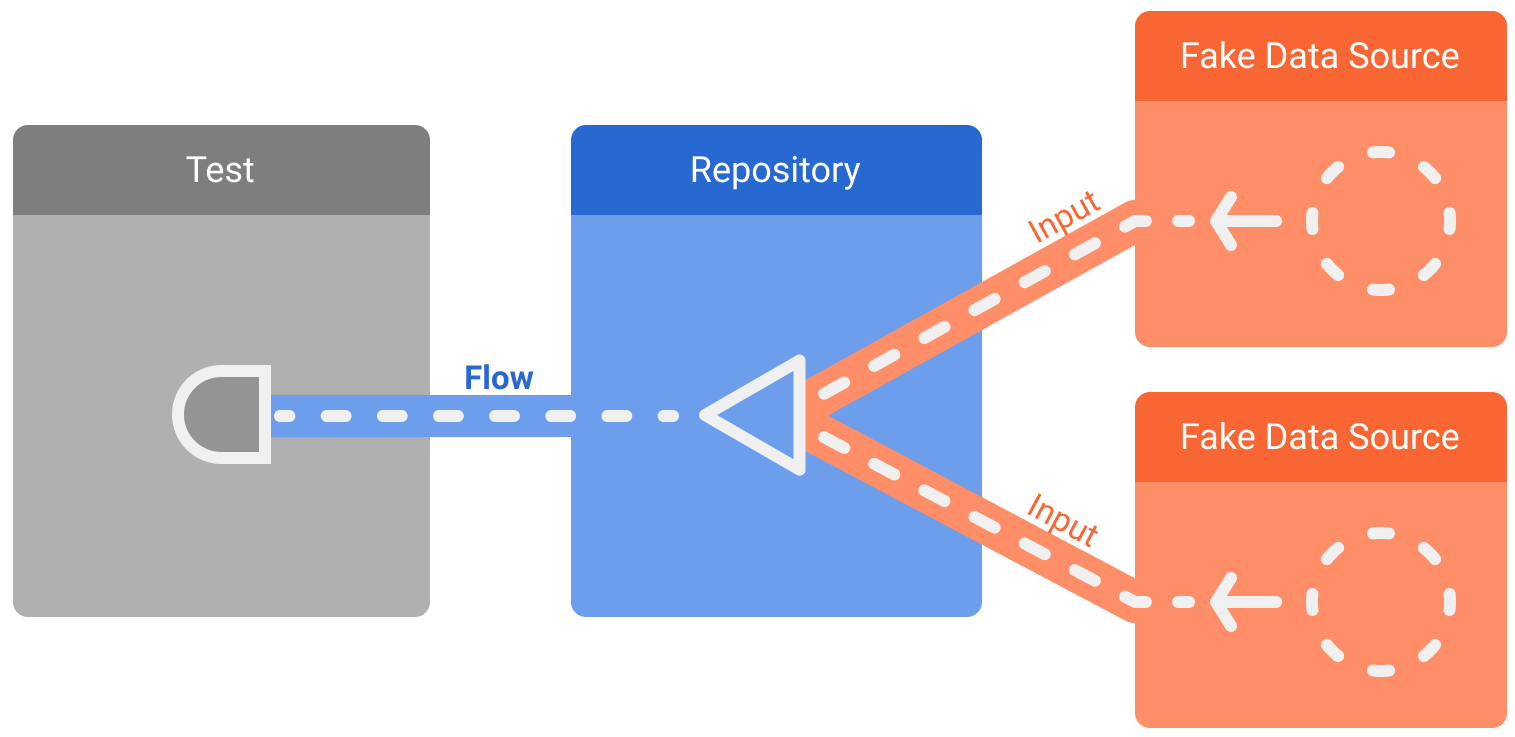
如要使測試具有確定性,您可以將存放區及其依附元件替換成一律發出相同假資料的假存放區:

如要發出資料流中一系列預先定義的值,請使用 flow 建構工具:
class MyFakeRepository : MyRepository {
    fun observeCount() = flow {
        emit(ITEM_1)
    }
}
在測試中,系統插入了這個假存放區,並取代實際的實作:
@Test
fun myTest() {
    // Given a class with fake dependencies:
    val sut = MyUnitUnderTest(MyFakeRepository())
    // Trigger and verify
    ...
}
現在,您已控制受測試主體的輸出內容,所以可以透過檢查輸出內容,來驗證主體是否正常執行。
在測試中斷言資料流發出作業
如果受測試的主體正在公開資料流,那麼測試便需要針對資料串流元素發表斷言。
假設上一個範例的存放區公開資料流:

部分測試僅需要檢查第一個發出作業,或資料流內有限數量的項目。
只要呼叫 first(),即可取用向資料流發出的第一個發出作業。此函式會等待接收第一個項目,然後將取消訊號傳送給生產者。
@Test
fun myRepositoryTest() = runTest {
    // Given a repository that combines values from two data sources:
    val repository = MyRepository(fakeSource1, fakeSource2)

    // When the repository emits a value
    val firstItem = repository.counter.first() // Returns the first item in the flow

    // Then check it's the expected item
    assertEquals(ITEM_1, firstItem)
}
如果測試需要檢查多個值,則呼叫 toList() 會讓資料流等待來源發出其所有值,然後再將這些值傳回,做為清單。這僅適用於有限的資料串流。
@Test
fun myRepositoryTest() = runTest {
    // Given a repository with a fake data source that emits ALL_MESSAGES
    val messages = repository.observeChatMessages().toList()

    // When all messages are emitted then they should be ALL_MESSAGES
    assertEquals(ALL_MESSAGES, messages)
}
如果資料串流需要較複雜的項目集合,或沒有回傳有限數量的項目,您可以使用 Flow API 來選擇及轉換項目。例如:
// Take the second item
outputFlow.drop(1).first()

// Take the first 5 items
outputFlow.take(5).toList()

// Takes the first item verifying that the flow is closed after that
outputFlow.single()

// Finite data streams
// Verify that the flow emits exactly N elements (optional predicate)
outputFlow.count()
outputFlow.count(predicate)
在測試期間持續收集
如上述範例所示,使用 toList() 收集資料流會在內部使用 collect(),並會暫停運行,直到整體結果清單做好回傳準備為止。
如果想在已經發出的值之間穿插動作,以便讓資料流發出值和斷言,您可以在測試期間持續收集資料流的值。
舉例來說,您可以測試以下 Repository 類別,同時加上內含 emit 方法的假資料來源實作,便可在測試期間動態產生值:
class Repository(private val dataSource: DataSource) {
    fun scores(): Flow<Int> {
        return dataSource.counts().map { it * 10 }
    }
}

class FakeDataSource : DataSource {
    private val flow = MutableSharedFlow<Int>()
    suspend fun emit(value: Int) = flow.emit(value)
    override fun counts(): Flow<Int> = flow
}
藉由在測試中加入假資料,就能建立可以持續接收 Repository 值的收集協同程式。在此範例中,我們會將這些內容收集到清單內,然後在內容執行斷言:
@Test
fun continuouslyCollect() = runTest {
    val dataSource = FakeDataSource()
    val repository = Repository(dataSource)

    val values = mutableListOf<Int>()
    backgroundScope.launch(UnconfinedTestDispatcher(testScheduler)) {
        repository.scores().toList(values)
    }

    dataSource.emit(1)
    assertEquals(10, values[0]) // Assert on the list contents

    dataSource.emit(2)
    dataSource.emit(3)
    assertEquals(30, values[2])

    assertEquals(3, values.size) // Assert the number of items collected
}
因為 Repository 在此處公開的資料流永遠不會完成,因此收集該項目的 toList 呼叫也永遠不會回傳。只要在 TestScope.backgroundScope 中啟用收集協同程式,就能確保協同程式會在測試結束前取消。否則 runTest 會持續等待資料流完成,導致測試停止回應,最終失敗。
請看此處的收集協同程式如何利用 UnconfinedTestDispatcher。這樣做可以確保收集協同程式積極啟動,並準備好在 launch 回傳後收集值。
使用 Turbine
第三方的 Turbine 程式庫可以提供便利的 API,讓您用於建立收集協同程式,還可以提供其他測試資料流可用的便利功能:
@Test
fun usingTurbine() = runTest {
    val dataSource = FakeDataSource()
    val repository = Repository(dataSource)

    repository.scores().test {
        // Make calls that will trigger value changes only within test{}
        dataSource.emit(1)
        assertEquals(10, awaitItem())

        dataSource.emit(2)
        awaitItem() // Ignore items if needed, can also use skip(n)

        dataSource.emit(3)
        assertEquals(30, awaitItem())
    }
}
詳情請參閱該程式庫的說明文件。
測試 StateFlows
StateFlow 是可觀測的資料容器,您可以收集這個項目,以便觀測在特定時間內以串流形式持有的值。請注意,這個值串流是混合的,也就是說如果在 StateFlow 內快速設定這些值,那麼該 StateFlow 的收集程式不一定能夠收集到所有中間值,而只能收集最近期的值。
如果您在測試中考量到混合情形,可以按照收集其他資料流的方式收集 StateFlow 的值,包括使用 Turbine 收集。在某些測試情境下,您可能需要嘗試收集並斷言所有的中間值。
不過,我們一般會建議將 StateFlow 視為資料容器,改為斷言其 value 屬性。這樣一來,測試便能在特定時間點驗證物件的目前狀態,不需要考量是否有混合情形。
舉例來說,您可以取用這項從 Repository 收集值的 ViewModel,並公開到 StateFlow 的 UI:
class MyViewModel(private val myRepository: MyRepository) : ViewModel() {
    private val _score = MutableStateFlow(0)
    val score: StateFlow<Int> = _score.asStateFlow()

    fun initialize() {
        viewModelScope.launch {
            myRepository.scores().collect { score ->
                _score.value = score
            }
        }
    }
}
這項 Repository 的假實作可能會像這樣:
class FakeRepository : MyRepository {
    private val flow = MutableSharedFlow<Int>()
    suspend fun emit(value: Int) = flow.emit(value)
    override fun scores(): Flow<Int> = flow
}
使用此假項目測試 ViewModel 時,您可以從此假項目發出值,以便觸發 ViewModel 的 StateFlow 更新行為,然後對更新過的 value 進行斷言:
@Test
fun testHotFakeRepository() = runTest {
    val fakeRepository = FakeRepository()
    val viewModel = MyViewModel(fakeRepository)

    assertEquals(0, viewModel.score.value) // Assert on the initial value

    // Start collecting values from the Repository
    viewModel.initialize()

    // Then we can send in values one by one, which the ViewModel will collect
    fakeRepository.emit(1)
    assertEquals(1, viewModel.score.value)

    fakeRepository.emit(2)
    fakeRepository.emit(3)
    assertEquals(3, viewModel.score.value) // Assert on the latest value
}
使用以 stateIn 建立的 StateFlows
在上一節中,ViewModel 使用 MutableStateFlow 儲存 Repository 的資料流所發出的最新值。這個模式非常常見,且通常會用 stateIn 運算子以更簡易的方式實作,可以將冷資料流轉換為熱 StateFlow:
class MyViewModelWithStateIn(myRepository: MyRepository) : ViewModel() {
    val score: StateFlow<Int> = myRepository.scores()
        .stateIn(viewModelScope, SharingStarted.WhileSubscribed(5000L), 0)
}
stateIn 運算子有 SharingStarted 參數,可以判斷作用時機並開始消費基礎資料流。SharingStarted.Lazily 和 SharingStarted.WhileSubscribed 這類選項經常用於檢視區塊模型。
即使您在測試時在 StateFlow 的 value 進行斷言,仍然需要建立收集程式。您可以使用空的收集程式:
@Test
fun testLazilySharingViewModel() = runTest {
    val fakeRepository = HotFakeRepository()
    val viewModel = MyViewModelWithStateIn(fakeRepository)

    // Create an empty collector for the StateFlow
    backgroundScope.launch(UnconfinedTestDispatcher(testScheduler)) {
        viewModel.score.collect {}
    }

    assertEquals(0, viewModel.score.value) // Can assert initial value

    // Trigger-assert like before
    fakeRepository.emit(1)
    assertEquals(1, viewModel.score.value)

    fakeRepository.emit(2)
    fakeRepository.emit(3)
    assertEquals(3, viewModel.score.value)
}
