Reminder: By Aug 31, 2025, all new apps and updates to existing apps must use Billing Library version 7 or newer. If you need more time to update your app, you can request an extension until Nov 1, 2025. Learn about Play Billing Library version deprecation.
Mantieni tutto organizzato con le raccolte
Salva e classifica i contenuti in base alle tue preferenze.
La Libreria Fatturazione Google Play restituisce una risposta BillingResult per informarti dell'esito di un'azione attivata. Per ulteriori informazioni, consulta la sezione relativa alla gestione dei codici di risposta BillingResult. Prima di
di eseguire il deployment della tua app
nell'ambiente di produzione, puoi testare
i flussi di risposta usando il Simulatore di risposta.
Simulatore di risposta
Quando integri la tua app con la Libreria Fatturazione Play, può essere difficile
per testare tutti i flussi BillingResponseCode, perché non ci sono molti
controllo sulla comunicazione tra il Play Store e il backend di Google Play.
La funzionalità Simulatore di risposta nell'app Play Billing Lab ti consente di
configurare le risposte dei codici di errore per la Libreria Fatturazione Play per testare vari complessi
scenari di errore.
Attiva i test degli override della fatturazione per la Libreria Fatturazione Play
Per abilitare la comunicazione tra il Simulatore di risposta e la tua app,
devi attivare i test di override della fatturazione per la Libreria Fatturazione Google Play
dall'interno della tua app. Per farlo, aggiungi i seguenti tag di metadati al
file AndroidManifest.xml della tua app.
Quando esegui il deployment dell'app nell'ambiente di produzione, devi utilizzare un file AndroidManifest.xml separato che non includa questi tag dei metadati o assicurarti di aver rimosso questi tag dal file AndroidManifest.xml.
Simulare errori della Libreria Fatturazione Play
Per simulare errori della Libreria Fatturazione Play, configura prima i codici di risposta
nell'app Play Billing Lab e poi testa l'app.
Configura un codice di risposta
Nell'app Play Billing Lab, accedi con un account tester delle licenze per la tua app.
Viene visualizzata la Dashboard di Play Billing Lab, inclusa la scheda Simulatore di risposta.
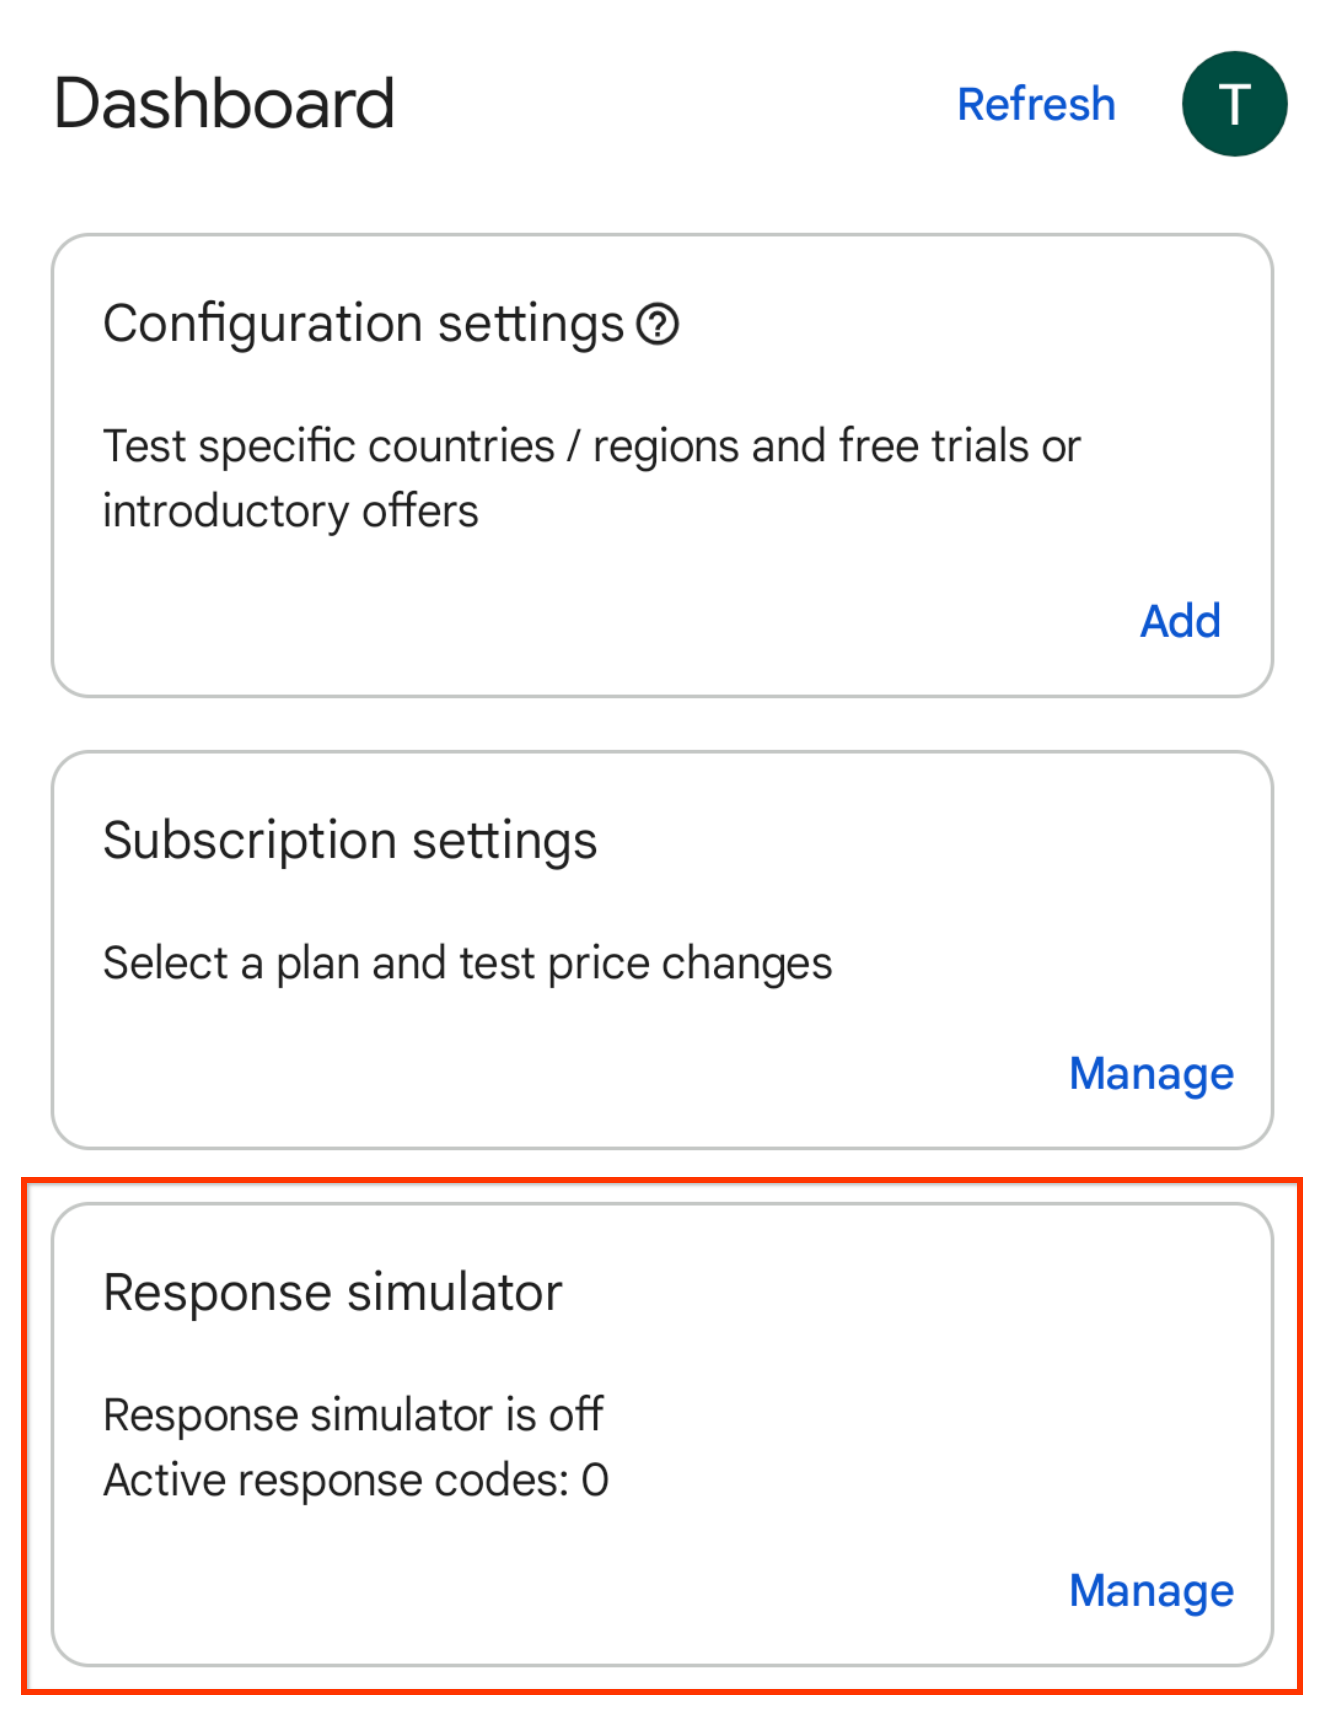
Figura 1. Scheda del simulatore di risposta.
Fai clic su Gestisci nella scheda Simulatore di risposta.
Viene visualizzata la schermata Simulatore di risposta.
Quando richiesto, consenti le notifiche da Play Billing Lab per visualizzare lo stato di connessione della tua app.
Attiva l'opzione Simula le risposte della Libreria Fatturazione Google Play, se non è già attivata.
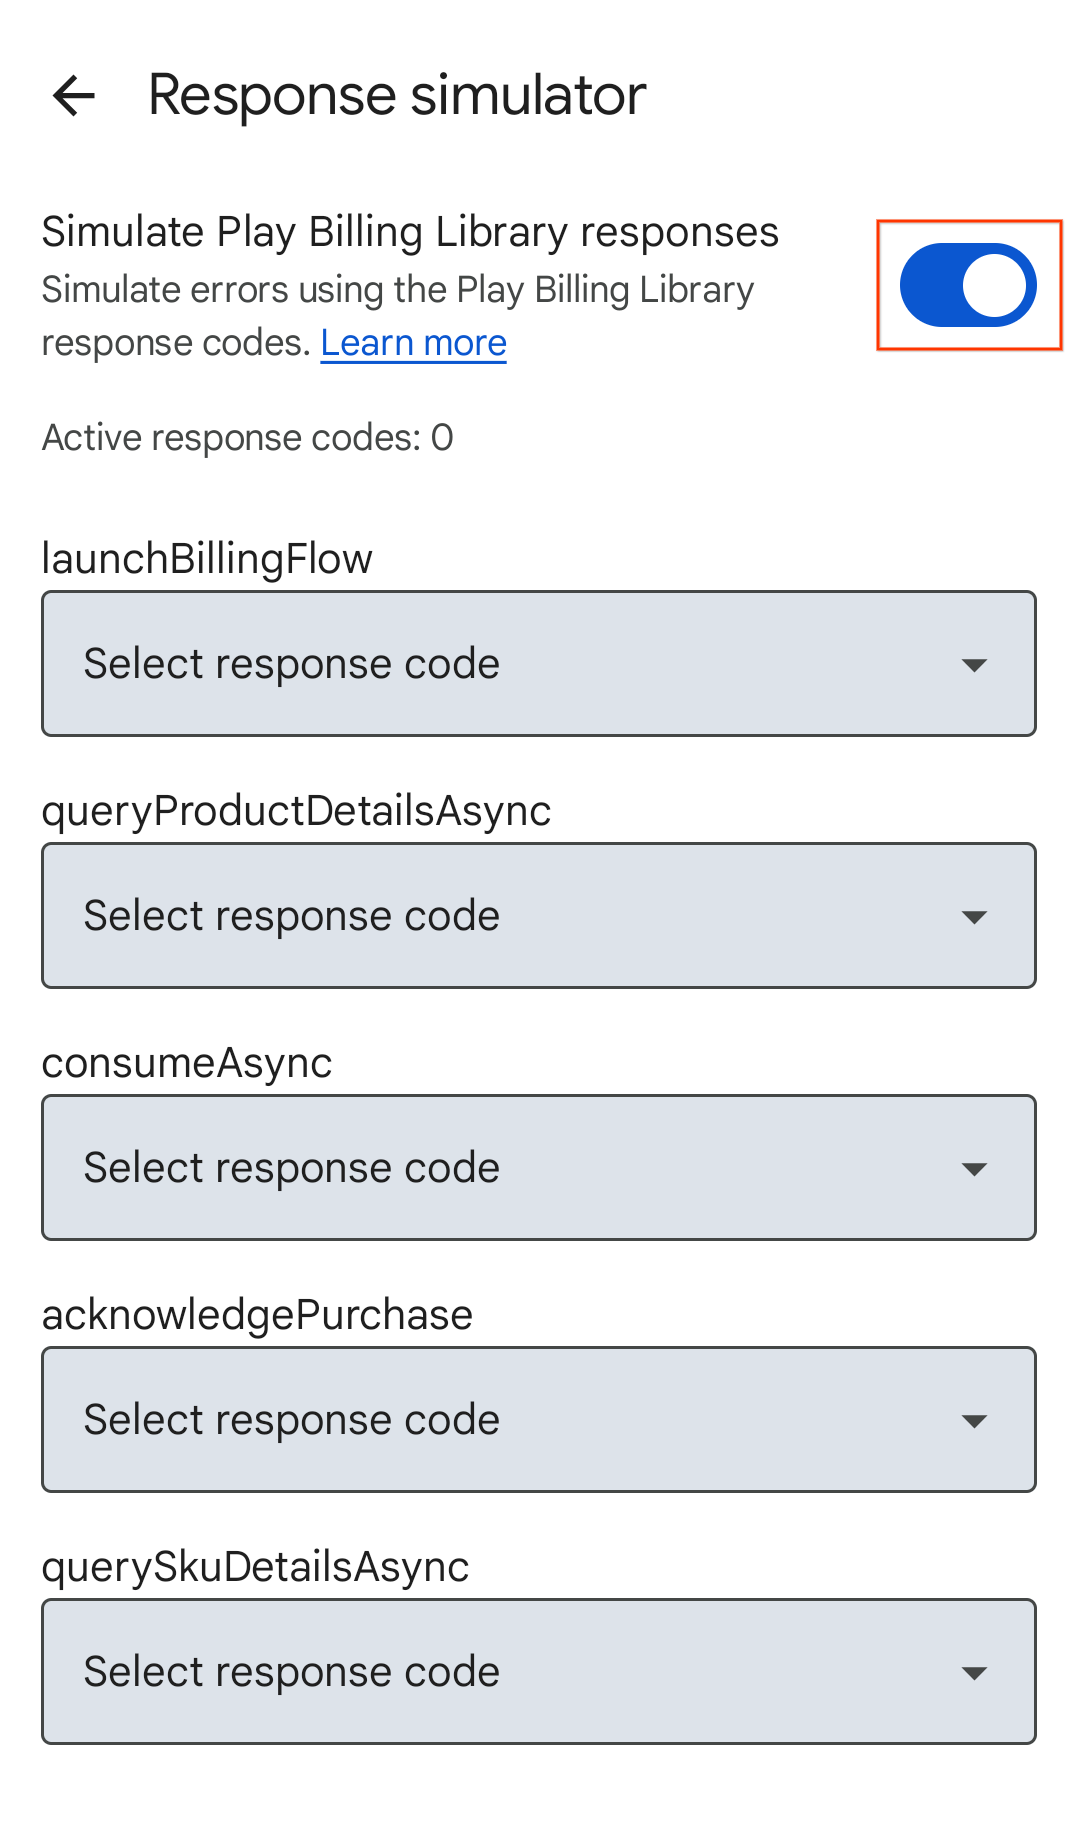
Figura 2. Simula il cambio di risposta della Libreria Fatturazione Play.
Seleziona un codice di risposta per le API Play Billing Library che vuoi testare.
Le selezioni vengono salvate automaticamente e il Simulatore di risposta
è pronto per inviare i codici di risposta selezionati alla tua app.
Testa la gestione degli errori dell'app
Apri l'app.
Se hai consentito le notifiche da Play Billing Lab, nella barra di stato del tuo dispositivo vedrai l'icona di notifica di Play Billing Lab che indica che la connessione al Simulatore di risposta è riuscita.
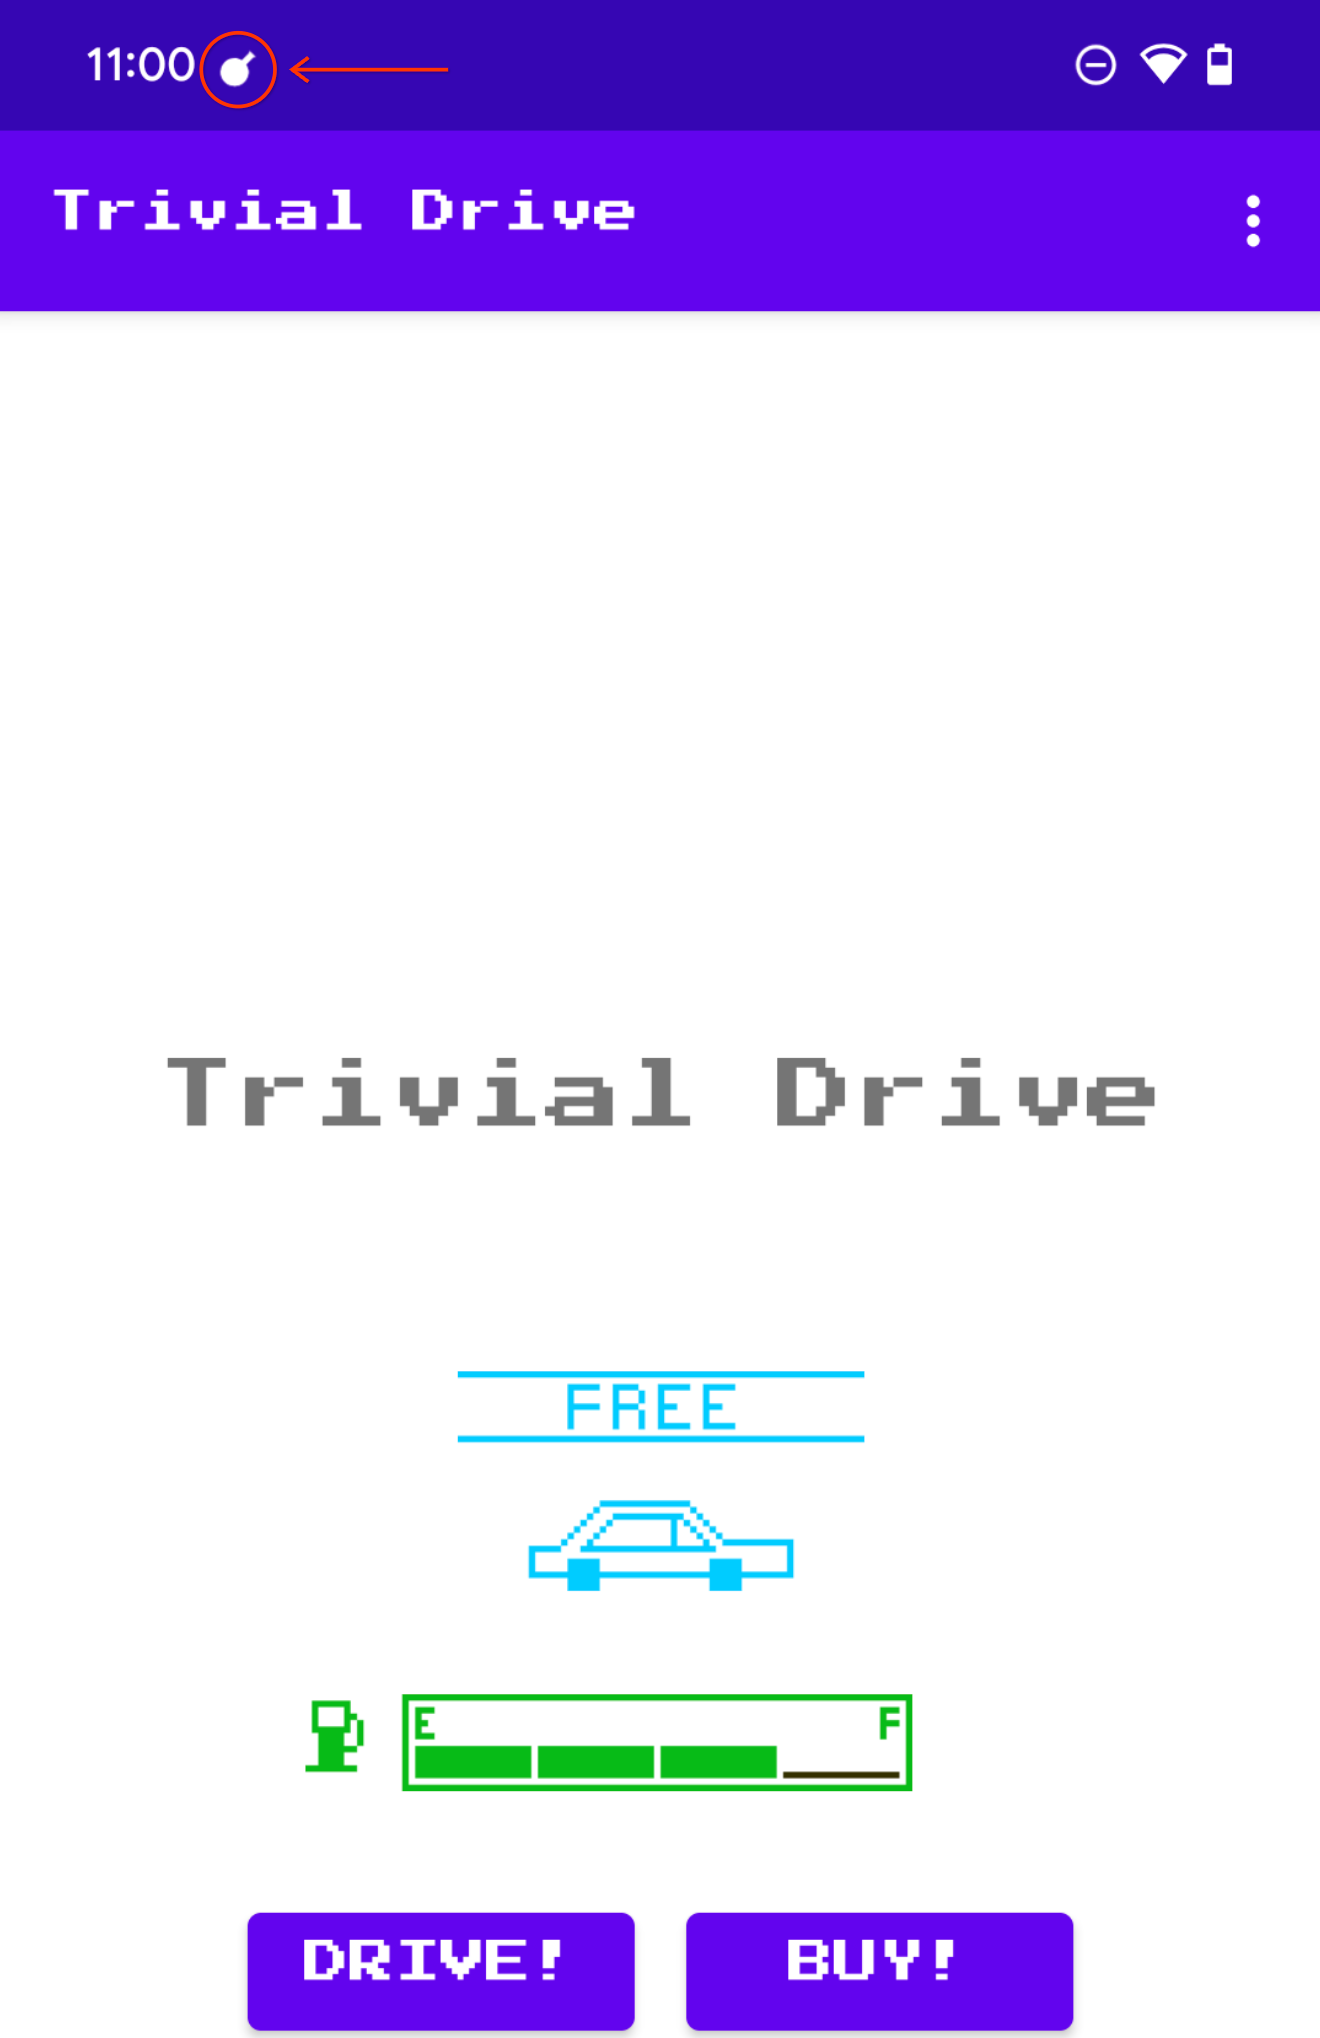
Figura 3. Icona di Play Billing Lab che indica che la connessione è riuscita.
Attiva il metodo dell'API Libreria Fatturazione Play che vuoi testare. Ad esempio:
Se vuoi testare launchBillingFlow, avvia un acquisto in-app
flusso di lavoro.
I campioni di contenuti e codice in questa pagina sono soggetti alle licenze descritte nella Licenza per i contenuti. Java e OpenJDK sono marchi o marchi registrati di Oracle e/o delle sue società consociate.
Ultimo aggiornamento 2025-07-27 UTC.
[null,null,["Ultimo aggiornamento 2025-07-27 UTC."],[],[],null,["# Test BillingResult response codes\n\nThe Play Billing Library returns a [`BillingResult`](/reference/com/android/billingclient/api/BillingResult) response to let you\nknow the outcome of an action that was triggered. For more\ninformation, see [handling `BillingResult` response codes](/google/play/billing/errors). Before you\ndeploy your app to the production environment, you can test your app's various\nresponse flows by using the Response Simulator.\n\nResponse Simulator\n------------------\n\nWhen you integrate your app with the Play Billing Library, it can be difficult\nto test all of the [`BillingResponseCode`](/reference/com/android/billingclient/api/BillingClient.BillingResponseCode) flows, because you don't have much\ncontrol over the communication between the Play Store and Play's backend.\nThe Response Simulator feature in the [Play Billing Lab](https://play.google.com/store/apps/details?id=com.google.android.apps.play.billingtestcompanion) app lets you\nconfigure error code responses for the Play Billing Library to test various complex\nerror scenarios.\n\n### Enable billing overrides testing for the Play Billing Library\n\n| **Note:** Before testing, ensure that your app is using [Play Billing Library](/google/play/billing/integrate#dependency) version 7.1.1 or later.\n\nTo enable communication between the Response Simulator and your app,\nyou must enable billing overrides testing for the Play Billing Library\nfrom within your app. To do this, add the following metadata tags to your app's\n`AndroidManifest.xml` file. \n\n```scdoc\n\u003cmanifest ... \u003e\n \u003capplication ... \u003e\n ...\n \u003cmeta-data\n android:name=\"com.google.android.play.largest_release_audience.NONPRODUCTION\"\n android:value=\"\" /\u003e\n \u003cmeta-data\n android:name=\"com.google.android.play.billingclient.enableBillingOverridesTesting\"\n android:value=\"true\" /\u003e\n \u003c/application\u003e\n\u003c/manifest\u003e\n```\n| **Note:** Even though adding only the `enableBillingOverridesTesting` tag and setting it to `true` is sufficient to enable billing overrides testing for your app, it's recommended that you also add the `NONPRODUCTION` tag. The `NONPRODUCTION` tag prevents accidental deployment of your app to the production environment with billing overrides testing enabled.\n\nWhen you deploy your app to the production environment, you should either\nuse a separate `AndroidManifest.xml` file that doesn't include these\nmetadata tags or ensure that you've removed these tags from the\n`AndroidManifest.xml` file.\n\n### Simulate Play Billing Library errors\n\nTo simulate Play Billing Library errors, first, configure the response codes\nin the [Play Billing Lab](https://play.google.com/store/apps/details?id=com.google.android.apps.play.billingtestcompanion) app, and then test your app.\n\n#### Configure a response code\n\n1. In the Play Billing Lab app, sign in with a [license tester](/google/play/billing/test#license-testers) account for your app.\n This displays the Play Billing Lab **Dashboard** including\n the **Response Simulator** card.\n\n **Figure 1.** Response Simulator card.\n2. Click **Manage** on the Response Simulator card.\n This shows the **Response Simulator** screen.\n\n3. When prompted, allow notifications from Play Billing Lab to see the connection status of your app.\n\n4. Enable the **Simulate Play Billing Library responses** switch, if it isn't\n already enabled.\n\n **Figure 2.** Simulate Play Billing Library responses switch.\n5. Select a response code for the Play Billing Library APIs that you want\n to test.\n Your selections are automatically saved, and the Response Simulator\n is ready to send the selected response codes to your app.\n\n#### Test your app's error handling\n\n| **Note:** When testing using the Response Simulator, ensure that you first open Play Billing Lab, and then open your app. Opening your app before opening Play Billing Lab may result in issues connecting to the Response Simulator.\n\n1. Open your app.\n\n - If you have allowed notifications from Play Billing Lab, you will see the Play Billing Lab notification icon in your device's status bar which indicates a successful connection to the Response Simulator.\n\n **Figure 3.** Play Billing Lab icon indicating successful connection.\n2. Trigger the Play Billing Library API method you want to test. For example,\n if you want to test the `launchBillingFlow`, initiate an in-app purchase\n flow."]]