Reminder: By Aug 31, 2025, all new apps and updates to existing apps must use Billing Library version 7 or newer. If you need more time to update your app, you can request an extension until Nov 1, 2025. Learn about Play Billing Library version deprecation.
Mantenha tudo organizado com as coleções
Salve e categorize o conteúdo com base nas suas preferências.
A Biblioteca Play Faturamento retorna uma resposta BillingResult para que você
saber o resultado de uma ação que foi acionada. Para mais
informações, consulte Como processar códigos de resposta BillingResult. Antes de
implantar o app no ambiente de produção, você pode testar os vários
fluxos de resposta usando o Simulador de resposta.
Simulador de respostas
Ao integrar seu app à Biblioteca Play Faturamento, pode ser difícil
testar todos os fluxos de BillingResponseCode, porque você não tem muito
controle sobre a comunicação entre a Play Store e o back-end do Play.
O recurso Simulador de resposta no app Play Billing Lab permite
configurar respostas de código de erro para a Biblioteca Play Faturamento testar vários produtos
cenários de erro.
Ativar testes de substituições de faturamento para a Biblioteca Play Faturamento
Para ativar a comunicação entre o Simulador de resposta e o app,
ative o teste de substituições de faturamento da Biblioteca Play Faturamento
no app. Para fazer isso, adicione as seguintes tags de metadados ao arquivo
AndroidManifest.xml do app.
Ao implantar o app no ambiente de produção, use
um arquivo AndroidManifest.xml separado que não inclua essas
tags de metadados ou remova essas tags do
arquivo AndroidManifest.xml.
Simular erros da Biblioteca Play Faturamento
Para simular erros da Biblioteca Play Faturamento, primeiro configure os códigos de resposta
no Play Faturamento Lab e, em seguida, teste seu app.
Configurar um código de resposta
No app Play Billing Lab, faça login com uma conta de testador de licença para o app.
Isso mostra o Painel do Play Billing Lab, incluindo
o card Simulador de resposta.
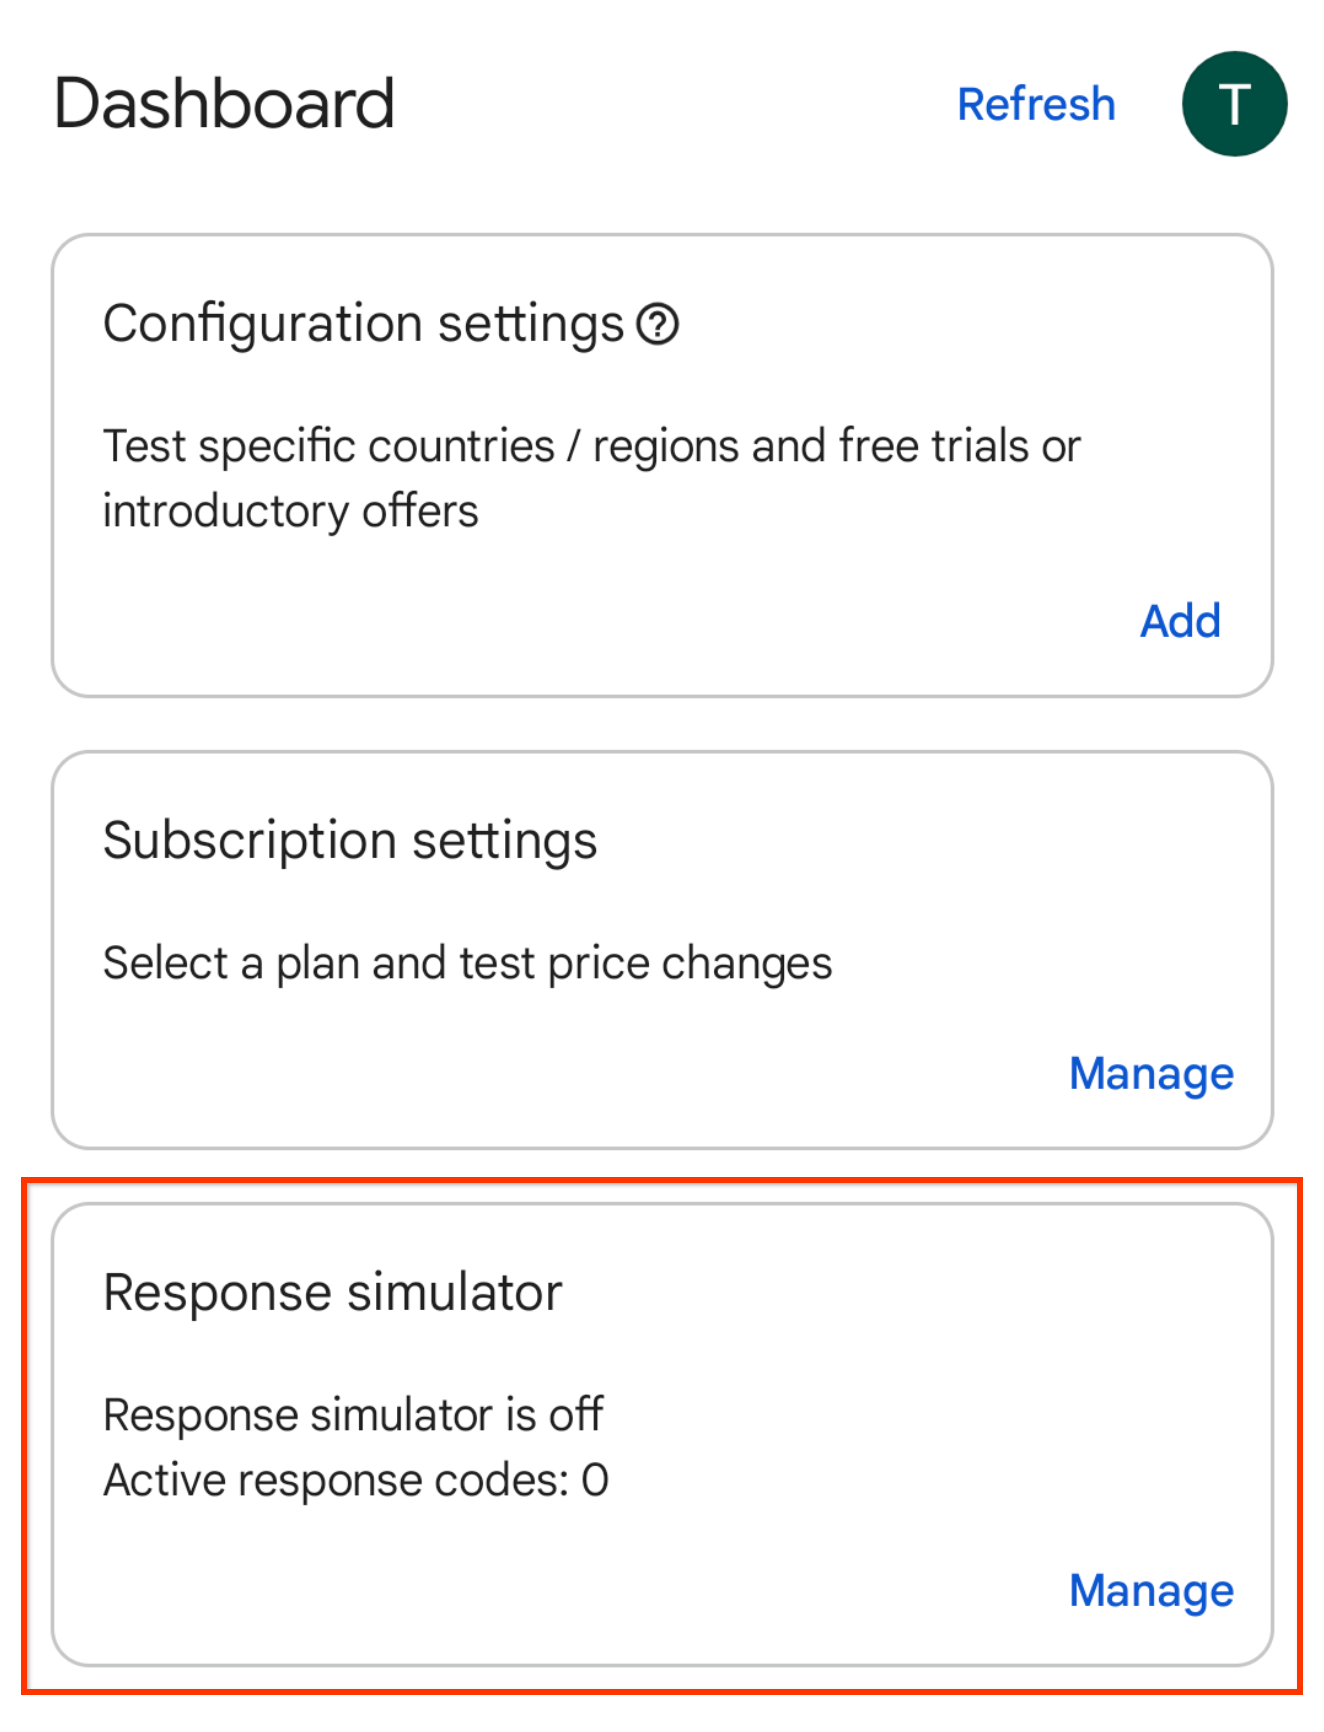
Figura 1. Card simulador de resposta.
Clique em Gerenciar no card "Simulador de resposta".
A tela Simulador de resposta será exibida.
Quando solicitado, permita notificações do Play Faturamento Lab para conferir o status de conexão do app.
Ative a opção Simular respostas da Biblioteca Play Faturamento, se ela não estiver ativada.
já ativado.
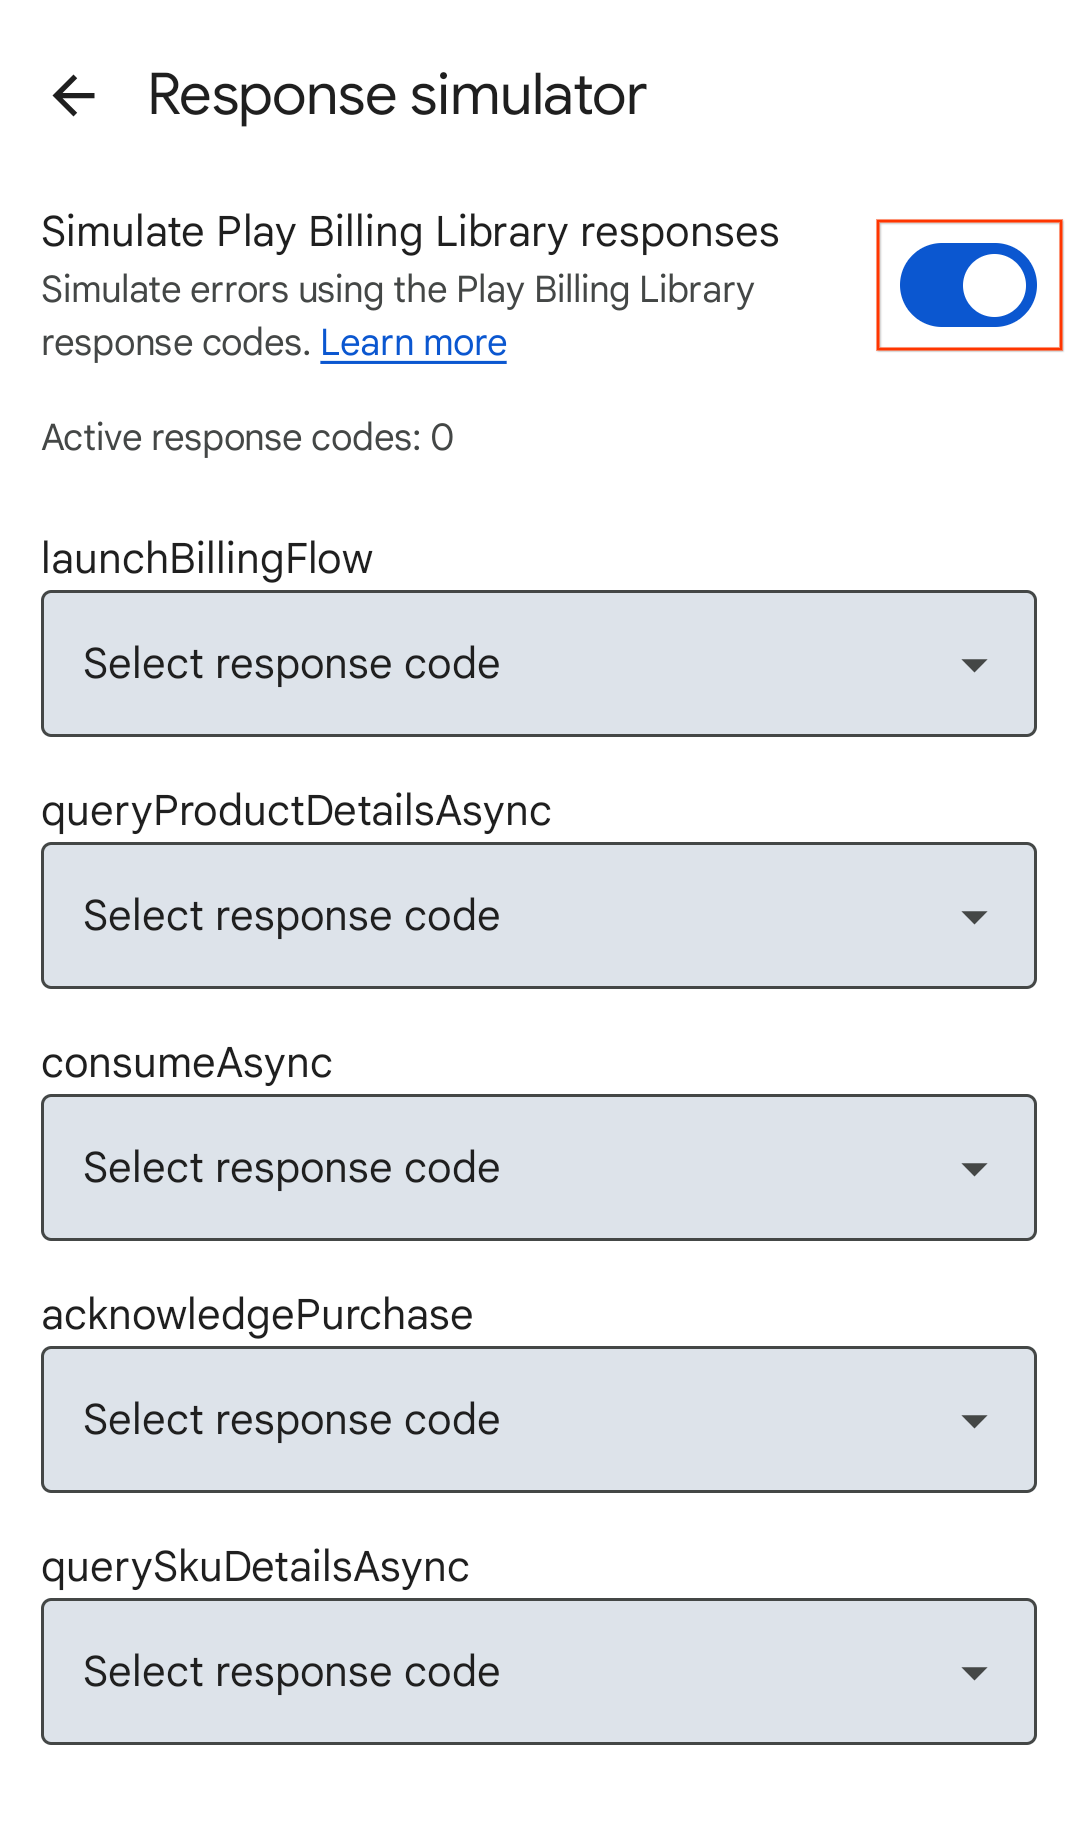
Figura 2. Simule a troca de respostas da Biblioteca Play Faturamento.
Selecione um código de resposta para as APIs da biblioteca Play Billing que você quer
testar.
Suas seleções são salvas automaticamente, e o Simulador de resposta
está pronto para enviar os códigos de resposta selecionados ao app.
Testar o tratamento de erros do app
Abra seu app.
Se você tiver permitido notificações do Play Billing Lab, o ícone de notificação do Play Billing Lab vai aparecer na barra de status do dispositivo, indicando que a conexão com o Simulador de resposta foi bem-sucedida.
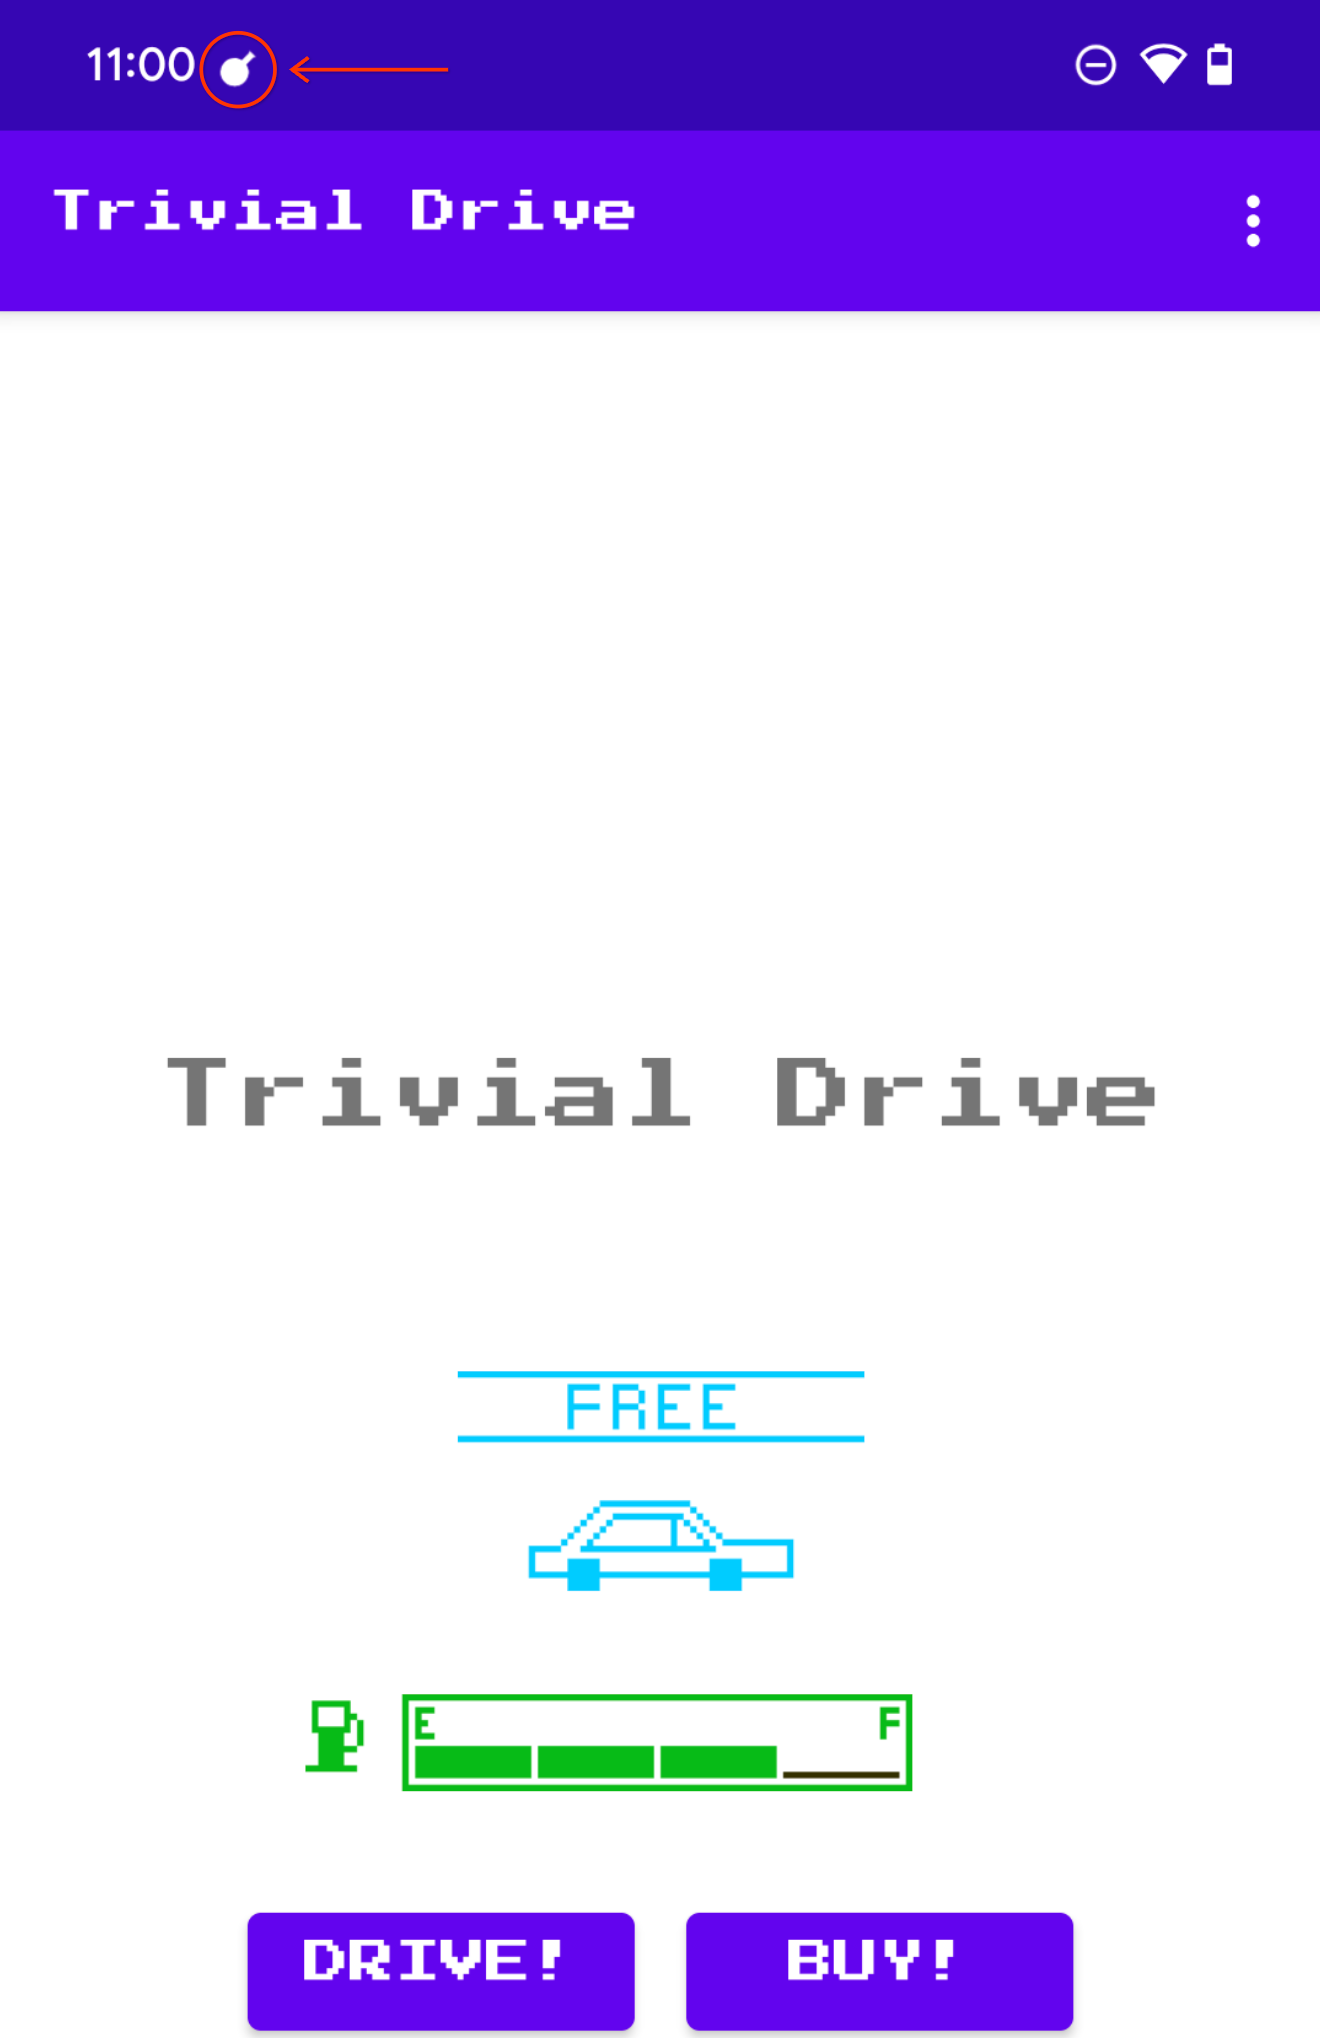
Figura 3. Ícone do Play Billing Lab indicando conexão bem-sucedida.
Acione o método da API Play Billing Library que você quer testar. Por exemplo,
se você quiser testar o launchBillingFlow, inicie um fluxo de compra
no app.
O conteúdo e os exemplos de código nesta página estão sujeitos às licenças descritas na Licença de conteúdo. Java e OpenJDK são marcas registradas da Oracle e/ou suas afiliadas.
Última atualização 2025-07-27 UTC.
[null,null,["Última atualização 2025-07-27 UTC."],[],[],null,["# Test BillingResult response codes\n\nThe Play Billing Library returns a [`BillingResult`](/reference/com/android/billingclient/api/BillingResult) response to let you\nknow the outcome of an action that was triggered. For more\ninformation, see [handling `BillingResult` response codes](/google/play/billing/errors). Before you\ndeploy your app to the production environment, you can test your app's various\nresponse flows by using the Response Simulator.\n\nResponse Simulator\n------------------\n\nWhen you integrate your app with the Play Billing Library, it can be difficult\nto test all of the [`BillingResponseCode`](/reference/com/android/billingclient/api/BillingClient.BillingResponseCode) flows, because you don't have much\ncontrol over the communication between the Play Store and Play's backend.\nThe Response Simulator feature in the [Play Billing Lab](https://play.google.com/store/apps/details?id=com.google.android.apps.play.billingtestcompanion) app lets you\nconfigure error code responses for the Play Billing Library to test various complex\nerror scenarios.\n\n### Enable billing overrides testing for the Play Billing Library\n\n| **Note:** Before testing, ensure that your app is using [Play Billing Library](/google/play/billing/integrate#dependency) version 7.1.1 or later.\n\nTo enable communication between the Response Simulator and your app,\nyou must enable billing overrides testing for the Play Billing Library\nfrom within your app. To do this, add the following metadata tags to your app's\n`AndroidManifest.xml` file. \n\n```scdoc\n\u003cmanifest ... \u003e\n \u003capplication ... \u003e\n ...\n \u003cmeta-data\n android:name=\"com.google.android.play.largest_release_audience.NONPRODUCTION\"\n android:value=\"\" /\u003e\n \u003cmeta-data\n android:name=\"com.google.android.play.billingclient.enableBillingOverridesTesting\"\n android:value=\"true\" /\u003e\n \u003c/application\u003e\n\u003c/manifest\u003e\n```\n| **Note:** Even though adding only the `enableBillingOverridesTesting` tag and setting it to `true` is sufficient to enable billing overrides testing for your app, it's recommended that you also add the `NONPRODUCTION` tag. The `NONPRODUCTION` tag prevents accidental deployment of your app to the production environment with billing overrides testing enabled.\n\nWhen you deploy your app to the production environment, you should either\nuse a separate `AndroidManifest.xml` file that doesn't include these\nmetadata tags or ensure that you've removed these tags from the\n`AndroidManifest.xml` file.\n\n### Simulate Play Billing Library errors\n\nTo simulate Play Billing Library errors, first, configure the response codes\nin the [Play Billing Lab](https://play.google.com/store/apps/details?id=com.google.android.apps.play.billingtestcompanion) app, and then test your app.\n\n#### Configure a response code\n\n1. In the Play Billing Lab app, sign in with a [license tester](/google/play/billing/test#license-testers) account for your app.\n This displays the Play Billing Lab **Dashboard** including\n the **Response Simulator** card.\n\n **Figure 1.** Response Simulator card.\n2. Click **Manage** on the Response Simulator card.\n This shows the **Response Simulator** screen.\n\n3. When prompted, allow notifications from Play Billing Lab to see the connection status of your app.\n\n4. Enable the **Simulate Play Billing Library responses** switch, if it isn't\n already enabled.\n\n **Figure 2.** Simulate Play Billing Library responses switch.\n5. Select a response code for the Play Billing Library APIs that you want\n to test.\n Your selections are automatically saved, and the Response Simulator\n is ready to send the selected response codes to your app.\n\n#### Test your app's error handling\n\n| **Note:** When testing using the Response Simulator, ensure that you first open Play Billing Lab, and then open your app. Opening your app before opening Play Billing Lab may result in issues connecting to the Response Simulator.\n\n1. Open your app.\n\n - If you have allowed notifications from Play Billing Lab, you will see the Play Billing Lab notification icon in your device's status bar which indicates a successful connection to the Response Simulator.\n\n **Figure 3.** Play Billing Lab icon indicating successful connection.\n2. Trigger the Play Billing Library API method you want to test. For example,\n if you want to test the `launchBillingFlow`, initiate an in-app purchase\n flow."]]