
This guide describes how to set up and run an Android Automotive instance with Google built-in. This guide also describes how to test the third-party Google APIs for use with navigation and voice solutions.
To learn more about these APIs, see Implement navigation app intents and Google Maps for Android Automotive Intents.

As shown, you can use three types of intents to describe the interaction between an assistant application and Google Maps: navigation, search and custom action. Equally, these intents describe the interaction between a Google Assistant and a navigation application.

This content describes how to test the intents from an assistant application with Google Maps. We also describe how integrate a navigation application to receive intents from Google Assistant or other assistant apps.
Setup
To get started:
- Download and install Android Studio.
- Open Tools > Device Manager and add the Automotive (1408p landscape) with Google Play image.
- Start the emulator image and sign in to Google Play. Search for and update Google Assistant.
- Extract the contents of our demo application project and open the project in Android Studio (File > Open...).
- Select Run > Run automotive to install and start the demo application in the emulator.
Demo
Implement navigation app intents and Google Maps for Android Automotive Intents describe the three types of intents you can execute: navigation, search, and custom action.
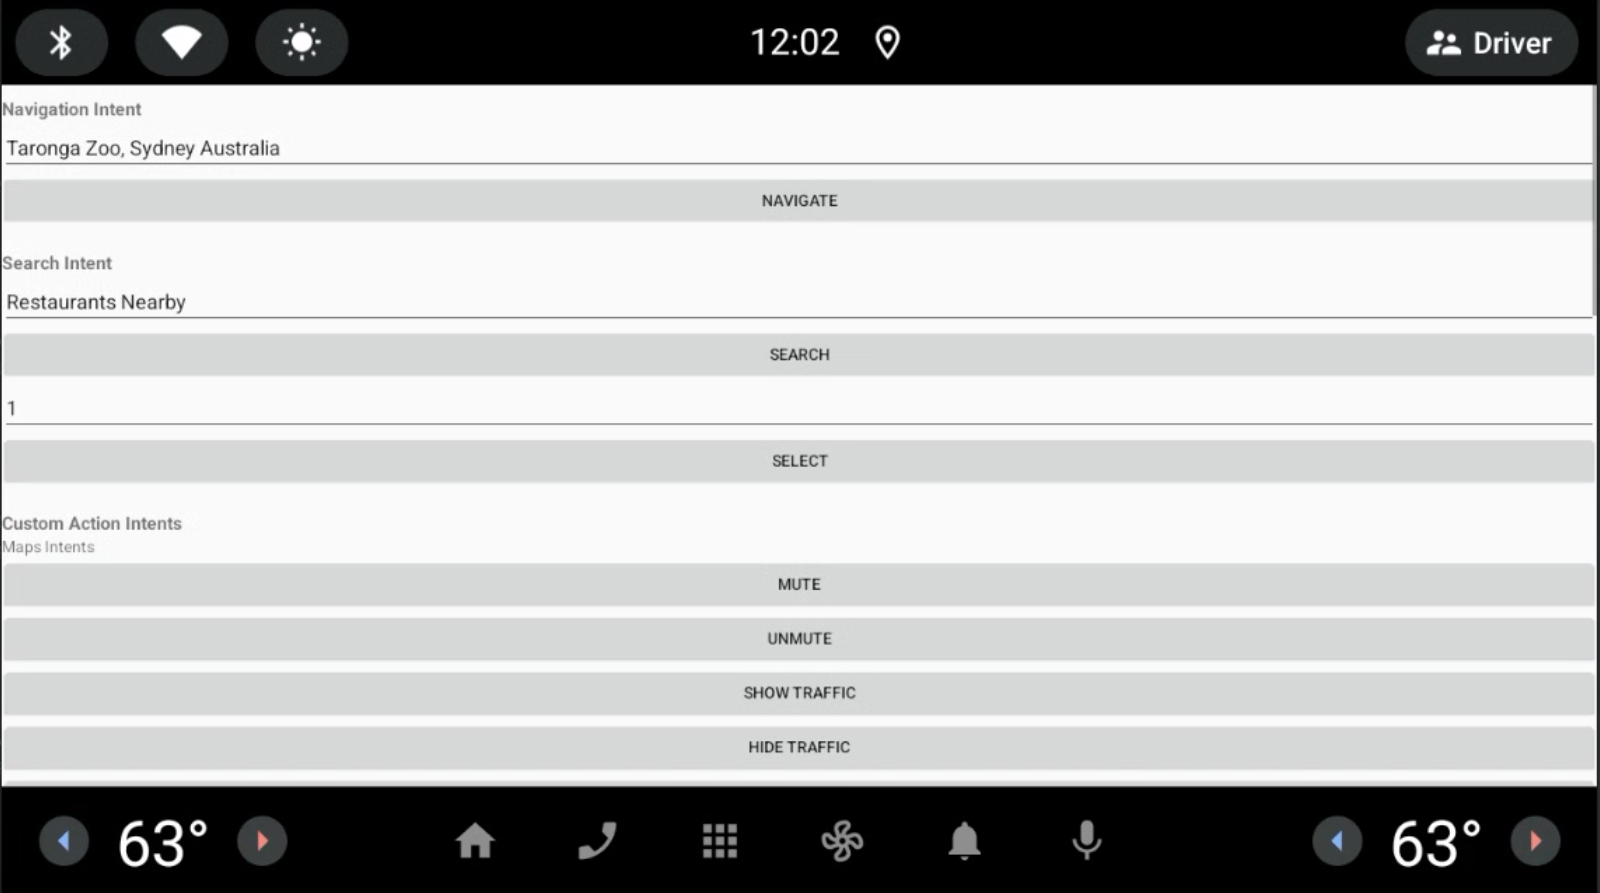
Google Maps executes the triggered operations.
To specify the demo application as the receiver of the intents triggered by Google Assistant:
Go to Settings > Google > Google Assistant > Default navigation app.
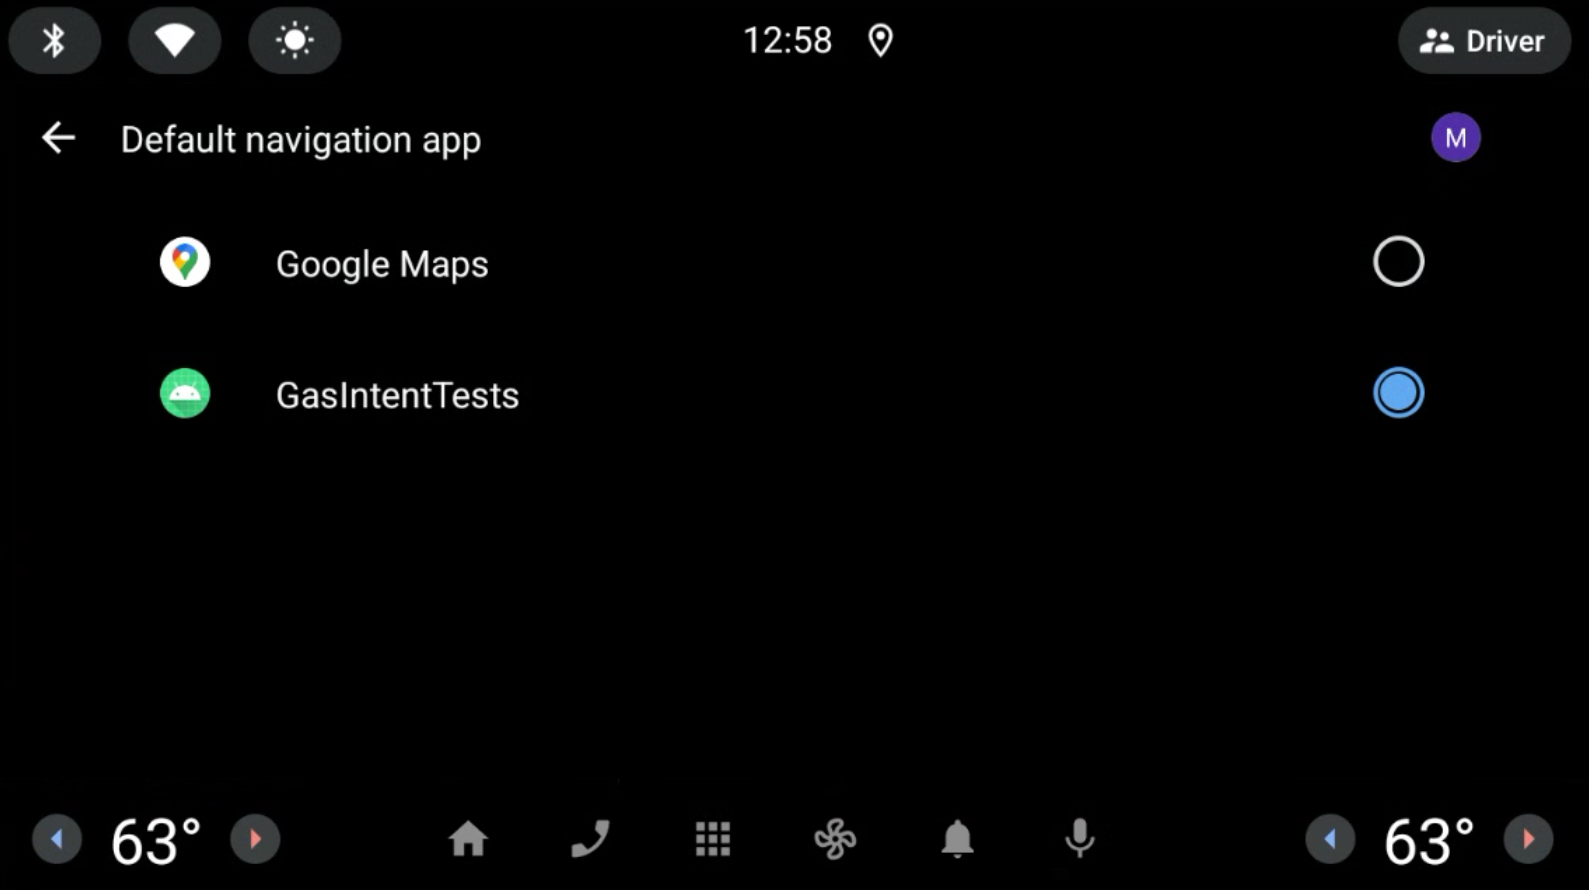
Figure 1. Select the default navigation App. Click the Microphone icon and speak a query. For example "Nearby restaurants.". See Extended controls, settings, and help if the microphone does not work as expected. The intent URI is sent by Google Assistant to the navigation app to process further.
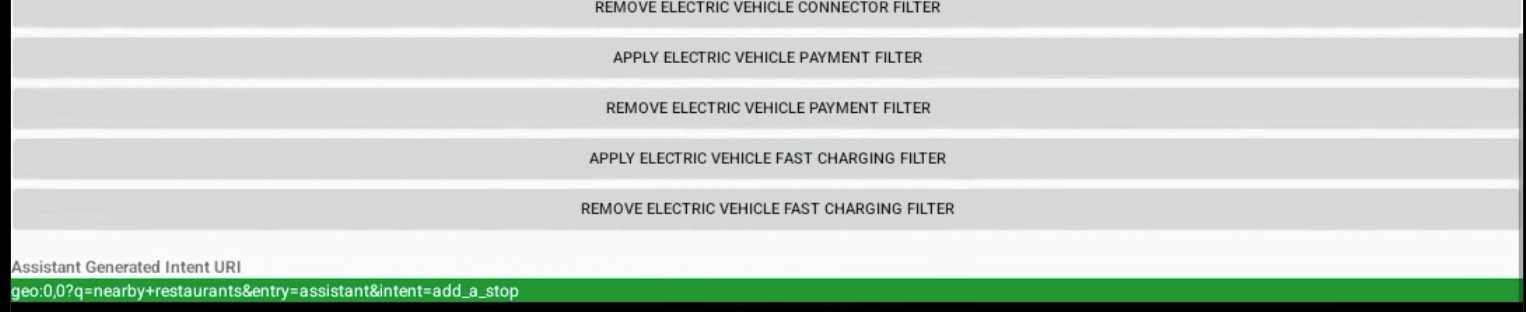
Figure 2. Output of Google Assistant generated Intent.
Technical Details
You can use the Android Debug Bridge (adb) to trigger intents from the console. To learn more, see gas-intents-console-tests.txt.
To designate that an application can receive intents from
Google Assistant, include this code in the AndroidManifest.xml file of the
navigation application:
   <!-- Navigation Intent -->
    <intent-filter>
      <action android:name="androidx.car.app.action.NAVIGATE" />
      <category android:name="android.intent.category.DEFAULT"/>
      <data android:scheme="geo" />
    </intent-filter>

    <!-- Search Intent -->
    <intent-filter>
      <action android:name="android.intent.action.VIEW" />
      <category android:name="android.intent.category.DEFAULT"/>
      <data android:scheme="geo" />
    </intent-filter>

    <!-- Custom Action Intents -->
    <intent-filter>
      <action android:name="android.intent.action.VIEW" />
      <category android:name="android.intent.category.DEFAULT"/>
      <data android:scheme="geo.action" />
    </intent-filter>
To add the app to Settings > Google > Google Assistant > Default navigation app so that it can be seen and selected, add:
    <intent-filter>
        <action android:name="android.intent.action.MAIN" />
        <category android:name="android.intent.category.APP_MAPS" />
    </intent-filter>