
Credential Manager 是指 Android 14 中引入的一组 API,支持多种登录方法,例如用户名和密码、通行密钥和联合登录解决方案(如“使用 Google 账号登录”)。调用 Credential Manager API 时,Android 系统会汇总设备上安装的所有凭据提供程序提供的凭据。本文档介绍了一组为这些凭据提供程序提供集成端点的 API。
设置
在凭据提供程序中实现功能之前,请完成以下各部分中显示的设置步骤。
声明依赖项
将以下依赖项添加到应用模块的 build 脚本中,以使用 Credential Manager 库的最新版本:
Kotlin
dependencies {
    implementation("androidx.credentials:credentials:1.7.0-alpha02")
}
Groovy
dependencies {
    implementation "androidx.credentials:credentials:1.7.0-alpha02"
}
在清单文件中声明服务元素
在应用的清单文件 AndroidManifest.xml 中,添加一个服务类的 <service> 声明,用于扩展 androidx.credentials 库中的 CredentialProviderService 类,如以下示例所示。
<service android:name=".MyCredentialProviderService"
    android:enabled="true"
    android:exported="true"
    android:label="My Credential Provider"
    android:icon="@mipmap/ic_launcher"
    android:permission="android.permission.BIND_CREDENTIAL_PROVIDER_SERVICE"
    tools:targetApi="upside_down_cake">
    <intent-filter>
        <action android:name="android.service.credentials.CredentialProviderService"/>
    </intent-filter>
    <meta-data
        android:name="android.credentials.provider"
        android:resource="@xml/provider"/>
</service>
上例中显示的权限和 intent 过滤器是使 Credential Manager 流程按预期运行所必需的。需要此权限才能确保仅 Android 系统可以绑定到此服务。intent 过滤器用于将此服务检测为 Credential Manager 使用的凭据提供程序。
声明支持的凭据类型
在 res/xml 目录中,新建一个名为 provider.xml 的文件。在该文件中,通过为库中的每种凭据类型定义的常量来声明您的服务支持的凭据类型。在以下示例中,服务支持传统密码和通行密钥,其常量定义为 TYPE_PASSWORD_CREDENTIAL 和 TYPE_PUBLIC_KEY_CREDENTIAL:
<credential-provider xmlns:android="http://schemas.android.com/apk/res/android">
    <capabilities>
        <capability name="android.credentials.TYPE_PASSWORD_CREDENTIAL" />
        <capability name="androidx.credentials.TYPE_PUBLIC_KEY_CREDENTIAL" />
    </capabilities>
</credential-provider>
在之前的 API 级别中,凭据提供程序集成了一些 API,例如用于自动填充密码和其他数据的 API。这些提供程序可以使用相同的内部基础架构来存储现有凭据类型,同时将其扩展为支持其他凭据(包括通行密钥)。
分两个阶段与提供程序互动
Credential Manager 分两个阶段与凭据提供程序互动:
- 第一阶段是“开始/查询阶段”,系统在此阶段会绑定到凭据提供程序服务并通过
Begin…请求调用onBeginGetCredentialRequest()、onBeginCreateCredentialRequest()或onClearCredentialStateRequest()方法。provider 必须处理这些请求并给出Begin…响应,同时使用相关条目填充响应,这些条目对应着要在账号选择器上显示的选项。每个条目都必须设置PendingIntent。 - 用户选择条目后,即会进入“选择阶段”,并且会触发与该条目相关联的
PendingIntent,从而启动相应的提供程序 activity。用户与此 activity 互动结束后,凭据提供程序必须在结束此 activity 之前,设置对此 activity 结果的响应。然后,系统会将此响应发送给调用了 Credential Manager 的客户端应用。
处理通行密钥创建
处理针对通行密钥创建的查询
当客户端应用希望创建通行密钥并使用凭据提供程序存储它时,会调用 createCredential API。如需在您的凭据提供程序服务中处理该请求,以使通行密钥实际存储在您的存储空间中,请完成以下部分中所示的步骤。
- 替换从
CredentialProviderService扩展的服务中的onBeginCreateCredentialRequest()方法。 - 通过构建相应的
BeginCreateCredentialResponse并通过回调进行传递来处理BeginCreateCredentialRequest。 - 构建
BeginCreateCredentialResponse时,请添加所需的CreateEntries。每个CreateEntry均应与可保存凭据的账号相对应,而且必须设置PendingIntent以及其他所需的元数据。
以下示例说明了如何实现这些步骤。
override fun onBeginCreateCredentialRequest(
    request: BeginCreateCredentialRequest,
    cancellationSignal: CancellationSignal,
    callback: OutcomeReceiver<BeginCreateCredentialResponse, CreateCredentialException>,
) {
    val response: BeginCreateCredentialResponse? = processCreateCredentialRequest(request)
    if (response != null) {
        callback.onResult(response)
    } else {
        callback.onError(CreateCredentialUnknownException())
    }
}

fun processCreateCredentialRequest(request: BeginCreateCredentialRequest): BeginCreateCredentialResponse? {
    when (request) {
        is BeginCreatePublicKeyCredentialRequest -> {
            // Request is passkey type
            return handleCreatePasskeyQuery(request)
        }
    }
    // Request not supported
    return null
}

private fun handleCreatePasskeyQuery(
    request: BeginCreatePublicKeyCredentialRequest
): BeginCreateCredentialResponse {

    // Adding two create entries - one for storing credentials to the 'Personal'
    // account, and one for storing them to the 'Family' account. These
    // accounts are local to this sample app only.
    val createEntries: MutableList<CreateEntry> = mutableListOf()
    createEntries.add(
        CreateEntry(
            PERSONAL_ACCOUNT_ID,
            createNewPendingIntent(PERSONAL_ACCOUNT_ID, CREATE_PASSKEY_INTENT)
        )
    )

    createEntries.add(
        CreateEntry(
            FAMILY_ACCOUNT_ID,
            createNewPendingIntent(FAMILY_ACCOUNT_ID, CREATE_PASSKEY_INTENT)
        )
    )

    return BeginCreateCredentialResponse(createEntries)
}

private fun createNewPendingIntent(accountId: String, action: String): PendingIntent {
    val intent = Intent(action).setPackage(PACKAGE_NAME)

    // Add your local account ID as an extra to the intent, so that when
    // user selects this entry, the credential can be saved to this
    // account
    intent.putExtra(EXTRA_KEY_ACCOUNT_ID, accountId)

    return PendingIntent.getActivity(
        applicationContext, UNIQUE_REQ_CODE,
        intent,
        (
            PendingIntent.FLAG_MUTABLE
                or PendingIntent.FLAG_UPDATE_CURRENT
            )
    )
}
您的 PendingIntent 构建应遵循以下要求:
- 应将相应的 activity 设置为显示任何所需的生物识别提示、确认或选择。
- 在调用相应 activity 时提供程序所需的任何必需数据都应设置为用于创建
PendingIntent的 intent extra,例如创建流程中的accountId。 - 必须使用
PendingIntent.FLAG_MUTABLE标记构建PendingIntent,以便系统可以将最终请求附加到 intent extra。 - 不得使用
PendingIntent.FLAG_ONE_SHOT标记构建PendingIntent,因为用户可能会选择一个条目,然后返回并重新选择它,这会导致PendingIntent触发两次。 - 必须使用唯一的请求代码构建您的
PendingIntent,以便每个条目都可以具有自身相应的PendingIntent。
处理通行密钥创建请求的条目选择
- 当用户选择之前填充的
CreateEntry时,系统会调用相应的PendingIntent并创建关联的提供程序Activity。 - 调用 activity 的
onCreate方法后,请访问关联的 intent 并将其传递到PendingIntentHander类以获取ProviderCreateCredentialRequest。 - 从请求中提取
requestJson、callingAppInfo和clientDataHash。 - 从 intent extra 中提取本地
accountId。这是特定于示例应用的实现,并非必需项。此账号 ID 可用于根据此特定账号 ID 存储此凭据。 - 验证
requestJson。根据 WebAuthn 规范,以下示例使用本地数据类(如PublicKeyCredentialCreationOptions)将输入 JSON 转换为结构化类。作为凭据提供商,您可以将其替换为自己的解析器。 - 如果调用源自原生 Android 应用,请检查通话应用的资源链接。
- 显示身份验证提示。以下示例使用 Android Biometric API。
- 身份验证成功后,生成
credentialId和密钥对。 - 根据
callingAppInfo.packageName将私钥保存到本地数据库。 - 构建一个包含公钥和
credentialId的网络身份验证 API JSON 响应。以下示例使用本地实用程序类(例如AuthenticatorAttestationResponse和FidoPublicKeyCredential),可帮助基于前面提到的规范构建 JSON。作为凭据提供方,您可以将这些类替换为自己的构建器。 - 使用上面生成的 JSON 构建
CreatePublicKeyCredentialResponse。 - 通过
PendingIntentHander.setCreateCredentialResponse()将Intent上的CreatePublicKeyCredentialResponse设置为 extra,并设置对此 activity 结果的 intent。 - 完成 activity。
下面的代码示例展示了这些步骤。onCreate() 被调用后,此代码需要在 activity 类中处理。
override fun onCreate(savedInstanceState: Bundle?, persistentState: PersistableBundle?) {
    super.onCreate(savedInstanceState, persistentState)
    // ...

    val request =
        PendingIntentHandler.retrieveProviderCreateCredentialRequest(intent)

    val accountId = intent.getStringExtra(CredentialsRepo.EXTRA_KEY_ACCOUNT_ID)
    if (request != null && request.callingRequest is CreatePublicKeyCredentialRequest) {
        val publicKeyRequest: CreatePublicKeyCredentialRequest =
            request.callingRequest as CreatePublicKeyCredentialRequest
        createPasskey(
            publicKeyRequest.requestJson,
            request.callingAppInfo,
            publicKeyRequest.clientDataHash,
            accountId
        )
    }
}

@SuppressLint("RestrictedApi")
fun createPasskey(
    requestJson: String,
    callingAppInfo: CallingAppInfo?,
    clientDataHash: ByteArray?,
    accountId: String?
) {
    val request = PublicKeyCredentialCreationOptions(requestJson)

    val biometricPrompt = BiometricPrompt(
        this,
        { }, // Pass in your own executor
        object : AuthenticationCallback() {
            override fun onAuthenticationError(errorCode: Int, errString: CharSequence) {
                super.onAuthenticationError(errorCode, errString)
                finish()
            }

            override fun onAuthenticationFailed() {
                super.onAuthenticationFailed()
                finish()
            }

            @RequiresApi(VERSION_CODES.P)
            override fun onAuthenticationSucceeded(
                result: AuthenticationResult
            ) {
                super.onAuthenticationSucceeded(result)

                // Generate a credentialId
                val credentialId = ByteArray(32)
                SecureRandom().nextBytes(credentialId)

                // Generate a credential key pair
                val spec = ECGenParameterSpec("secp256r1")
                val keyPairGen = KeyPairGenerator.getInstance("EC")
                keyPairGen.initialize(spec)
                val keyPair = keyPairGen.genKeyPair()

                // Save passkey in your database as per your own implementation

                // Create AuthenticatorAttestationResponse object to pass to
                // FidoPublicKeyCredential

                val response = AuthenticatorAttestationResponse(
                    requestOptions = request,
                    credentialId = credentialId,
                    credentialPublicKey = getPublicKeyFromKeyPair(keyPair),
                    origin = appInfoToOrigin(callingAppInfo!!),
                    up = true,
                    uv = true,
                    be = true,
                    bs = true,
                    packageName = callingAppInfo.packageName
                )

                val credential = FidoPublicKeyCredential(
                    rawId = credentialId,
                    response = response,
                    authenticatorAttachment = "", // Add your authenticator attachment
                )
                val result = Intent()

                val createPublicKeyCredResponse =
                    CreatePublicKeyCredentialResponse(credential.json())

                // Set the CreateCredentialResponse as the result of the Activity
                PendingIntentHandler.setCreateCredentialResponse(
                    result,
                    createPublicKeyCredResponse
                )
                setResult(RESULT_OK, result)
                finish()
            }
        }
    )

    val promptInfo = BiometricPrompt.PromptInfo.Builder()
        .setTitle("Use your screen lock")
        .setSubtitle("Create passkey for ${request.rp.name}")
        .setAllowedAuthenticators(
            BiometricManager.Authenticators.BIOMETRIC_STRONG
            /* or BiometricManager.Authenticators.DEVICE_CREDENTIAL */
        )
        .build()
    biometricPrompt.authenticate(promptInfo)
}

@RequiresApi(VERSION_CODES.P)
fun appInfoToOrigin(info: CallingAppInfo): String {
    val cert = info.signingInfo.apkContentsSigners[0].toByteArray()
    val md = MessageDigest.getInstance("SHA-256")
    val certHash = md.digest(cert)
    // This is the format for origin
    return "android:apk-key-hash:${b64Encode(certHash)}"
}
处理针对密码创建请求的查询
如需处理针对密码创建请求的查询,请执行以下操作:
- 在上一部分提到的
processCreateCredentialRequest()方法中,在切换代码块内添加另一个用于处理密码请求的用例。 - 构建
BeginCreateCredentialResponse时,添加所需的CreateEntries。 - 每个
CreateEntry都应对应于可保存凭据的账号,并且必须在其中设置PendingIntent以及其他元数据。
以下示例说明了如何实现这些步骤:
fun processCreateCredentialRequest(
    request: BeginCreateCredentialRequest
): BeginCreateCredentialResponse? {
    when (request) {
        is BeginCreatePublicKeyCredentialRequest -> {
            // Request is passkey type
            return handleCreatePasskeyQuery(request)
        }

        is BeginCreatePasswordCredentialRequest -> {
            // Request is password type
            return handleCreatePasswordQuery(request)
        }
    }
    return null
}

@RequiresApi(VERSION_CODES.M)
private fun handleCreatePasswordQuery(
    request: BeginCreatePasswordCredentialRequest
): BeginCreateCredentialResponse {
    val createEntries: MutableList<CreateEntry> = mutableListOf()

    // Adding two create entries - one for storing credentials to the 'Personal'
    // account, and one for storing them to the 'Family' account. These
    // accounts are local to this sample app only.
    createEntries.add(
        CreateEntry(
            PERSONAL_ACCOUNT_ID,
            createNewPendingIntent(PERSONAL_ACCOUNT_ID, CREATE_PASSWORD_INTENT)
        )
    )
    createEntries.add(
        CreateEntry(
            FAMILY_ACCOUNT_ID,
            createNewPendingIntent(FAMILY_ACCOUNT_ID, CREATE_PASSWORD_INTENT)
        )
    )

    return BeginCreateCredentialResponse(createEntries)
}
处理密码创建请求的条目选择
当用户选择填充的 CreateEntry 后,系统会执行相应的 PendingIntent 并调出关联的 activity。访问传入 onCreate 中的关联 intent 并将其传递给 PendingIntentHander 类,以获取 ProviderCreateCredentialRequest 方法。
以下示例说明了如何实现此流程。您需要在 activity 的 onCreate() 方法中处理此代码。
val createRequest = PendingIntentHandler.retrieveProviderCreateCredentialRequest(intent)
val accountId = intent.getStringExtra(CredentialsRepo.EXTRA_KEY_ACCOUNT_ID)

if (createRequest == null) {
    return
}

val request: CreatePasswordRequest = createRequest.callingRequest as CreatePasswordRequest

// Fetch the ID and password from the request and save it in your database
mDatabase.addNewPassword(
    PasswordInfo(
        request.id,
        request.password,
        createRequest.callingAppInfo.packageName
    )
)

// Set the final response back
val result = Intent()
val response = CreatePasswordResponse()
PendingIntentHandler.setCreateCredentialResponse(result, response)
setResult(Activity.RESULT_OK, result)
finish()
处理用户登录
通过以下步骤处理用户登录:
- 当客户端应用尝试让用户登录时,它会准备
GetCredentialRequest实例。 - Android 框架通过绑定到这些服务,将此请求传播到所有适用的凭据提供程序。
- 然后,提供程序服务会收到包含
BeginGetCredentialOption列表的BeginGetCredentialRequest,其中每项都包含可用于检索匹配凭据的参数。
如需在您的凭据提供程序服务中处理此请求,请完成以下步骤:
替换
onBeginGetCredentialRequest()方法以处理请求。请注意,如果凭据处于锁定状态,您可以立即在响应中设置AuthenticationAction并调用回调。private val unlockEntryTitle = "Authenticate to continue" override fun onBeginGetCredentialRequest( request: BeginGetCredentialRequest, cancellationSignal: CancellationSignal, callback: OutcomeReceiver<BeginGetCredentialResponse, GetCredentialException>, ) { if (isAppLocked()) { callback.onResult( BeginGetCredentialResponse( authenticationActions = mutableListOf( AuthenticationAction( unlockEntryTitle, createUnlockPendingIntent() ) ) ) ) return } try { response = processGetCredentialRequest(request) callback.onResult(response) } catch (e: GetCredentialException) { callback.onError(GetCredentialUnknownException()) } }需要先解锁凭据才能返回任何
credentialEntries的提供程序必须设置一个待处理 intent,用于将用户转到应用的解锁流程:private fun createUnlockPendingIntent(): PendingIntent { val intent = Intent(UNLOCK_INTENT).setPackage(PACKAGE_NAME) return PendingIntent.getActivity( applicationContext, UNIQUE_REQUEST_CODE, intent, ( PendingIntent.FLAG_MUTABLE or PendingIntent.FLAG_UPDATE_CURRENT ) ) }从本地数据库检索凭据,并使用
CredentialEntries进行设置以显示在选择器中。对于通行密钥,您可以将credentialId设置为 intent 中的 extra,以便在用户选择此条目时知道它对应于哪个凭据。companion object { // These intent actions are specified for corresponding activities // that are to be invoked through the PendingIntent(s) private const val GET_PASSKEY_INTENT_ACTION = "PACKAGE_NAME.GET_PASSKEY" private const val GET_PASSWORD_INTENT_ACTION = "PACKAGE_NAME.GET_PASSWORD" } fun processGetCredentialRequest( request: BeginGetCredentialRequest ): BeginGetCredentialResponse { val callingPackageInfo = request.callingAppInfo val callingPackageName = callingPackageInfo?.packageName.orEmpty() val credentialEntries: MutableList<CredentialEntry> = mutableListOf() for (option in request.beginGetCredentialOptions) { when (option) { is BeginGetPasswordOption -> { credentialEntries.addAll( populatePasswordData( callingPackageName, option ) ) } is BeginGetPublicKeyCredentialOption -> { credentialEntries.addAll( populatePasskeyData( callingPackageInfo, option ) ) } else -> { Log.i(TAG, "Request not supported") } } } return BeginGetCredentialResponse(credentialEntries) }从数据库查询凭据,创建要填充的通行密钥和密码条目。
private fun populatePasskeyData(
    callingAppInfo: CallingAppInfo?,
    option: BeginGetPublicKeyCredentialOption
): List<CredentialEntry> {
    val passkeyEntries: MutableList<CredentialEntry> = mutableListOf()
    val request = PublicKeyCredentialRequestOptions(option.requestJson)
    // Get your credentials from database where you saved during creation flow
    val creds = getCredentialsFromInternalDb(request.rpId)
    val passkeys = creds.passkeys
    for (passkey in passkeys) {
        val data = Bundle()
        data.putString("credId", passkey.credId)
        passkeyEntries.add(
            PublicKeyCredentialEntry(
                context = applicationContext,
                username = passkey.username,
                pendingIntent = createNewPendingIntent(
                    GET_PASSKEY_INTENT_ACTION,
                    data
                ),
                beginGetPublicKeyCredentialOption = option,
                displayName = passkey.displayName,
                icon = passkey.icon
            )
        )
    }
    return passkeyEntries
}

// Fetch password credentials and create password entries to populate to the user
private fun populatePasswordData(
    callingPackage: String,
    option: BeginGetPasswordOption
): List<CredentialEntry> {
    val passwordEntries: MutableList<CredentialEntry> = mutableListOf()

    // Get your password credentials from database where you saved during
    // creation flow
    val creds = getCredentialsFromInternalDb(callingPackage)
    val passwords = creds.passwords
    for (password in passwords) {
        passwordEntries.add(
            PasswordCredentialEntry(
                context = applicationContext,
                username = password.username,
                pendingIntent = createNewPendingIntent(
                    GET_PASSWORD_INTENT
                ),
                beginGetPasswordOption = option,
                displayName = password.username,
                icon = password.icon
            )
        )
    }
    return passwordEntries
}

private fun createNewPendingIntent(
    action: String,
    extra: Bundle? = null
): PendingIntent {
    val intent = Intent(action).setPackage(PACKAGE_NAME)
    if (extra != null) {
        intent.putExtra("CREDENTIAL_DATA", extra)
    }

    return PendingIntent.getActivity(
        applicationContext, UNIQUE_REQUEST_CODE, intent,
        (PendingIntent.FLAG_MUTABLE or PendingIntent.FLAG_UPDATE_CURRENT)
    )
}
查询并填充凭据后,您现在需要处理用户要选择凭据的选择阶段,无论它是通行密钥还是密码。
处理通行密钥的用户选择
- 在相应 activity 的
onCreate方法中,检索关联的 intent 并传递给PendingIntentHandler.retrieveProviderGetCredentialRequest()。 - 从上面检索到的请求中提取
GetPublicKeyCredentialOption。随后,从此选项中提取requestJson和clientDataHash。 - 从 intent extra 中提取
credentialId,它由设置相应PendingIntent时的凭据提供程序填充。 - 使用上面存取的请求参数从本地数据库中提取通行密钥。
使用提取的元数据和用户验证断言通行密钥有效。
val getRequest = PendingIntentHandler.retrieveProviderGetCredentialRequest(intent)
val publicKeyRequest = getRequest?.credentialOptions?.first() as GetPublicKeyCredentialOption

val requestInfo = intent.getBundleExtra("CREDENTIAL_DATA")
val credIdEnc = requestInfo?.getString("credId").orEmpty()

// Get the saved passkey from your database based on the credential ID from the PublicKeyRequest
val passkey = mDatabase.getPasskey(credIdEnc)

// Decode the credential ID, private key and user ID
val credId = b64Decode(credIdEnc)
val privateKey = b64Decode(passkey.credPrivateKey)
val uid = b64Decode(passkey.uid)

val origin = appInfoToOrigin(getRequest.callingAppInfo)
val packageName = getRequest.callingAppInfo.packageName

validatePasskey(
    publicKeyRequest.requestJson,
    origin,
    packageName,
    uid,
    passkey.username,
    credId,
    privateKey
)
如需验证用户,请显示生物识别提示(或其他断言方法)。以下代码段使用 Android Biometric API。
身份验证成功后,根据 W3 网络身份验证断言规范构建 JSON 响应。在下面的代码段中,辅助数据类(如
AuthenticatorAssertionResponse)用于接收结构化参数并将其转换为所需的 JSON 格式。响应包含 WebAuthn 凭据私钥中的数字签名。信赖方的服务器可以验证此签名以在用户登录之前对其进行身份验证。使用上面生成的 JSON 构建
PublicKeyCredential,并在最终的GetCredentialResponse上设置它。针对此 activity 的结果设置此最终响应。
以下示例说明了可以如何实现这些步骤:
val request = PublicKeyCredentialRequestOptions(requestJson)
val privateKey: ECPrivateKey = convertPrivateKey(privateKeyBytes)

val biometricPrompt = BiometricPrompt(
    this,
    { }, // Pass in your own executor
    object : BiometricPrompt.AuthenticationCallback() {
        override fun onAuthenticationError(
            errorCode: Int,
            errString: CharSequence
        ) {
            super.onAuthenticationError(errorCode, errString)
            finish()
        }

        override fun onAuthenticationFailed() {
            super.onAuthenticationFailed()
            finish()
        }

        override fun onAuthenticationSucceeded(
            result: BiometricPrompt.AuthenticationResult
        ) {
            super.onAuthenticationSucceeded(result)
            val response = AuthenticatorAssertionResponse(
                requestOptions = request,
                credentialId = credId,
                origin = origin,
                up = true,
                uv = true,
                be = true,
                bs = true,
                userHandle = uid,
                packageName = packageName
            )

            val sig = Signature.getInstance("SHA256withECDSA")
            sig.initSign(privateKey)
            sig.update(response.dataToSign())
            response.signature = sig.sign()

            val credential = FidoPublicKeyCredential(
                rawId = credId,
                response = response,
                authenticatorAttachment = "", // Add your authenticator attachment
            )
            val result = Intent()
            val passkeyCredential = PublicKeyCredential(credential.json())
            PendingIntentHandler.setGetCredentialResponse(
                result, GetCredentialResponse(passkeyCredential)
            )
            setResult(RESULT_OK, result)
            finish()
        }
    }
)

val promptInfo = BiometricPrompt.PromptInfo.Builder()
    .setTitle("Use your screen lock")
    .setSubtitle("Use passkey for ${request.rpId}")
    .setAllowedAuthenticators(
        BiometricManager.Authenticators.BIOMETRIC_STRONG
        /* or BiometricManager.Authenticators.DEVICE_CREDENTIAL */
    )
    .build()
biometricPrompt.authenticate(promptInfo)
处理密码身份验证的用户选择
- 在相应的 activity 中,访问传入
onCreate的 intent,并使用PendingIntentHandler提取ProviderGetCredentialRequest。 在请求中使用
GetPasswordOption检索收到的软件包名称对应的密码凭据。val getRequest = PendingIntentHandler.retrieveProviderGetCredentialRequest(intent) val passwordOption = getRequest?.credentialOptions?.first() as GetPasswordOption val username = passwordOption.allowedUserIds.first() // Fetch the credentials for the calling app package name val creds = mDatabase.getCredentials(callingAppInfo.packageName) val passwords = creds.passwords val it = passwords.iterator() var password = "" while (it.hasNext()) { val passwordItemCurrent = it.next() if (passwordItemCurrent.username == username) { password = passwordItemCurrent.password break } }检索完毕后,设置所选密码凭据的响应。
// Set the response back
val result = Intent()
val passwordCredential = PasswordCredential(username, password)
PendingIntentHandler.setGetCredentialResponse(
    result, GetCredentialResponse(passwordCredential)
)
setResult(Activity.RESULT_OK, result)
finish()
处理身份验证操作条目的选择
如前所述,如果凭据被锁定,凭据提供程序可以设置 AuthenticationAction。如果用户选择此条目,系统会调用与 PendingIntent 中设置的 intent 操作对应的 activity。然后,凭据提供程序可以显示生物识别身份验证流程或类似机制来解锁凭据。成功后,凭据提供程序必须构建一个 BeginGetCredentialResponse,这与上述用户登录处理方式类似,因为凭据现在处于解锁状态。然后,在将准备好的 intent 设置为结果并完成此 activity 之前,必须通过 PendingIntentHandler.setBeginGetCredentialResponse() 方法设置此响应。
清除凭据请求
客户端应用可能会请求必须清除为凭据选择维护的任何状态,例如凭据提供程序可能会记住之前选择的凭据,而下次仅返回该凭据。客户端应用会调用此 API,并且希望清除固定选择。您的凭据提供程序服务可以通过替换 onClearCredentialStateRequest() 方法来处理此请求:
override fun onClearCredentialStateRequest(
    request: ProviderClearCredentialStateRequest,
    cancellationSignal: CancellationSignal,
    callback: OutcomeReceiver<Void?, ClearCredentialException>
) {
    // Delete any maintained state as appropriate.
}
添加了可链接到提供商设置页面的功能
为了让用户能够从密码、通行密钥和自动填充界面打开提供程序的设置,凭据提供程序应用应在 res/xml/provider.xml 中实现 credential-provider settingsActivity 清单属性。借助此属性,如果用户点击密码、通行密钥和自动填充服务列表中的提供方名称,您可以使用 intent 打开应用的自有设置界面。将此属性的值设置为要从设置界面启动的 activity 的名称。
<credential-provider
    xmlns:android="http://schemas.android.com/apk/res/android"
    android:settingsSubtitle="Example settings provider name"
    android:settingsActivity="com.example.SettingsActivity">
    <capabilities>
        <capability name="android.credentials.TYPE_PUBLIC_KEY_CREDENTIAL" />
    </capabilities>
</credential-provider>

设置 intent
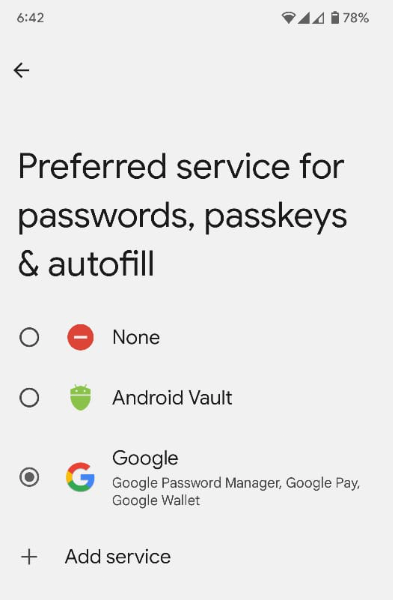
打开设置:android.settings.CREDENTIAL_PROVIDER intent 会显示一个设置界面,用户可以在其中选择首选凭据提供程序和其他凭据提供程序。

首选凭据服务:ACTION_REQUEST_SET_AUTOFILL_SERVICE intent 会将用户重定向到首选提供方选择界面。此屏幕上选择的提供商将成为首选凭据和自动填充提供商。
获取特权应用的许可名单
网络浏览器等特权应用通过在 Credential Manager GetCredentialRequest() 和 CreatePublicKeyCredentialRequest() 方法中设置 origin 参数,代表其他依赖方进行 Credential Manager 调用。为了处理这些请求,凭据提供程序会使用 getOrigin() API 检索 origin。
如需检索 origin,凭据提供程序应用需要将可信的特权调用方列表传递给 androidx.credentials.provider.CallingAppInfo's getOrigin() API。此许可名单必须是有效的 JSON 对象。如果 packageName 和从 signingInfo 获取的证书指纹与传递给 getOrigin() API 的 privilegedAllowlist 中找到的应用指纹匹配,系统会返回 origin。获取 origin 值后,提供商应用应将其视为特权调用,并在 AuthenticatorResponse 中的客户端数据上设置此 origin,而不是使用调用应用的签名来计算 origin。
如果您要检索 origin,请使用直接在 CreatePublicKeyCredentialRequest() 或 GetPublicKeyCredentialOption() 中提供的 clientDataHash,而不是在签名请求期间对 clientDataJSON 进行汇编和哈希处理。为避免 JSON 解析问题,请在证明和断言响应中为 clientDataJSON 设置占位值。Google 密码管理工具会使用公开可用的许可名单来调用 getOrigin()。作为凭据提供方,您可以使用此列表,也可以采用 API 所述的 JSON 格式提供自己的凭据。具体使用哪个列表由提供方决定。如需获取第三方凭据提供程序的特权访问权限,请参阅第三方提供的文档。
在设备上启用提供程序
用户必须通过依次选择设备设置 > 密码和账号 > 您的提供程序 > 启用(或停用)来启用提供程序。
fun createSettingsPendingIntent(): PendingIntent