
本页概述了测试 Android 应用的核心原则,包括中心最佳实践及其优势。
测试的优势
测试是应用开发流程中不可或缺的一环。通过持续对应用运行测试,您可以在公开发布应用之前验证其正确性、功能行为和易用性。
您可以通过浏览应用来 手动 测试应用。您可以使用不同的设备和模拟器,更改系统语言,并尝试生成每个用户错误或遍历每个用户流。
不过,手动测试的可伸缩性较差,并且很容易忽略应用行为中的回归。自动化测试 涉及使用工具为您执行测试,这种方式更快、更具可重复性,并且通常可以在开发流程的早期阶段为您提供更多有关应用的可操作反馈。
Android 中的测试类型
移动应用非常复杂,必须在许多环境中正常运行。因此,测试类型有很多。
主题
例如,根据主题,测试类型有所不同:
- 功能测试:我的应用是否能按预期运行?
- 性能测试:应用是否能快速高效地运行?
- 无障碍功能测试:应用是否能与无障碍服务良好配合?
- 兼容性测试:应用是否能在每种设备和 API 级别上良好运行?
范围
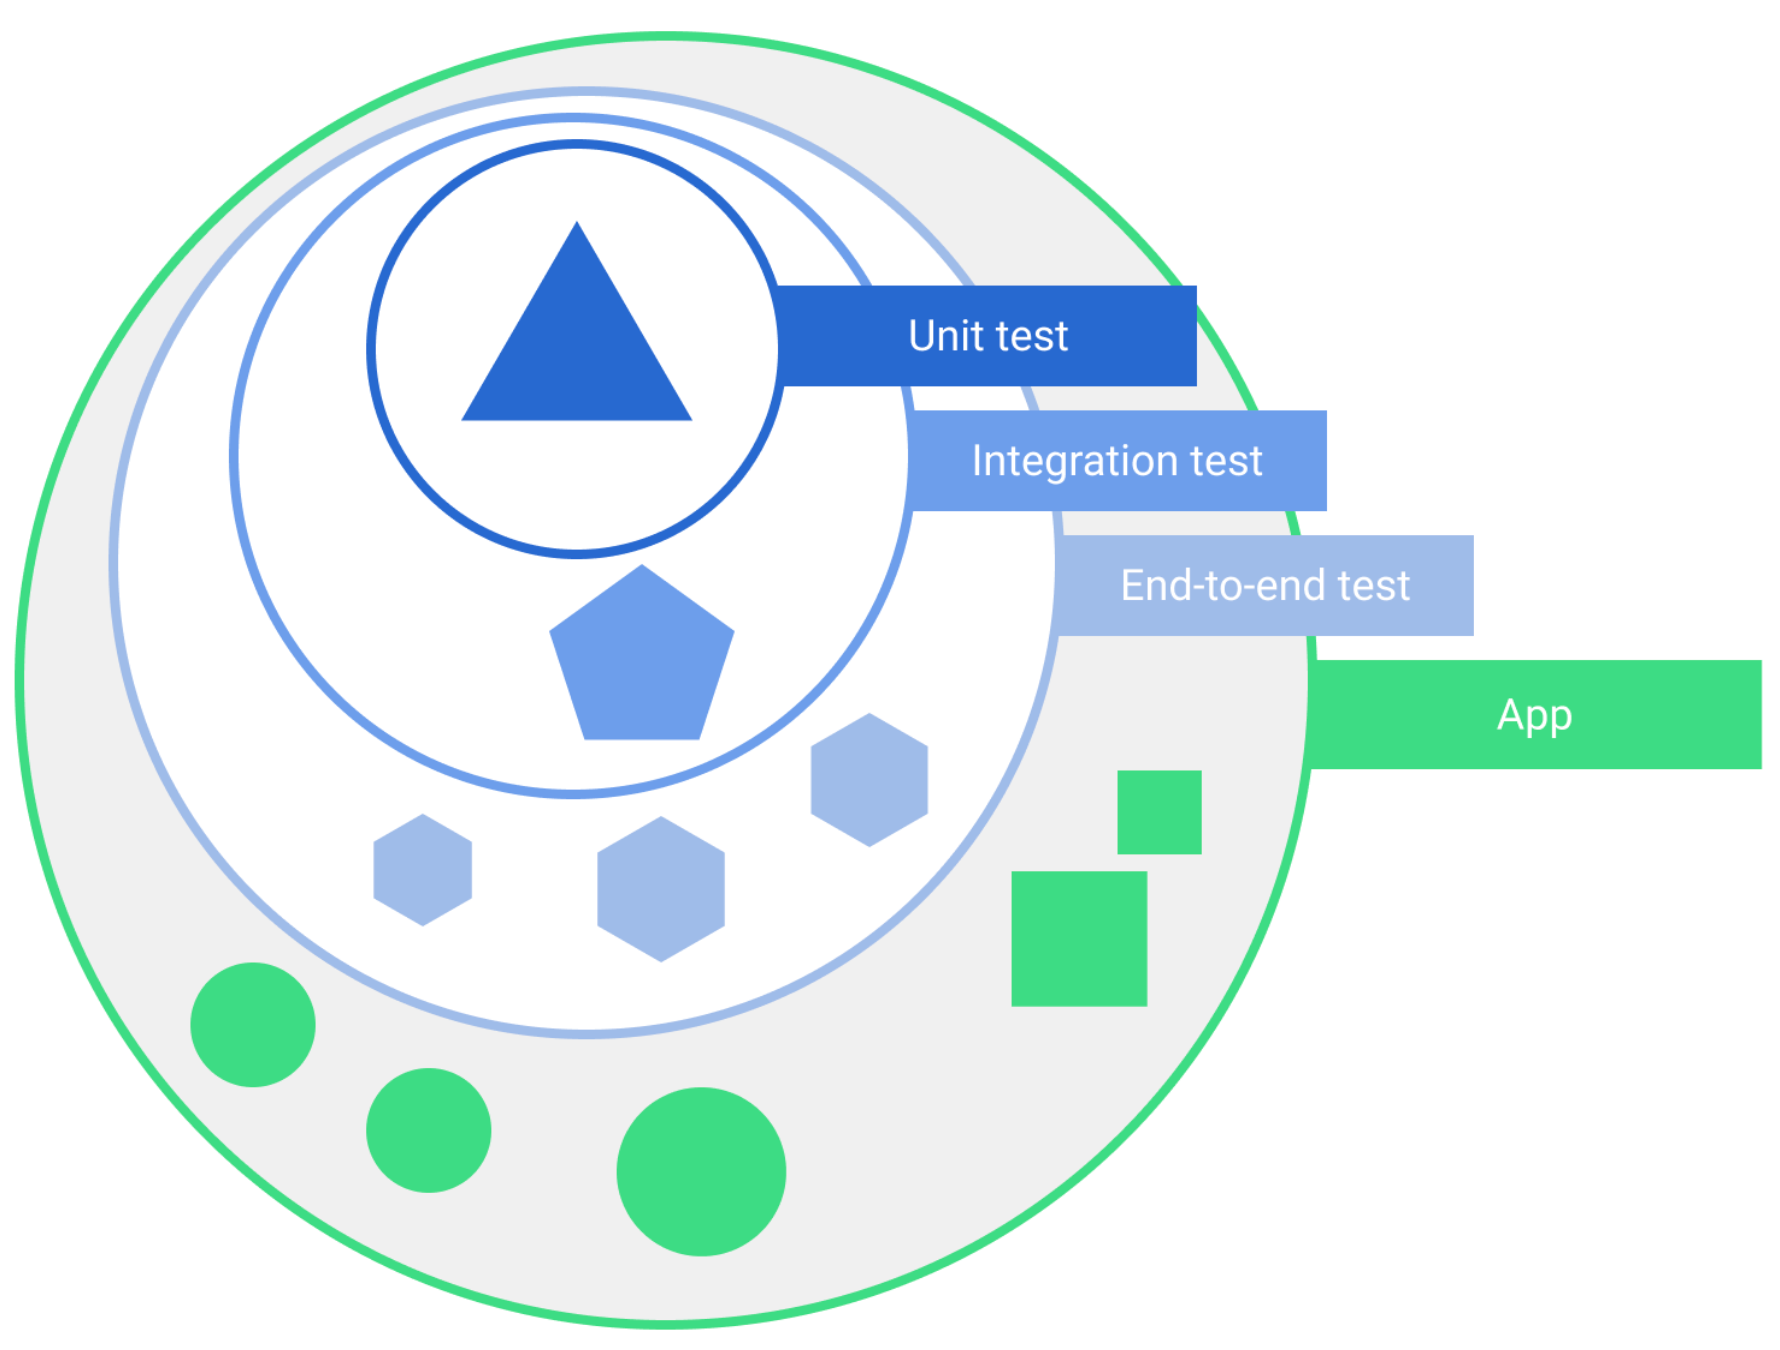
测试也会因 大小 或 隔离程度 而异:
- 单元测试 或小型测试 仅验证应用中非常小的一部分,例如方法或类。
- 端到端 测试或大型测试 同时验证应用的较大一部分,例如整个屏幕或用户流。
- 中型测试 介于两者之间,用于检查两个或多个单元之间的集成 。
测试的分类方式有很多。不过,对于应用开发者来说,最重要的区别在于测试的运行位置。
插桩测试与本地测试
您可以在 Android 设备上或其他计算机上运行测试:
- 插桩测试 在 Android 设备(实体设备或模拟设备)上运行。 应用与注入命令并读取状态的 测试应用 一起构建和安装。插桩测试通常是界面测试,用于启动应用,然后与其互动。
- 本地测试 在开发机器或服务器上执行,因此也称为 主机端测试 。它们通常很小且速度很快,可将接受测试的主题与应用的其余部分隔离开。
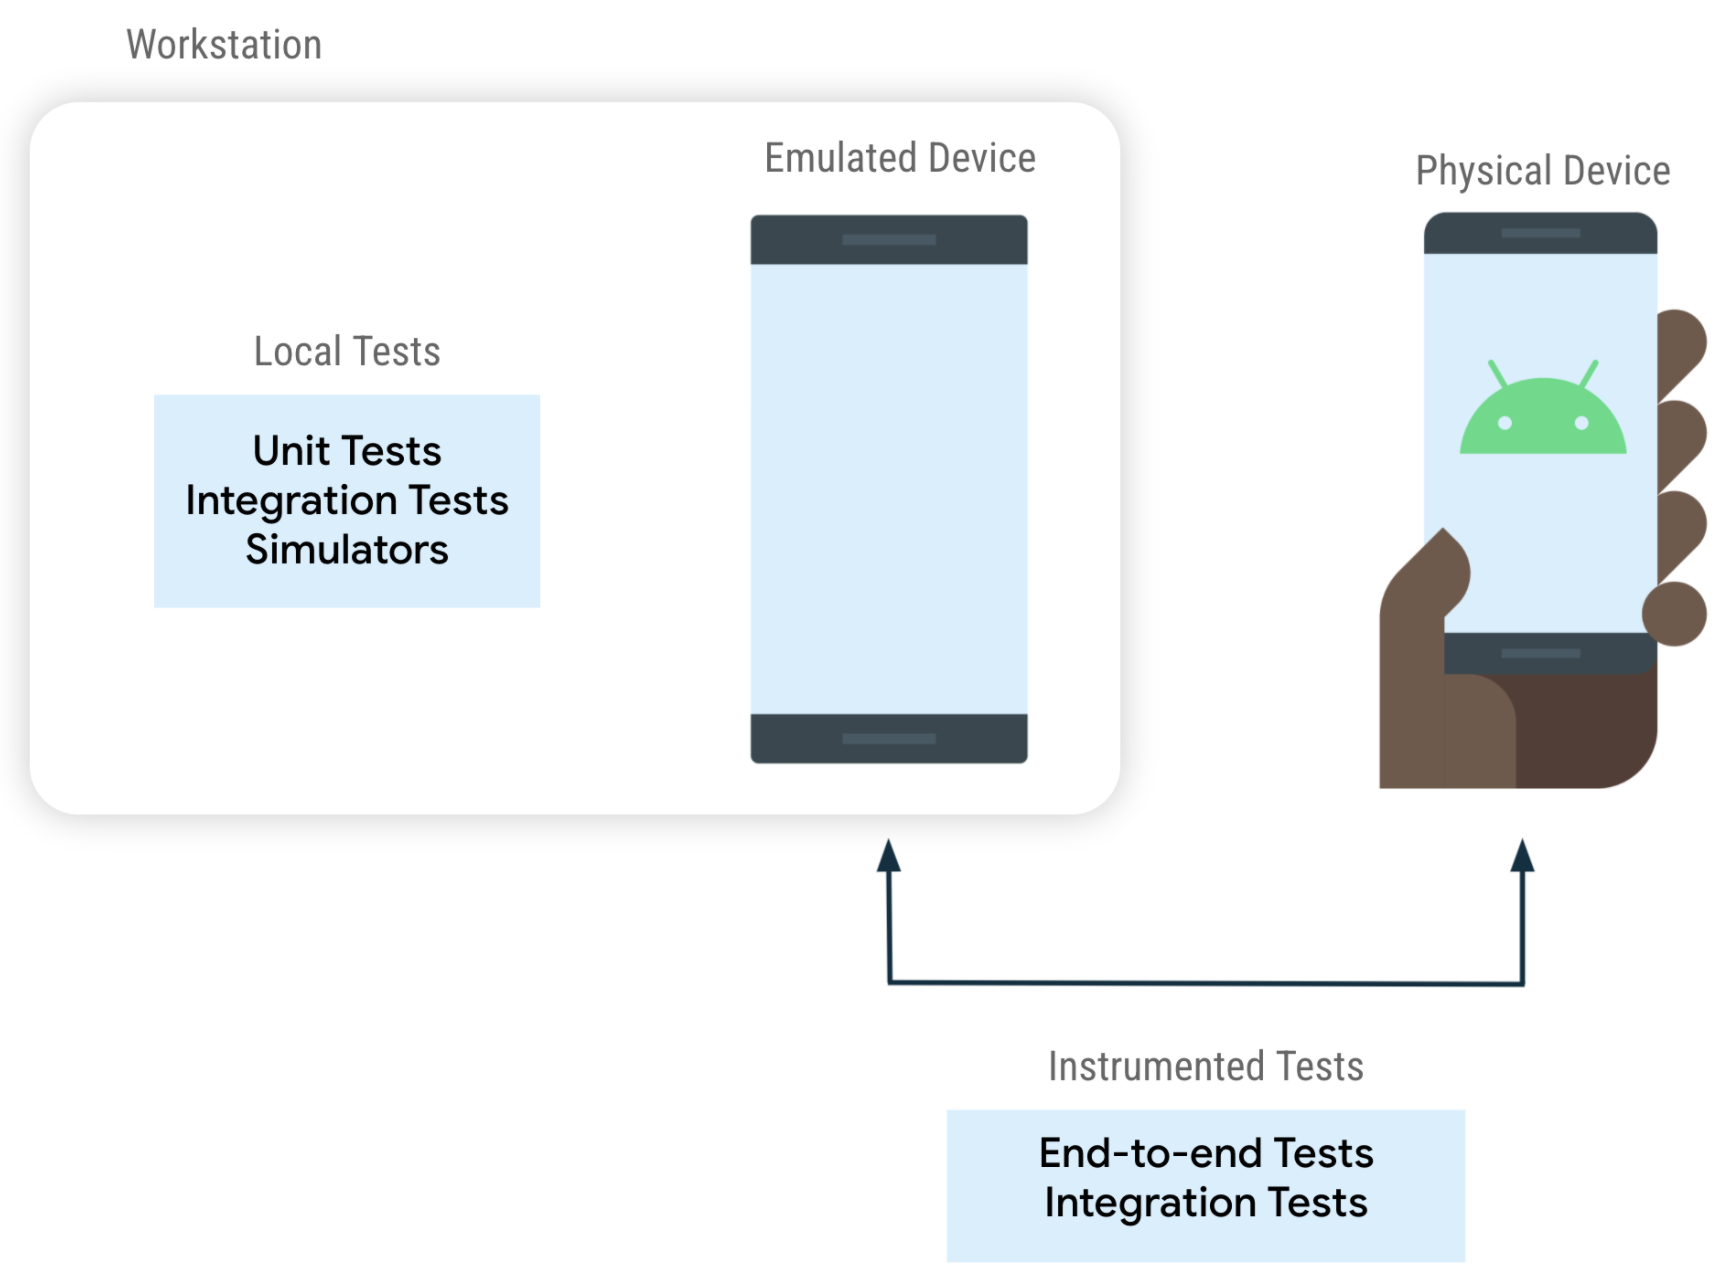
并非所有单元测试都是本地测试,也并非所有端到端测试都在设备上运行。例如:
- 大型本地测试:您可以使用在本地运行的 Android 模拟器,例如 Robolectric。
- 小型插桩测试:您可以验证代码是否能与 框架功能(例如 SQLite 数据库)良好配合。您可以在多台设备上运行此测试,以检查与多个版本的 SQLite 的集成。
示例
以下代码段演示了如何在 插桩界面测试 中与界面互动,该测试会点击某个元素并验证是否显示了另一个元素。
Espresso
// When the Continue button is clicked
onView(withText("Continue"))
    .perform(click())

// Then the Welcome screen is displayed
onView(withText("Welcome"))
    .check(matches(isDisplayed()))
Compose UI
// When the Continue button is clicked
composeTestRule.onNodeWithText("Continue").performClick()

// Then the Welcome screen is displayed
composeTestRule.onNodeWithText("Welcome").assertIsDisplayed()
此代码段显示了 ViewModel 的 单元测试 的一部分(本地、主机端测试):
// Given an instance of MyViewModel
val viewModel = MyViewModel(myFakeDataRepository)

// When data is loaded
viewModel.loadData()

// Then it should be exposing data
assertTrue(viewModel.data != null)
可测试架构
借助可测试的应用架构,代码遵循一种结构,让您可以轻松单独测试代码的不同部分。可测试架构还具有其他优势,例如可读性、可维护性、可伸缩性和可重用性更好。
不可测试 的架构会产生以下结果:
- 测试规模更大、速度更慢、更不稳定。无法进行单元测试的类可能必须通过更大的集成测试或界面测试来涵盖。
- 测试不同场景的机会更少。大型测试速度较慢,因此测试应用的所有可能状态可能不切实际。
如需详细了解架构指南,请参阅应用 架构指南。
解耦方法
如果您可以从其余部分提取函数、类或模块的一部分,则测试起来会更轻松、更有效。这种做法称为解耦,它是可测试架构最重要的概念。
常见的解耦技术包括:
- 将应用拆分为多个 层 ,例如呈现层、网域层和数据层。您还可以将应用拆分为多个 模块,每个功能对应一个模块。
- 避免向具有大型依赖项的实体(例如 activity 和 fragment)添加逻辑。将这些类用作框架的入口点,并将 界面和业务逻辑 移至其他位置,例如移至 Composable、ViewModel 或网域层。
- 避免在包含业务逻辑的类中直接使用 框架依赖项 。 例如,请勿在 ViewModel 中使用 Android Context。
- 使依赖项易于 替换 。例如,使用 接口而不是具体实现。即使您不使用依赖项注入框架,也要使用 依赖项注入。
后续步骤
现在,您已经了解了为什么要进行测试以及两种主要的测试类型,接下来可以 阅读 要测试的内容或了解测试策略
或者,如果您想创建第一个测试并边做边学,请查看 测试 Codelab。