
تتيح القوائم للمستخدمين اختيار عنصر من مجموعة خيارات بسهولة على أجهزة Wear OS.
تتضمّن مكتبة واجهة المستخدم للأجهزة القابلة للارتداء فئة
WearableRecyclerView، وهي عملية تنفيذ
RecyclerView
لإنشاء قوائم محسّنة للأجهزة القابلة للارتداء. يمكنك استخدام هذه الواجهه
في تطبيقك المخصّص للأجهزة القابلة للارتداء من خلال إنشاء حاوية WearableRecyclerView جديدة.
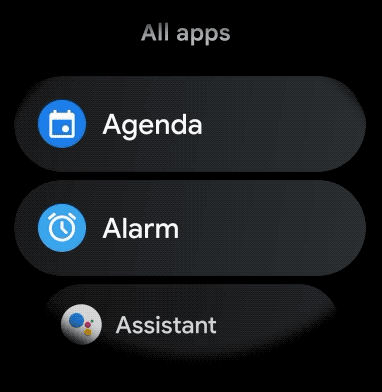
استخدِم WearableRecyclerView ل
قائمة طويلة من العناصر البسيطة، مثل مشغّل التطبيقات أو قائمة بجهات الاتصال. قد يحتوي كل عنصر
على سلسلة قصيرة ورمز مرتبط به. بدلاً من ذلك، قد يتضمّن كل عنصر سلسلة ملف شخصي
أو رمزًا فقط.
ملاحظة: تجنَّب التنسيقات المعقّدة. يجب أن يكتفي المستخدمون بإلقاء نظرة سريعة على العنصر لتحديد هويته، خاصةً مع حجم الشاشة المحدود للأجهزة القابلة للارتداء.
من خلال توسيع فئة RecyclerView الحالية، تعرِض واجهات برمجة التطبيقات WearableRecyclerView
قائمة بالعناصر التي يمكن التمرير فيها عموديًا في قائمة مستقيمة تلقائيًا. يمكنك أيضًا استخدام
واجهات برمجة تطبيقات WearableRecyclerView للموافقة على تنسيق منحني
وإيماءة التمرير الدائري
في تطبيقات الأجهزة القابلة للارتداء.
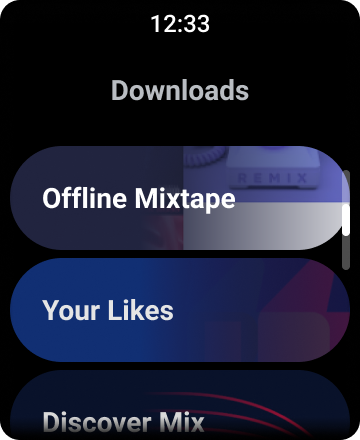
الشكل 1: عرض القائمة التلقائي على Wear OS
يوضّح لك هذا الدليل كيفية استخدام فئة WearableRecyclerView لإنشاء
قوائم في تطبيقات Wear OS، وكيفية تفعيل تنسيق منحني
للعناصر التي يمكن التمرير فيها، وكيفية تخصيص مظهر
العناصر أثناء التمرير.
إضافة WearableRecyclerView إلى نشاط باستخدام ملف XML
يضيف التنسيق التالي WearableRecyclerView إلى نشاط:
<androidx.wear.widget.WearableRecyclerView
    xmlns:android="http://schemas.android.com/apk/res/android"
    xmlns:tools="http://schemas.android.com/tools"
    android:id="@+id/recycler_launcher_view"
    android:layout_width="match_parent"
    android:layout_height="match_parent"
    android:scrollbars="vertical" />
يوضّح المثال التالي الرمز WearableRecyclerView
المطبَّق على نشاط:
Kotlin
class MainActivity : Activity() {

    override fun onCreate(savedInstanceState: Bundle?) {
        super.onCreate(savedInstanceState)
        setContentView(R.layout.activity_main)
    }
    ...
}
Java
public class MainActivity extends Activity {
    @Override
    public void onCreate(Bundle savedInstanceState) {
        super.onCreate(savedInstanceState);
        setContentView(R.layout.activity_main);
    }
    ...
}
إنشاء تنسيق منحني
لإنشاء تخطيط منحني للعناصر التي يمكن التمرير فيها في تطبيقك المخصّص للأجهزة القابلة للارتداء، اتّبِع الخطوات التالية:
-
استخدِم
WearableRecyclerViewكسلة رئيسية في تنسيق XML ذي الصلة. -
اضبط الطريقة
setEdgeItemsCenteringEnabled(boolean)علىtrue. يؤدي ذلك إلى وضع العنصر الأول والأخير في القائمة في منتصف الشاشة عموديًا. -
استخدِم طريقة
WearableRecyclerView.setLayoutManager()لضبط تنسيق العناصر على الشاشة.
Kotlin
wearableRecyclerView.apply {
    // To align the edge children (first and last) with the center of the screen.
    isEdgeItemsCenteringEnabled = true
    ...
    layoutManager = WearableLinearLayoutManager(this@MainActivity)
}
Java
// To align the edge children (first and last) with the center of the screen.
wearableRecyclerView.setEdgeItemsCenteringEnabled(true);
...
wearableRecyclerView.setLayoutManager(
                new WearableLinearLayoutManager(this));
إذا كان تطبيقك يتضمّن متطلبات محدّدة لتخصيص مظهر العناصر المخصّصة للأطفال أثناء الانتقال للأعلى أو للأسفل، على سبيل المثال،
تغيير حجم الرموز والنص أثناء انتقال العناصر بعيدًا عن المركز، يمكنك توسيع
فئة
WearableLinearLayoutManager.LayoutCallback وتجاوز الأسلوب
onLayoutFinished.
تعرض المقتطفات التالية من الرموز مثالاً على تخصيص الانتقال للأعلى أو للأسفل للعناصر بحيث يتم توسيع نطاق العناصر
بعيدًا عن المركز من خلال توسيع فئة
WearableLinearLayoutManager.LayoutCallback:
Kotlin
/** How much icons should scale, at most.  */
private const val MAX_ICON_PROGRESS = 0.65f

class CustomScrollingLayoutCallback : WearableLinearLayoutManager.LayoutCallback() {

    private var progressToCenter: Float = 0f

    override fun onLayoutFinished(child: View, parent: RecyclerView) {
        child.apply {
            // Figure out % progress from top to bottom.
            val centerOffset = height.toFloat() / 2.0f / parent.height.toFloat()
            val yRelativeToCenterOffset = y / parent.height + centerOffset

            // Normalize for center.
            progressToCenter = Math.abs(0.5f - yRelativeToCenterOffset)
            // Adjust to the maximum scale.
            progressToCenter = Math.min(progressToCenter, MAX_ICON_PROGRESS)

            scaleX = 1 - progressToCenter
            scaleY = 1 - progressToCenter
        }
    }
}
Java
public class CustomScrollingLayoutCallback extends WearableLinearLayoutManager.LayoutCallback {
    /** How much icons should scale, at most. */
    private static final float MAX_ICON_PROGRESS = 0.65f;

    private float progressToCenter;

    @Override
    public void onLayoutFinished(View child, RecyclerView parent) {

        // Figure out % progress from top to bottom.
        float centerOffset = ((float) child.getHeight() / 2.0f) / (float) parent.getHeight();
        float yRelativeToCenterOffset = (child.getY() / parent.getHeight()) + centerOffset;

        // Normalize for center.
        progressToCenter = Math.abs(0.5f - yRelativeToCenterOffset);
        // Adjust to the maximum scale.
        progressToCenter = Math.min(progressToCenter, MAX_ICON_PROGRESS);

        child.setScaleX(1 - progressToCenter);
        child.setScaleY(1 - progressToCenter);
    }
}
Kotlin
wearableRecyclerView.layoutManager =
        WearableLinearLayoutManager(this, CustomScrollingLayoutCallback())
Java
CustomScrollingLayoutCallback customScrollingLayoutCallback =
                new CustomScrollingLayoutCallback();
wearableRecyclerView.setLayoutManager(
                new WearableLinearLayoutManager(this, customScrollingLayoutCallback));