
2 つのデバイス間の接続を作成するには、
メカニズムを使用する(1 つのデバイスがサーバーを開く必要があるため)
もう 1 つは、サーバー デバイスの認証情報を使用して接続を開始する必要があります。
MAC アドレス。サーバー デバイスとクライアント デバイスはそれぞれ、必要な認証情報を取得する
BluetoothSocket(別のグループ)
できます。サーバーは受信接続が確立されると、ソケット情報を受け取ります。
拒否されます。クライアントは、RFCOMM チャネルをオープンするときにソケット情報を提供します
サーバーに送ります。
サーバーとクライアントは、それぞれに
同じ RFCOMM チャネルに接続されている BluetoothSocket。この時点で、
デバイスが入出力ストリームを取得し、データ転送を開始して、
Bluetooth の転送に関するセクション
。このセクション
2 つのデバイス間の接続を開始する方法を示します。
その際、 Bluetooth の権限 アプリを Bluetooth 用にセットアップしてから、 接続しようと試みます。
接続方式
実装方法の一つとして、各デバイスをサーバーとして自動的に準備する方法があります。 これにより、各デバイスでサーバー ソケットが開かれ、接続をリッスンするようにします。イン この場合、いずれかのデバイスがもう一方のデバイスとの接続を開始し、 できます。または、一方のデバイスで接続を明示的にホストして、接続をオープン サーバー ソケットに接続し、もう一方のデバイスが接続を開始します。
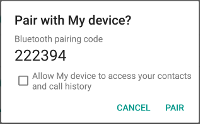
図 1. Bluetooth ペア設定ダイアログ。
サーバーとして接続する
2 つのデバイスを接続する場合、一方がサーバーとして機能するには、
オープン
BluetoothServerSocket。
サーバー ソケットの目的は、受信接続リクエストをリッスンすることです。
リクエストが受け入れられた後に、接続された BluetoothSocket を提供します。Google
BluetoothSocket は、BluetoothServerSocket
BluetoothServerSocket は破棄できます。破棄する必要もありません。
接続を受け入れられます
サーバー ソケットを設定して接続を受け入れるには、次の手順を完了します。 行います。
呼び出して
BluetoothServerSocketを取得しますlistenUsingRfcommWithServiceRecord(String, UUID)。文字列はサービスの識別可能な名前で、 新しい Service Discovery Protocol(SDP)データベース エントリに自動的に書き込まれる 確認できます。名前は任意で、シンプルにアプリ名を指定できます。 Universally Unique Identifier(UUID)も SDP エントリに含む クライアント デバイスとの接続合意の基礎となります。 クライアントがこのデバイスに接続しようとすると、UUID が 一意の ID が生成されます。これらの 接続が承認されるには、UUID が一致する必要があります。
UUID は、文字列 ID の標準化された 128 ビット形式で、 特定します。UUID は、UUID を使用して システムやネットワーク内で一意であるとは限りません。これは、UUID が 実質的にゼロです。外部 IP アドレスを使用せずに、 できます。この場合、一意の ID を使用して アプリの Bluetooth サービスに接続します。アプリで使用する UUID を取得するには、UUID を使用できます。 多数のランダムな
UUIDジェネレータを作成してから、 次を含む UUIDfromString(String)。呼び出して接続リクエストのリッスンを開始します
accept()。これはブロッキング呼び出しです。接続が確立されたときまたは 発生します。接続が受け入れられるのは、 リモート デバイスが次の UUID を含む接続リクエストを送信しました。 このリスニング サーバー ソケットに登録されているソケットを返します。成功すると
accept()は接続されたBluetoothSocketを返します。追加の接続を受け入れる場合を除き、
close()。このメソッド呼び出しにより、サーバー ソケットとそのすべてのリソースが解放されますが、 によって返された接続済みの
BluetoothSocketが閉じないaccept()。TCP/IP とは異なり、RFCOMM では、接続できるクライアントは 1 つにつき 1 つ そのため、ほとんどの場合、close()接続されたソケットを受け入れた直後にBluetoothServerSocketが呼び出される。
accept() 呼び出しはブロッキング呼び出しであるため、メインでは実行しないでください。
呼び出すことができます。別のスレッドで実行すると、アプリが
他のユーザー操作には反応します。通常は、すべての作業を行うのが合理的です。
新しいスレッドでの BluetoothServerSocket または BluetoothSocket の関与
管理できます。ブロックされた通話(accept() など)をキャンセルするには、close() を呼び出します。
(別のスレッドの BluetoothServerSocket または BluetoothSocket で)備考
BluetoothServerSocket または BluetoothSocket に対するすべてのメソッドが
スレッドセーフです。
例
以下は、リクエストを受け入れるサーバー コンポーネントの簡略化したスレッドです。 受信接続:
Kotlin
private inner class AcceptThread : Thread() {

   private val mmServerSocket: BluetoothServerSocket? by lazy(LazyThreadSafetyMode.NONE) {
       bluetoothAdapter?.listenUsingInsecureRfcommWithServiceRecord(NAME, MY_UUID)
   }

   override fun run() {
       // Keep listening until exception occurs or a socket is returned.
       var shouldLoop = true
       while (shouldLoop) {
           val socket: BluetoothSocket? = try {
               mmServerSocket?.accept()
           } catch (e: IOException) {
               Log.e(TAG, "Socket's accept() method failed", e)
               shouldLoop = false
               null
           }
           socket?.also {
               manageMyConnectedSocket(it)
               mmServerSocket?.close()
               shouldLoop = false
           }
       }
   }

   // Closes the connect socket and causes the thread to finish.
   fun cancel() {
       try {
           mmServerSocket?.close()
       } catch (e: IOException) {
           Log.e(TAG, "Could not close the connect socket", e)
       }
   }
}
Java
private class AcceptThread extends Thread {
   private final BluetoothServerSocket mmServerSocket;

   public AcceptThread() {
       // Use a temporary object that is later assigned to mmServerSocket
       // because mmServerSocket is final.
       BluetoothServerSocket tmp = null;
       try {
           // MY_UUID is the app's UUID string, also used by the client code.
           tmp = bluetoothAdapter.listenUsingRfcommWithServiceRecord(NAME, MY_UUID);
       } catch (IOException e) {
           Log.e(TAG, "Socket's listen() method failed", e);
       }
       mmServerSocket = tmp;
   }

   public void run() {
       BluetoothSocket socket = null;
       // Keep listening until exception occurs or a socket is returned.
       while (true) {
           try {
               socket = mmServerSocket.accept();
           } catch (IOException e) {
               Log.e(TAG, "Socket's accept() method failed", e);
               break;
           }

           if (socket != null) {
               // A connection was accepted. Perform work associated with
               // the connection in a separate thread.
               manageMyConnectedSocket(socket);
               mmServerSocket.close();
               break;
           }
       }
   }

   // Closes the connect socket and causes the thread to finish.
   public void cancel() {
       try {
           mmServerSocket.close();
       } catch (IOException e) {
           Log.e(TAG, "Could not close the connect socket", e);
       }
   }
}
この例では必要な受信接続は 1 つだけなので、
接続が承認され、BluetoothSocket が取得されると、アプリは
別のスレッドに BluetoothSocket を取得したら、
BluetoothServerSocket を呼び出してループから抜けます。
なお、accept() が BluetoothSocket を返すとき、ソケットはすでに
接続されています。そのため、
connect()(同様に)
行うことができます。
アプリ固有の manageMyConnectedSocket() メソッドは、
スレッドで実行します。この点については、
Bluetooth の転送
提供します。
通常は、作業が完了したらすぐに BluetoothServerSocket を閉じるべきです。
受信接続をリッスンしますこの例では、すぐに close() が呼び出されます。
BluetoothSocket が獲得されたためです。また、一般公開の
メソッド(イベント内でプライベート BluetoothSocket を閉じることができる)
そのサーバー ソケットでのリッスンを停止する必要があります。
クライアントとして接続
接続を受け入れるリモート デバイスとの接続を開始
接続する場合は、まず BluetoothDevice を取得する必要があります。
リモート デバイスを表すオブジェクトです。Google Chat で
BluetoothDevice、Bluetooth を探す
。必要なこと
次に、BluetoothDevice を使用して BluetoothSocket を取得し、
接続します
基本的な手順は次のとおりです。
BluetoothDeviceを使用して、以下を呼び出してBluetoothSocketを取得します。createRfcommSocketToServiceRecord(UUID)。このメソッドは、クライアントが次の操作を行えるように
BluetoothSocketオブジェクトを初期化します。BluetoothDeviceに接続する。ここで渡される UUID は、使用する UUID と一致している必要があります 呼び出されたときにサーバー デバイスによってlistenUsingRfcommWithServiceRecord(String, UUID)BluetoothServerSocketを開きます。一致する UUID を使用するには、 UUID 文字列をアプリに挿入して、両方のサーバーから参照できます。 構成する必要がありますconnect()を呼び出して接続を開始します。このメソッドは、 ブロックします。クライアントがこのメソッドを呼び出した後、システムは SDP ルックアップを実行して、 リモート デバイスに送信されます。ルックアップに成功し、 リモート デバイスが接続を受け入れると、使用する RFCOMM チャネルを
connect()メソッドが戻ります。接続が 失敗した場合、またはconnect()メソッドが(約 12 秒後に)タイムアウトした場合: メソッドがIOExceptionをスローする。
connect() はブロッキング呼び出しであるため、常に実行する必要があります。
メイン アクティビティ(UI)とは別のスレッドに配置する必要があります。
使用します。
例
Bluetooth を開始するクライアント スレッドの基本的な例を、以下に示します。 connection:
Kotlin
private inner class ConnectThread(device: BluetoothDevice) : Thread() {

   private val mmSocket: BluetoothSocket? by lazy(LazyThreadSafetyMode.NONE) {
       device.createRfcommSocketToServiceRecord(MY_UUID)
   }

   public override fun run() {
       // Cancel discovery because it otherwise slows down the connection.
       bluetoothAdapter?.cancelDiscovery()

       mmSocket?.let { socket ->
           // Connect to the remote device through the socket. This call blocks
           // until it succeeds or throws an exception.
           socket.connect()

           // The connection attempt succeeded. Perform work associated with
           // the connection in a separate thread.
           manageMyConnectedSocket(socket)
       }
   }

   // Closes the client socket and causes the thread to finish.
   fun cancel() {
       try {
           mmSocket?.close()
       } catch (e: IOException) {
           Log.e(TAG, "Could not close the client socket", e)
       }
   }
}
Java
private class ConnectThread extends Thread {
   private final BluetoothSocket mmSocket;
   private final BluetoothDevice mmDevice;

   public ConnectThread(BluetoothDevice device) {
       // Use a temporary object that is later assigned to mmSocket
       // because mmSocket is final.
       BluetoothSocket tmp = null;
       mmDevice = device;

       try {
           // Get a BluetoothSocket to connect with the given BluetoothDevice.
           // MY_UUID is the app's UUID string, also used in the server code.
           tmp = device.createRfcommSocketToServiceRecord(MY_UUID);
       } catch (IOException e) {
           Log.e(TAG, "Socket's create() method failed", e);
       }
       mmSocket = tmp;
   }

   public void run() {
       // Cancel discovery because it otherwise slows down the connection.
       bluetoothAdapter.cancelDiscovery();

       try {
           // Connect to the remote device through the socket. This call blocks
           // until it succeeds or throws an exception.
           mmSocket.connect();
       } catch (IOException connectException) {
           // Unable to connect; close the socket and return.
           try {
               mmSocket.close();
           } catch (IOException closeException) {
               Log.e(TAG, "Could not close the client socket", closeException);
           }
           return;
       }

       // The connection attempt succeeded. Perform work associated with
       // the connection in a separate thread.
       manageMyConnectedSocket(mmSocket);
   }

   // Closes the client socket and causes the thread to finish.
   public void cancel() {
       try {
           mmSocket.close();
       } catch (IOException e) {
           Log.e(TAG, "Could not close the client socket", e);
       }
   }
}
このスニペットでは、接続の前に cancelDiscovery() が呼び出されています。
行われます。必ず connect() の前に cancelDiscovery() を呼び出す必要があります。
特に、デバイスの有無にかかわらず cancelDiscovery() が成功するためです。
検出中です。エラーの有無を判定するために、
デバイスの検出が進行中である場合、
isDiscovering()。
アプリ固有の manageMyConnectedSocket() メソッドは、
スレッドで実行します。この点については、
Bluetooth データの転送に関するヘルプセンター記事をご覧ください。
BluetoothSocket の作業が終わったら、必ず close() を呼び出してください。そうすることで、
接続されたソケットを直ちに閉じ、関連するすべての内部
説明します。