Android XR SDK 现已推出开发者预览版。我们期望收到您的反馈!请访问我们的
支持页面与我们联系。
Android XR Extensions for Unity 快速入门
使用集合让一切井井有条
根据您的偏好保存内容并对其进行分类。
每个功能都包含一个示例,供您使用和玩弄代码和场景设置。本快速入门将引导您导入适用于 Unity 的 Android XR 扩展程序软件包,然后配置人脸跟踪示例。
前提条件
在完成以下步骤之前,请确保您已完成Unity 项目设置中所述的步骤。
导入软件包
如需从 Git 网址加载 Unity Package Manager 软件包,请执行以下操作:
- 在 Window 中,打开 Package Manager。
- 在 Package Manager 工具栏中打开“Add”(添加)菜单。
- 在用于添加软件包的选项中,点击 +(加号)按钮。
在下拉列表中,点击 Install package from git 网址(通过 Git 网址安装软件包)。
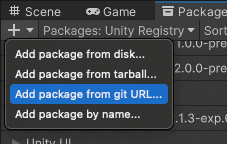
输入以下网址:
https://github.com/android/android-xr-unity-package.git
选择安装。
配置面部跟踪示例
所有示例(包括本示例)都包含一个 README 文件,其中包含有关如何配置和设置项目的说明。
如需导入和配置示例,请执行以下操作:
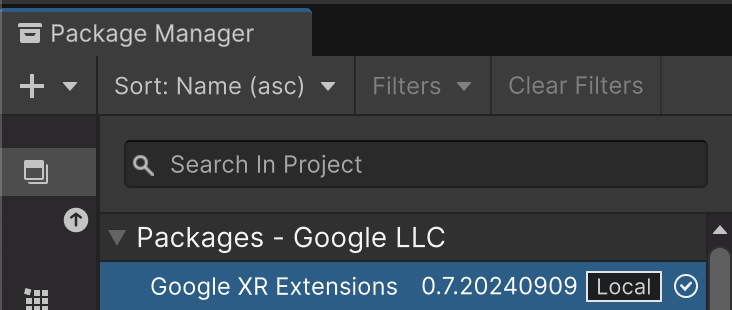
依次前往 Package Manager > In Project > Android XR Extensions for Unity。

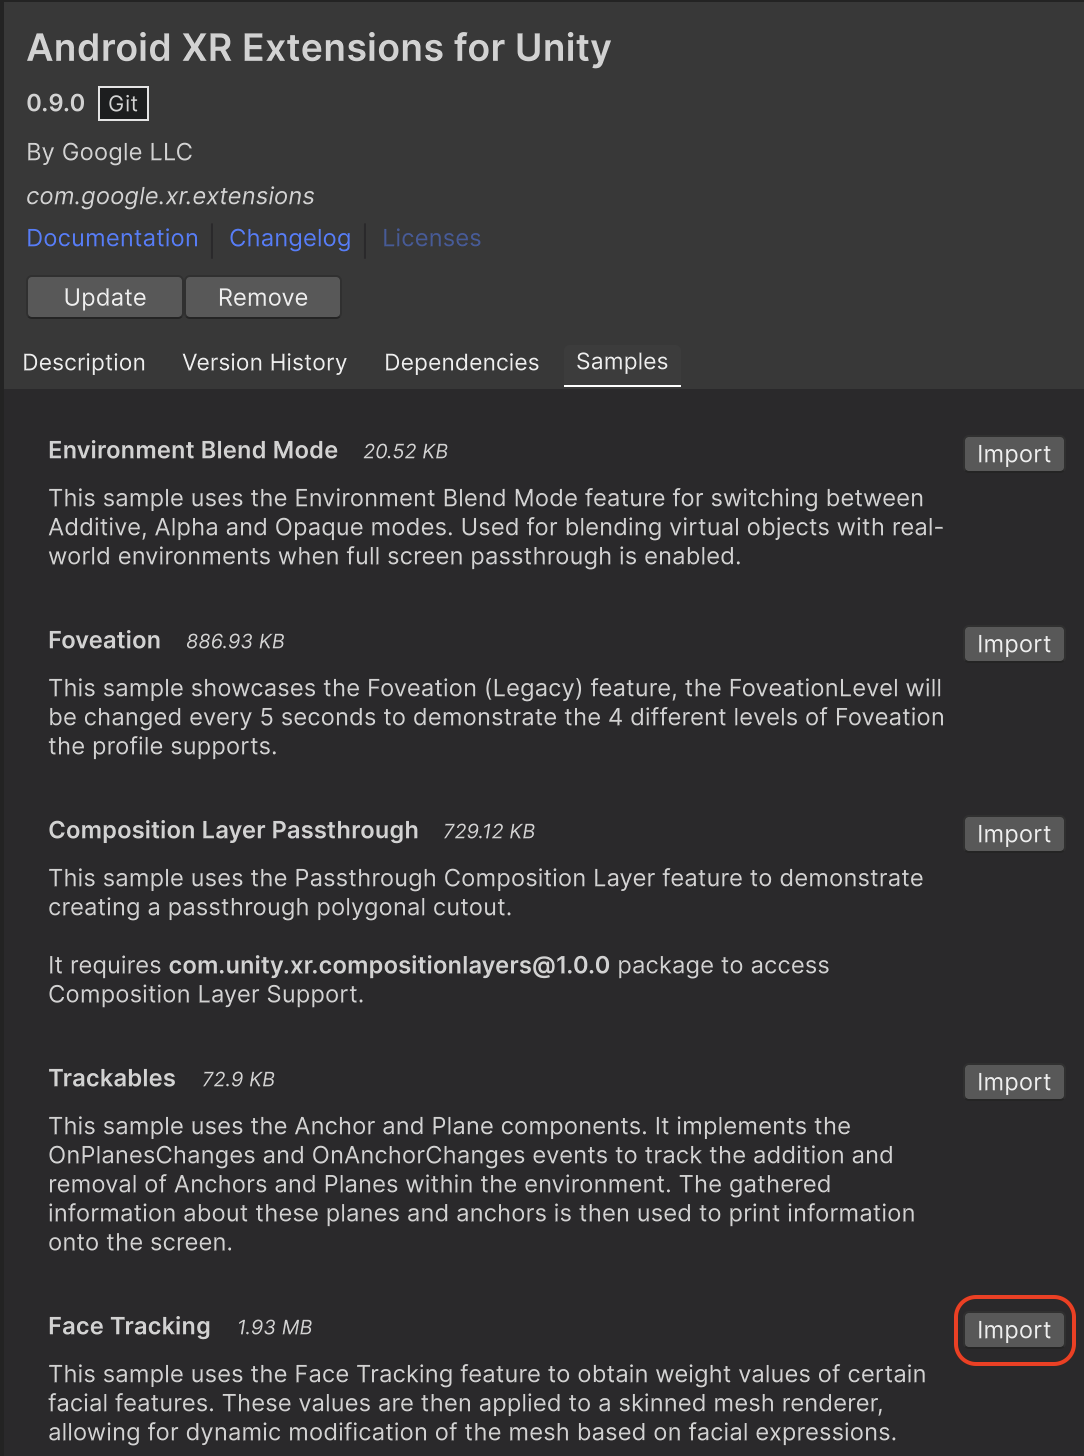
选择示例标签页。找到人脸跟踪示例,然后点击导入。

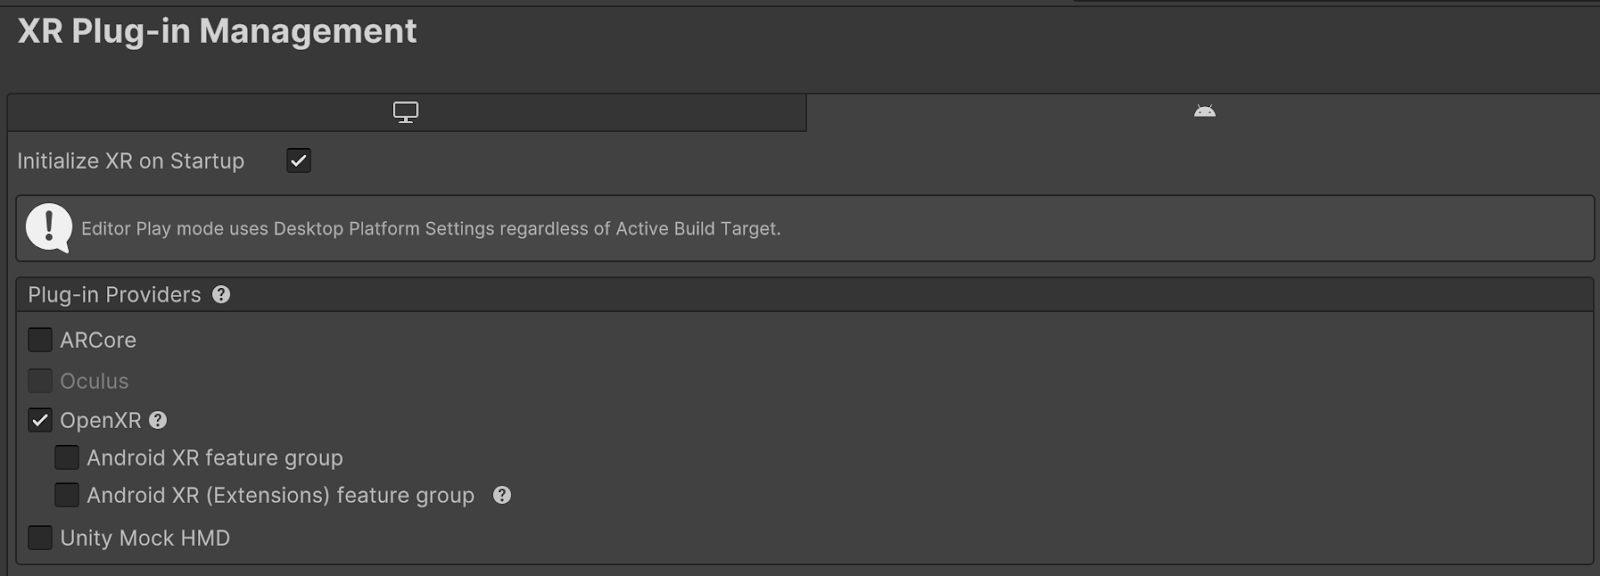
依次前往 Edit > Project Settings > XR Plug-in Management。
在 Android 标签页的 Plug-in Providers 下,启用 OpenXR。
然后,启用 Android XR(扩展程序)功能组。

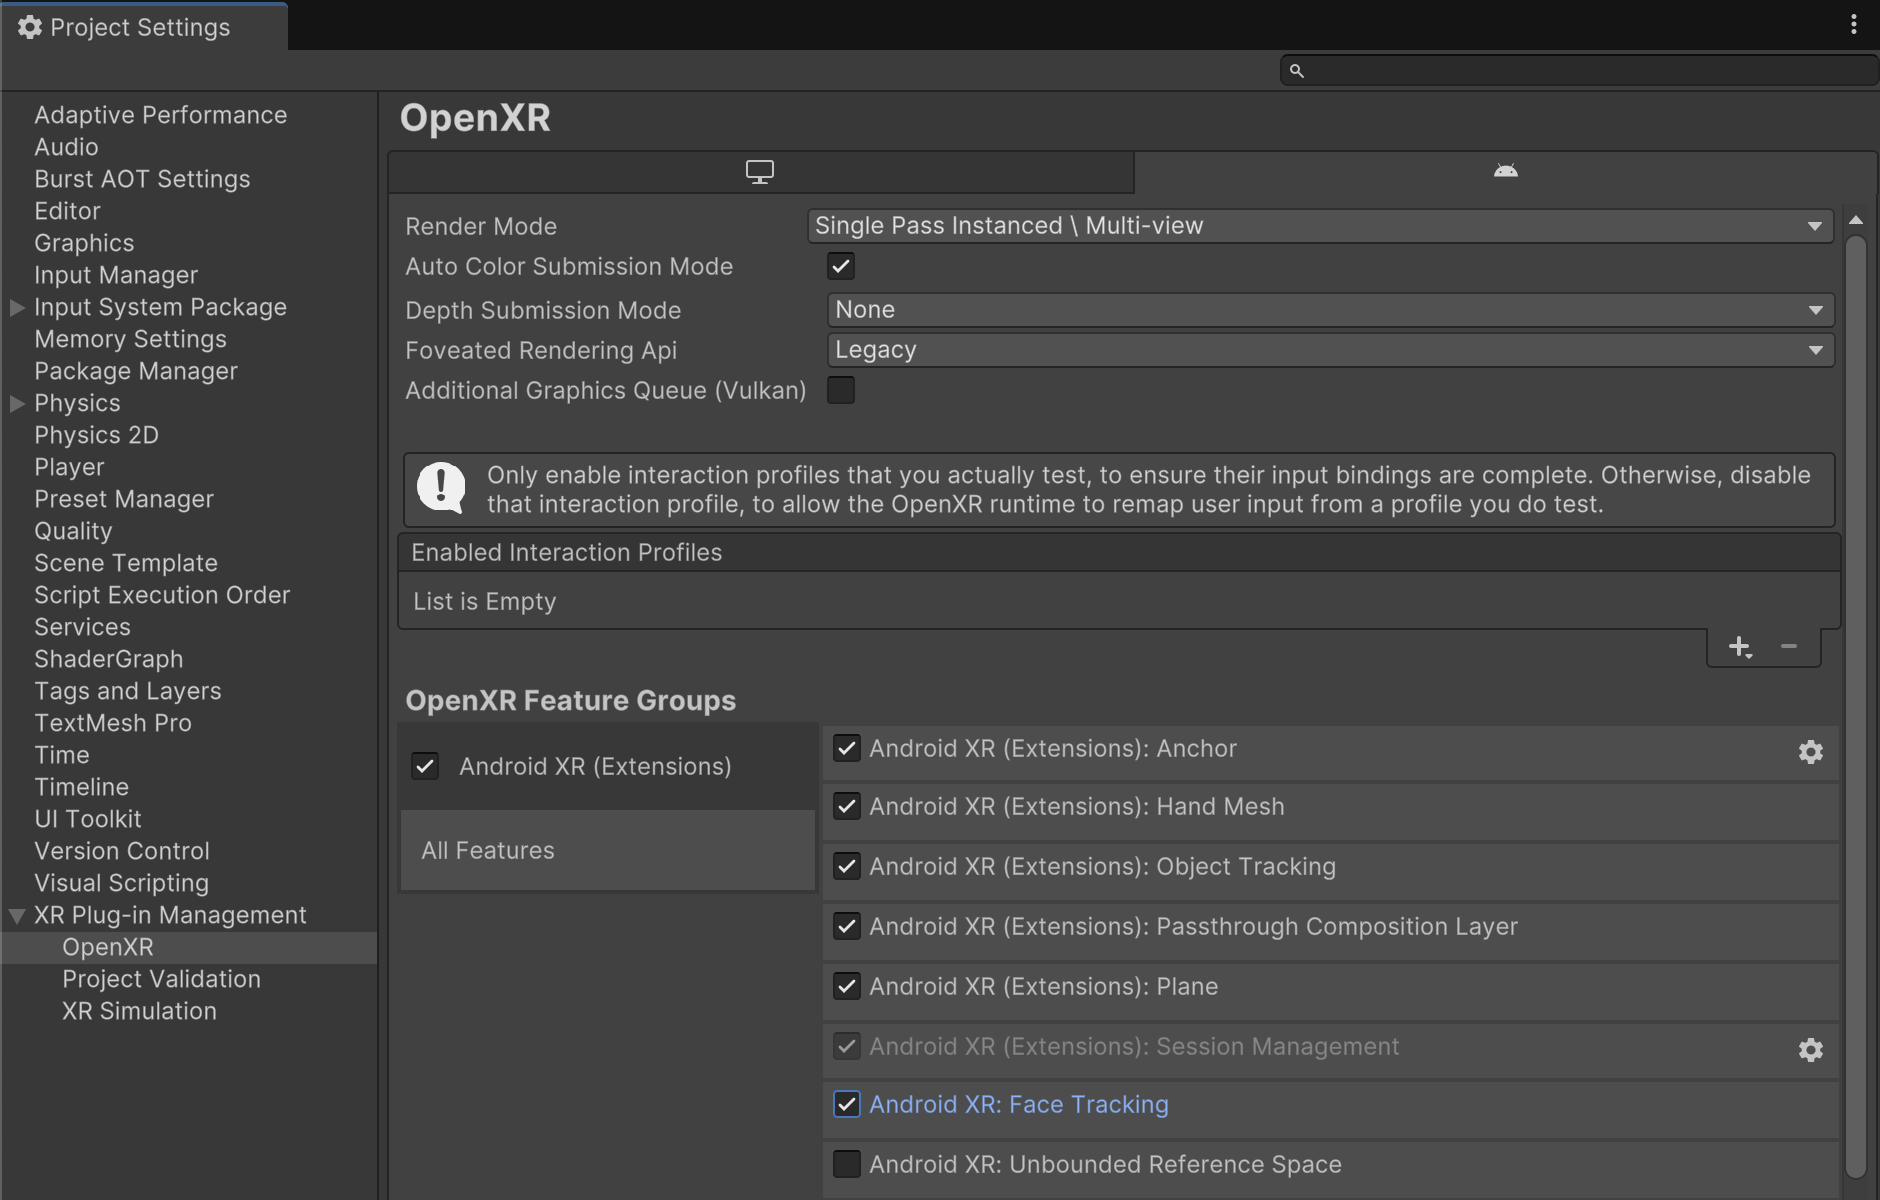
依次前往 Edit > Project Settings > XR Plug-in Management > OpenXR。
启用 Android XR:人脸跟踪。

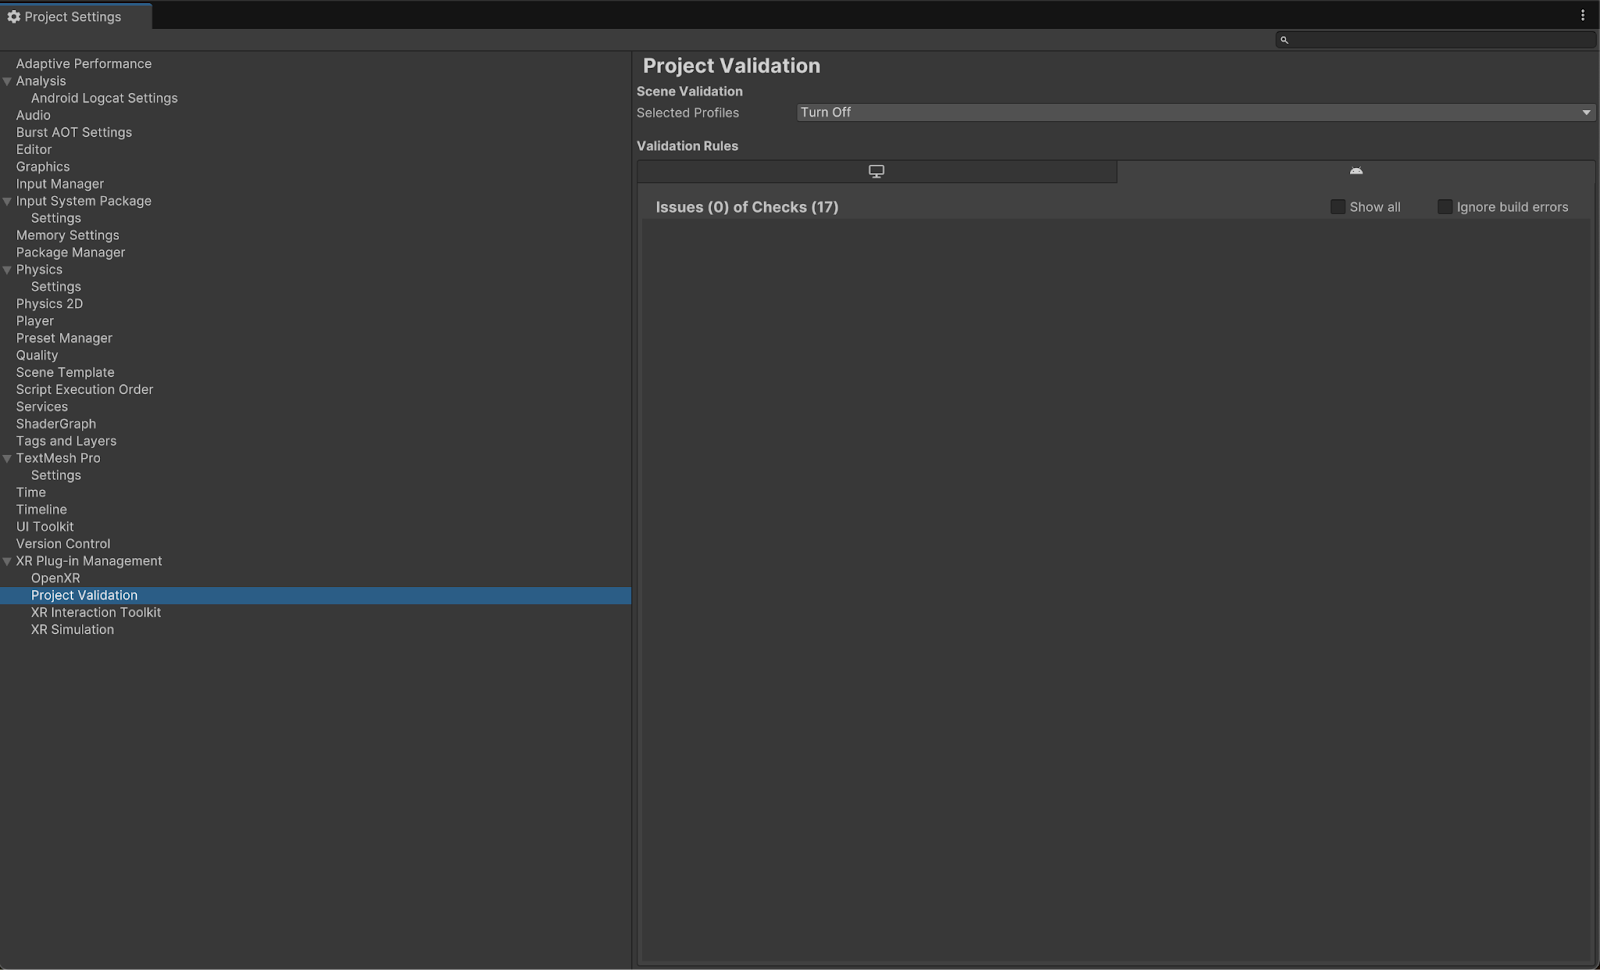
在 XR Plug-in Management > Project Validation 下,修正所有与 OpenXR 相关的问题。这有助于配置您的玩家设置。

在项目中,打开 FaceTracking 场景,该场景位于 Assets > Samples > Android XR Extensions for Unity > version > Face Tracking 中。

OpenXR™ 和 OpenXR 徽标是 Khronos Group Inc. 拥有的商标,已在中国、欧盟、日本和英国注册为商标。
本页面上的内容和代码示例受内容许可部分所述许可的限制。Java 和 OpenJDK 是 Oracle 和/或其关联公司的注册商标。
最后更新时间 (UTC):2025-07-27。
[null,null,["最后更新时间 (UTC):2025-07-27。"],[],[],null,["# Android XR Extensions for Unity quickstart\n\nEach feature includes a sample for you to use and play with code and scene\nsetups. This quickstart walks you through importing the Android XR Extensions\nfor Unity package and then configuring the face tracking sample.\n\nPrerequisites\n-------------\n\nBefore completing these steps, make sure you've completed the steps described in\n[Unity project setup](/develop/xr/unity/setup).\n\nImport packages\n---------------\n\nTo load a Unity Package Manager package from a Git URL:\n\n1. In **Window** , open the **Package Manager**.\n2. Open the add menu in the **Package Manager** toolbar.\n3. In the options for adding packages, click the **+** (plus) button.\n4. In the drop-down list, click **Install package from git URL**.\n\n5. Enter the following URL:\n\n https://github.com/android/android-xr-unity-package.git\n\n6. Select **Install**.\n\nConfigure the face tracking sample\n----------------------------------\n\nAll samples, including this one, include a README file containing\ninstructions on how to configure and set up the project.\n\nTo import and configure the sample:\n\n1. Go to **Package Manager** \\\u003e **In Project** \\\u003e **Android XR Extensions for Unity**.\n\n2. Select the **Samples** tab. Find the **Face Tracking** sample and click **Import**.\n\n3. Go to **Edit \\\u003e Project Settings \\\u003e XR Plug-in Management**.\n\n4. In the **Android** tab, under **Plug-in Providers** , enable **OpenXR**.\n\n Then, enable the **Android XR (Extensions) feature group** .\n5. Go to **Edit \\\u003e Project Settings \\\u003e XR Plug-in Management \\\u003e OpenXR**.\n\n6. Enable **Android XR: Face Tracking**.\n\n7. Under **XR Plug-in Management \\\u003e Project Validation**, fix all OpenXR-related\n issues. This helps configure your Player Settings.\n\n8. In your **Project** , open the **FaceTracking** scene, located in **Assets \\\u003e Samples \\\u003e Android XR Extensions for Unity \\\u003e *version* \\\u003e Face Tracking**.\n\n*** ** * ** ***\n\nOpenXR™ and the OpenXR logo are trademarks owned\nby The Khronos Group Inc. and are registered as a trademark in China,\nthe European Union, Japan and the United Kingdom."]]