
本文說明 Batterystats 工具與 Battery Historian 指令碼的基本設定步驟和工作流程。如要瞭解如何使用 Battery Historian 檢查電池耗電模式,請參閱「使用 Battery Historian 分析電源使用情況」。
Batterystats 是 Android 架構中的一項工具,可收集裝置的電池資料。您可以透過 adb 將收集到的電池資料轉儲到開發機器,然後利用 Battery Historian 建立可分析的報表。Battery Historian 會將報表從 Batterystats 轉換成 HTML 圖表,方便您在瀏覽器中查看。
Batterystats 和 Battery Historian 很適合以下用途:
- 瞭解程序中消耗電池電力的環節和方式。
- 找出應用程式中可延遲或移除的工作,提升電池續航力。
安裝 Battery Historian
您可以使用 Docker 安裝 Battery Historian。如要瞭解其他安裝方式,包括透過原始碼建構,請見專案 GitHub 頁面中的 README 檔案。如要透過 Docker 安裝,請按照下列步驟操作:
如要確認 Docker 是否已正確安裝,請開啟指令列並輸入下列指令:
docker run hello-world如果已正確安裝 Docker,畫面上會顯示以下輸出內容:
Unable to find image 'hello-world:latest' locally
latest: Pulling from library/hello-world
78445dd45222: Pull complete
Digest:
sha256:c5515758d4c5e1e838e9cd307f6c6a0d620b5e07e6f927b07d05f6d12a1ac8d7
Status: Downloaded newer image for hello-world:latest

Hello from Docker!
This message shows that your installation appears to be working correctly.

To generate this message, Docker took the following steps:
1. The Docker client contacted the Docker daemon.
2. The Docker daemon pulled the "hello-world" image from the Docker Hub.
3. The Docker daemon created a new container from that image which runs the
executable that produces the output you are currently reading.
4. The Docker daemon streamed that output to the Docker client, which sent it to your terminal
請先啟動 Docker Desktop 應用程式 (即 Docker 的 GUI 前端),再執行 Battery Historian 映像檔。執行這個映像檔會將 Docker 工具初始化。這個步驟必須至少執行一次,Battery Historian 才能運作。
首次執行 Battery Historian 時,請從指令列執行。您無法透過 Docker Desktop 應用程式指定要執行網路伺服器的通訊埠,只能透過指令列執行此操作。不過,當您成功從指令列執行容器後,系統會在 Docker Desktop 中建立一個項目,而您可以從 Docker Desktop 中使用同一組事件監聽器通訊埠啟動該項目。
請使用下列指令執行 Battery Historian 映像檔:
docker run -p port_number:9999 gcr.io/android-battery-historian/stable:3.1 --port 9999
Battery Historian 會使用您選擇的通訊埠,即透過
port_number指定的通訊埠。在瀏覽器中前往 Battery Historian 頁面,確認該工具正在執行。工具位址會因作業系統而異:
- Linux 和 Mac
- Battery Historian 的位址是
http://localhost:port_number。 - Windows
- 啟動 Docker 後,系統會指出此工具所用電腦的 IP 位址。舉例來說,如果 IP 位址是 123.456.78.90,代表 Battery Historian 位址是
http://123.456.78.90:port_number。
隨後,Battery Historian 的起始網頁將會開啟,您可以在該頁面上傳及查看電池統計資料。
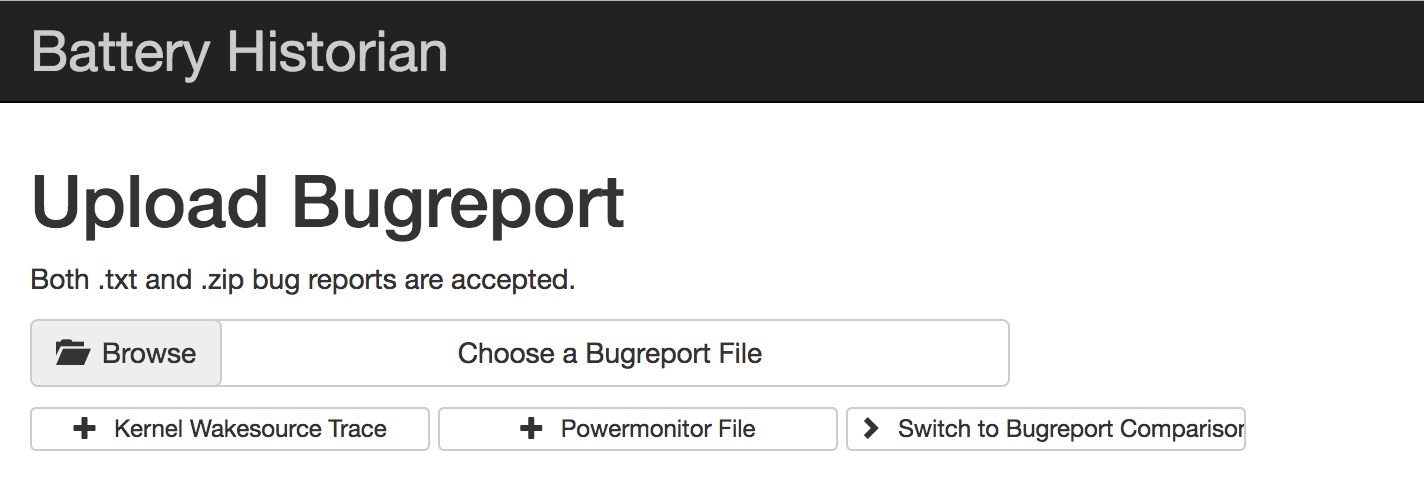
圖 1. Battery Historian 起始網頁。
使用 Batterystats 收集資料
如要使用 Batterystats 從裝置收集資料,然後在 Battery Historian 中開啟,請執行以下操作:
將行動裝置連接到電腦。
在終端機視窗中執行下列指令,關閉執行中的
adb伺服器:adb kill-server重新啟動
adb並執行下列指令,檢查是否有任何已連結的裝置。adb devices這項指令會列出您的裝置,輸出內容會類似於以下範例。

圖 2. adb devices的輸出內容,顯示有一部連接的裝置。如果指令未列出裝置,請確認手機已連接,且已啟用 USB 偵錯功能,然後終止並重新啟動
adb。執行以下指令,重設電池資料收集作業:
adb shell dumpsys batterystats --reset裝置一律會在背景收集 Batterystats 和其他偵錯資訊。選擇重設後,系統會清除先前收集的電池資料。如果不想重設,輸出內容會非常龐大。
中斷裝置與電腦的連結,讓裝置只從本身電池取得電力。
使用應用程式,執行要收集資料的操作,例如中斷 Wi-Fi 連線,並將資料傳送至雲端。
重新連接手機。
確認系統可辨識手機後,請執行下列指令:
adb devices執行下列指令,轉儲所有電池資料。這可能需要一段時間。
adb shell dumpsys batterystats > [path/]batterystats.txt
系統會使用選用路徑引數,在您指定的目錄中建立
batterystats.txt檔案。如未指定路徑,檔案會建立在主目錄中。使用原始資料建立報表。
- 搭載 Android 7.0 以上版本的裝置:
-
adb bugreport [path/]bugreport.zip
- 搭載 Android 6.0 以下版本的裝置:
-
adb bugreport [path/]bugreport.txt
錯誤報告可能需要幾分鐘才能製作完成。在製作完成前,請勿中斷裝置連結或取消程序。
和
batterystats.txt相同,系統會使用選用的path引數,在您指定的目錄中建立這些檔案。如未指定路徑,這些檔案會建立在主目錄中。如果 Battery Historian 尚未執行,請使用以下指令執行此工具:
docker run -p port_number:9999 gcr.io/android-battery-historian/stable:3.1 --port 9999
如要在 Battery Historian 中檢視資料,請在瀏覽器中開啟 Battery Historian。在 Mac 和 Linux,Battery Historian 會在
http://localhost:port_number執行。如果是 Windows,Battery Historian 則在http://your_IP_address:port_number執行。按一下「Browse」,然後選擇您建立的錯誤報告檔案。
按一下「Submit」。Battery Historian 會開啟依據 Batterystats 資料建立的圖表。
使用 Battery Historian 圖表檢視資料
Battery Historian 會以圖表呈現一段時間內的電力相關事件。
當系統元件因處於使用狀態而消耗電池電力時,圖表的每一列都會顯示有顏色的長條線段。此圖表不會顯示元件已使用多少電力,只會顯示應用程式是否處於使用狀態。系統會依類別歸納圖表,以長條圖顯示各類別的變化趨勢,如圖表的 x 軸所示。
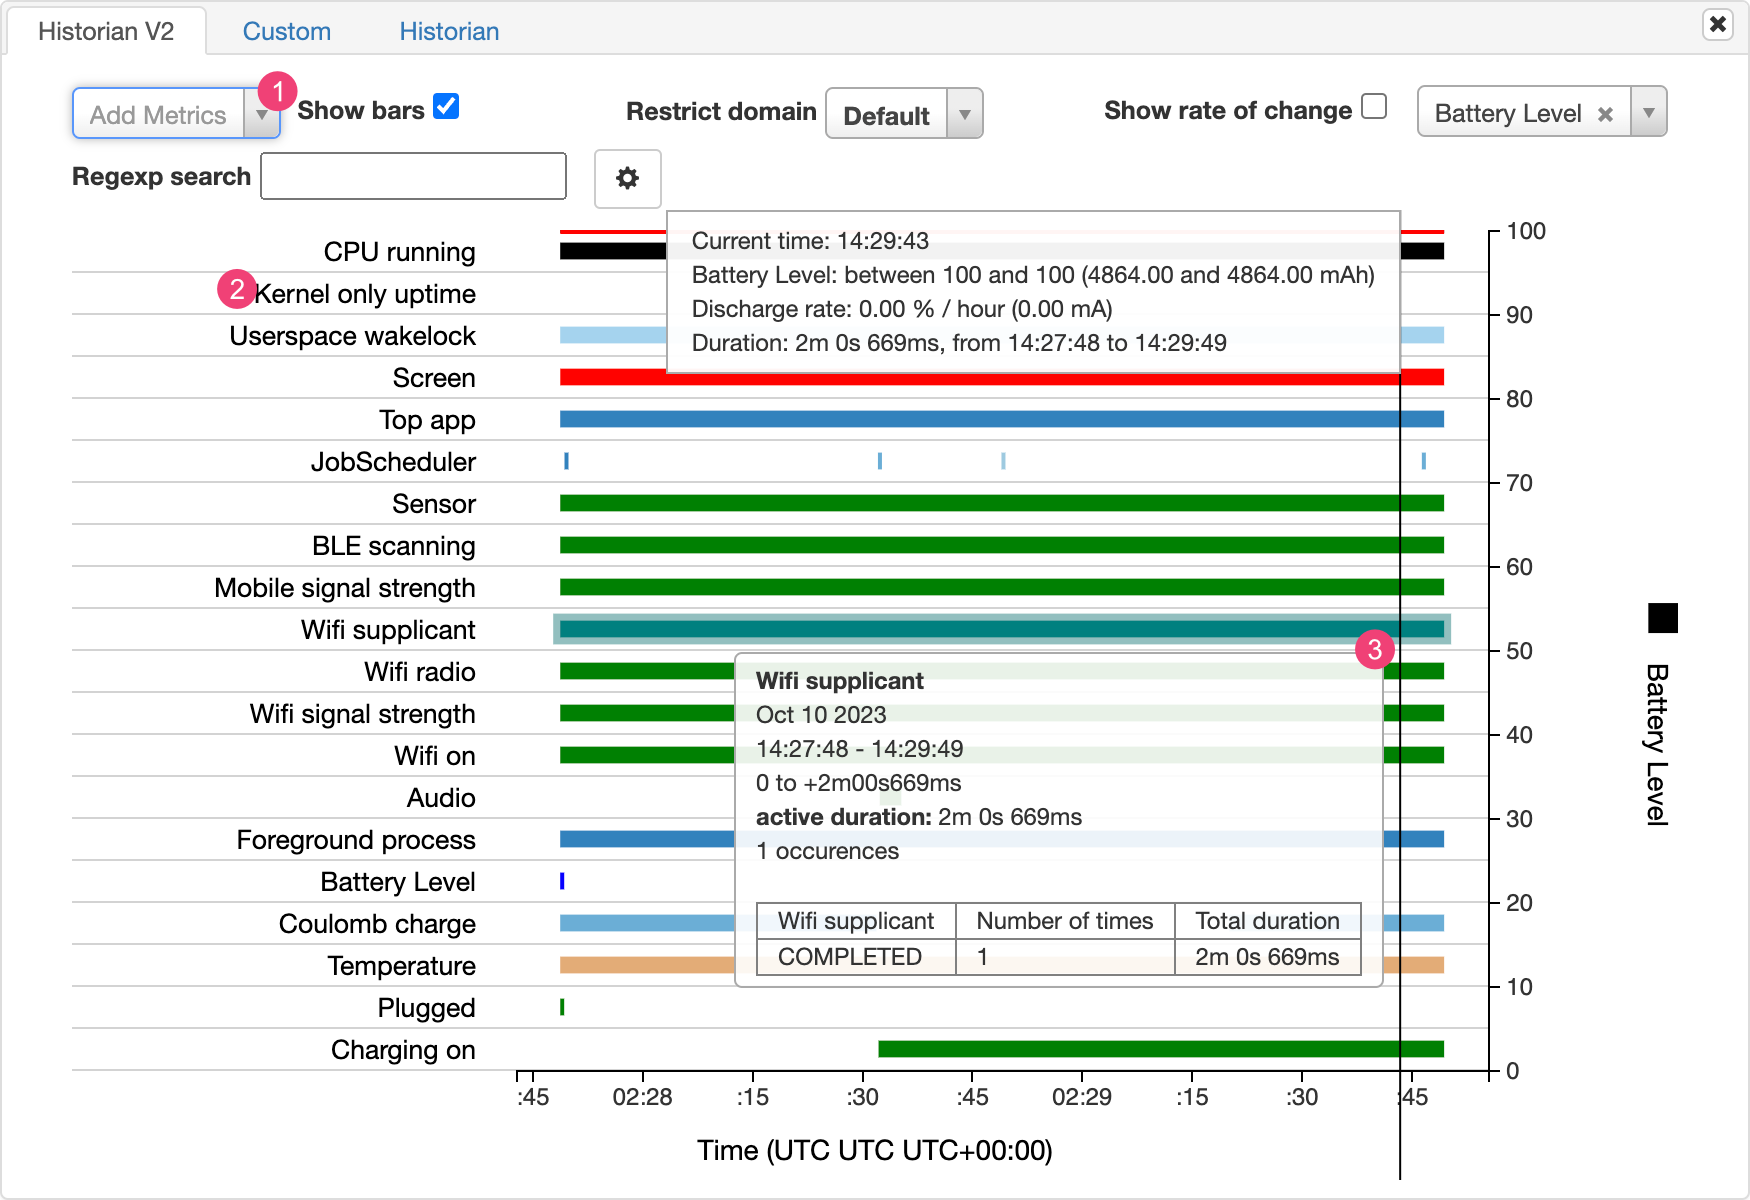
- 從下拉式清單新增其他指標。
- 將游標懸停在指標名稱上,即可查看每個指標的詳細資訊,包括圖表中所用顏色的說明。
- 將游標懸停在長條上,即可查看該指標的詳細資訊,以及時間軸上特定時間點的電池統計資料。
其他 Batterystats 輸出內容
在 Battery Historian 圖表後的統計資料部分中,您可以查看 batterystats.txt 檔案的其他相關資訊。

1「System Stats」分頁包含整個系統的統計資料,例如電池信號等級和螢幕亮度。此資訊有助您全面掌握裝置的運作情況。如要確保沒有外部事件影響您的測試,這就特別有用。
2「App Stats」分頁包含特定應用程式的資訊。請使用「App Selection」窗格中的「Sort apps by」下拉式清單 (3),排序應用程式清單。您可以使用應用程式下拉式清單 (4),選取要查看哪個特定應用程式的統計資料。