
앱의 네이티브 코드를 컴파일하고 디버그하려면 다음 구성요소가 필요합니다.
- Android 네이티브 개발 키트(NDK): Android에서 C 및 C++ 코드를 사용할 수 있도록 해주는 도구 모음입니다.
- CMake: Gradle과 함께 작동하여 네이티브 라이브러리를 빌드하는 외부 빌드 도구입니다. ndk-build만 사용하려는 경우에는 이 구성요소가 필요하지 않습니다.
- LLDB: Android 스튜디오에서 네이티브 코드를 디버깅하는 데 사용하는 디버거입니다. 기본적으로 LLDB는 Android 스튜디오와 함께 설치됩니다.
이 페이지에서는 이러한 구성요소를 자동으로 설치하거나, Android 스튜디오 또는 sdkmanager 도구를 사용하여 구성요소를 수동으로 다운로드하고 설치하는 방법을 설명합니다.
NDK 및 CMake 자동 설치
Android Gradle 플러그인 4.2.0 이상에서는 라이선스가 사전에 수락된 경우 프로젝트를 처음 빌드할 때 필수 NDK 및 CMake를 자동으로 설치할 수 있습니다. 라이선스 약관을 이미 읽고 이에 동의했다면 스크립트에서 다음 명령어를 사용하여 사전에 라이선스를 수락할 수 있습니다.
yes | ${sdk}/cmdline-tools/latest/bin/sdkmanager --licenses
NDK 및 CMake 설치
개발자가 NDK를 설치하면 Android 스튜디오에서 사용 가능한 최신 NDK가 선택됩니다. 대부분의 프로젝트는 기본 NDK 버전이면 충분합니다.
하지만 프로젝트에 특정 NDK 버전이 하나 이상 필요한 경우 특정 버전을 다운로드하고 설정할 수 있습니다. 이렇게 하면 여러 프로젝트에서 각각 특정 NDK 버전에 종속된 재현 가능한 빌드를 만들 수 있습니다. Android 스튜디오는 모든 NDK 버전을 android-sdk/ndk/ 디렉터리에 설치합니다.
Android 스튜디오에서 CMake와 기본 NDK를 설치하려면 다음을 따르세요.
프로젝트를 연 상태에서 Tools > SDK Manager를 클릭합니다.
SDK Tools 탭을 클릭합니다.
NDK (Side by side) 및 CMake 체크박스를 선택합니다.
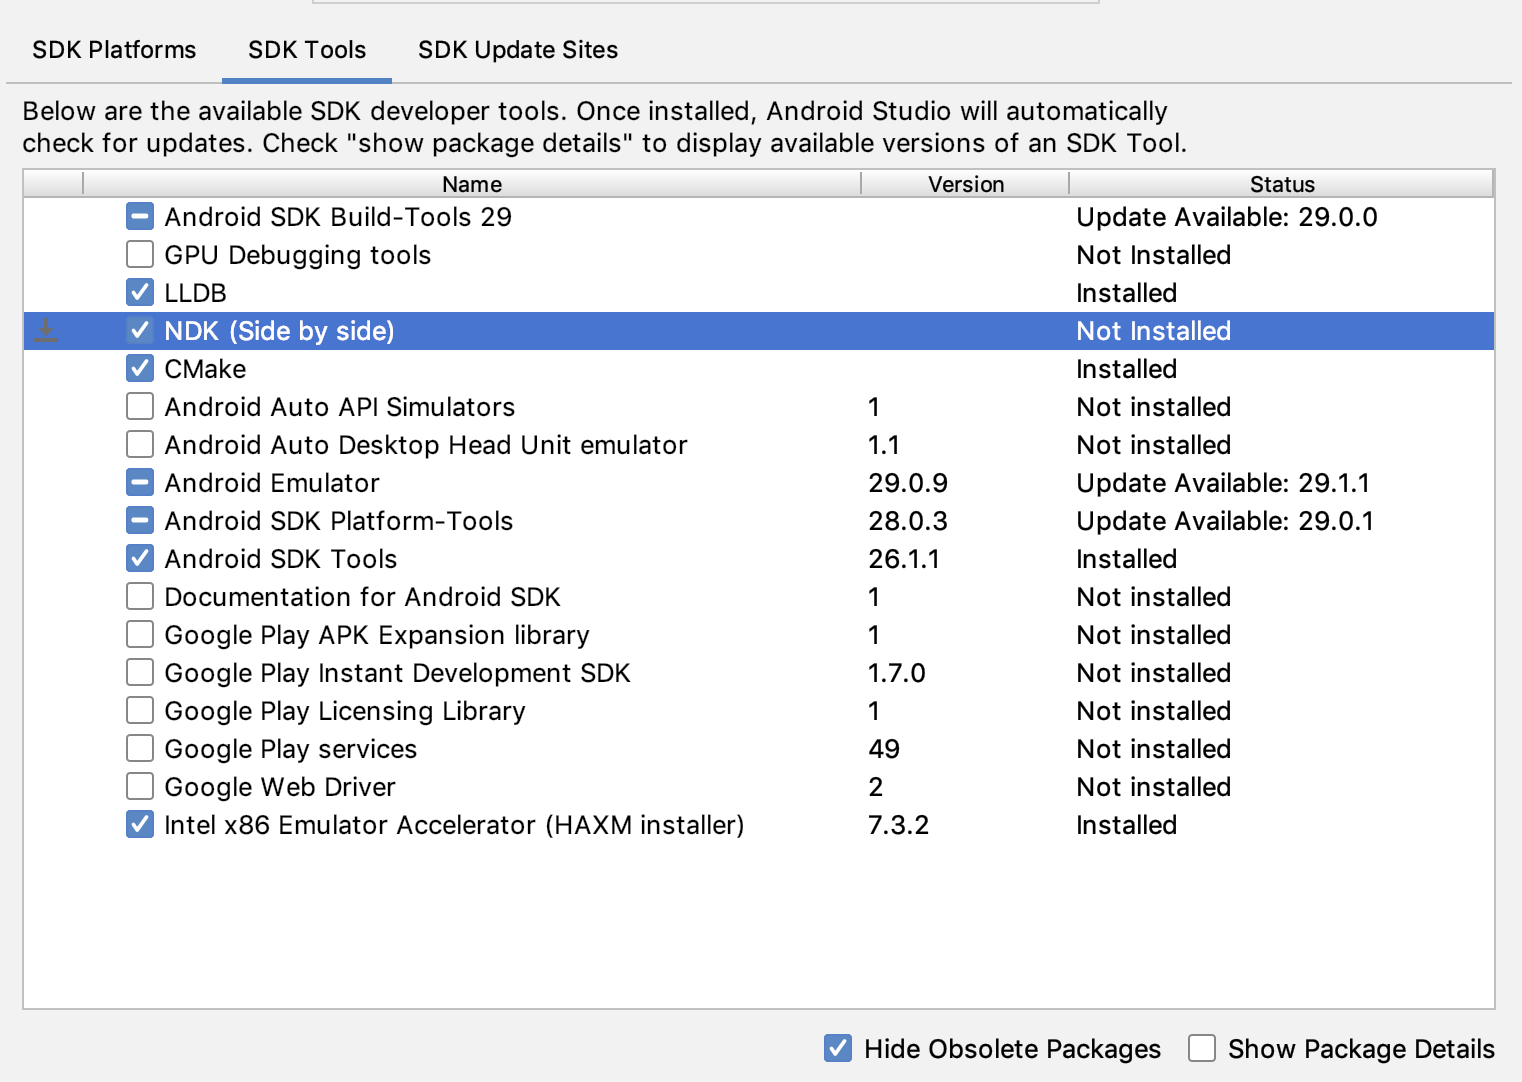 그림 1. NDK(Side by side) 옵션을 보여주는 SDK 도구 창
OK를 클릭합니다.
대화상자에 NDK 패키지가 디스크에서 차지하는 공간이 표시됩니다.
OK를 클릭합니다.
설치가 완료되면 Finish를 클릭합니다.
프로젝트가 자동으로 빌드 파일을 동기화하고 빌드를 실행합니다. 발생하는 모든 오류를 해결하세요.
특정 버전의 CMake 설정
SDK Manager에는 CMake의 포크된 3.6.0 버전과 3.10.2 버전이 포함됩니다. 특정 CMake 버전을 설정하지 않은 프로젝트는 CMake 3.10.2로 빌드됩니다. CMake 버전을 설정하려면 다음을 모듈의 build.gradle 파일에 추가하세요.
Groovy
android {
    ...
    externalNativeBuild {
        cmake {
            ...
            version "cmake-version"
        }
    }
}
Kotlin
android {
    ...
    externalNativeBuild {
        cmake {
            ...
            version = "cmake-version"
        }
    }
}
SDK Manager에 포함되지 않는 CMake 버전을 사용하려면 다음 단계를 따르세요.
- 공식 CMake 웹사이트에서 CMake를 다운로드하여 설치합니다.
- Gradle이 사용할 CMake 버전을 모듈의
build.gradle파일에 지정합니다. PATH환경 변수에 CMake 설치 경로를 추가하거나 아래와 같이 프로젝트의local.properties파일에 포함합니다. Gradle이build.gradle파일에 지정된 CMake의 버전을 찾지 못하면 빌드 오류가 발생합니다.# If you set this property, Gradle no longer uses PATH to find CMake. cmake.dir = "path-to-cmake"</pre>아직 워크스테이션에 Ninja 빌드 시스템을 설치하지 않았다면 Ninja 공식 웹사이트로 이동하여 사용 중인 OS에 맞는 최신 버전의 Ninja를 다운로드하여 설치합니다. 또한
PATH환경 변수에 Ninja 설치 경로를 추가해야 합니다.
특정 NDK 버전 설치
특정 NDK 버전을 설치하려면 다음을 실행합니다.
프로젝트를 연 상태에서 Tools > SDK Manager를 클릭합니다.
SDK Tools 탭을 클릭합니다.
Show Package Details 체크박스를 선택합니다.
NDK (Side by side) 체크박스 및 그 아래에서 설치하려는 NDK 버전에 상응하는 체크박스를 선택합니다. Android 스튜디오는 모든 NDK 버전을
android-sdk/ndk/디렉터리에 설치합니다.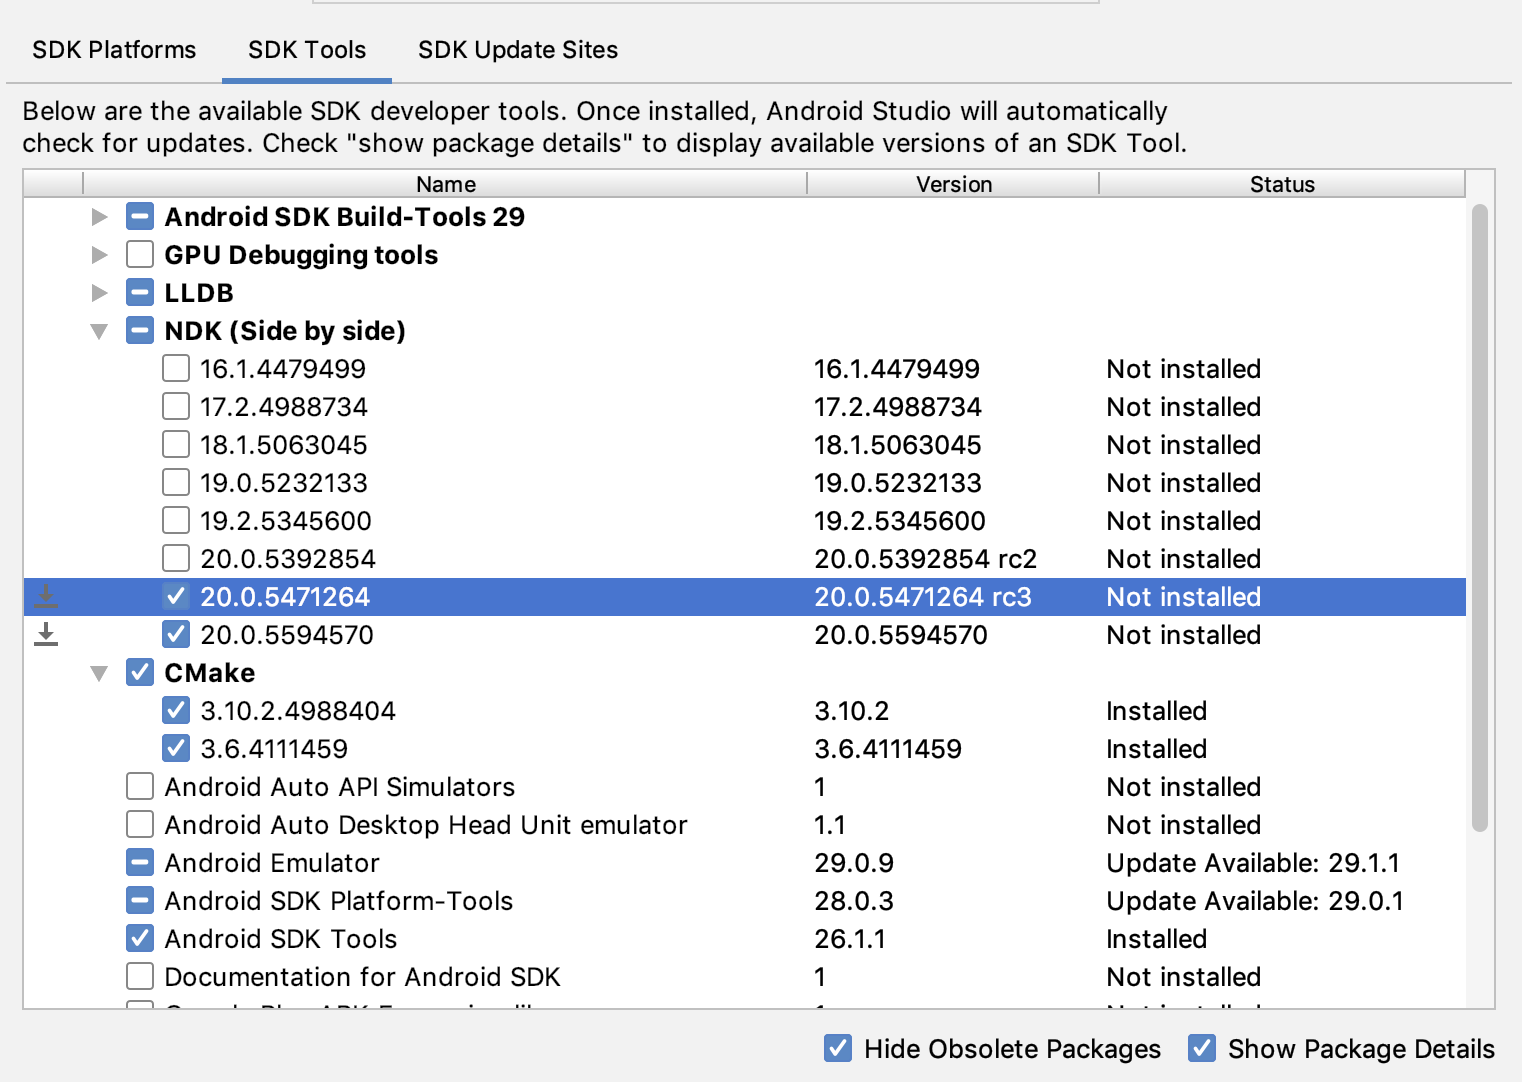 그림 2. NDK(Side by side) 옵션을 보여주는 SDK 도구 창
OK를 클릭합니다.
대화상자에 NDK 패키지가 차지하는 공간이 표시됩니다.
OK를 클릭합니다.
설치가 완료되면 Finish를 클릭합니다.
프로젝트가 자동으로 빌드 파일을 동기화하고 빌드를 실행합니다. 발생하는 모든 오류를 해결하세요.
모듈에서 사용할 NDK 버전으로 각 모듈을 설정합니다. Android 스튜디오 3.6 이상을 사용하는 경우 버전을 지정하지 않으면 Android Gradle 플러그인이 호환되는 것으로 알려진 버전을 선택합니다.
프로젝트에서 특정 NDK 버전 설정
다음 중 하나에 해당하면 프로젝트에서 NDK 버전을 설정해야 할 수 있습니다.
- 프로젝트가 상속된 것이며 특정 버전의 NDK 및 Android Gradle 플러그인(AGP)을 사용해야 하는 경우. 자세한 내용은 Android Gradle 플러그인의 NDK 설정을 참조하세요.
여러 버전의 NDK가 설치되어 있고 특정 NDK를 사용하고자 하는 경우. 이 경우에는 다음 코드 샘플에서와 같이 모듈의
build.gradle파일에android.ndkVersion속성을 사용하여 버전을 지정하세요.Groovy
android {
    ndkVersion "major.minor.build" // e.g.,  ndkVersion "21.3.6528147"
}
Kotlin
android {
    ndkVersion = "major.minor.build" // e.g.,  ndkVersion "21.3.6528147"
}
AGP 버전별 기본 NDK 버전
출시 전에 각 AGP 버전은 해당 시점에 안정적인 것으로 평가된 최신 NDK 버전으로 철저하게 테스트됩니다. build.gradle 파일에 NDK 버전을 지정하지 않으면 이 NDK 버전이 프로젝트를 빌드하는 데 사용됩니다. 다양한 AGP 버전의 기본 NDK 버전은 AGP 출시 노트 및 AGP 이전 출시 노트에 문서화되어 있습니다.