تنظيم صفحاتك في مجموعات
يمكنك حفظ المحتوى وتصنيفه حسب إعداداتك المفضّلة.
على العديد من أجهزة Android، يمكنك التقاط لقطة شاشة بالضغط على زرَّي التشغيل وخفض الصوت في الجهاز في الوقت نفسه. لحفظ لقطة شاشة في محطة العمل مباشرةً، يمكنك
التقاط لقطة شاشة باستخدام Android Studio.
لأخذ لقطة شاشة باستخدام "استوديو Android"، يُرجى اتّباع الخطوات التالية:
في "استوديو Android"، اختَر عرض > أداة Windows > Logcat لفتح Logcat.
حدد الجهاز وعملية من القوائم في أعلى النافذة.
انقر على رمز التقاط الشاشة على يمين النافذة.
تظهر لقطة الشاشة في نافذة محرّر لقطات الشاشة.
ملاحظة: في الإصدار 7.0 من نظام التشغيل Android والإصدارات الأحدث، يمكنك إعادة ضبط شريط الحالة لإزالة الإشعارات مؤقتًا وضبط مستوى إشارة البطارية وشحنها بالكامل. لإجراء
ذلك، افتح "الإعدادات" واختَر خيارات المطوّرين > الوضع التجريبي. فعِّل
إظهار الوضع التجريبي. ولمزيد من المعلومات، يُرجى الاطّلاع على ضبط خيارات المطوّرين على الجهاز فقط.
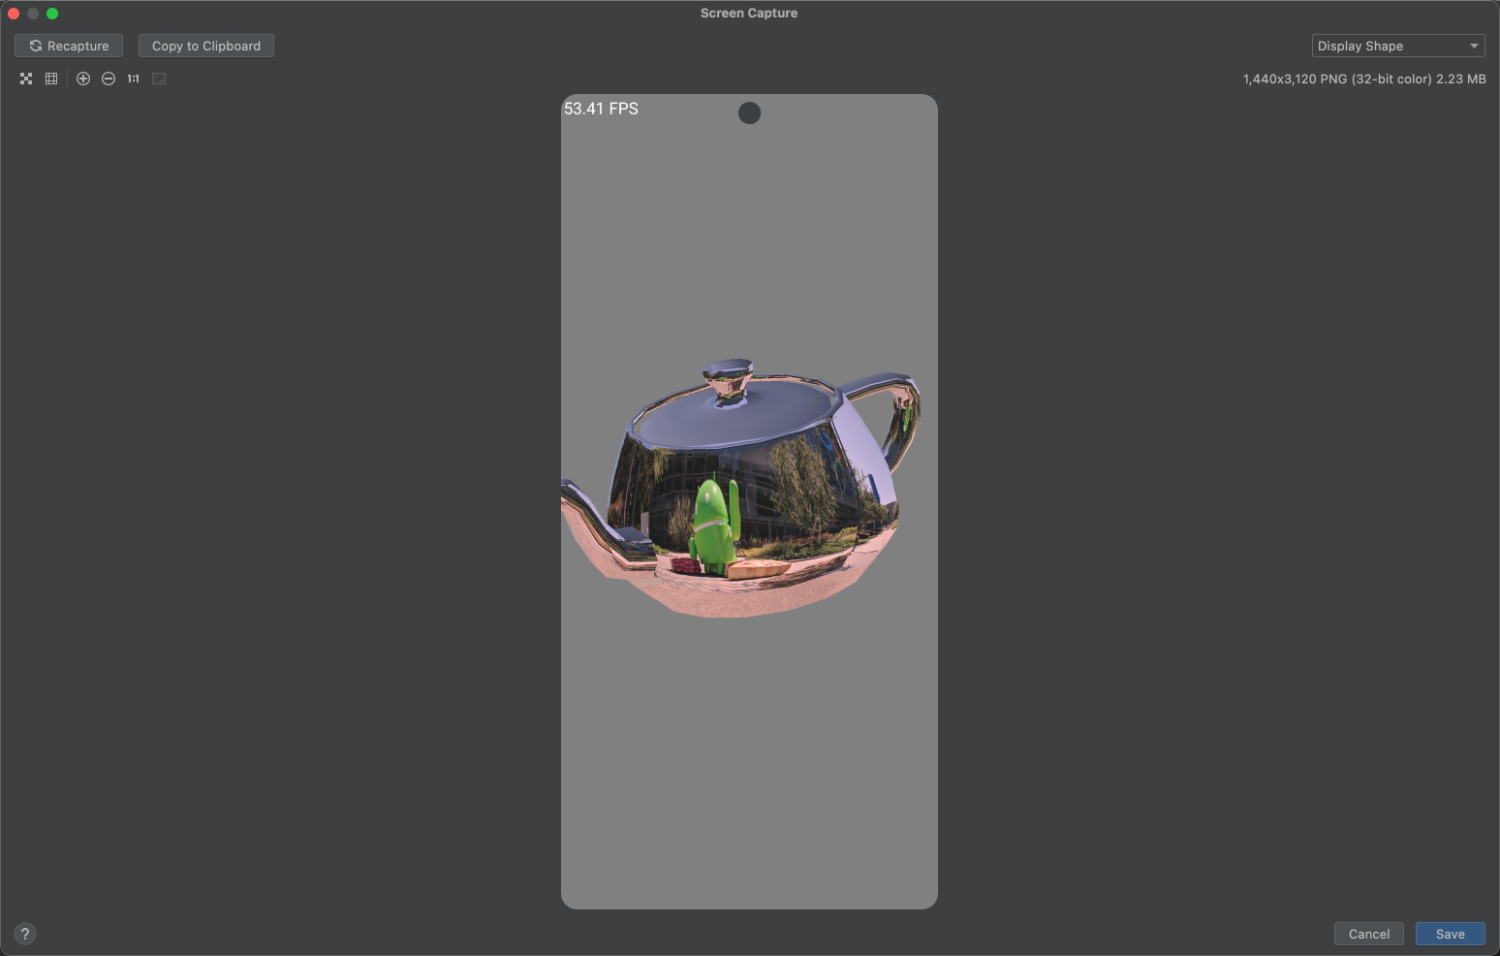
الشكل 1. محرّر لقطات الشاشة في "استوديو Android"
(اختياري) غيِّر الصورة باستخدام الخيارات التالية:
ملخّص: خُذ لقطة شاشة جديدة.
تدوير لليسار: يمكنك تدوير الصورة بمقدار 90 درجة عكس اتجاه عقارب الساعة.
التدوير لليمين: يمكنك تدوير الصورة بزاوية 90 درجة في اتجاه عقارب الساعة.
لقطة شاشة للإطار: اختَر
جهازًا لتضمين لقطة الشاشة في عمل فني حقيقي لجهاز.
ملاحظة: إذا
اخترت جهازًا لإطار لقطة الشاشة يختلف عن
الجهاز الفعلي الذي التقطته، سيوسّع المحرّر صورتك لتتطابق مع أبعاد
إطار الجهاز. يمكنك بدلاً من ذلك استخدام أداة إنشاء الأعمال الفنية للأجهزة على الإنترنت التي توفّر إطارات أجهزة للأجهزة الرائجة.
انقر على حفظ.
حدِّد الموقع واسم الملف،
ثم انقر على حسنًا.
أخذ لقطة شاشة من المحاكي
إذا كنت تستخدم المحاكي، يمكنك التقاط لقطة شاشة من نافذة المحاكي بالنقر على زر التقاط لقطة شاشة، كما هو موضح في الشكل 2:
<figure">
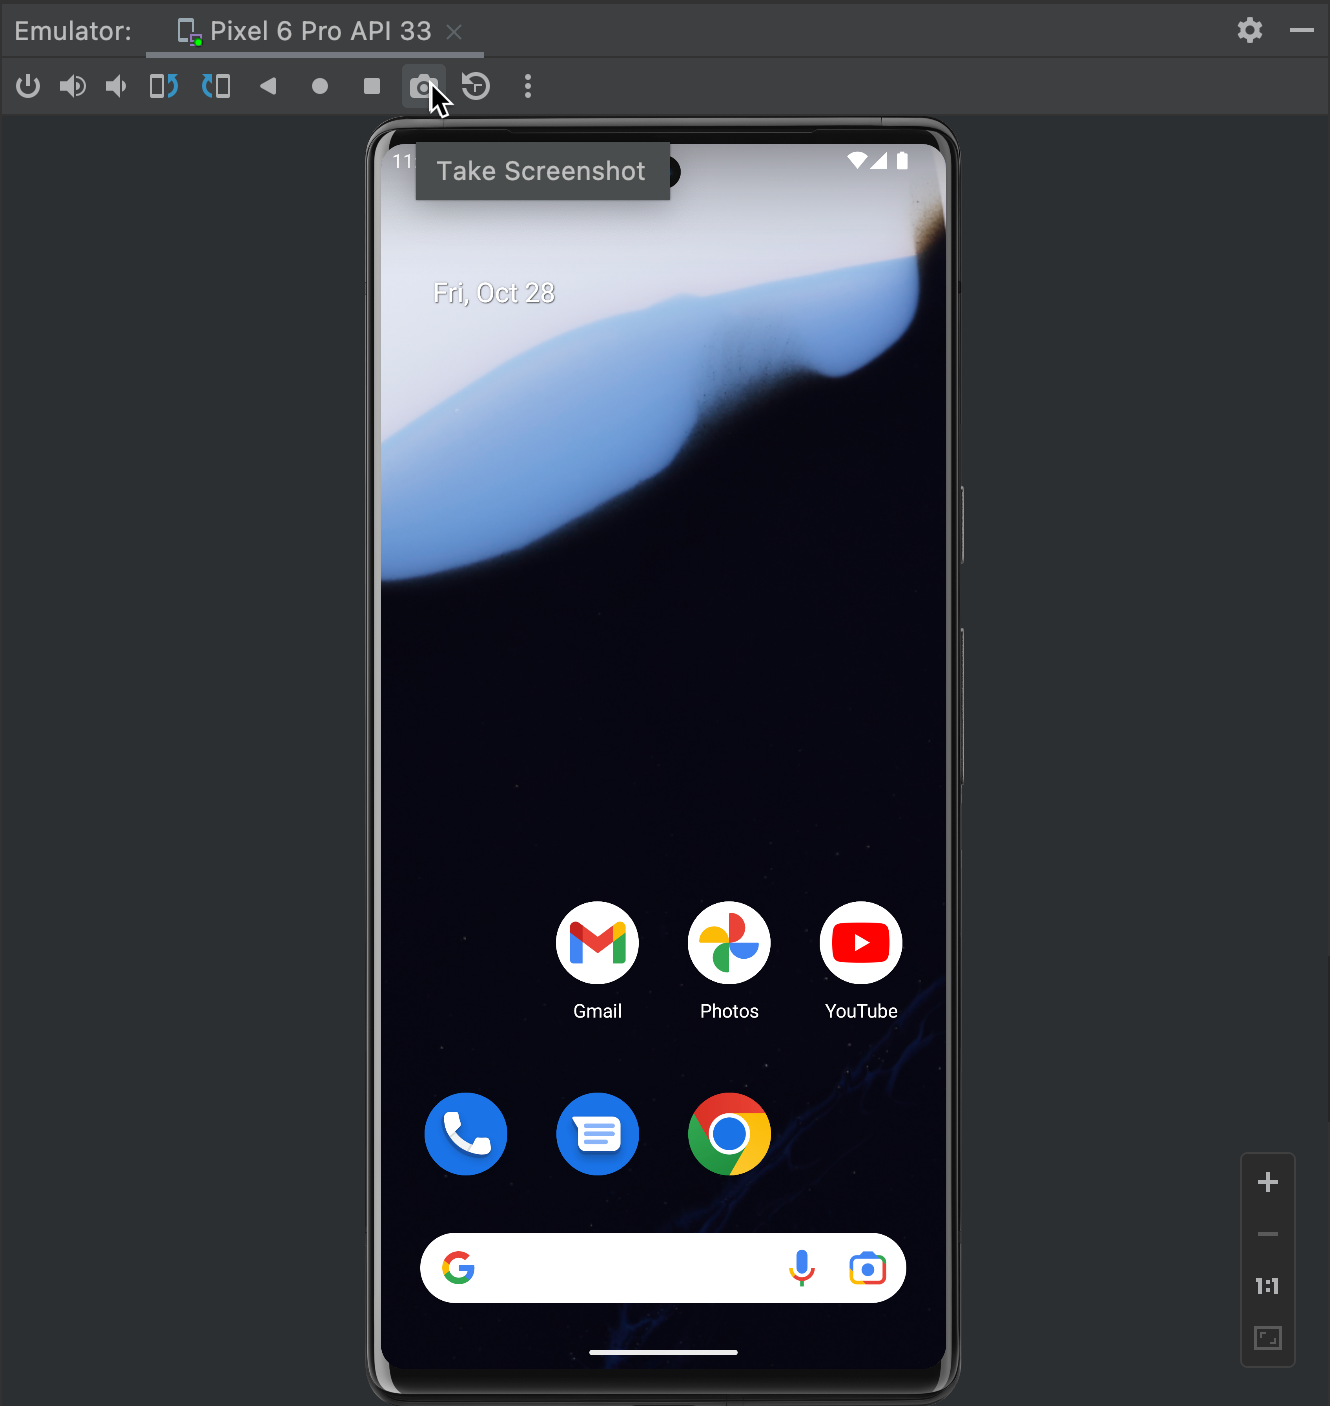
الشكل 2. خُذ لقطة شاشة من نافذة المحاكي.
</figure">
يخضع كل من المحتوى وعيّنات التعليمات البرمجية في هذه الصفحة للتراخيص الموضحّة في ترخيص استخدام المحتوى. إنّ Java وOpenJDK هما علامتان تجاريتان مسجَّلتان لشركة Oracle و/أو الشركات التابعة لها.
تاريخ التعديل الأخير: 2023-09-25 (حسب التوقيت العالمي المتفَّق عليه)
[null,null,["تاريخ التعديل الأخير: 2023-09-25 (حسب التوقيت العالمي المتفَّق عليه)"],[],[],null,["# Take a screenshot\n\nOn many Android devices, you can capture a screenshot by pressing the Power and Volume-down buttons\non the device simultaneously. To save a screenshot directly to your workstation, you can\ncapture the screenshot using Android Studio.\n\nTo capture a screenshot with Android Studio, follow these steps:\n\n1. Run your app on a connected device or emulator. If using a connected device, be sure you have [enabled USB debugging](/studio/run/device#setting-up).\n2. In Android Studio, select **View \\\u003e Tool Windows \\\u003e Logcat** to open [Logcat](/studio/debug/am-logcat).\n3. Select the device and a process from the menus at the top of the window.\n4. Click **Screen Capture** on the left side of the window.\n\n The screenshot appears in a **Screenshot Editor** window.\n\n **Tip:** On Android 7.0 and higher, you can reset the status bar to\n temporarily remove notifications and set the signal and battery levels to full. To do\n so, open Settings and select **Developer options \\\u003e Demo mode** . Enable\n **Show demo mode** . For more information, see\n [Configure on-device\n developer options](/studio/debug/dev-options).\n **Figure 1.** Screenshot editor in Android Studio.\n5. (Optional) Change the image with the following options:\n - **Recapture**: Take a new screenshot.\n - **Rotate Left**: Rotate the image 90 degrees counter-clockwise.\n - **Rotate Right**: Rotate the image 90 degrees clockwise.\n - **Frame Screenshot** : Choose a device to wrap your screenshot with real device artwork.\n\n **Note:** If\n you select a device for the screenshot frame that differs from the\n actual device you captured, the editor stretches your image to match the\n dimensions of the device frame. You instead might want to use the online\n [Device art\n generator](/distribute/tools/promote/device-art) that offers device frames for popular devices.\n6. Click **Save**.\n7. Specify the location and filename, and then click **OK**.\n\nTake a screenshot from the emulator\n-----------------------------------\n\n\nIf you are using the emulator, you can take a screenshot from the emulator window by clicking the\n**Take Screenshot** button, as shown in figure 2:\n**Figure 2.** Take a screenshot from the emulator window."]]