
Wear OS 提供了多种截取 Wear OS 界面的方法:
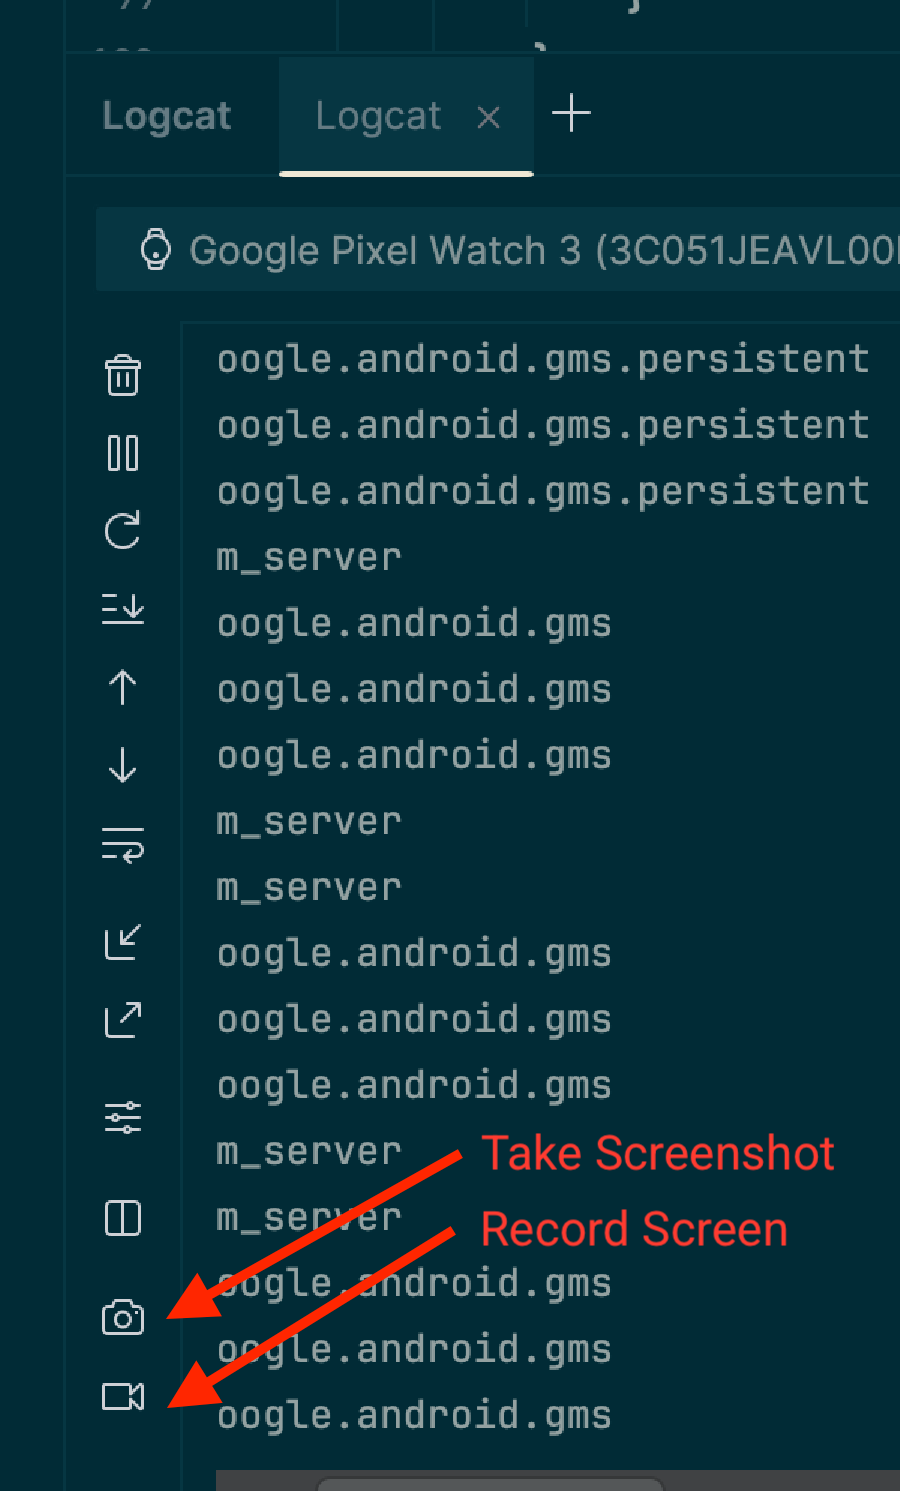
- Android Studio:使用 Logcat 截取屏幕截图。
- 配套应用:在 Google Pixel Watch 设备上,使用截取穿戴式设备的屏幕选项截取屏幕截图。
- Wear OS 的屏幕录制功能:录制屏幕视频。
在 Android Studio 中截取屏幕截图和录制屏幕
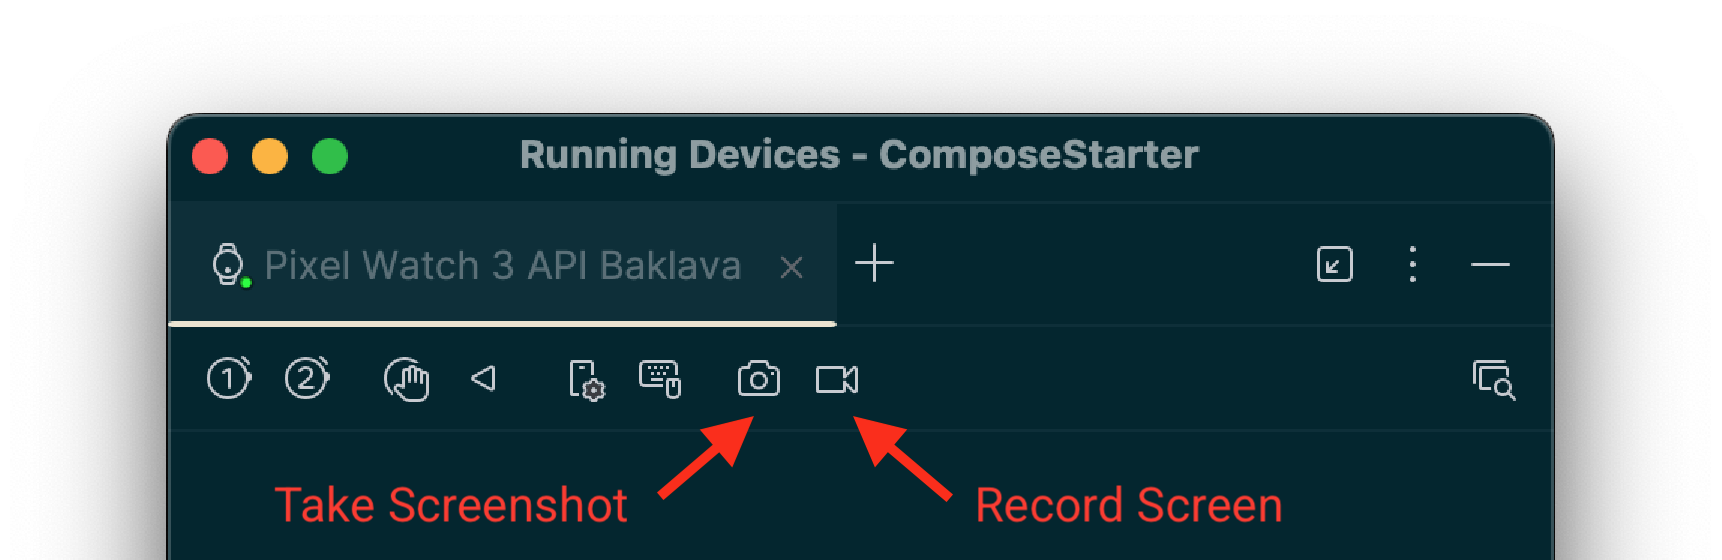
直接从 Android Studio 截取穿戴式设备应用界面的屏幕截图并录制视频。此流程与其他设备类型的流程相同,可以在 IDE 中的多个位置完成。
- 在 Android Studio 中打开您的应用。
- 在设备或模拟器上运行您的应用。
- 前往要截取的屏幕。
- 从以下任一工具窗口启动屏幕截图:
- 完成拍摄:
- 对于屏幕截图:拍摄后会显示编辑器窗口。在点击保存之前,您可以进行调整,例如添加设备边框。
- 对于屏幕录制:点击录制按钮后,选择视频选项,然后点击开始录制。与您的应用互动,然后在完成时点击 Stop Recording。系统会显示一个对话框,供您保存生成的文件。
使用 adb 截取屏幕截图和录制屏幕
您可以使用 Android 调试桥 (adb) 从命令行捕获屏幕内容。
屏幕截图
使用 screencap 命令可截取 Wear OS 设备显示屏的屏幕截图。其运作方式与移动设备上的相同。
# Use 'exec-out' instead of 'shell' to get raw data
$ adb exec-out screencap -p > screen.png
对于 Wear OS,需要特别注意的一点是,此命令会捕获原始的正方形帧缓冲区,其中不包含圆形遮罩。如需制作精美的屏幕截图,您可以使用图片编辑工具应用圆形遮罩。例如,使用 ImageMagick:
# Use ImageMagick to apply a circular mask
$ adb exec-out screencap -p | magick - \
    -alpha set -background none -fill white \
      \( +clone -channel A -evaluate set 0 +channel -draw "circle %[fx:(w-1)/2],%[fx:(h-1)/2] %[fx:(w-1)/2],0.5" \) \
    -compose dstin -composite \
    png:screen.png
屏幕录制
与移动设备不同,Wear OS 不支持标准 adb screenrecord 命令。
我们建议改用开源工具 scrcpy。如需进行基本使用,从设备屏幕录制视频文件,请运行以下命令:
# Record the screen to a file named video.mp4. Use Ctrl+C to stop.
scrcpy --no-audio --no-window --record video.mp4
如需在 30 秒后自动停止录制,请使用 --time-limit 选项:
# Record the screen to a file named video.mp4, stopping after 30 seconds.
scrcpy --no-audio --no-window --record video.mp4 --time-limit=30
使用配套应用截取屏幕截图
如需截取 Google Pixel Watch 设备的屏幕截图,您可以使用 Google Pixel Watch 配套应用。请按以下步骤操作:
- 在界面上,找到您要截取的屏幕。
- 在 Android 手机上,如果您尚未启用开发者选项,请依次选择设置 > 关于手机,然后点按版本号七次,将其启用。
- 在手机上打开 Wear 配套应用。
- 点按右上角的三点状溢出按钮以打开菜单。
- 点按抓取穿戴式设备屏幕截图。系统随即会显示以下消息:屏幕截图请求已发送。然后,您会收到以下通知:现在可以发送手表屏幕截图了。点按即可发送。
- 点按通知,以便界面中显示使用蓝牙、Gmail 或其他方式发送或分享屏幕截图的选项。