
Resource Manager 是一个工具窗口,用于在应用中导入、创建、管理和使用资源。若要打开该工具窗口,您可以从菜单中依次选择 View > Tool Windows > Resource Manager,也可以在左侧栏中选择 Resource Manager。
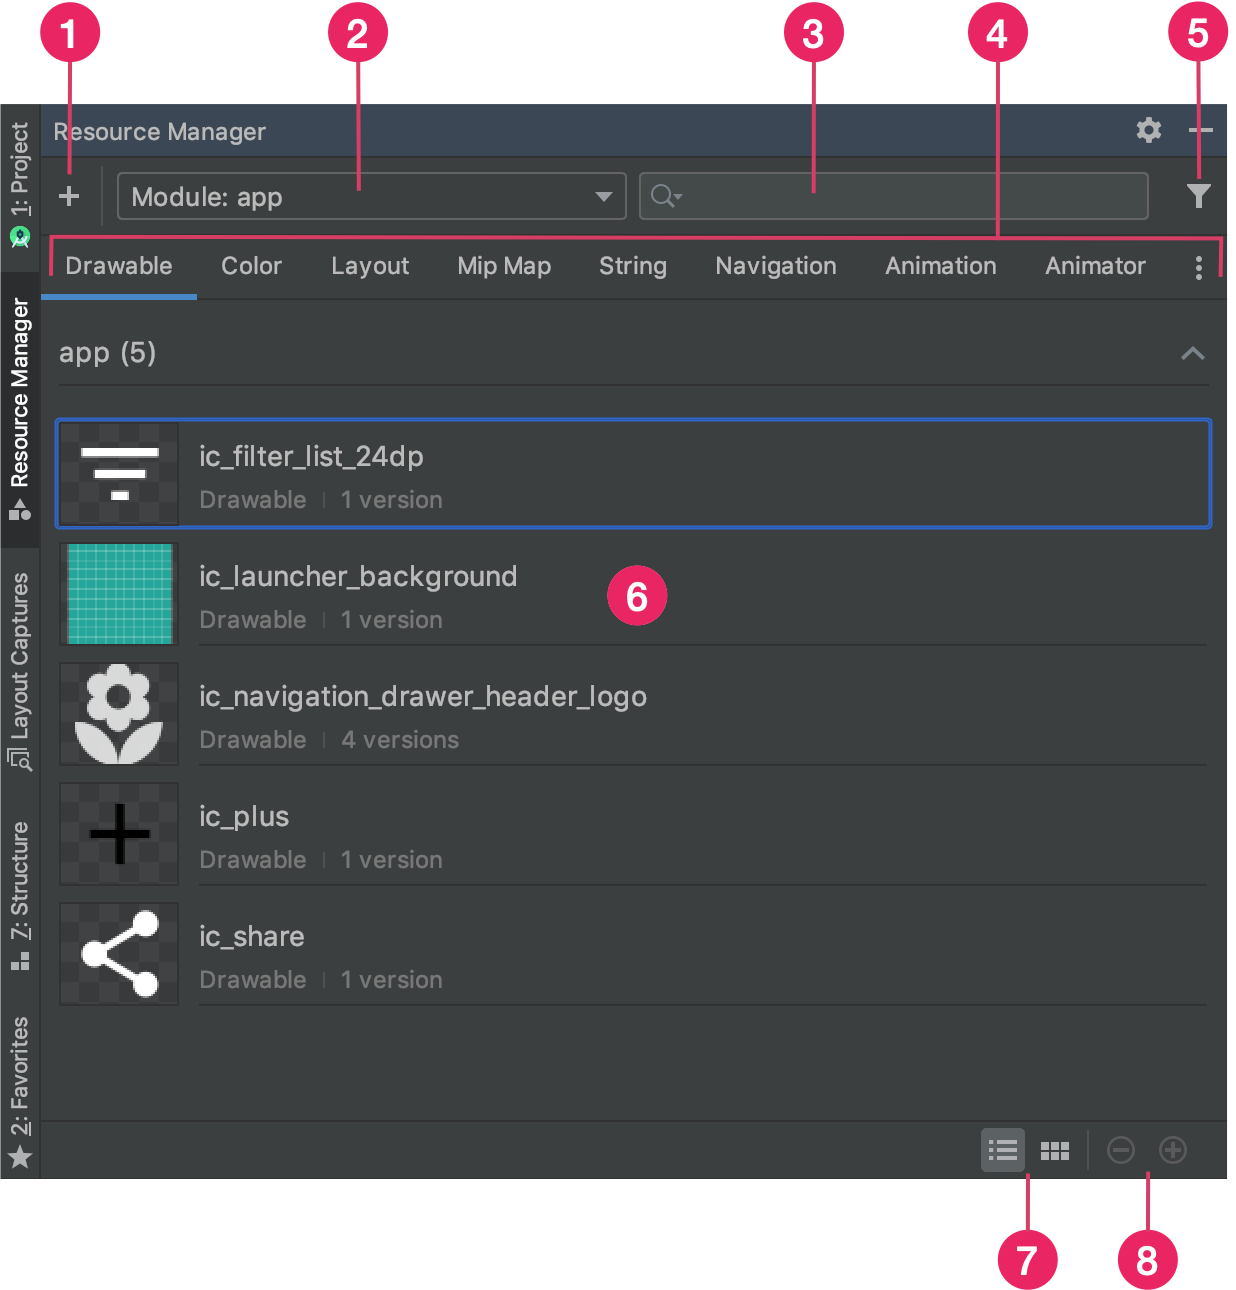
图 1:Resource Manager 工具窗口。
- 点击 Add 图标
 可向项目添加新的资源。您可以添加图片资源、矢量资源、字体或资源文件和值,也可以将可绘制对象导入到项目中。
- 选择一个模块可查看该模块专属的资源。
- 使用搜索栏在项目的所有模块中搜索资源。
- 按照 Resource Manager 中的类型显示资源。
使用这些标签页可在各种资源类型之间切换。点击溢出图标
 可显示其他资源类型。
 - 借助过滤器按钮,过滤本地相关模块、外部库和 Android 框架中显示的资源。您还可以使用该过滤器来显示主题背景属性。
- 在主要内容区域中预览您的资源。右键点击某项资源可打开上下文菜单,您可以通过该菜单重命名资源、在应用中搜索使用了该资源的位置。
- 点击这些按钮能够以图块或列表形式列出资源。
- 点击这些按钮可更改资源的预览大小。
除了上述功能之外,Resource Manager 还提供了一种将可绘制对象批量导入项目中的方法。若要批量导入,您可以采用以下任一方法:
- 将图片文件(包括 SVG 文件)直接拖动到 Resource Manager 中。
- 使用 Import Drawables 向导。
如需了解详情,请参阅将可绘制对象导入项目中部分。
如需查看更多详细信息,请在 Resource Manager 中双击相应的资源。如果某项资源有多个版本,此详细视图将显示每个版本以及所有关联的限定符,如图 2 所示。您可以在此视图中双击特定版本以在编辑器窗口中打开它。
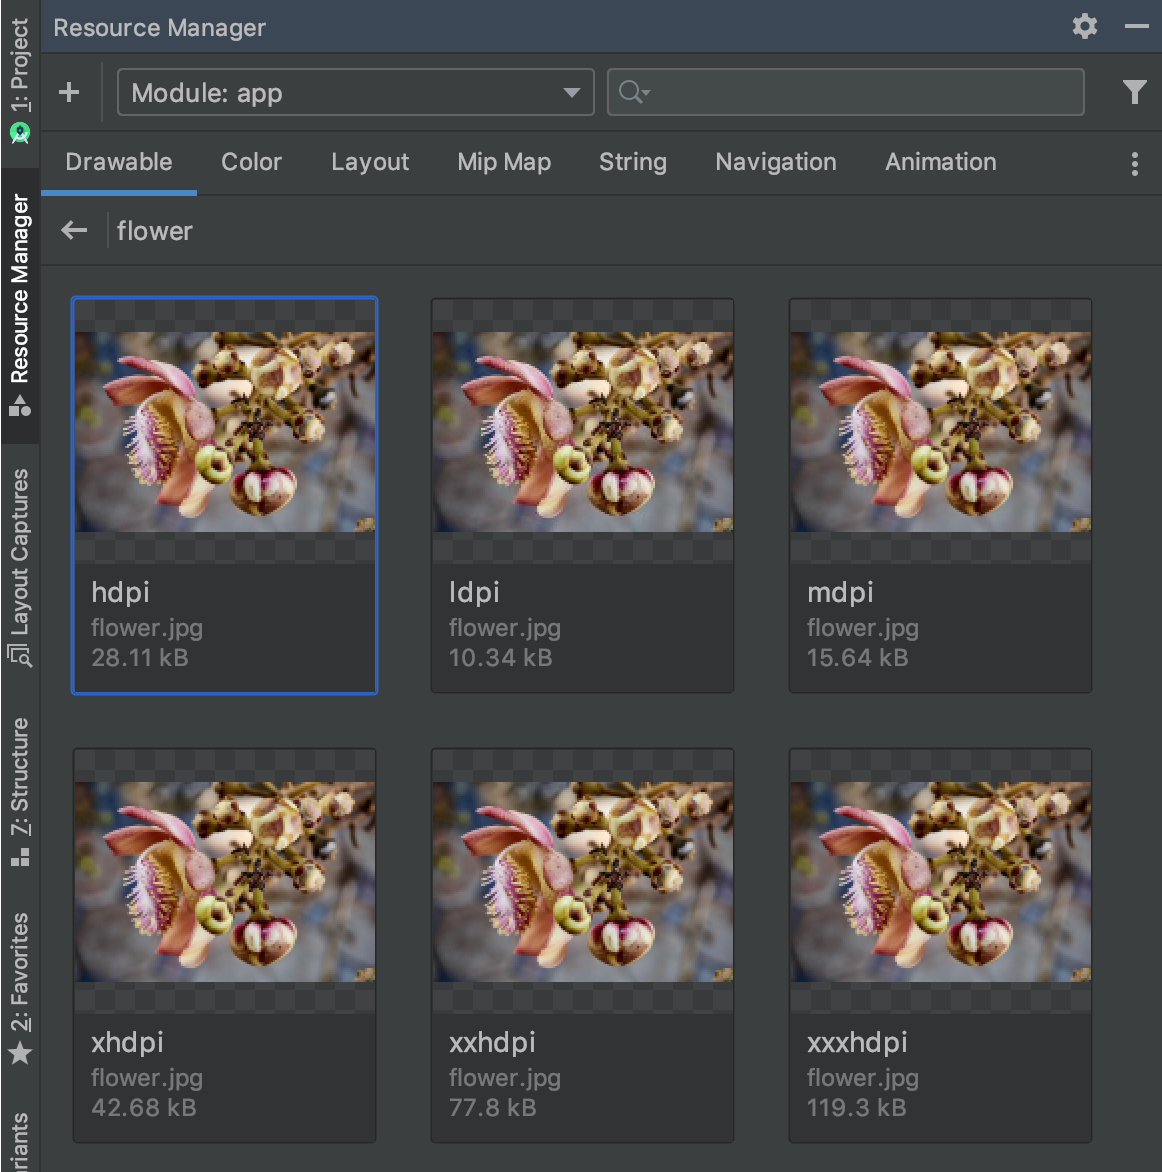
图 2:显示适用于不同屏幕密度的图片资源版本的 Resource Manager。
将可绘制对象导入项目中
您可以使用 Resource Manager 将图片资源导入项目中。如需查看受支持的图片类型列表,请参阅图片支持。
若要将图片资源导入项目中,请执行以下操作:
将图片直接拖动到 Android Studio 的 Resource Manager 窗口中。
- 除此以外,您还可以:
- 点击加号图标 (+).
- 选择 Import Drawables,如图 3 所示。
- 选择要导入的文件和文件夹。
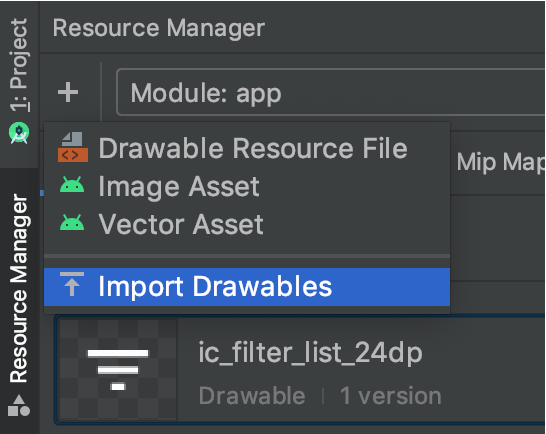
图 3:从菜单中选择 Import Drawables。
- 除此以外,您还可以:
此时将显示 Import drawables 对话框,如图 4 所示。此对话框会显示您要导入的资源的列表。您可以通过点击资源预览上方的文本框来重命名资源。
如果您要提供同一资源的多个版本,请添加设备配置限定符(如以下部分中所述),以描述资源支持的特定配置。
例如,如果您要为同一资源提供适用于不同屏幕密度的多个版本,则可以为每个版本添加一个 Density 限定符。请注意,如果两项或多项资源具有相同的名称和限定符,则仅导入一个版本。
如需详细了解资源限定符,请参阅提供备用资源。
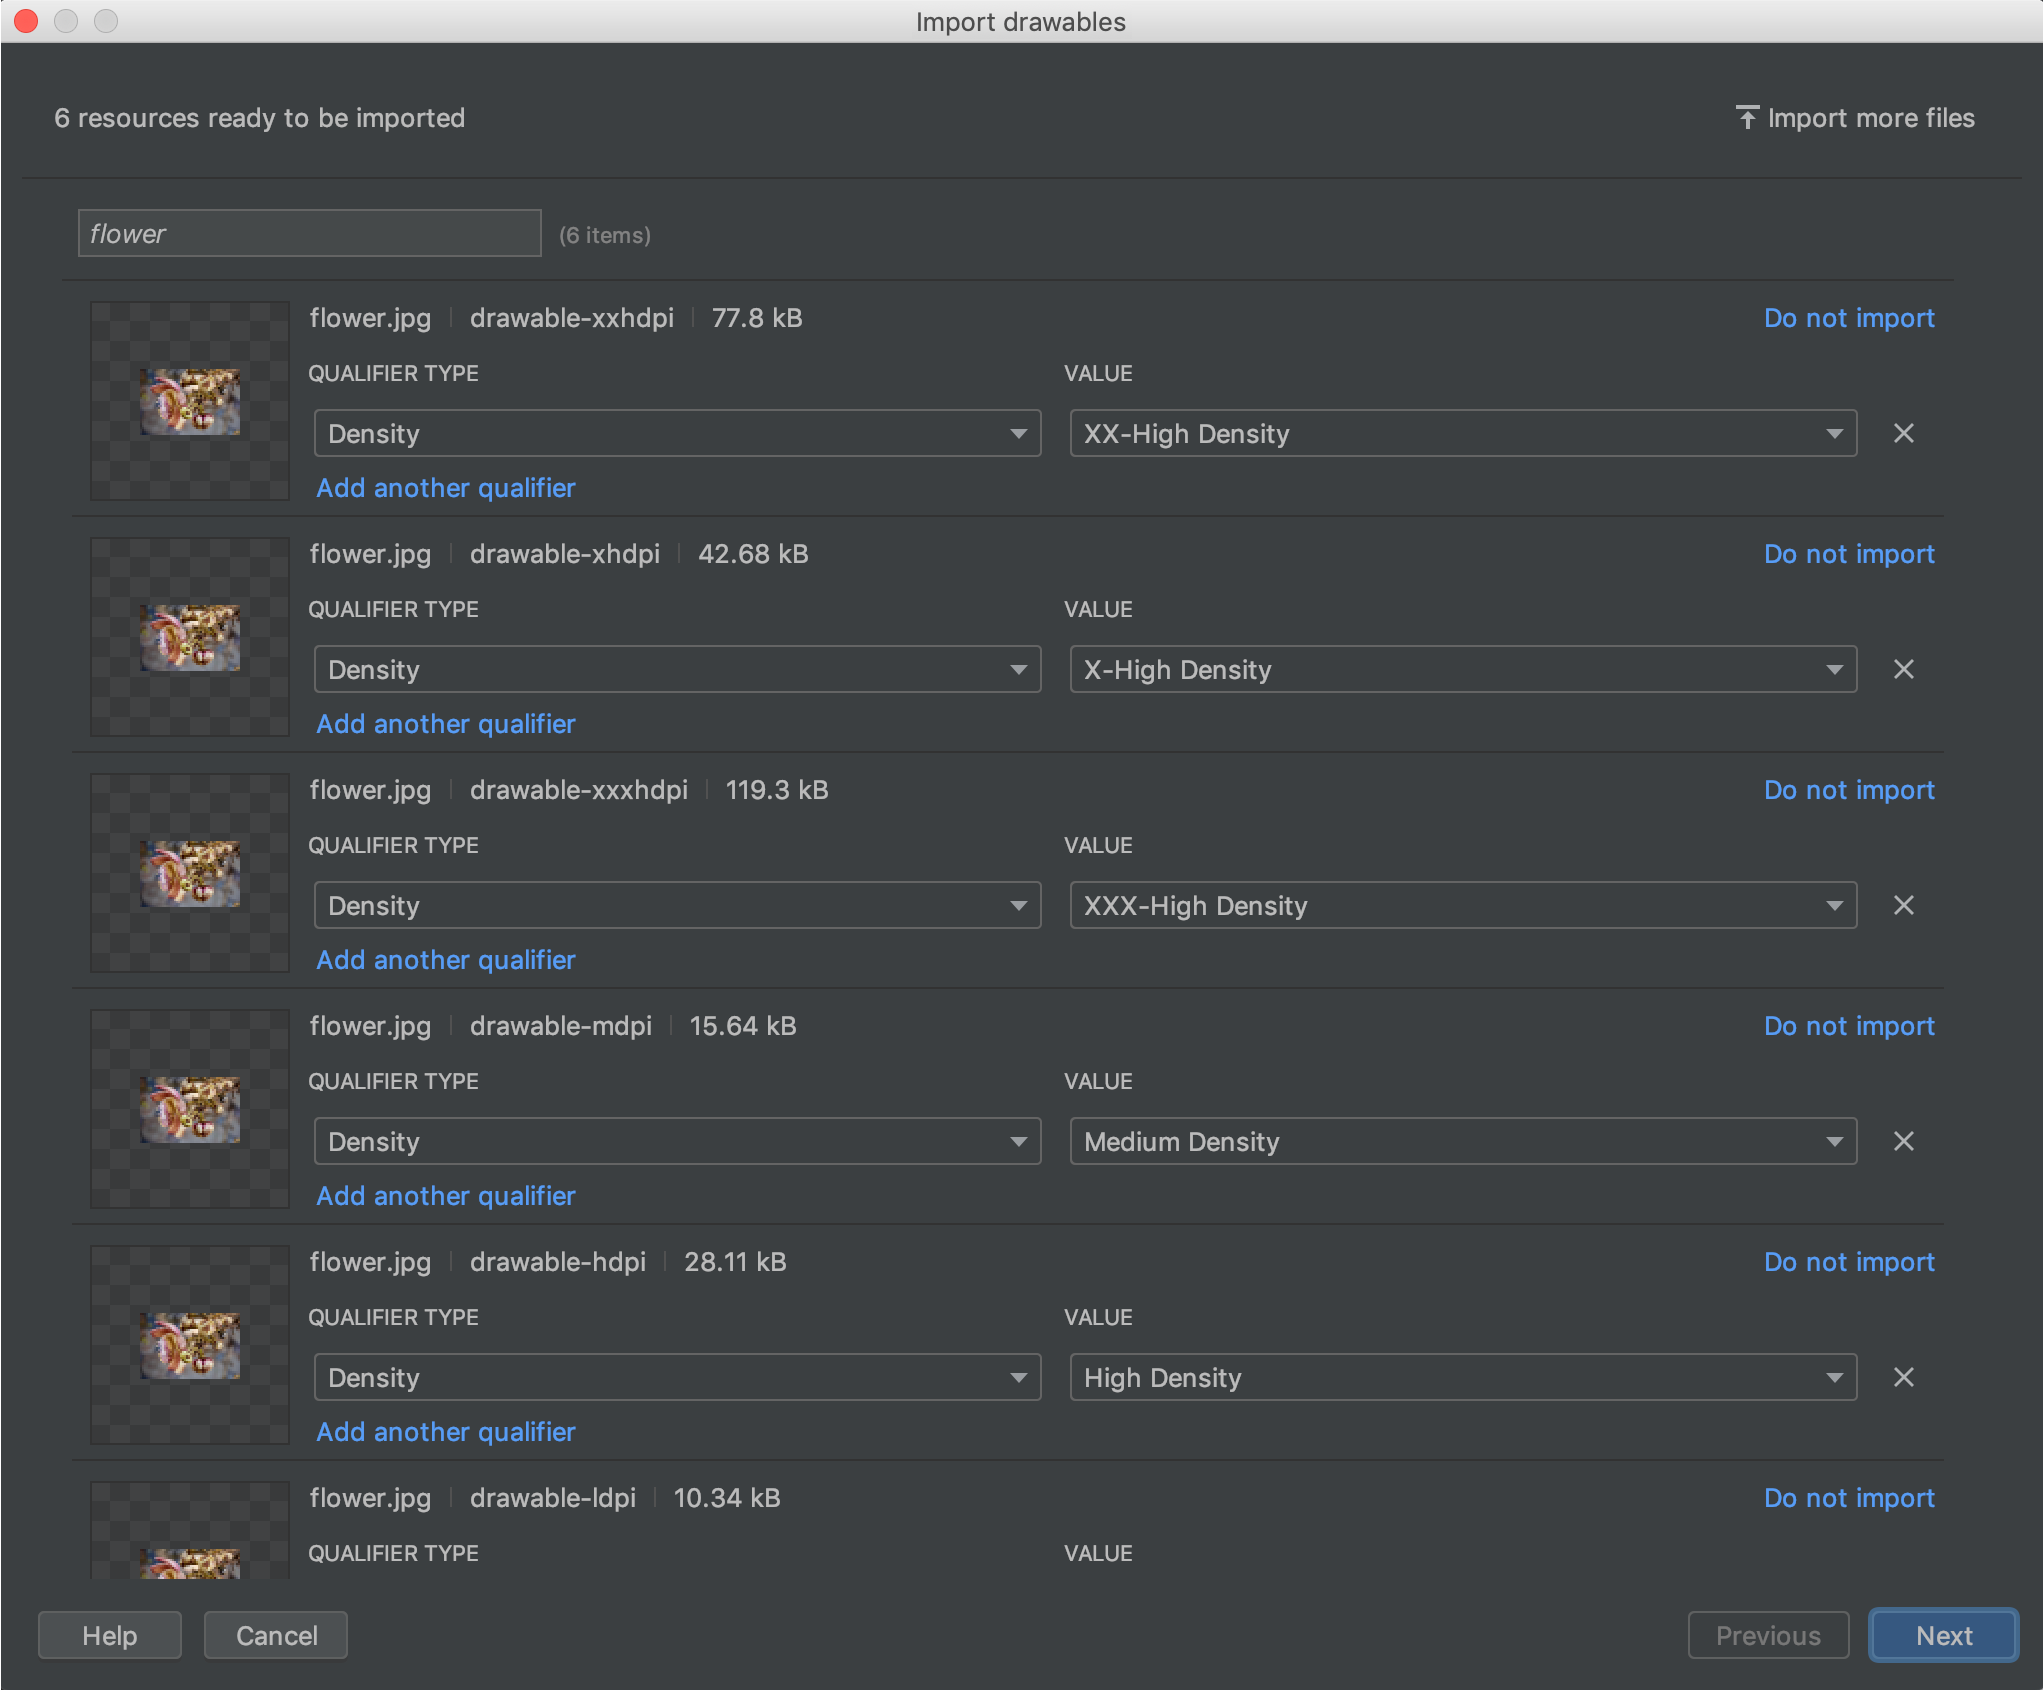
图 4:Import drawables 对话框。
为资源命名并添加任何所需的限定符后,点击 Next。
下一个屏幕会显示要导入的资源的摘要。准备好导入后,点击 Import。
在 Resource Manager 窗口中,您的资源现在已可供您在项目中使用了,如图 5 所示。

图 5:Resource Manager 现在显示您导入的图片。
自动解析可绘制对象的密度
当您导入文件或文件夹时,如果其路径包含密度限定符,Resource Manager 会自动在导入过程中应用密度限定符。Resource Manager 可以解析 Android 的密度限定符和 iOS 的缩放比例。
下表列出了受支持的不同密度在 Android 和 iOS 系统中的表示方法:
| 密度 | Android 密度限定符 | iOS 缩放比例 |
|---|---|---|
| 低密度(约 120dpi) | ldpi |
不支持 |
| 中密度(约 160dpi) | mdpi |
原始缩放 |
| 高密度(约 240dpi) | hdpi |
不支持 |
| 超高密度(约 320dpi) | xhdpi |
@2x |
| 超超高密度(约 480dpi) | xxhdpi |
@3x |
| 超超超高密度(约 640dpi) | xxxhdpi |
@4x |
以下示例说明了导入后输入路径如何转换为资源路径:
- Android 密度限定符:
hdpi - 输入路径:/UserFolder/icon1/hdpi/icon.png
资源路径:<projectFolder>/<moduleFolder>/src/main/res/drawable-hdpi/icon.png - Android 密度限定符:
xxhdpi - 输入路径:/UserFolder/icon1/abc-xxhdpi/icon.png
资源路径:<projectFolder>/<moduleFolder>/src/main/res/drawable-xxhdpi/icon.png - iOS 缩放比例:@2x
- 输入路径:/UserFolder/icon1/icon@2x.png
资源路径:<projectFolder>/<moduleFolder>/src/main/res/drawable-xhdpi/icon.png - iOS 缩放比例:@2x
- 输入路径:/UserFolder/icon1/icon@2x_alternate.png
资源路径:<projectFolder>/<moduleFolder>/src/main/res/drawable-xhdpi/icon_alternate.png
如需详细了解如何支持不同的设备像素密度,请参阅支持不同的像素密度。
在 Jetpack Compose 中使用资源
使用 Jetpack Compose 进行构建时,您可以使用优化的 API 直接从 Kotlin 代码访问资源,从而确保界面逻辑和资源引用保持同步。
- 图片:在
Image可组合项中使用painterResource(id = R.drawable.your_image)。 - 字符串:使用
stringResource(id = R.string.your_string)检索本地化界面文本。 - 颜色:使用
colorResource(id = R.color.your_color)应用主题定义的颜色。
Resource Manager 可确保正确生成这些 ID,让您能够从 Compose 界面层次结构中无缝引用资源。
如需了解高级资源处理(包括动态字体加载、特定于配置的资源和特定于 Compose 的资源库),请参阅有关 Compose 中的资源的文档。