
ConstraintLayout 是一種版面配置,可讓您依據畫面上其他可組合項的相對關係放置可組合項。也是使用多個巢狀 Row、Column、Box 和 其他自訂版面配置元素 的替代做法。如果要實作的大型版面配置對齊要求較複雜,ConstraintLayout 就非常實用。
建議您在下列情況下使用 ConstraintLayout:
- 要避免在放置畫面元素時建立多個
Columns 和Rows 的巢狀結構,以便改善程式碼可讀性時。 - 要依據其他可組合項的相對關係放置可組合項,或根據引導線、阻隔線或鏈結放置可組合項時。
在 View 系統中,建議您使用 ConstraintLayout 來建立複雜的大型版面配置,因為平面檢視區塊階層的效能會優於巢狀檢視區塊。不過,這個問題不會發生在 Compose 中,因為 Compose 能夠有效處理深層的版面配置階層。
開始使用 ConstraintLayout
如要在 Compose 中使用 ConstraintLayout,除了 Compose 設定之外,您還必須在 build.gradle 中加入以下依附元件:
implementation "androidx.constraintlayout:constraintlayout-compose:1.0.1"
Compose 中的 ConstraintLayout 會使用 DSL,其運作方式如下:
- 使用
createRefs()或createRefFor()在ConstraintLayout中為每個可組合項建立參照 - 限制條件是透過
constrainAs()修飾符提供,該修飾符會經由參數接收參照資訊,並讓您在 lambda 主體中指定其限制條件。 - 限制條件是透過
linkTo()或其他實用方法指定。 parent是現有的參照,可用來指定對ConstraintLayout可組合項本身的限制。
以下是使用 ConstraintLayout 的可組合項範例:
@Composable
fun ConstraintLayoutContent() {
ConstraintLayout {
// Create references for the composables to constrain
val (button, text) = createRefs()
Button(
onClick = { /* Do something */ },
// Assign reference "button" to the Button composable
// and constrain it to the top of the ConstraintLayout
modifier = Modifier.constrainAs(button) {
top.linkTo(parent.top, margin = 16.dp)
}
) {
Text("Button")
}
// Assign reference "text" to the Text composable
// and constrain it to the bottom of the Button composable
Text(
"Text",
Modifier.constrainAs(text) {
top.linkTo(button.bottom, margin = 16.dp)
}
)
}
}
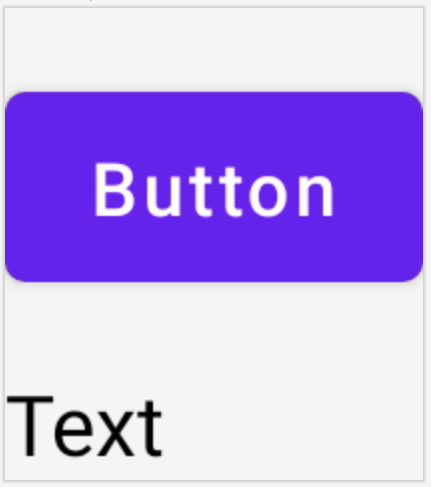
這段程式碼會將 Button 的頂端限制在距離父項邊界 16.dp 的位置,也將 Text 限制在距離 Button 底端邊界 16.dp 的位置。
經過分離的 API
在 ConstraintLayout 範例中,限制條件是以內嵌方式指定,並在其套用目標的可組合項中設定了修飾符。但是,在某些情況下,最好將限制與所套用的配置分離。舉例來說,您可能想要根據螢幕設定變更限制條件,或是在兩組限制條件之間產生動畫。
對於這類情況,您可以透過不同方式使用 ConstraintLayout:
- 傳入
ConstraintSet作為ConstraintLayout的參數。 - 使用
layoutId修飾符,將在ConstraintSet中建立的參照指派給可組合項。
@Composable
fun DecoupledConstraintLayout() {
BoxWithConstraints {
val constraints = if (minWidth < 600.dp) {
decoupledConstraints(margin = 16.dp) // Portrait constraints
} else {
decoupledConstraints(margin = 32.dp) // Landscape constraints
}
ConstraintLayout(constraints) {
Button(
onClick = { /* Do something */ },
modifier = Modifier.layoutId("button")
) {
Text("Button")
}
Text("Text", Modifier.layoutId("text"))
}
}
}
private fun decoupledConstraints(margin: Dp): ConstraintSet {
return ConstraintSet {
val button = createRefFor("button")
val text = createRefFor("text")
constrain(button) {
top.linkTo(parent.top, margin = margin)
}
constrain(text) {
top.linkTo(button.bottom, margin)
}
}
}
這樣一來,當您需要變更限制條件時,只要傳送不同的 ConstraintSet 即可。
ConstraintLayout 概念
ConstraintLayout 包含引導線、阻隔線和鏈結等概念,可協助您在可組合項中放置元素。
引導線
引導線是用於設計版面配置的小型視覺輔助工具。引導線能夠對可組合項進行限制。引導線可協助您在父項可組合項內以特定 dp 或 percentage 放置元素。
系統提供垂直和水平兩種不同 引導線。top 和 bottom 是兩條水平引導線,start 和 end 則是這兩條垂直引導線。
ConstraintLayout {
// Create guideline from the start of the parent at 10% the width of the Composable
val startGuideline = createGuidelineFromStart(0.1f)
// Create guideline from the end of the parent at 10% the width of the Composable
val endGuideline = createGuidelineFromEnd(0.1f)
// Create guideline from 16 dp from the top of the parent
val topGuideline = createGuidelineFromTop(16.dp)
// Create guideline from 16 dp from the bottom of the parent
val bottomGuideline = createGuidelineFromBottom(16.dp)
}
如要建立引導線,請搭配所需的引導線類型使用 createGuidelineFrom*。這樣做會建立可用於 Modifier.constrainAs() 區塊中的參照。
阻隔線
阻隔線 會參照多個可組合項,根據指定側邊上最極端的小工具建立虛擬引導線。
如要建立阻隔線,請使用 createTopBarrier() (或 createBottomBarrier()、createEndBarrier()、createStartBarrier()),並提供用於製作阻隔線的參照。
ConstraintLayout {
val constraintSet = ConstraintSet {
val button = createRefFor("button")
val text = createRefFor("text")
val topBarrier = createTopBarrier(button, text)
}
}
接著,您就可以在 Modifier.constrainAs() 區塊中使用阻隔線。
鏈結
鏈結會在單軸 (水平或垂直) 內提供類似群組的行為,其他軸則可以設定獨立的限制條件。
如要建立鏈結,請使用 createVerticalChain 或 createHorizontalChain:
ConstraintLayout {
val constraintSet = ConstraintSet {
val button = createRefFor("button")
val text = createRefFor("text")
val verticalChain = createVerticalChain(button, text, chainStyle = ChainStyle.Spread)
val horizontalChain = createHorizontalChain(button, text)
}
}
這樣就能在 Modifier.constrainAs() 區塊中使用該鏈結。
鏈結可以使用不同 ChainStyles 設定,以決定如何處理可組合項周圍的空間,例如:
ChainStyle.Spread:空間會平均分配給所有可組合項,包括第一個可組合項之前和最後一個可組合項之後的可用空間。ChainStyle.SpreadInside:空間會平均分配給所有可組合項,在第一個可組合項之前或最後一個可組合項之後都不保留任何可用空間。ChainStyle.Packed:空間會分配在第一個可組合項之前和最後一個可組合項之後,可組合項會封裝在一起,且彼此之間沒有空間。
瞭解詳情
想進一步瞭解 Compose 中的 ConstraintLayout,請參閱使用 ConstraintLayout 的 Compose 範例一文提供的 API 應用。
為您推薦
- 注意:系統會在 JavaScript 關閉時顯示連結文字
- Compose 中的焦點
- 適用於 Jetpack Compose 的 Kotlin
- Compose 版面配置的基本概念