
系统轨迹会显示整个系统的活动和资源使用情况,因此您可以了解应用进程的调度和运行方式。Android Studio 性能剖析器中的系统轨迹视图通常用于调查以下问题:
- 应用和系统进程在设备核心和线程中的分布情况。
- 界面渲染的流畅程度。
- 设备和应用级别的耗电量。
本页简要介绍了系统轨迹视图中最常用的可视化图表。如需详细了解此处未介绍的可视化图表,请参阅图表词汇表。如需查看有关系统轨迹用途的更详细示例,请参阅本部分中的其他页面。
录制系统轨迹后,您会在时间轴上看到以下可视化图表。您应重点关注不同系统资源之间的相关性;例如,如果您发现调制解调器电源轨出现峰值,则应前往线程部分,查看当时哪些线程活动可能导致了该峰值。
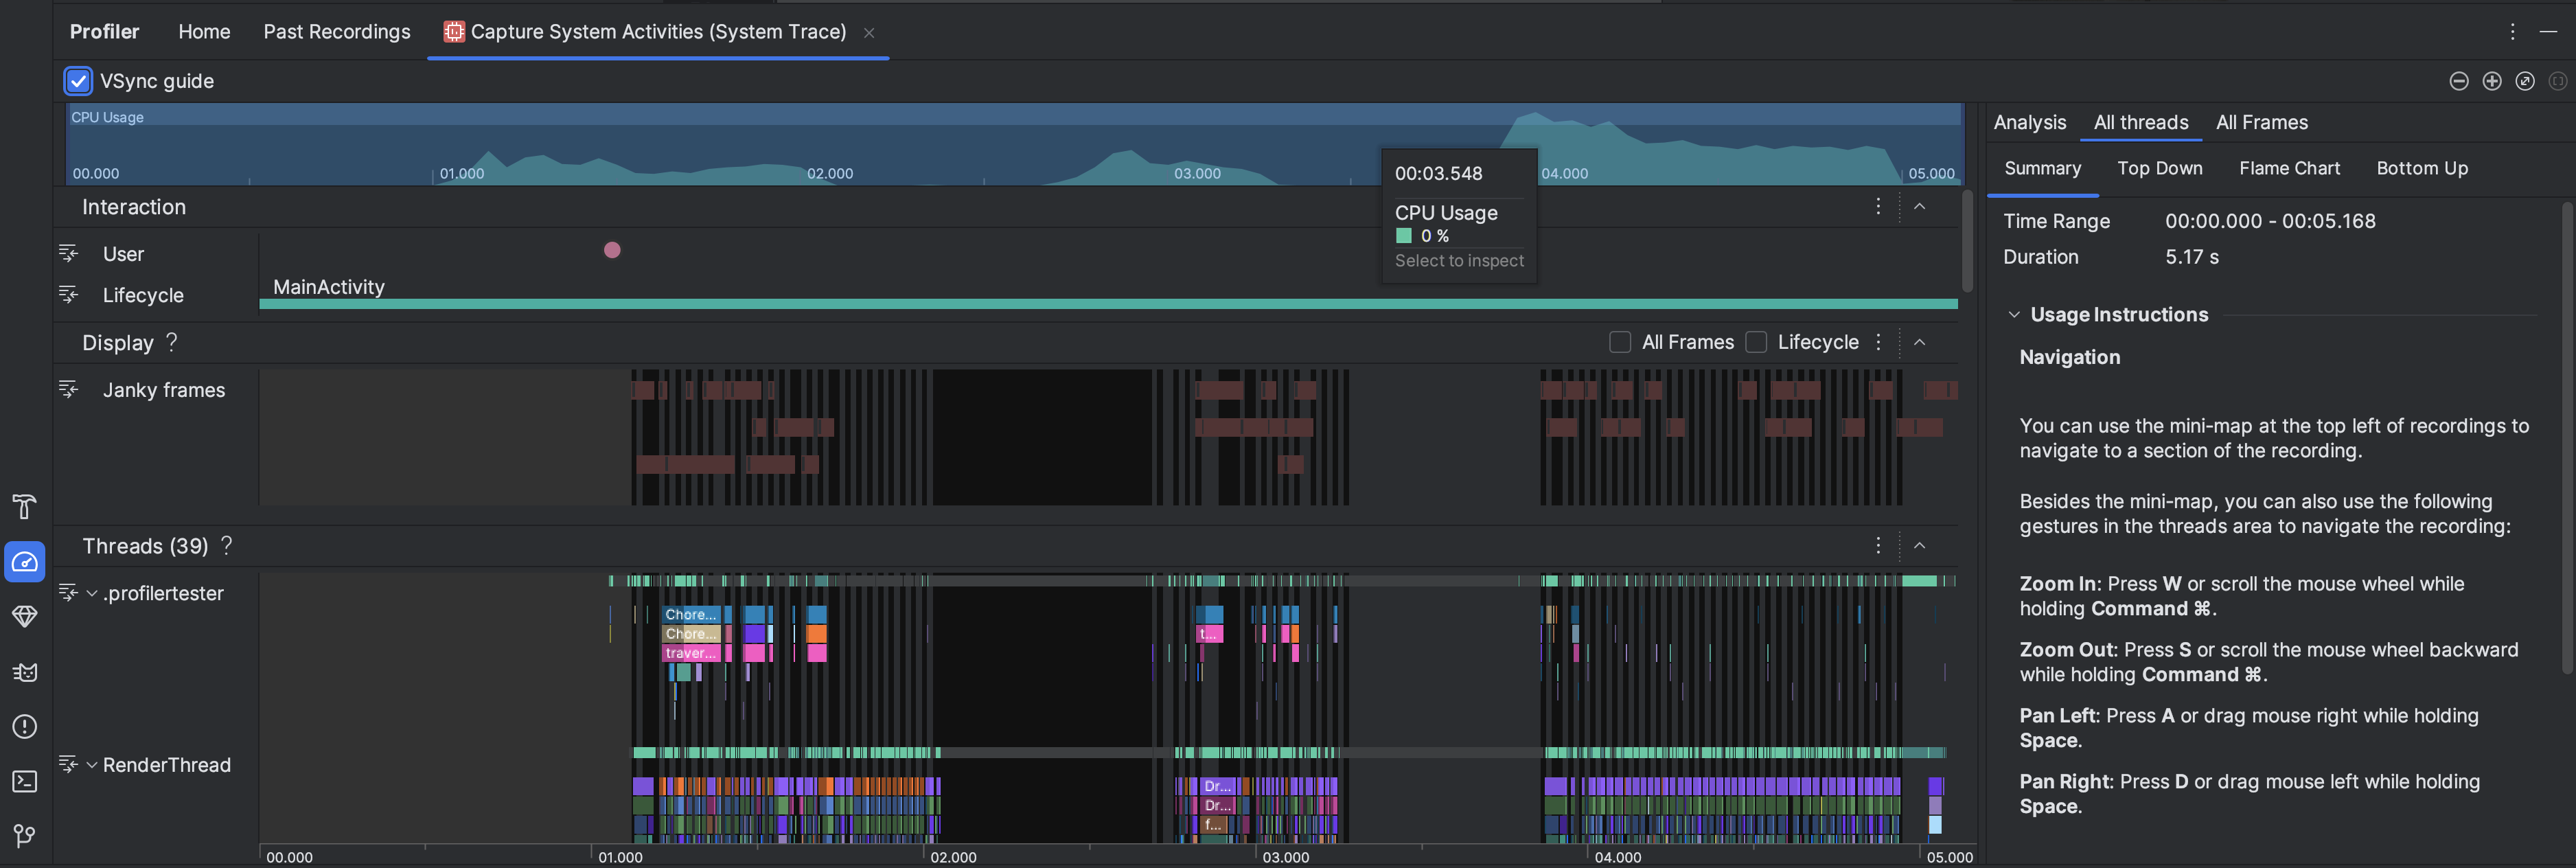
- CPU 使用率:显示应用的 CPU 使用率(以占总可用 CPU 容量的百分比表示,按时间划分)。突出显示时间轴的某个部分,以过滤出相应时间段的详细信息。
- 互动:沿着时间轴显示用户互动和应用生命周期事件(需要可调试的应用进程和搭载 API 级别 26 或更高版本的设备)。
- 显示:显示与应用界面渲染流畅度相关的信息。选择生命周期,以检查应用在主线程和
RenderThread上渲染每个帧所用的时间。此信息有助于调查导致界面卡顿和帧速率偏低的瓶颈。 线程:显示应用和各种系统进程运行的线程。如需了解如何使用系统轨迹来调查并帮助减少界面卡顿,请参阅检测界面卡顿。
提示:检查 Threads 时间轴时,您可以使用以下快捷方式:- 放大:按 W 或在按住 Ctrl 键(在 macOS 上,按住 Command 键)的同时滚动鼠标滚轮。
- 缩小:按 S 或在按住 Ctrl 键(在 macOS 上,按住 Command 键)的同时向后滚动鼠标滚轮。
- 向左平移:按 A 键或在按住空格键的同时向右拖动鼠标。
- 向右平移:按 D 键或在按住空格键的同时向左拖动鼠标。
- 展开或收起线程:双击线程名称,或在选中线程时按 Enter 键。
CPU Cores:显示设备中每个核心上的活动。查看每个核心的活动情况,有助于您了解哪些是现代移动处理器中的“大”核心或“小”核心。将指针悬停在某个线程活动上,可查看该核心在此特定时间在哪个线程上运行。

Process Memory (RSS):显示应用当前使用的物理内存量。如需了解详情,请参阅图表术语表。
电源轨道:在实体设备上进行分析时显示。如需了解详情,请参阅检查耗电情况。
电池:显示应用的电池用量。