
利用 Espresso 测试记录器工具,您可以为应用创建界面测试,而无需编写任何测试代码。通过记录测试场景,您可以记录自己与设备的交互,并添加断言以在应用的特定快照中验证界面元素。随后,Espresso 测试记录器会提取所保存的记录,并自动生成对应的界面测试,您可以运行该测试来测试您的应用。
Espresso 测试记录器根据 Espresso 测试框架编写测试,该框架是 AndroidX Test 中的一个 API。Espresso API 建议您根据用户操作创建简洁而可靠的界面测试。此结构可以声明预期、交互和断言,而不用直接访问底层应用的 Activity 和视图,这样可以防止测试不稳定并能优化测试运行速度。
在您的测试设备上关闭动画
在使用 Espresso 测试记录器之前,请确保在测试设备上关闭动画以防止意外结果。按照 Espresso 设置说明操作,不过请注意,您不需要手动设置对 Espresso 库的依赖项引用,因为测试记录器会在您保存记录时自动执行此操作。对于给定项目来说,这些步骤只需要做一次。
记录 Espresso 测试
Espresso 测试由两个主要部分组成:界面交互和 View 元素断言。界面交互包括用户可以用来与您的应用交互的点按和键入操作。断言可以验证视觉元素是否存在于屏幕上或验证其内容。例如,“便签”测试应用的 Espresso 测试可能包含点击按钮和撰写新便签的界面交互,但会使用断言来验证按钮是否存在和便签的内容。
本部分将介绍如何使用 Espresso 测试记录器创建这两个测试组成部分,以及如何保存您已完成的记录来生成测试。
记录界面交互
要开始使用 Espresso 测试记录器记录测试,请按以下步骤操作:
- 依次点击 Run > Record Espresso Test。
- 在 Select Deployment Target 窗口中,选择要在哪个设备上记录测试。如有必要,创建一个新的 Android 虚拟设备。点击 OK。
- Espresso 测试记录器可以触发项目的构建,您必须先安装并启动应用,然后 Espresso 测试记录器才允许您与其交互。Record Your Test 窗口将在应用启动后显示,由于您尚未与设备交互,因此主面板将显示“No events recorded yet”。与您的设备交互以开始记录事件,如“点按”和“键入”操作。
注意:在可以开始记录交互之前,您可能会在设备上看到一个显示“Waiting for Debugger”或“Attaching Debugger”的对话框。Espresso 测试记录器使用调试程序来记录界面事件。连接调试程序后,该对话框将自动关闭;请勿点击 Force Close。
记录的交互将显示在 Record Your Test 窗口的主面板中,如下面的图 1 所示。当您运行测试时,Espresso 测试将尝试以相同的顺序执行这些操作。
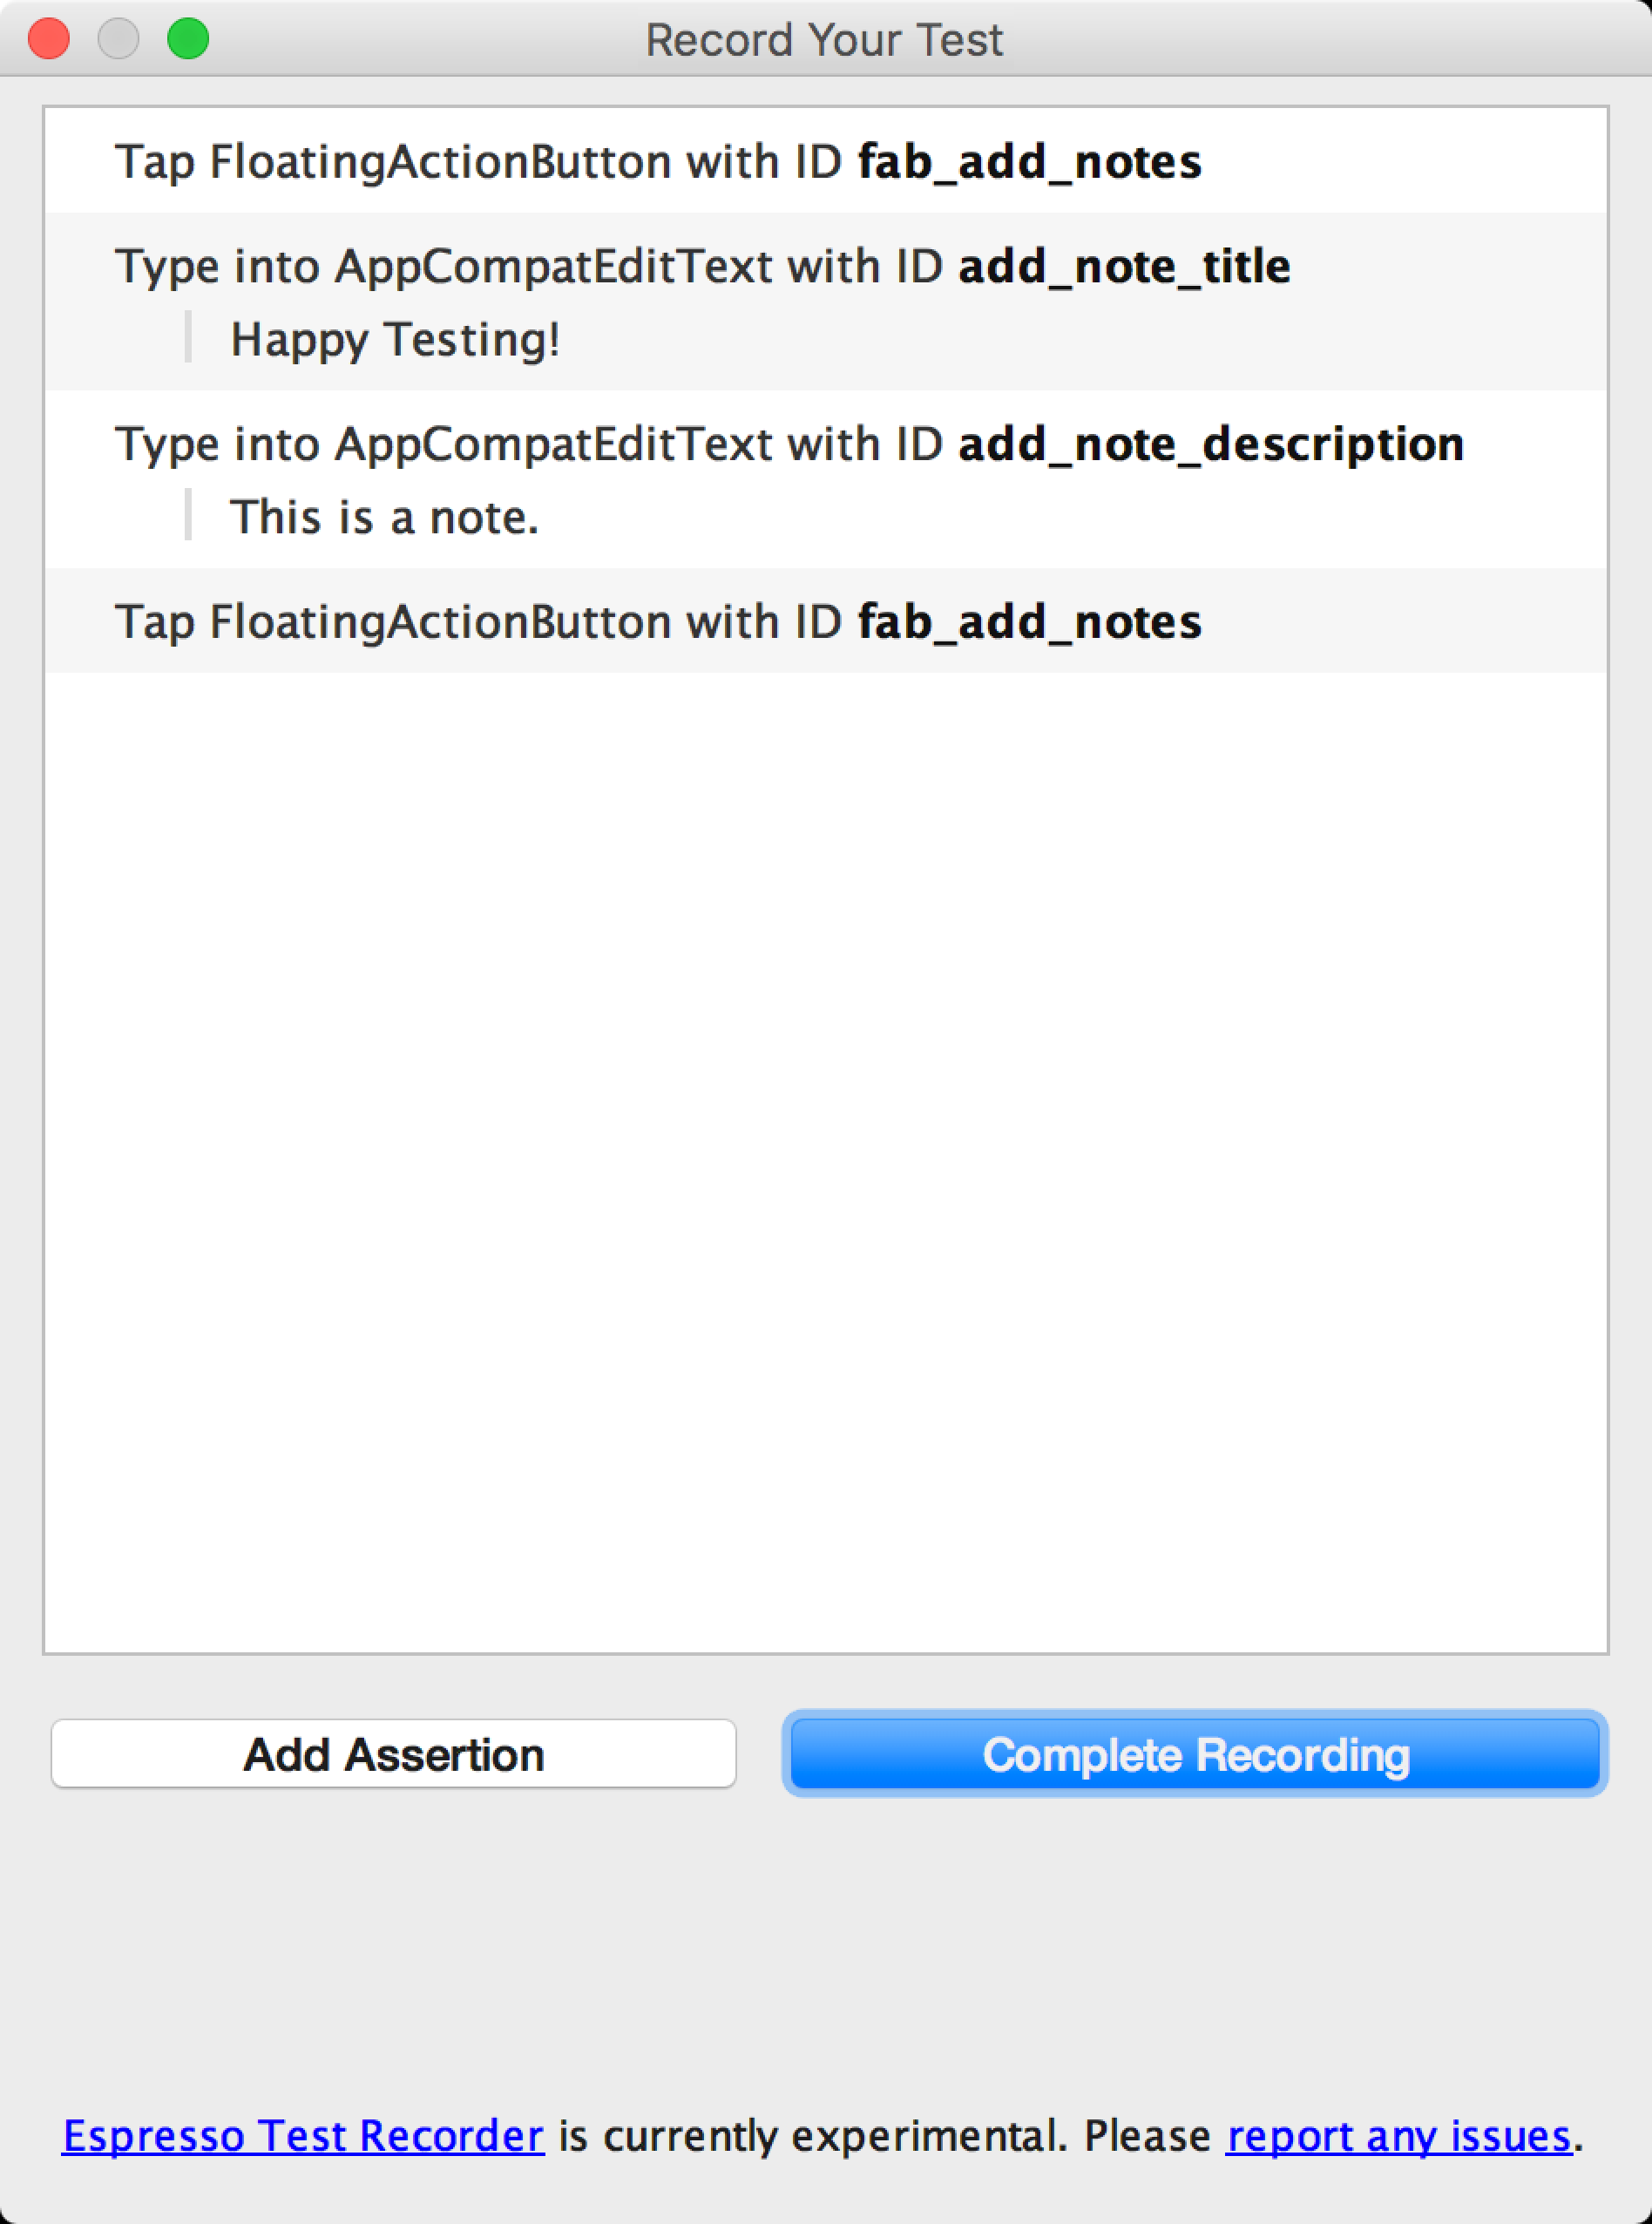
图 1. Record Your Test 窗口,其中显示了记录的界面交互。
添加断言以验证界面元素
断言可以通过三种主要类型来验证 View 元素是否存在或验证其内容:
- text is:检查选定 View 元素的文本内容
- exists:检查 View 元素是否存在于屏幕上可见的当前 View 层次结构中
- does not exist:检查 View 元素是否不存在于当前 View 层次结构中
要向您的测试添加断言,请按以下步骤操作:
- 点击 Add Assertion。在 Espresso 获取界面层次结构和当前应用状态的其他相关信息时,会显示 Screen Capture 对话框。Espresso 截取屏幕截图后,该对话框将自动关闭。
- 当前屏幕的布局将显示在 Record Your Test 窗口右侧的面板中。若要选择要为其创建断言的 View 元素,请在屏幕截图中点击相应的元素,或使用窗口底部的 Edit assertion 框中的第一个下拉菜单。选定的 View 对象将突出显示在红框中。
- 从 Edit assertion 框的第二个下拉菜单中选择要使用的断言。Espresso 将使用选定 View 元素的有效断言填充菜单。
- 如果您选择“text is”断言,Espresso 将自动插入选定 View 元素中当前存在的文本。您可以使用 Edit assertion 框中的文本字段来修改文本,使其与您所需的断言匹配。
- 点击 Save and Add Another 以再创建一个断言,或点击 Save Assertion 以关闭断言面板。
图 2 中的屏幕截图显示正在创建一个“text is”断言来验证便签的标题是否为“Happy Testing!”:
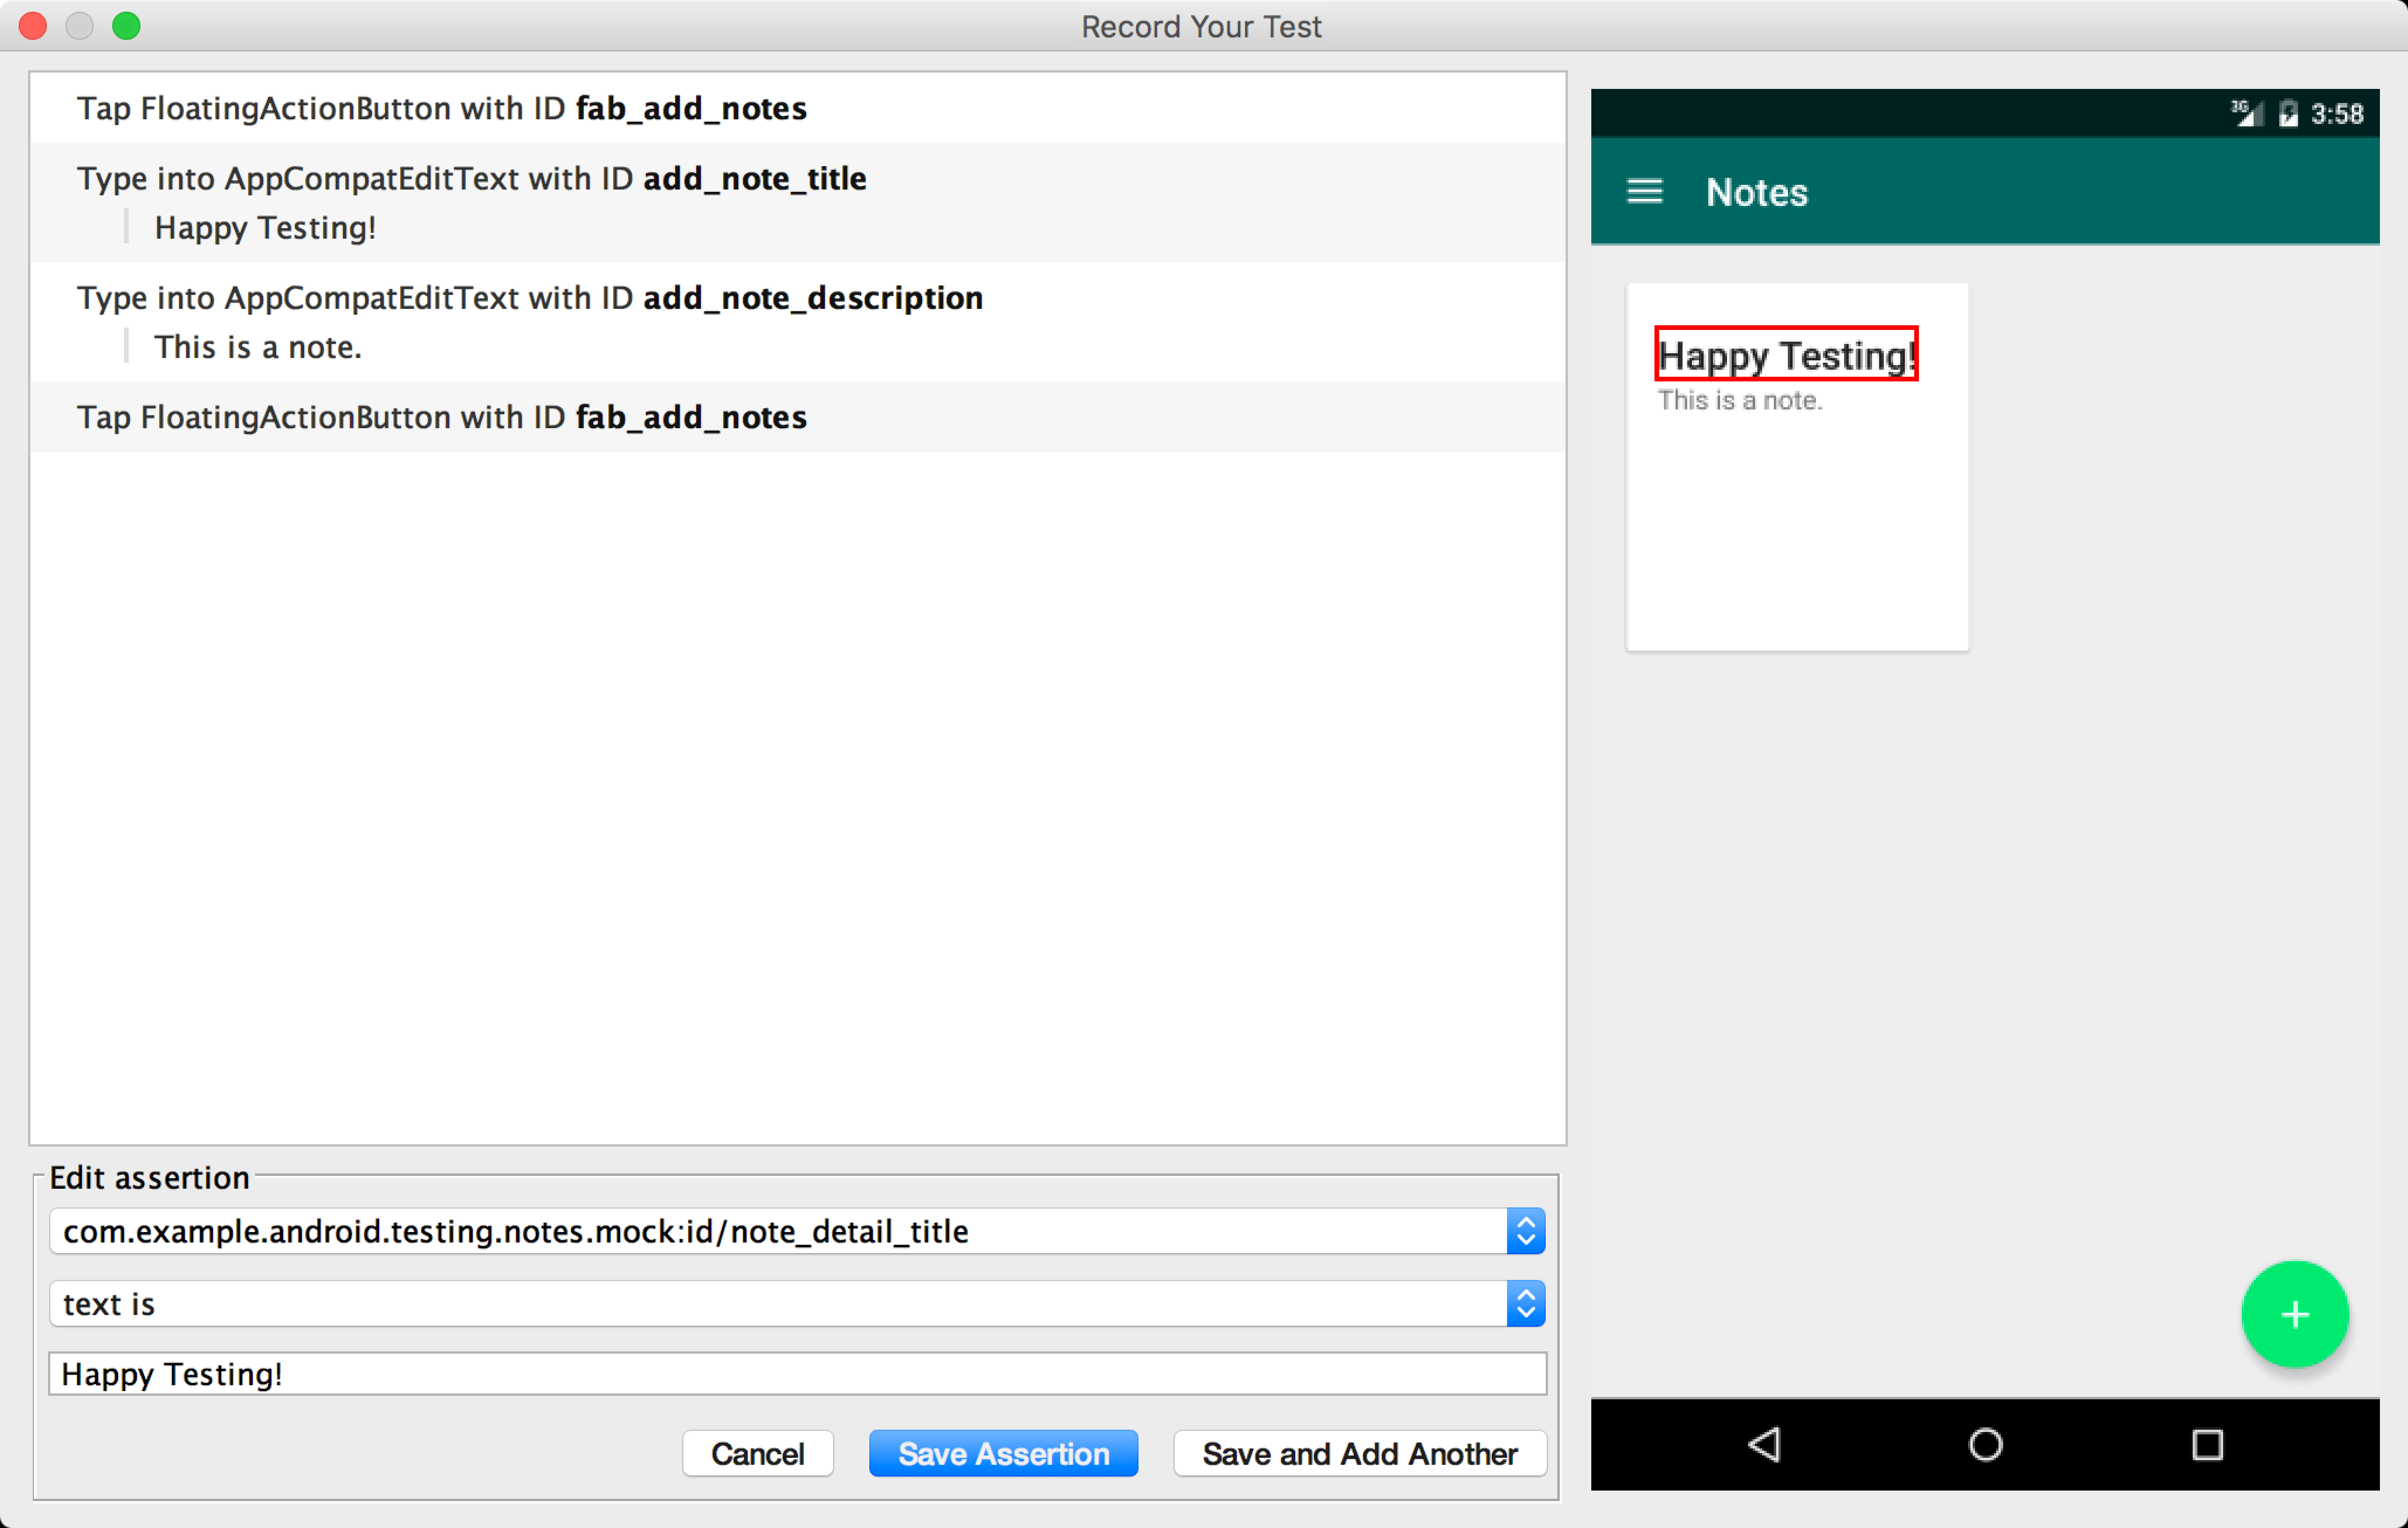
图 2. 选择一个 View 元素(在红框中)后的 Edit assertion 框。
在创建断言的同时,您可以继续与您的应用交互,即使断言面板仍在 Record Your Test 窗口中打开着也是如此。Espresso 测试记录器将一直记录您的操作,但您正在修改的断言在保存后将显示在这些交互之前。断言的屏幕截图也将保持您点击 Add Assertion 按钮时设备或模拟器具有的布局。
保存记录
完成与应用的交互并添加断言后,请按以下步骤操作,保存您的记录并生成 Espresso 测试:
- 点击 Complete Recording。系统随即会显示 Pick a test class name for your test 窗口。
- Espresso 测试记录器会根据已启动 Activity 的名称在软件包内为您的测试提供一个唯一的名称。如果您要更改建议的名称,请使用 Test class name 文本字段。点击 Save。
- 如果您还未将 Espresso 依赖项添加到您的应用,那么当您尝试保存测试时,系统会显示 Missing Espresso dependencies 对话框。点击 Yes 以将依赖项自动添加到您的 文件。点击 Yes 以将依赖项自动添加到您的
build.gradle文件。
- 如果您还未将 Espresso 依赖项添加到您的应用,那么当您尝试保存测试时,系统会显示 Missing Espresso dependencies 对话框。点击 Yes 以将依赖项自动添加到您的 文件。点击 Yes 以将依赖项自动添加到您的
- 文件将在 Espresso 测试记录器生成它后自动打开,Android Studio 将显示在 IDE 的 Project 窗口中选择的测试类。
在本地运行 Espresso 测试
如需运行 Espresso 测试,请使用 Android Studio IDE 左侧的 Project ![]() 窗口:
窗口:
- 打开所需的应用模块文件夹并导航至您想要运行的测试。测试的位置取决于插桩测试根目录的位置以及已启动的 activity 的软件包名称。以下示例展示了“便签”测试应用的测试保存位置:
- 如果您在窗口内使用的是 Android 视图,请依次转到 java > com.example.username.appname (androidTest)。
- 如果您在窗口内使用的是 Project 视图,请依次转到模块文件夹内的 src > androidTest > java > com.example.username.appname。
- 右键点击该测试,然后点击 Run ‘testName’。
- 或者,您也可以打开测试文件,然后右键点击生成的测试类或方法。如需详细了解如何运行测试,请参阅 Test Your App 页面。
- 在 Select Deployment Target 窗口中,选择要在哪个设备上运行测试。如有必要,创建一个新的 Android 虚拟设备。点击 OK。
在 IDE 底部的 Run 窗口中监控测试的进度。Android Studio 将为项目运行完整构建,并在 Run 窗口中打开一个包含测试名称的标签页,如图 3 所示。您可以在此标签页中查看您的测试是通过还是失败,以及测试的运行时长。测试完成时,此标签页将记录“Tests ran to completion”。
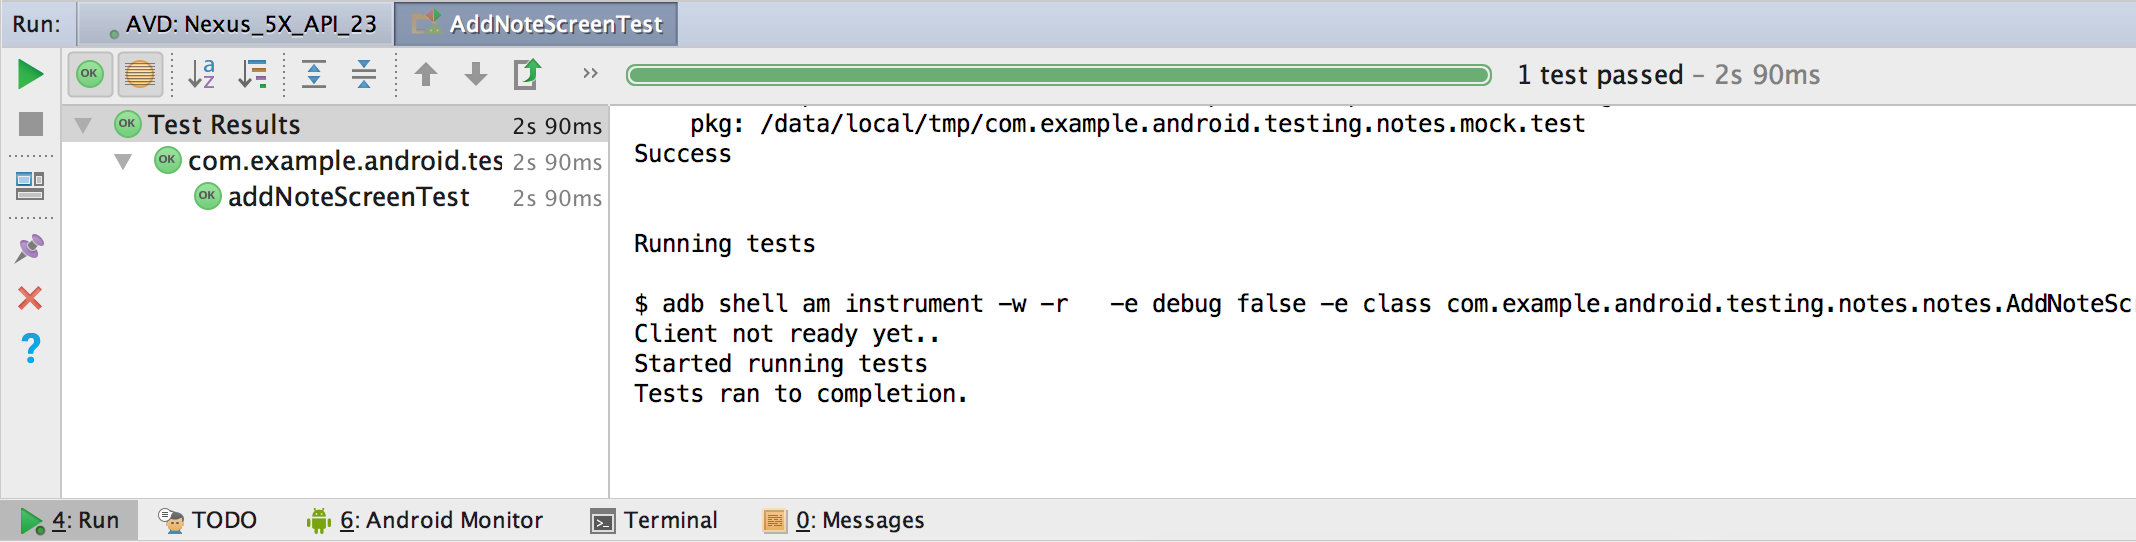
图 3. 在本地运行 Espresso 测试后 Run 窗口中的示例输出。
如需详细了解如何编写测试运行配置,请阅读创建和修改运行/调试配置中的“为类或方法定义测试配置”部分。
利用 Firebase Test Lab for Android 运行 Espresso 测试
您可以将 Espresso 测试记录器生成的测试与 Firebase Test Lab 结合使用,在云中针对成百上千种设备配置对 您的应用进行测试。利用 Test Lab 在 Spark 方案每日免费配额内测试您的应用时不收取任何费用。若要利用 Firebase Test Lab 运行 Espresso 测试,请为您的应用创建 Firebase 项目,然后按照说明从 Android Studio 中利用 Firebase Test Lab 运行测试。
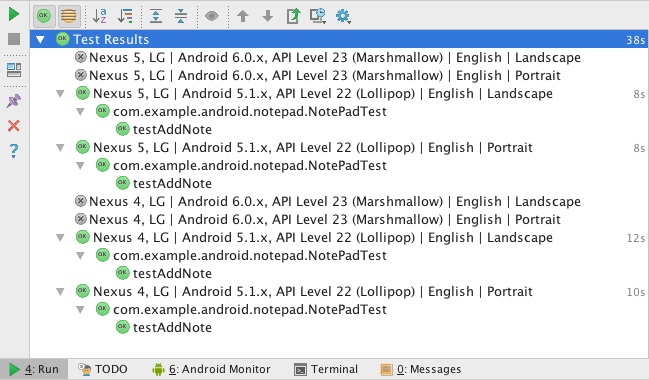
图 4. 利用 Firebase Test Lab 在多个设备上运行测试后 Run 窗口中的示例输出。