
您可以使用 Image 可組合項 (contentScale、colorFilter) 中的屬性來自訂圖片。您也可以使用現有的修飾符到 Image 上來套用不同的效果。修飾符可用於任何可組合項,而不只在於 Image 可組合項,而 contentScale 和 colorFilter 則是 Image 可組合項中的明確參數。
內容縮放
指定 contentScale 選項,用來裁剪或變更圖片在邊界內的縮放方式。如未指定 contentScale 選項,系統預設會使用 ContentScale.Fit。
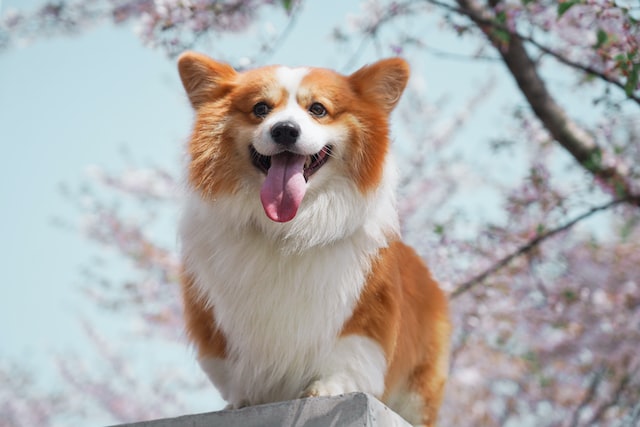
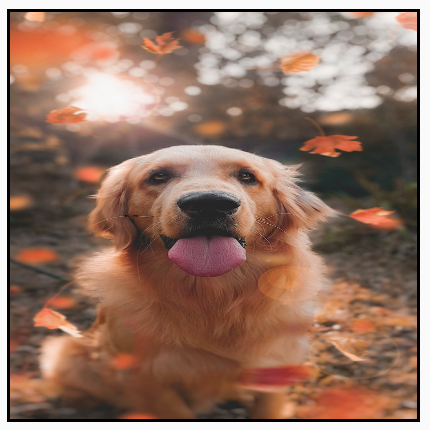
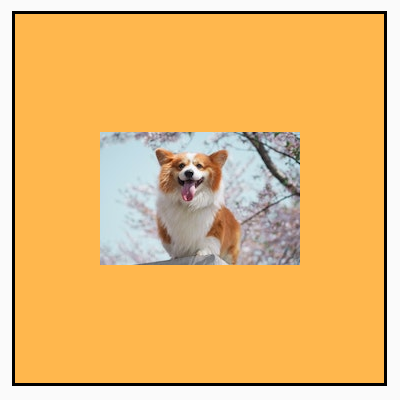
在以下範例中,Image 可組合項的限制為 150dp 並帶有邊框,且 Image 可組合項的背景設定為黃色。您可以參考下面的展示圖表,瞭解不同的 ContentScale 選項會呈現什麼效果。
val imageModifier = Modifier .size(150.dp) .border(BorderStroke(1.dp, Color.Black)) .background(Color.Yellow) Image( painter = painterResource(id = R.drawable.dog), contentDescription = stringResource(id = R.string.dog_content_description), contentScale = ContentScale.Fit, modifier = imageModifier )
設定不同的 ContentScale 選項會產生不同的輸出內容。下表可協助您選擇正確的 ContentScale 模式:
| 來源圖片 |

|
|
ContentScale |
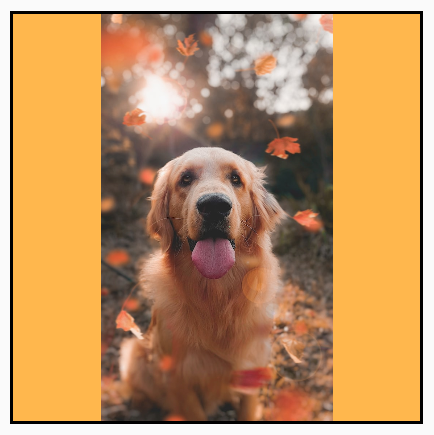
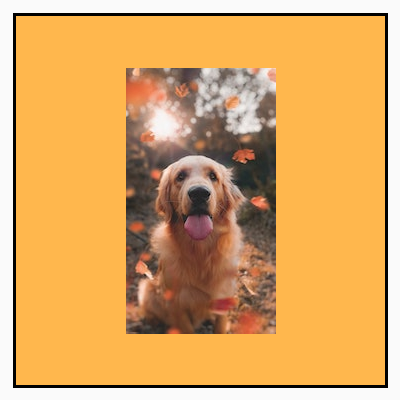
結果 - 直向圖片: | 結果 - 橫向圖片: |
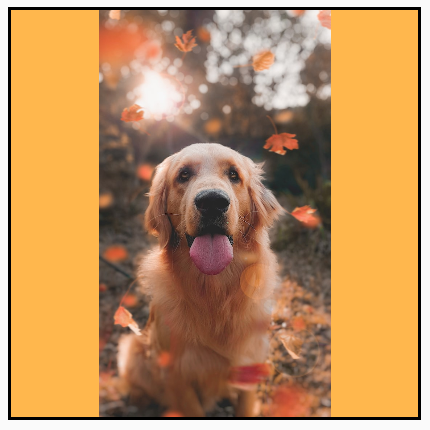
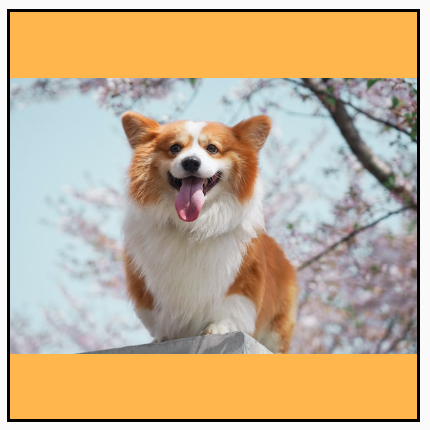
ContentScale.Fit:以一致的方式縮放圖片,保留顯示比例 (預設)。如果內容小於圖片大小,系統會將圖片放大,與邊界貼合。 |

|

|
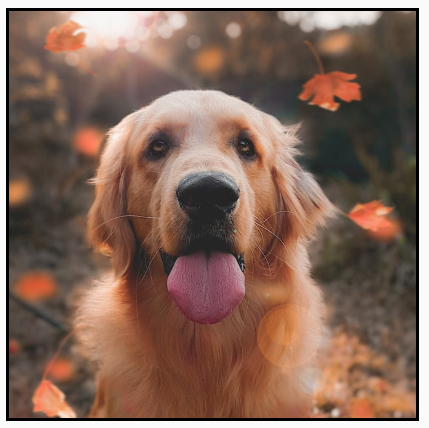
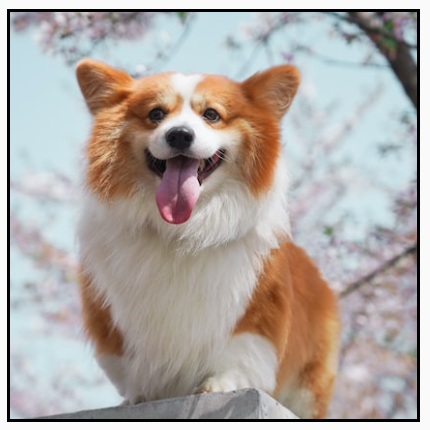
ContentScale.Crop:根據可用空間置中裁剪圖片。 |

|

|
ContentScale.FillHeight:縮放來源,保持顯示比例,確保邊界與目的地高度相符。 |
|

|
ContentScale.FillWidth:縮放來源,保持顯示比例,確保邊界與目的地寬度相符。 |
|
|
ContentScale.FillBounds:垂直或水平縮放內容,以不一致的方式填滿目的地的邊界。(注意:如果圖片與容器的顯示比例不同,圖片可能會扭曲)。 |
|
|
ContentScale.Inside:縮放來源,在目的地邊界內保持顯示比例。如果來源的兩個維度均小於或等於目的地,則顯示方式則與 None 類似。內容一律會保留在邊界內。如果內容小於邊界,則不會套用縮放設定。 |
來源圖片大於邊界:
 來源圖片小於邊界:
|
來源圖片大於邊界:
 來源圖片小於邊界:
|
ContentScale.None:不會對來源套用任何縮放設定。如果內容小於目的地範圍,圖片不會放大至與該區域大小一致。 |
來源圖片大於邊界:
 來源圖片小於邊界:
|
來源圖片大於邊界:
 來源圖片小於邊界:
|
將 Image 可組合函式剪裁成一個形狀
如要讓圖像符合形狀,請使用內建的 clip 修飾符。如要將圖片裁剪為圓形圖案,請使用 Modifier.clip(CircleShape):
Image( painter = painterResource(id = R.drawable.dog), contentDescription = stringResource(id = R.string.dog_content_description), contentScale = ContentScale.Crop, modifier = Modifier .size(200.dp) .clip(CircleShape) )
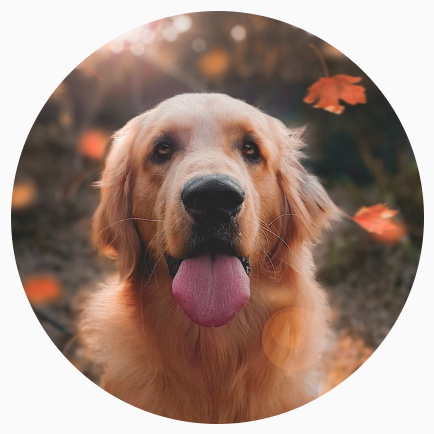
CircleShape 裁剪圖片。如要使用圓角形狀,請使用 Modifier.clip(RoundedCornerShape(16.dp)),並指定要圓角的邊角大小:
Image( painter = painterResource(id = R.drawable.dog), contentDescription = stringResource(id = R.string.dog_content_description), contentScale = ContentScale.Crop, modifier = Modifier .size(200.dp) .clip(RoundedCornerShape(16.dp)) )
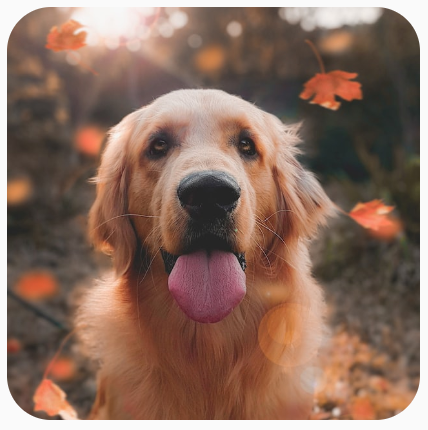
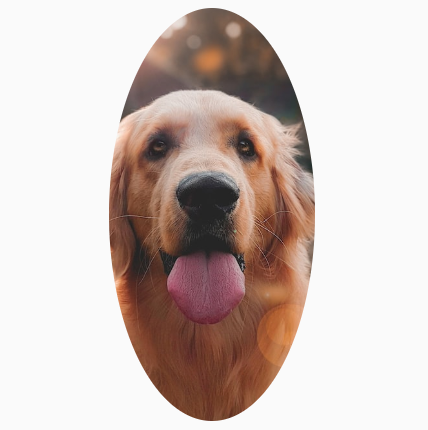
RoundedCornerShape 裁剪圖片。您還可以擴充 Shape 來剪裁自己想要的形狀,並針對該形狀提供 Path 在其周圍剪裁:
class SquashedOval : Shape { override fun createOutline( size: Size, layoutDirection: LayoutDirection, density: Density ): Outline { val path = Path().apply { // We create an Oval that starts at ¼ of the width, and ends at ¾ of the width of the container. addOval( Rect( left = size.width / 4f, top = 0f, right = size.width * 3 / 4f, bottom = size.height ) ) } return Outline.Generic(path = path) } } Image( painter = painterResource(id = R.drawable.dog), contentDescription = stringResource(id = R.string.dog_content_description), contentScale = ContentScale.Crop, modifier = Modifier .size(200.dp) .clip(SquashedOval()) )
為 Image 可組合函式加上邊框
常見的做法是組合 Modifier.border() 與 Modifier.clip(),在圖片周圍建立邊框:
val borderWidth = 4.dp Image( painter = painterResource(id = R.drawable.dog), contentDescription = stringResource(id = R.string.dog_content_description), contentScale = ContentScale.Crop, modifier = Modifier .size(150.dp) .border( BorderStroke(borderWidth, Color.Yellow), CircleShape ) .padding(borderWidth) .clip(CircleShape) )

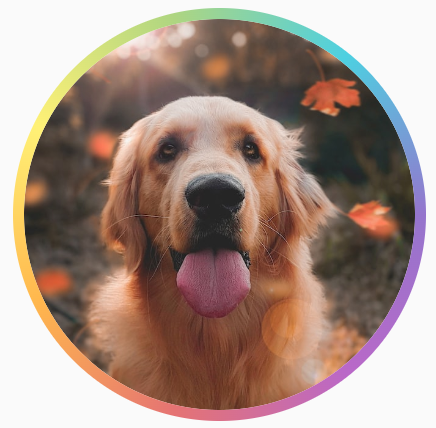
如要建立梯度邊框,可以使用 Brush API 在圖片周圍繪製彩虹梯度邊框:
val rainbowColorsBrush = remember { Brush.sweepGradient( listOf( Color(0xFF9575CD), Color(0xFFBA68C8), Color(0xFFE57373), Color(0xFFFFB74D), Color(0xFFFFF176), Color(0xFFAED581), Color(0xFF4DD0E1), Color(0xFF9575CD) ) ) } val borderWidth = 4.dp Image( painter = painterResource(id = R.drawable.dog), contentDescription = stringResource(id = R.string.dog_content_description), contentScale = ContentScale.Crop, modifier = Modifier .size(150.dp) .border( BorderStroke(borderWidth, rainbowColorsBrush), CircleShape ) .padding(borderWidth) .clip(CircleShape) )
設定自訂顯示比例
如要將圖片轉換為自訂顯示比例,請使用 Modifier.aspectRatio(16f/9f) 提供圖片 (或任何可組合函式) 一個自訂比例。
Image( painter = painterResource(id = R.drawable.dog), contentDescription = stringResource(id = R.string.dog_content_description), modifier = Modifier.aspectRatio(16f / 9f) )
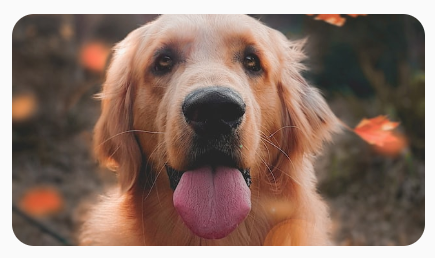
Image 上使用 Modifier.aspectRatio(16f/9f)。色彩濾鏡:轉換圖片的像素顏色
Image 可組合函式具有 colorFilter 參數,可變更圖片個別像素的輸出內容。
為圖片著色
使用 ColorFilter.tint(color, blendMode) 時,會將含有指定色彩的混合模式套用至 Image 可組合項。ColorFilter.tint(color, blendMode) 使用 BlendMode.SrcIn 對內容調色,這表示螢幕上顯示的圖片會呈現出所給予的色彩。這對於需要不同主題的圖示和向量來說非常實用。
Image( painter = painterResource(id = R.drawable.baseline_directions_bus_24), contentDescription = stringResource(id = R.string.bus_content_description), colorFilter = ColorFilter.tint(Color.Yellow) )

ColorFilter.tint」,BlendMode.SrcIn。其他 BlendMode 的結果會產生不同的效果。例如,在圖片上使用 Color.Green 設定 BlendMode.Darken 會產生以下結果:
Image( painter = painterResource(id = R.drawable.dog), contentDescription = stringResource(id = R.string.dog_content_description), colorFilter = ColorFilter.tint(Color.Green, blendMode = BlendMode.Darken) )
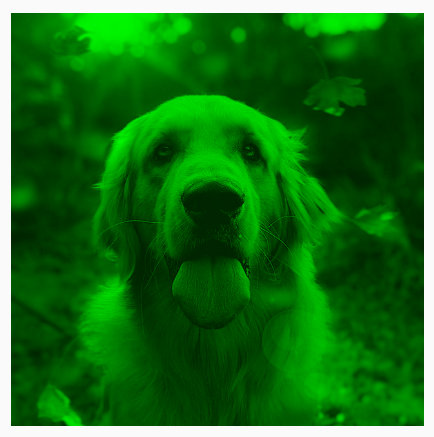
Color.Green tint 搭配 BlendMode.Darken。如要進一步瞭解不同的混合模式,請參閱 BlendMode 參考文件。
套用色彩矩陣的 Image 濾鏡
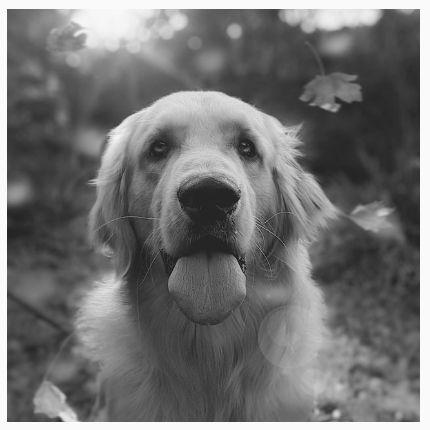
使用顏色矩陣 ColorFilter 選項來轉換圖片。舉例來說,如要為圖片套用黑白濾鏡,可以使用 ColorMatrix,並將飽和度設定為 0f。
Image( painter = painterResource(id = R.drawable.dog), contentDescription = stringResource(id = R.string.dog_content_description), colorFilter = ColorFilter.colorMatrix(ColorMatrix().apply { setToSaturation(0f) }) )
調整 Image 可組合項的對比度或亮度
如要變更圖片的對比度和亮度,可以使用 ColorMatrix 來變更值:
val contrast = 2f // 0f..10f (1 should be default) val brightness = -180f // -255f..255f (0 should be default) val colorMatrix = floatArrayOf( contrast, 0f, 0f, 0f, brightness, 0f, contrast, 0f, 0f, brightness, 0f, 0f, contrast, 0f, brightness, 0f, 0f, 0f, 1f, 0f ) Image( painter = painterResource(id = R.drawable.dog), contentDescription = stringResource(id = R.string.dog_content_description), colorFilter = ColorFilter.colorMatrix(ColorMatrix(colorMatrix)) )
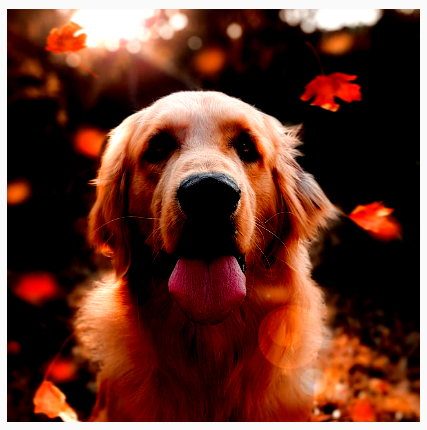
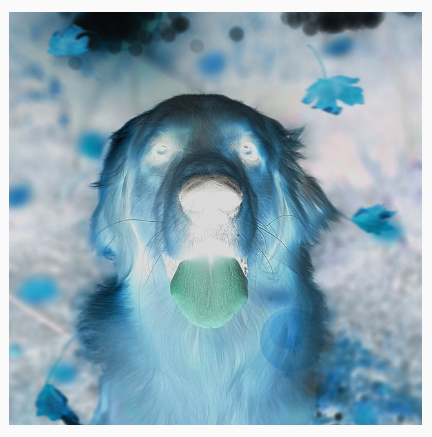
ColorMatrix 調整圖片亮度和對比度。反轉 Image 可組合項的顏色
如要反轉圖片顏色,設定 ColorMatrix 來反轉顏色:
val colorMatrix = floatArrayOf( -1f, 0f, 0f, 0f, 255f, 0f, -1f, 0f, 0f, 255f, 0f, 0f, -1f, 0f, 255f, 0f, 0f, 0f, 1f, 0f ) Image( painter = painterResource(id = R.drawable.dog), contentDescription = stringResource(id = R.string.dog_content_description), colorFilter = ColorFilter.colorMatrix(ColorMatrix(colorMatrix)) )
將 Image 可組合函式模糊處理
如要模糊處理圖片,請使用 Modifier.blur(),並提供 radiusX 和 radiusY 來分別指定水平和垂直方向的模糊半徑。
Image( painter = painterResource(id = R.drawable.dog), contentDescription = stringResource(id = R.string.dog_content_description), contentScale = ContentScale.Crop, modifier = Modifier .size(150.dp) .blur( radiusX = 10.dp, radiusY = 10.dp, edgeTreatment = BlurredEdgeTreatment(RoundedCornerShape(8.dp)) ) )
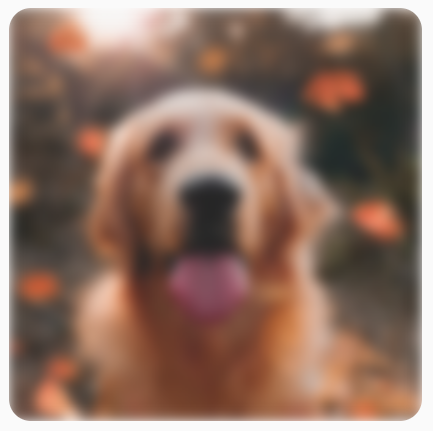
BlurEffect套用至圖片。模糊處理 Images 時,建議使用 BlurredEdgeTreatment(Shape) 而非 BlurredEdgeTreatment.Unbounded,因為後者是用來模糊處理應在原始內容邊界外轉譯的任意轉譯內容。圖片可能不會在內容邊界外轉譯;而模糊處理圓角矩形則可能需要如此的區別。
舉例來說,如果將前一張圖片的 BlurredEdgeTreatment 設定為 Unbounded,圖片的邊緣會模糊處理,而不是銳利的:
Image( painter = painterResource(id = R.drawable.dog), contentDescription = stringResource(id = R.string.dog_content_description), contentScale = ContentScale.Crop, modifier = Modifier .size(150.dp) .blur( radiusX = 10.dp, radiusY = 10.dp, edgeTreatment = BlurredEdgeTreatment.Unbounded ) .clip(RoundedCornerShape(8.dp)) )
BlurEdgeTreatment.Unbounded。為您推薦
- 注意:系統會在 JavaScript 關閉時顯示連結文字
- 圖形修飾符
- 載入圖片
- Material 圖示