
導覽元件是程式庫,可用來管理複雜導覽、轉場動畫、深層連結,以及在應用程式中各個畫面之間傳遞、已檢查編譯時間的引數。
本文件做為通用指南,介紹如何遷移現有應用程式,以使用導覽元件。
一般來說,遷移作業涉及下列步驟:
將畫面專用的 UI 邏輯移出活動:移動應用程式的 UI 不必將活動邏輯傳至活動中,即可確保每個活動都只有 以及
Toolbar等全域導覽 UI 元件時 將每個畫面導入片段或自訂到達網頁。整合導覽元件-可針對各項活動建立導覽圖表,其中包含該活動管理的一或多個片段。以導覽元件作業取代片段交易。
新增活動目的地-將
startActivity()呼叫替換為使用活動目的地的動作。合併活動-如果有多個活動共用一個共同的版面配置,請合併導覽圖表。
必要條件
本指南假設您已遷移應用程式,以使用 AndroidX 程式庫。如果尚未遷移,請先遷移專案以使用 AndroidX,然後再繼續。
將畫面專用的 UI 邏輯移出活動
活動是系統層級的元件,可促進應用程式與 Android 之間的圖形互動。活動會登錄在應用程式的資訊清單中,方便 Android 瞭解哪些活動可以啟動。活動類別還能讓您的應用程式對 Android 變更做出反應,例如應用程式的 UI 進入或離開前景、旋轉等。該活動也可以做為在不同畫面之間分享狀態的地方。
在應用程式的內容中,活動應做為導覽的主機 且應具有在畫面間轉換的邏輯和知識。 傳遞資料等不過,管理 UI 的詳細資料時,最好留給 UI 較小且可重複使用的部分。這個模式的建議實作方式是片段。若要進一步瞭解使用片段的優勢,請參閱「單一活動:原因、時機和方式」。導覽功能可透過「導覽片段」依附元件支援片段。導覽功能也支援自訂目的地類型。
如果您的應用程式未使用片段,則必須先遷移應用程式中的每個畫面,以便使用片段。您此時並未移除活動。而是在建立代表畫面的片段,並依責任分割 UI 邏輯。
片段簡介
讓我們先舉例說明片段導入流程 由兩個畫面組成的應用程式:產品清單畫面和 畫面。只要點選清單畫面上的產品 使用者前往詳細資料畫面,進一步瞭解產品。
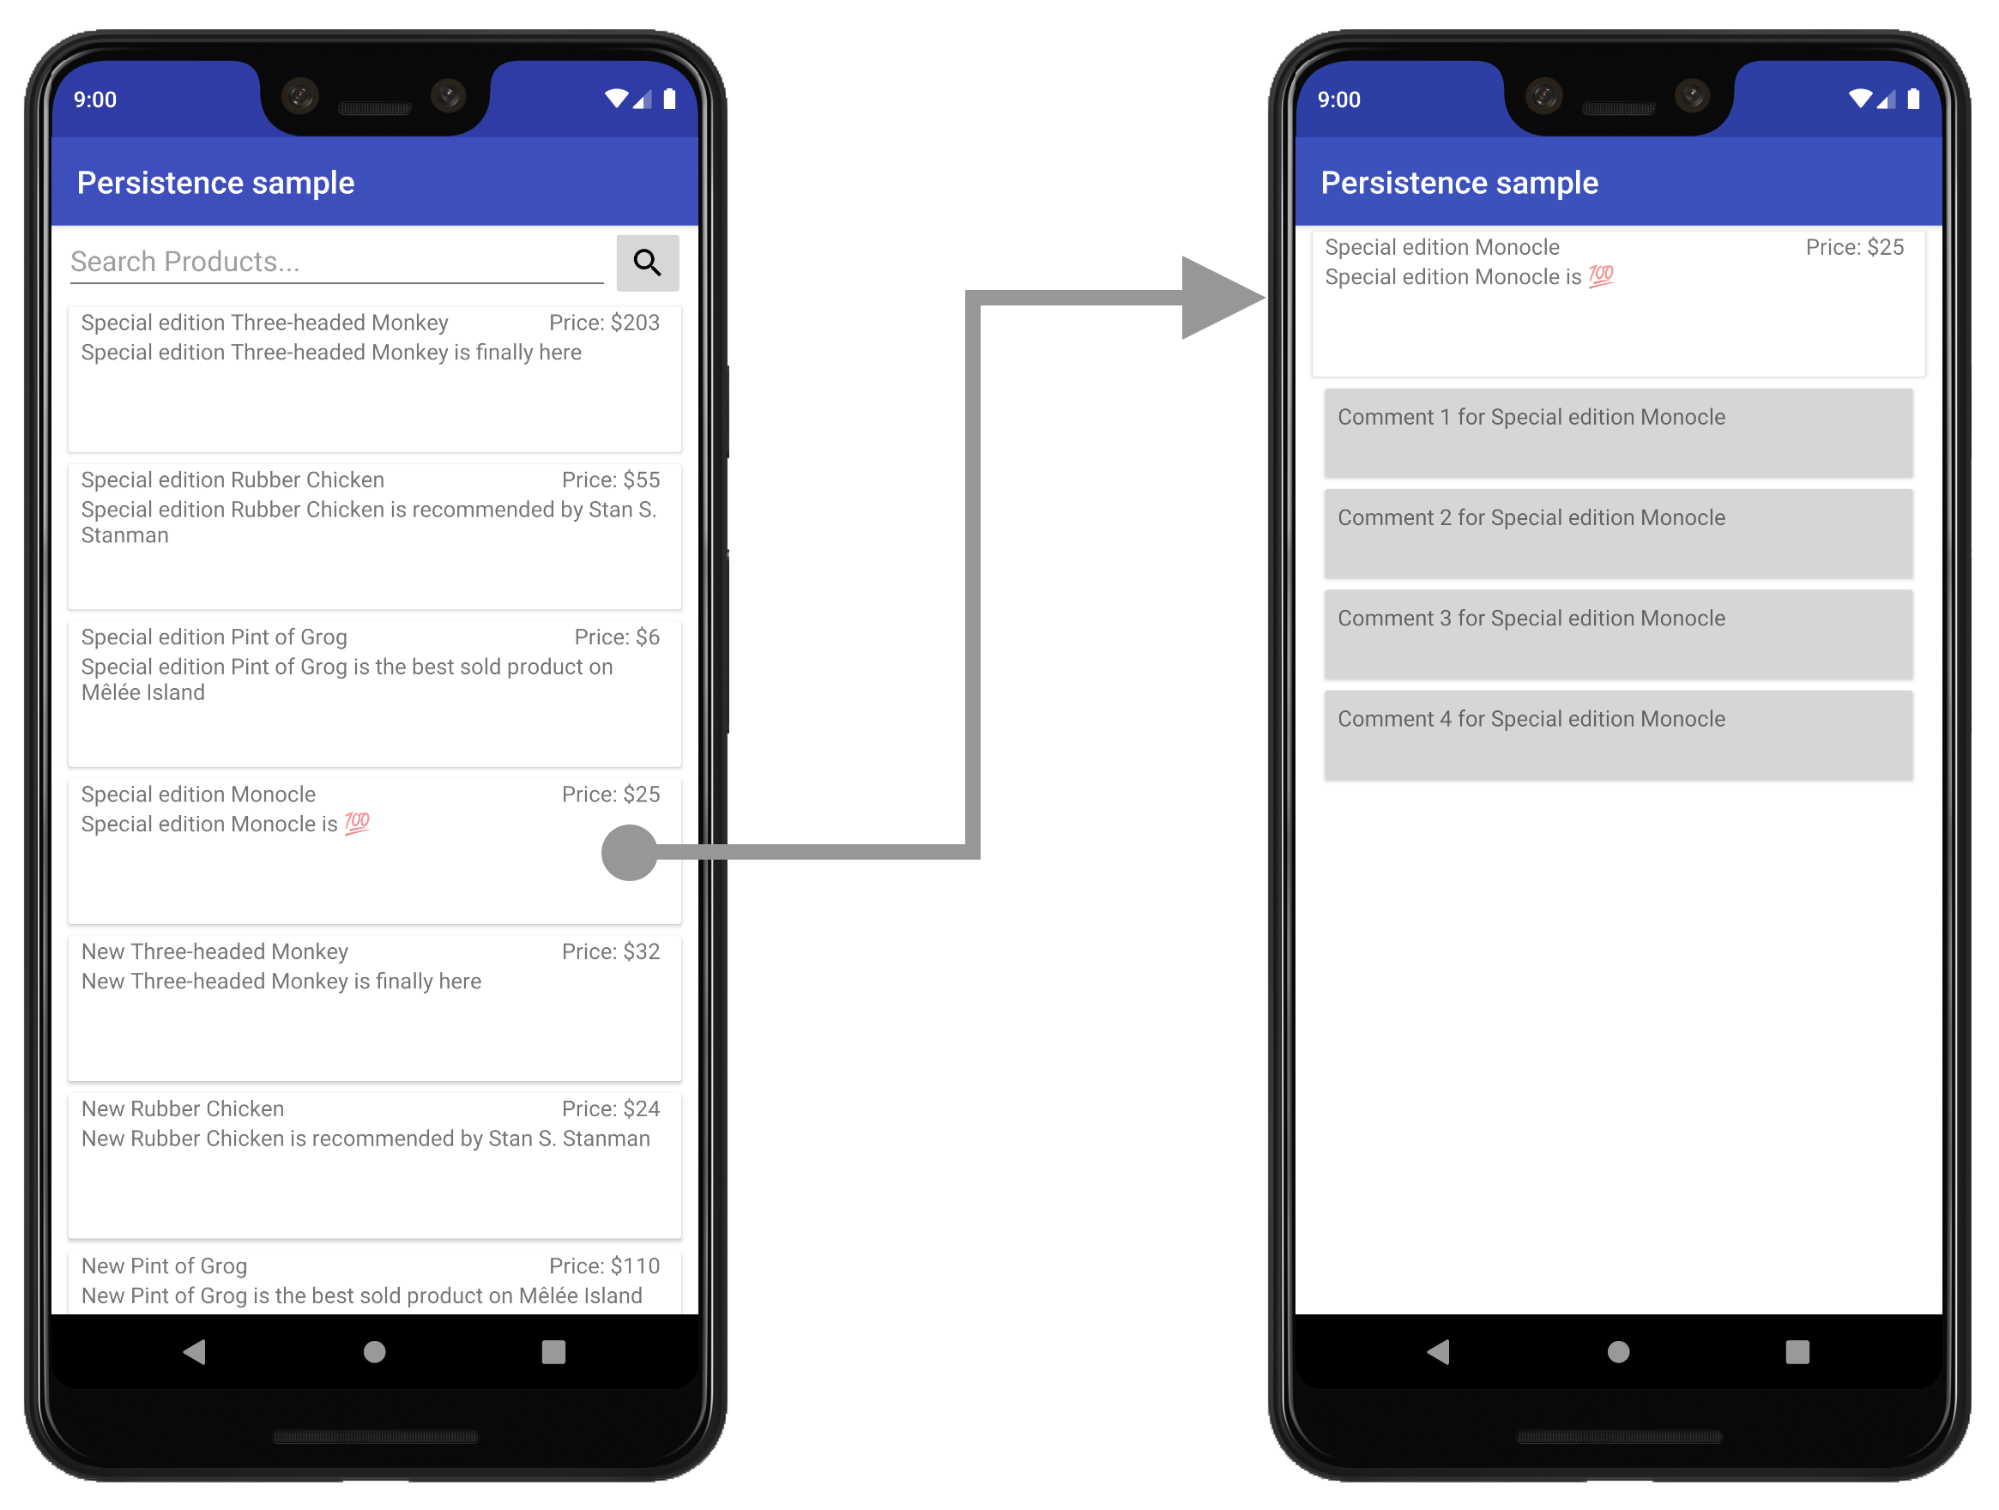
在這個範例中,清單和詳細資料畫面目前為個別活動。
建立新的版面配置來代管 UI
若要導入片段,請先建立新的活動版面配置檔案,以便代管片段。這會取代活動目前的內容檢視畫面版面配置。
如需簡潔的檢視畫面,可使用 FrameLayout,如以下範例 product_list_host 所示:
<FrameLayout
   xmlns:app="http://schemas.android.com/apk/res-auto"
   xmlns:android="http://schemas.android.com/apk/res/android"
   android:id="@+id/main_content"
   android:layout_height="match_parent"
>   android:layout_width="match_parent" /
id 屬性是指稍後加入片段的內容部分。
接著,在活動的 onCreate() 函式中,修改活動 onCreate 函式中的版面配置檔案參照,指向這個新的版面配置檔案:
Kotlin
class ProductListActivity : AppCompatActivity() {
    ...
    override fun onCreate(savedInstanceState: Bundle?) {
        ...
        // Replace setContentView(R.layout.product_list) with the line below
        setContentView(R.layout.product_list_host)
        ...
    }
}
Java
public class ProductListActivity extends AppCompatActivity {
    ...
    @Override
    public void onCreate(@Nullable Bundle savedInstanceState) {
        ...
        // Replace setContentView(R.layout.product_list); with the line below
        setContentView(R.layout.product_list_host);
        ...
    }
}
現有的版面配置 (在此範例中為 product_list) 會做為即將建立的片段的根目錄檢視。
建立片段
建立新的片段,以管理畫面的 UI。建議最好與活動主機名稱一致。下方的程式碼片段使用 ProductListFragment,例如:
Kotlin
class ProductListFragment : Fragment() {
    // Leave empty for now.
}
Java
public class ProductListFragment extends Fragment {
    // Leave empty for now.
}
將活動邏輯移至片段
設定片段定義後,下一步就是將這個畫面的 UI 邏輯從活動移至這個新片段。如果原本採用以活動為基礎的架構,則活動的 onCreate() 函式中可能會有許多檢視畫面建立邏輯。
以下範例是需要移動的以活動為基礎的畫面與 UI 邏輯:
Kotlin
class ProductListActivity : AppCompatActivity() {

    // Views and/or ViewDataBinding references, Adapters...
    private lateinit var productAdapter: ProductAdapter
    private lateinit var binding: ProductListActivityBinding

    ...

    // ViewModels, System Services, other Dependencies...
    private val viewModel: ProductListViewModel by viewModels()

    ...

    override fun onCreate(savedInstanceState: Bundle?) {
        super.onCreate(savedInstanceState)

        // View initialization logic
        DataBindingUtil.setContentView(this, R.layout.product_list_activity)

        // Post view initialization logic
        // Connect adapters
        productAdapter = ProductAdapter(productClickCallback)
        binding.productsList.setAdapter(productAdapter)

        // Initialize view properties, set click listeners, etc.
        binding.productsSearchBtn.setOnClickListener {...}

        // Subscribe to state
        viewModel.products.observe(this, Observer { myProducts ->
            ...
        })

        // ...and so on
    }
   ...
}
Java
public class ProductListActivity extends AppCompatActivity {

    // Views and/or ViewDataBinding references, adapters...
    private ProductAdapter productAdapter;
    private ProductListActivityBinding binding;

    ...

    // ViewModels, system services, other dependencies...
    private ProductListViewModel viewModel;

    ...

    @Override
    protected void onCreate(@Nullable Bundle savedInstanceState) {
        super.onCreate(savedInstanceState);

        // View initialization logic
        DataBindingUtil.setContentView(this, R.layout.product_list_activity);

        // Post view initialization logic
        // Connect adapters
        productAdapter = new ProductAdapter(productClickCallback);
        binding.productsList.setAdapter(productAdapter);

        // Initialize ViewModels and other dependencies
        ProductListViewModel viewModel = new ViewModelProvider(this).get(ProductListViewModel.java);

        // Initialize view properties, set click listeners, etc.
        binding.productsSearchBtn.setOnClickListener(v -> { ... });

        // Subscribe to state
        viewModel.getProducts().observe(this, myProducts ->
            ...
       );

       // ...and so on
   }
您的活動也可能控制使用者前往下一個畫面的時間和方式,如以下範例所示:
Kotlin
    // Provided to ProductAdapter in ProductListActivity snippet.
    private val productClickCallback = ProductClickCallback { product ->
        show(product)
    }

    fun show(product: Product) {
        val intent = Intent(this, ProductActivity::class.java)
        intent.putExtra(ProductActivity.KEY_PRODUCT_ID, product.id)
        startActivity(intent)
    }
Java
// Provided to ProductAdapter in ProductListActivity snippet.
private ProductClickCallback productClickCallback = this::show;

private void show(Product product) {
    Intent intent = new Intent(this, ProductActivity.class);
    intent.putExtra(ProductActivity.KEY_PRODUCT_ID, product.getId());
    startActivity(intent);
}
在片段中,您在 onCreateView() 與 onViewCreated() 之間分配這個工作,而且活動中僅保留導覽邏輯:
Kotlin
class ProductListFragment : Fragment() {

    private lateinit var binding: ProductListFragmentBinding
    private val viewModel: ProductListViewModel by viewModels()

     // View initialization logic
    override fun onCreateView(inflater: LayoutInflater,
            container: ViewGroup?,
            savedInstanceState: Bundle?): View? {
        binding = DataBindingUtil.inflate(
                inflater,
                R.layout.product_list,
                container,
                false
        )
        return binding.root
    }

    // Post view initialization logic
    override fun onViewCreated(view: View, savedInstanceState: Bundle?) {
        // Connect adapters
        productAdapter = ProductAdapter(productClickCallback)
        binding.productsList.setAdapter(productAdapter)

        // Initialize view properties, set click listeners, etc.
        binding.productsSearchBtn.setOnClickListener {...}

        // Subscribe to state
        viewModel.products.observe(this, Observer { myProducts ->
            ...
        })

        // ...and so on
    }

    // Provided to ProductAdapter
    private val productClickCallback = ProductClickCallback { product ->
        if (lifecycle.currentState.isAtLeast(Lifecycle.State.STARTED)) {
            (requireActivity() as ProductListActivity).show(product)
        }
    }
    ...
}
Java
public class ProductListFragment extends Fragment {

    private ProductAdapter productAdapter;
    private ProductListFragmentBinding binding;

    // View initialization logic
    @Nullable
    @Override
    public View onCreateView(@NonNull LayoutInflater inflater,
            @Nullable ViewGroup container,
            @Nullable Bundle savedInstanceState) {
        binding = DataBindingUtil.inflate(
                inflater,
                R.layout.product_list_fragment,
                container,
                false);
        return binding.getRoot();
    }

    // Post view initialization logic
    @Override
    public void onViewCreated(@NonNull View view,
            @Nullable Bundle savedInstanceState) {

        // Connect adapters
        binding.productsList.setAdapter(productAdapter);

        // Initialize ViewModels and other dependencies
        ProductListViewModel viewModel = new ViewModelProvider(this)
                .get(ProductListViewModel.class);

        // Initialize view properties, set click listeners, etc.
        binding.productsSearchBtn.setOnClickListener(...)

        // Subscribe to state
        viewModel.getProducts().observe(this, myProducts -> {
            ...
       });

       // ...and so on

    // Provided to ProductAdapter
    private ProductClickCallback productClickCallback = new ProductClickCallback() {
        @Override
        public void onClick(Product product) {
            if (getLifecycle().getCurrentState().isAtLeast(Lifecycle.State.STARTED)) {
                ((ProductListActivity) requireActivity()).show(product);
            }
        }
    };
    ...
}
請注意,在 ProductListFragment 中,呼叫 setContentView() 並不會加載並連結版面配置。在片段中,onCreateView() 會初始化根目錄檢視。onCreateView() 會使用
LayoutInflater,可用於
根據版面配置資源檔案加載根層級檢視畫面。此範例重複使用活動使用的現有 product_list 版面配置,因為無須對版面配置做任何變動。
如果活動的 onStart()、onResume() 中有任何 UI 邏輯,
與導覽無關的 onPause() 或 onStop() 函式,您可以
將這些函式移至片段上名稱相同的對應函式。
初始化代管活動中的片段
將所有 UI 邏輯下移至片段後,只有活動中應該僅剩下導覽邏輯。
Kotlin
class ProductListActivity : AppCompatActivity() {

    override fun onCreate(savedInstanceState: Bundle?) {
        super.onCreate(savedInstanceState)
        setContentView(R.layout.product_list_host)
    }

    fun show(product: Product) {
        val intent = Intent(this, ProductActivity::class.java)
        intent.putExtra(ProductActivity.KEY_PRODUCT_ID, product.id)
        startActivity(intent)
    }
}
Java
public class ProductListActivity extends AppCompatActivity {

    @Override
    protected void onCreate(@Nullable Bundle savedInstanceState) {
        super.onCreate(savedInstanceState);
        setContentView(R.layout.product_list_host);
    }

    public void show(Product product) {
        Intent intent = new Intent(this, ProductActivity.class);
        intent.putExtra(ProductActivity.KEY_PRODUCT_ID, product.getId());
        startActivity(intent);
    }
}
最後一個步驟是在設定內容檢視畫面後,立即在 onCreate() 中建立片段的執行個體:
Kotlin
override fun onCreate(savedInstanceState: Bundle?) {
    super.onCreate(savedInstanceState)
    setContentView(R.layout.product_list_host)

    if (savedInstanceState == null) {
        val fragment = ProductListFragment()
        supportFragmentManager
                .beginTransaction()
                .add(R.id.main_content, fragment)
                .commit()
    }
}
Java
@Override
protected void onCreate(@Nullable Bundle savedInstanceState) {
    super.onCreate(savedInstanceState);
    setContentView(R.layout.product_list_host);

    if (savedInstanceState == null) {
        ProductListFragment fragment = new ProductListFragment();
        getSupportFragmentManager()
                .beginTransaction()
                .add(R.id.main_content, fragment)
                .commit();
    }
}
如此範例所示,FragmentManager 會在設定變更時自動儲存和還原片段,因此只有在 savedInstanceState 為空值時,才需要新增片段。
將意圖額外項目傳遞至片段
如果您的活動是透過意圖接收 Extras,則可將這些內容直接傳遞至片段做為引數。
在此範例中,ProductDetailsFragment 直接從活動的意圖額外項目接收其引數:
Kotlin
...

if (savedInstanceState == null) {
    val fragment = ProductDetailsFragment()

    // Intent extras and Fragment Args are both of type android.os.Bundle.
    fragment.arguments = intent.extras

    supportFragmentManager
            .beginTransaction()
            .add(R.id.main_content, fragment)
            .commit()
}

...
Java
...

if (savedInstanceState == null) {
    ProductDetailsFragment fragment = new ProductDetailsFragment();

    // Intent extras and fragment Args are both of type android.os.Bundle.
    fragment.setArguments(getIntent().getExtras());

    getSupportFragmentManager()
            .beginTransaction()
            .add(R.id.main_content, fragment)
            .commit();
}

...
此時,您應可使用第一個畫面測試執行應用程式 改為使用片段繼續遷移其他以活動為基礎的畫面,每次疊代後都進行測試。
整合導覽元件
採用以片段為基礎的架構後,就可以開始整合導覽元件。
首先,請在專案中新增最新的 Navigation 依附元件,並 請參閱 Navigation 程式庫版本資訊。
建立導覽圖表
導覽元件會在資源檔案中,以圖表呈現應用程式的導覽設定,與應用程式檢視畫面的呈現方式相當類似。這有助於 將應用程式的導覽架構維持在程式碼集外,並 讓您以視覺化的方式編輯應用程式導覽
若要建立導覽圖表,請先建立名為 navigation 的新資源資料夾。若要新增圖表,請在這個目錄上按一下滑鼠右鍵,然後選擇
新增 >導覽資源檔案。

導覽元件使用活動做為導覽主機,並在使用者瀏覽應用程式時,將個別片段換成該主機。在開始以視覺化方式呈現應用程式導覽的版面配置之前,您必須在要代管此圖表的活動中設定 NavHost。由於我們使用片段,因此可使用導覽元件的預設 NavHost 實作 NavHostFragment。
NavHostFragment 是透過 FragmentContainerView 設定
放置在代管活動中,如以下範例所示:
<androidx.fragment.app.FragmentContainerView
   android:name="androidx.navigation.fragment.NavHostFragment"
   app:navGraph="@navigation/product_list_graph"
   app:defaultNavHost="true"
   android:id="@+id/main_content"
   android:layout_width="match_pare>nt"
   android:layout_height="match_parent" /
app:NavGraph 屬性會指向與這個導覽主機相關的導覽圖表。設定這個屬性後,會加載導覽圖表,並在 NavHostFragment 上設定圖表屬性。app:defaultNavHost 屬性可以確保
NavHostFragment 攔截系統返回按鈕。
如果使用 DrawerLayout 或 BottomNavigationView 等頂層導覽,這個 FragmentContainerView 會取代主要內容檢視畫面元素。如需範例,請參閱「透過 NavigationUI 更新 UI 元件」。
如果是簡潔的版面配置,則可加入這個 FragmentContainerView 元素做為根層級 ViewGroup 的子項:
<FrameLayout
   xmlns:app="http://schemas.android.com/apk/res-auto"
   xmlns:android="http://schemas.android.com/apk/res/android"
   android:layout_height="match_parent"
   andro>id<:layout_width="match_parent"

androidx.fragment.app.FragmentContainerView
   android:id="@+id/main_content"
   android:name="androidx.navigation.fragment.NavHostFragment"
   app:navGraph="@navigation/product_list_graph"
   app:defaultNavHost="true"
>  < andr>oid:layout_width="match_parent"
   android:layout_height="match_parent" /

/FrameLayout
如果按一下下方的「Design」(設計) 分頁標籤,應該會看到類似的圖表
類似下方的文字在圖表左上方的目的地下方,可看到 layout_name (resource_id) 格式中的 NavHost 活動參照。
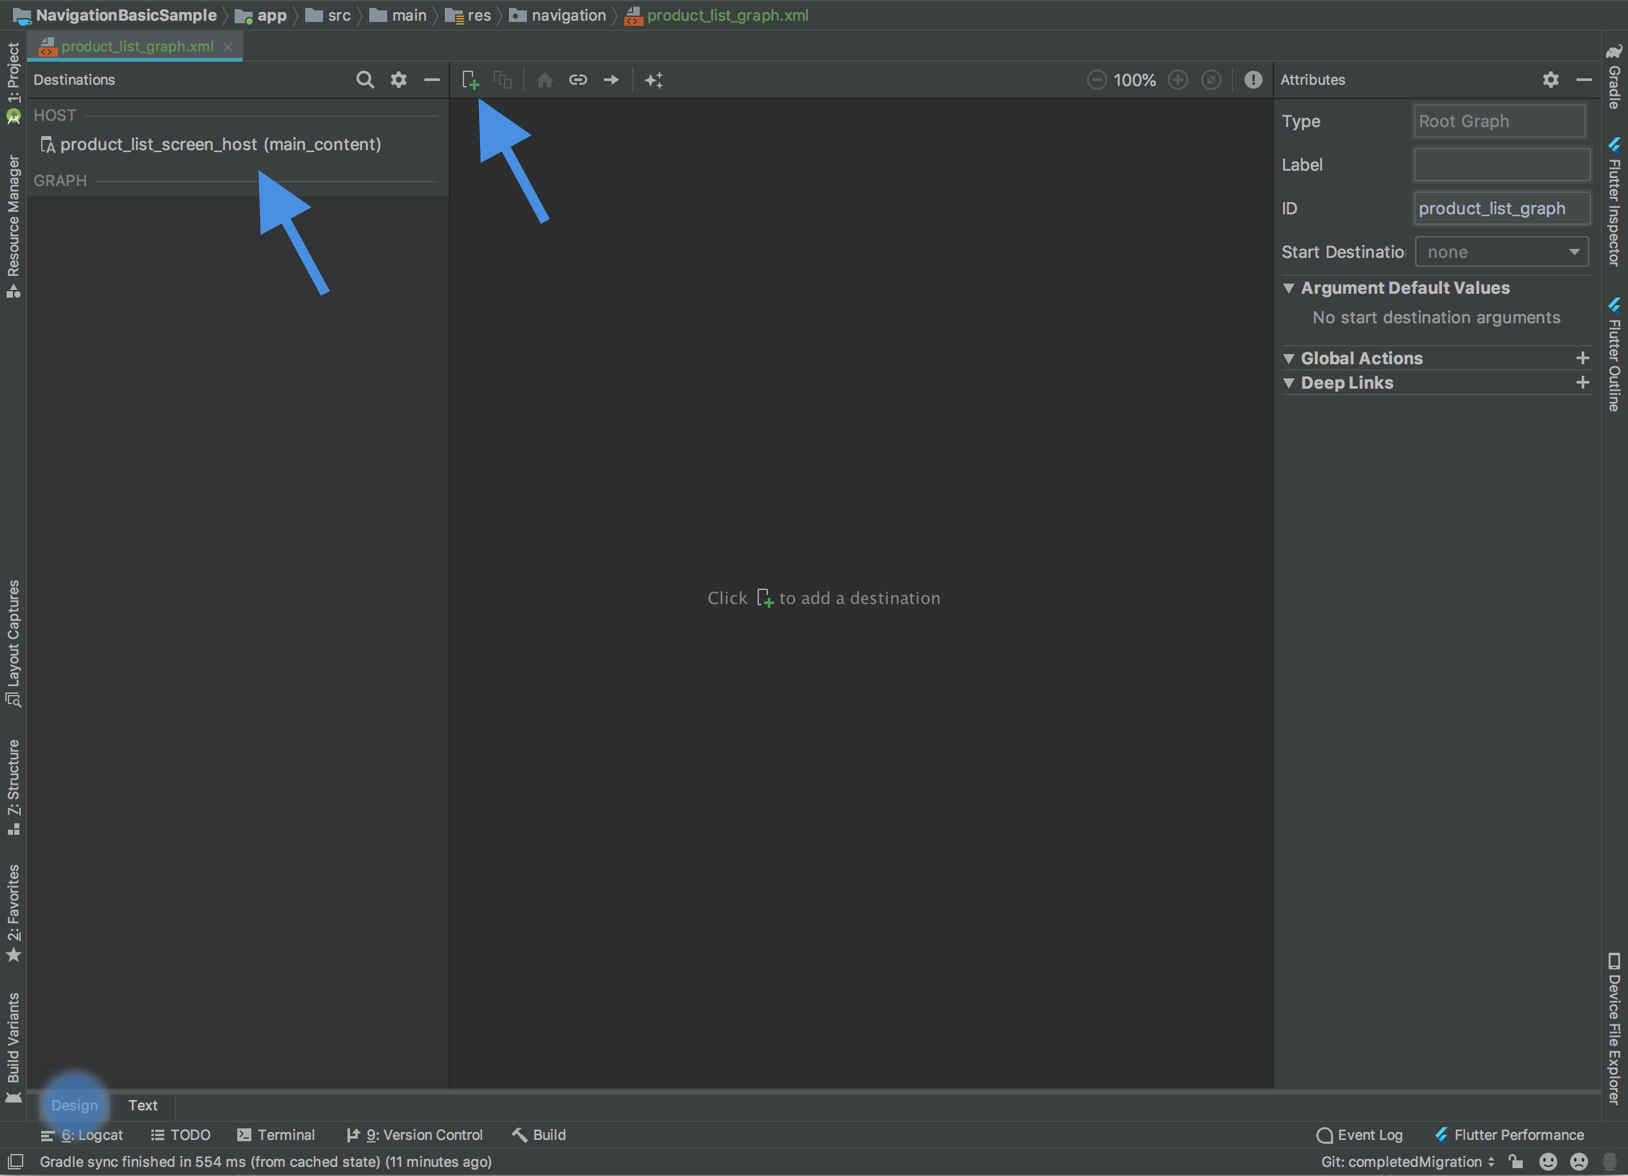
按一下頂端附近的加號按鈕 ![]() ,就能將片段新增至此圖表。
,就能將片段新增至此圖表。
導覽元件將個別畫面稱為「目的地」。 目的地可以是片段、活動或自訂目的地。您可以在圖表中新增任何類型的目的地,但請注意,活動目的地會視為「終端機目的地」,因為一旦您前往活動目的地,就是在獨立的導覽主機和圖表中作業。
導覽元件是指使用者從某個位置 actions,做為另一個目的地的到達網頁。動作也可以描述轉場動畫和快顯行為。
移除片段交易
使用導覽元件後,如果您要在同一個活動下,瀏覽至以片段為基礎的不同畫面,可移除 FragmentManager 互動。
如果應用程式在同一個活動或頂層使用多個片段
例如導覽匣版面配置或底部導覽列
使用 FragmentManager 和
FragmentTransactions
在 UI 的主要內容部分新增或取代片段。這已
透過提供操作選項,以導覽元件取代並簡化使用導覽元件
連結圖表中的目的地,然後使用
NavController。
以下列出幾種您可能會遇到的情境,以及如何在每個情境中完成遷移作業。
管理多個片段的單一活動
如果管理多個片段的單一活動,活動程式碼可能如下所示:
Kotlin
class MainActivity : AppCompatActivity() {

    override fun onCreate(savedInstanceState: Bundle?) {
        super.onCreate(savedInstanceState)
        setContentView(R.layout.activity_main)

        // Logic to load the starting destination
        //  when the Activity is first created
        if (savedInstanceState == null) {
            val fragment = ProductListFragment()
            supportFragmentManager.beginTransaction()
                    .add(R.id.fragment_container, fragment, ProductListFragment.TAG)
                    .commit()
        }
    }

    // Logic to navigate the user to another destination.
    // This may include logic to initialize and set arguments on the destination
    // fragment or even transition animations between the fragments (not shown here).
    fun navigateToProductDetail(productId: String) {
        val fragment = new ProductDetailsFragment()
        val args = Bundle().apply {
            putInt(KEY_PRODUCT_ID, productId)
        }
        fragment.arguments = args

        supportFragmentManager.beginTransaction()
                .addToBackStack(ProductDetailsFragment.TAG)
                .replace(R.id.fragment_container, fragment, ProductDetailsFragment.TAG)
                .commit()
    }
}
Java
public class MainActivity extends AppCompatActivity {

    @Override
    protected void onCreate(@Nullable Bundle savedInstanceState) {
        super.onCreate(savedInstanceState);
        setContentView(R.layout.activity_main);

        // Logic to load the starting destination when the activity is first created.
        if (savedInstanceState == null) {
            val fragment = ProductListFragment()
            supportFragmentManager.beginTransaction()
                    .add(R.id.fragment_container, fragment, ProductListFragment.TAG)
                    .commit();
        }
    }

    // Logic to navigate the user to another destination.
    // This may include logic to initialize and set arguments on the destination
    // fragment or even transition animations between the fragments (not shown here).
    public void navigateToProductDetail(String productId) {
        Fragment fragment = new ProductDetailsFragment();
        Bundle args = new Bundle();
        args.putInt(KEY_PRODUCT_ID, productId);
        fragment.setArguments(args);

        getSupportFragmentManager().beginTransaction()
                .addToBackStack(ProductDetailsFragment.TAG)
                .replace(R.id.fragment_container, fragment, ProductDetailsFragment.TAG)
                .commit();
    }
}
在來源目的地中,您可能會叫用導覽函式來回應某些事件,如下所示:
Kotlin
class ProductListFragment : Fragment() {
    ...
    override fun onViewCreated(view: View, savedInstanceState: Bundle?) {
        // In this example a callback is passed to respond to an item clicked
        //  in a RecyclerView
        productAdapter = ProductAdapter(productClickCallback)
        binding.productsList.setAdapter(productAdapter)
    }
    ...

    // The callback makes the call to the activity to make the transition.
    private val productClickCallback = ProductClickCallback { product ->
            (requireActivity() as MainActivity).navigateToProductDetail(product.id)
    }
}
Java
public class ProductListFragment extends Fragment  {
    ...
    @Override
    public void onViewCreated(@NonNull View view,
            @Nullable Bundle savedInstanceState) {
    // In this example a callback is passed to respond to an item clicked in a RecyclerView
        productAdapter = new ProductAdapter(productClickCallback);
        binding.productsList.setAdapter(productAdapter);
    }
    ...

    // The callback makes the call to the activity to make the transition.
    private ProductClickCallback productClickCallback = product -> (
        ((MainActivity) requireActivity()).navigateToProductDetail(product.getId())
    );
}
若要加以取代,請更新導覽圖表,藉此設定開始目的地和連結目的地的動作,並視需要定義引數:
<navigation xmlns:android="http://schemas.android.com/apk/res/android"
    xmlns:app="http://schemas.android.com/apk/res-auto"
    xmlns:tools="http://schemas.android.com/tools"
    android:id="@+id/product_list_graph"
   > app:s<tartDestination="@id/product_list"

    fragment
        android:id="@+id/product_list"
        android:name="com.example.android.persistence.ui.ProductListFragment"
        an>droid:lab<el="Product List"
        tools:layout="@layout/product_list"
        action
            andro>id:id<="@+>id/na<vigate_to_product_detail"
            app:destination="@id/product_detail" /
    /fragment
    fragment
        android:id="@+id/product_detail"
        android:name="com.example.andro>id.persis<tence.ui.ProductDetailFragment"
        android:label="Product Detail&qu>ot;
 <       too<ls:layout=&>quot;@layout/product_detail"
        argument
            android:name="product_id"
            app:argType="integer" /
    /fragment
/navigation
然後您就可以更新活動:
Kotlin
class MainActivity : AppCompatActivity() {

    // No need to load the start destination, handled automatically by the Navigation component
    override fun onCreate(savedInstanceState: Bundle?) {
        super.onCreate(savedInstanceState)
        setContentView(R.layout.activity_main)
    }
}
Java
public class MainActivity extends AppCompatActivity {

    // No need to load the start destination, handled automatically by the Navigation component
    @Override
    protected void onCreate(@Nullable Bundle savedInstanceState) {
        super.onCreate(savedInstanceState);
        setContentView(R.layout.activity_main);
    }
}
活動不再需要使用 navigateToProductDetail() 方法。未來
部分,我們更新 ProductListFragment,以便使用 NavController 瀏覽內容
下一個產品詳細資料畫面
安全傳遞引數
導覽元件有一個名為 Gradle 外掛程式的 Gradle 外掛程式 Safe Args 會產生簡單的物件和建構工具類別,用於以類型安全的方式存取 為目的地和動作指定的引數。
套用外掛程式後,依導覽圖表的目的地定義的任何引數,都會造成導覽元件架構產生 Arguments 類別,為目標目的地提供型別安全引數。定義動作後,會造成外掛程式產生 Directions 設定類別,可用來指示 NavController 如何讓使用者前往目標目的地。如果動作指向需要引數的目的地,產生的 Directions 類別會包含需要這些參數的建構函式方法。
在片段中,使用 NavController 和產生的 Directions 類別為目標目的地提供型別安全引數,如下方範例所示:
Kotlin
class ProductListFragment : Fragment() {

    override fun onViewCreated(view: View, savedInstanceState: Bundle?) {
        // In this example a callback is passed to respond to an item clicked in a RecyclerView
        productAdapter = ProductAdapter(productClickCallback)
        binding.productsList.setAdapter(productAdapter)
    }
    ...

    // The callback makes the call to the NavController to make the transition.
    private val productClickCallback = ProductClickCallback { product ->
        val directions = ProductListDirections.navigateToProductDetail(product.id)
        findNavController().navigate(directions)
    }
}
Java
public class ProductListFragment extends Fragment  {
    ...
    @Override
    public void onViewCreated(@NonNull View view,
            @Nullable Bundle savedInstanceState) {
        // In this example a callback is passed to respond to an item clicked in a RecyclerView
        productAdapter = new ProductAdapter(productClickCallback);
        binding.productsList.setAdapter(productAdapter);
    }
    ...

    // The callback makes the call to the activity to make the transition.
    private ProductClickCallback productClickCallback = product -> {
        ProductListDirections.ViewProductDetails directions =
                ProductListDirections.navigateToProductDetail(product.getId());
        NavHostFragment.findNavController(this).navigate(directions);
    };
}
頂層導覽
如果應用程式使用 DrawerLayout,則活動中可能會有許多設定邏輯,用於管理開啟和關閉導覽匣,以及前往其他目的地。
所產生的活動可能看起來像這樣:
Kotlin
class MainActivity : AppCompatActivity(),
    NavigationView.OnNavigationItemSelectedListener {

    override fun onCreate(savedInstanceState: Bundle?) {
        super.onCreate(savedInstanceState)
        setContentView(R.layout.activity_main)

        val toolbar: Toolbar = findViewById(R.id.toolbar)
        setSupportActionBar(toolbar)

        val drawerLayout: DrawerLayout = findViewById(R.id.drawer_layout)
        val navView: NavigationView = findViewById(R.id.nav_view)
        val toggle = ActionBarDrawerToggle(
                this,
                drawerLayout,
                toolbar,
                R.string.navigation_drawer_open,
                R.string.navigation_drawer_close
        )
        drawerLayout.addDrawerListener(toggle)
        toggle.syncState()

        navView.setNavigationItemSelectedListener(this)
    }

    override fun onBackPressed() {
        val drawerLayout: DrawerLayout = findViewById(R.id.drawer_layout)
        if (drawerLayout.isDrawerOpen(GravityCompat.START)) {
            drawerLayout.closeDrawer(GravityCompat.START)
        } else {
            super.onBackPressed()
        }
    }

    override fun onNavigationItemSelected(item: MenuItem): Boolean {
        // Handle navigation view item clicks here.
        when (item.itemId) {
            R.id.home -> {
                val homeFragment = HomeFragment()
                show(homeFragment)
            }
            R.id.gallery -> {
                val galleryFragment = GalleryFragment()
                show(galleryFragment)
            }
            R.id.slide_show -> {
                val slideShowFragment = SlideShowFragment()
                show(slideShowFragment)
            }
            R.id.tools -> {
                val toolsFragment = ToolsFragment()
                show(toolsFragment)
            }
        }
        val drawerLayout: DrawerLayout = findViewById(R.id.drawer_layout)
        drawerLayout.closeDrawer(GravityCompat.START)
        return true
    }
}

private fun show(fragment: Fragment) {

    val drawerLayout = drawer_layout as DrawerLayout
    val fragmentManager = supportFragmentManager

    fragmentManager
            .beginTransaction()
            .replace(R.id.main_content, fragment)
            .commit()

    drawerLayout.closeDrawer(GravityCompat.START)
}
Java
public class MainActivity extends AppCompatActivity
        implements NavigationView.OnNavigationItemSelectedListener {

    @Override
    protected void onCreate(Bundle savedInstanceState) {
        super.onCreate(savedInstanceState);
        setContentView(R.layout.activity_main);

        Toolbar toolbar = findViewById(R.id.toolbar);
        setSupportActionBar(toolbar);

        DrawerLayout drawer = findViewById(R.id.drawer_layout);
        NavigationView navigationView = findViewById(R.id.nav_view);
        ActionBarDrawerToggle toggle = new ActionBarDrawerToggle(
                this,
                drawer,
                toolbar,
                R.string.navigation_drawer_open,
                R.string.navigation_drawer_close);
        drawer.addDrawerListener(toggle);
        toggle.syncState();

        navigationView.setNavigationItemSelectedListener(this);
    }

    @Override
    public void onBackPressed() {
        DrawerLayout drawer = findViewById(R.id.drawer_layout);
        if (drawer.isDrawerOpen(GravityCompat.START)) {
            drawer.closeDrawer(GravityCompat.START);
        } else {
            super.onBackPressed();
        }
    }

    @Override
    public boolean onNavigationItemSelected(MenuItem item) {
        // Handle navigation view item clicks here.
        int id = item.getItemId();

        if (id == R.id.home) {
            Fragment homeFragment = new HomeFragment();
            show(homeFragment);
        } else if (id == R.id.gallery) {
            Fragment galleryFragment = new GalleryFragment();
            show(galleryFragment);
        } else if (id == R.id.slide_show) {
            Fragment slideShowFragment = new SlideShowFragment();
            show(slideShowFragment);
        } else if (id == R.id.tools) {
            Fragment toolsFragment = new ToolsFragment();
            show(toolsFragment);
        }

        DrawerLayout drawer = findViewById(R.id.drawer_layout);
        drawer.closeDrawer(GravityCompat.START);
        return true;
    }

    private void show(Fragment fragment) {

        DrawerLayout drawerLayout = findViewById(R.id.drawer_layout);
        FragmentManager fragmentManager = getSupportFragmentManager();

        fragmentManager
                .beginTransaction()
                .replace(R.id.main_content, fragment)
                .commit();

        drawerLayout.closeDrawer(GravityCompat.START);
    }
}
在專案中加入導覽元件並
導覽圖,加入圖表中的每個內容到達網頁 (例如
首頁、圖片庫、投影播放和工具)。請確認選單項目 id 值與相關的目的地 id 值相符,如下所示:
<!-- activity_main_drawer.xml -->
<menu xmlns:android="http://schemas.android.com/apk/res/android"
xmlns:tools="http://schemas.android.com/tools"
tools:show>In=&qu<ot;navigation_view"
group andr>oid:check<ableBehavior="single"
item
android:id="@+id/home"
android:icon="@drawable/ic_menu_>camera&qu<ot;
android:title="@string/menu_home" /
item
android:id="@+id/gallery"
android:ico>n="@<drawable/ic_menu_gallery"
android:title="@string/menu_gallery" /
item
android:id="@+id/slide_show&quo>t;
< android:icon="@drawable/ic_menu_slideshow"
android:title="@string/menu_slideshow" /
item
> < androi<d:id=>"@+id/tools"
android:icon="@drawable/ic_menu_manage"
android:title="@string/menu_tools" /
/group
/menu
<!-- activity_main_graph.xml -->
<navigation xmlns:android="http://schemas.android.com/apk/res/android"
    xmlns:app="http://schemas.android.com/apk/res-auto"
    xmlns:tools="http://schemas.android.com/tools"
    android:id="@+id/main_graph&q>uot;
 <   app:startDestination="@id/home"

    fragment
        android:id="@+id/home"
        android:name="com.example.HomeFragment&qu>ot;
  <      android:label="Home"
        tools:layout="@layout/home" /

    fragment
        android:id="@+id/gallery"
        android:name=&q>uot;co<m.example.GalleryFragment"
        android:label="Gallery"
        tools:layout="@layout/gallery" /

    fragment
        android:id="@+id/slide_sh>ow&quo<t;
        android:name="com.example.SlideShowFragment"
        android:label="Slide Show"
        tools:layout="@layout/slide_show&q>uo<t; /

    f>ragment
        android:id="@+id/tools"
        android:name="com.example.ToolsFragment"
        android:label="Tools"
        tools:layout="@layout/tools" /

/navigation
如果選單與圖表中的 id 值相符,則可連結這項活動的 NavController,以便根據選單項目自動處理導覽。NavController 也會處理 DrawerLayout 的開啟或關閉作業,並適當處理向上和返回按鈕的行為。
然後就能更新 MainActivity,以將 NavController 連結至 Toolbar 和 NavigationView。
請參考以下程式碼片段:
Kotlin
class MainActivity : AppCompatActivity()  {

    val drawerLayout by lazy { findViewById<DrawerLayout>(R.id.drawer_layout) }
    val navController by lazy {
      (supportFragmentManager.findFragmentById(R.id.main_content) as NavHostFragment).navController
    }
    val navigationView by lazy { findViewById<NavigationView>(R.id.nav_view) }

    override fun onCreate(savedInstanceState: Bundle?) {
        super.onCreate(savedInstanceState)
        setContentView(R.layout.activity_main)

        val toolbar = findViewById<Toolbar>(R.id.toolbar)
        setSupportActionBar(toolbar)

        // Show and Manage the Drawer and Back Icon
        setupActionBarWithNavController(navController, drawerLayout)

        // Handle Navigation item clicks
        // This works with no further action on your part if the menu and destination id’s match.
        navigationView.setupWithNavController(navController)

    }

    override fun onSupportNavigateUp(): Boolean {
        // Allows NavigationUI to support proper up navigation or the drawer layout
        // drawer menu, depending on the situation
        return navController.navigateUp(drawerLayout)
    }
}
Java
public class MainActivity extends AppCompatActivity {

    private DrawerLayout drawerLayout;
    private NavController navController;
    private NavigationView navigationView;

    @Override
    protected void onCreate(@Nullable Bundle savedInstanceState) {

        super.onCreate(savedInstanceState);
        setContentView(R.layout.activity_main);

        drawerLayout = findViewById(R.id.drawer_layout);
        NavHostFragment navHostFragment = (NavHostFragment)
            getSupportFragmentManager().findFragmentById(R.id.main_content);
        navController = navHostFragment.getNavController();
        navigationView = findViewById(R.id.nav_view);

        Toolbar toolbar = findViewById(R.id.toolbar);
        setSupportActionBar(toolbar);

        // Show and Manage the Drawer and Back Icon
        NavigationUI.setupActionBarWithNavController(this, navController, drawerLayout);

        // Handle Navigation item clicks
        // This works with no further action on your part if the menu and destination id’s match.
        NavigationUI.setupWithNavController(navigationView, navController);

    }

    @Override
    public boolean onSupportNavigateUp() {
        // Allows NavigationUI to support proper up navigation or the drawer layout
        // drawer menu, depending on the situation.
        return NavigationUI.navigateUp(navController, drawerLayout);

    }
}
對於以 BottomNavigationView 為基礎的導覽,都能採用同一個技巧 以及以選單為基礎的導覽功能如需更多範例,請參閱透過 NavigationUI 更新 UI 元件。
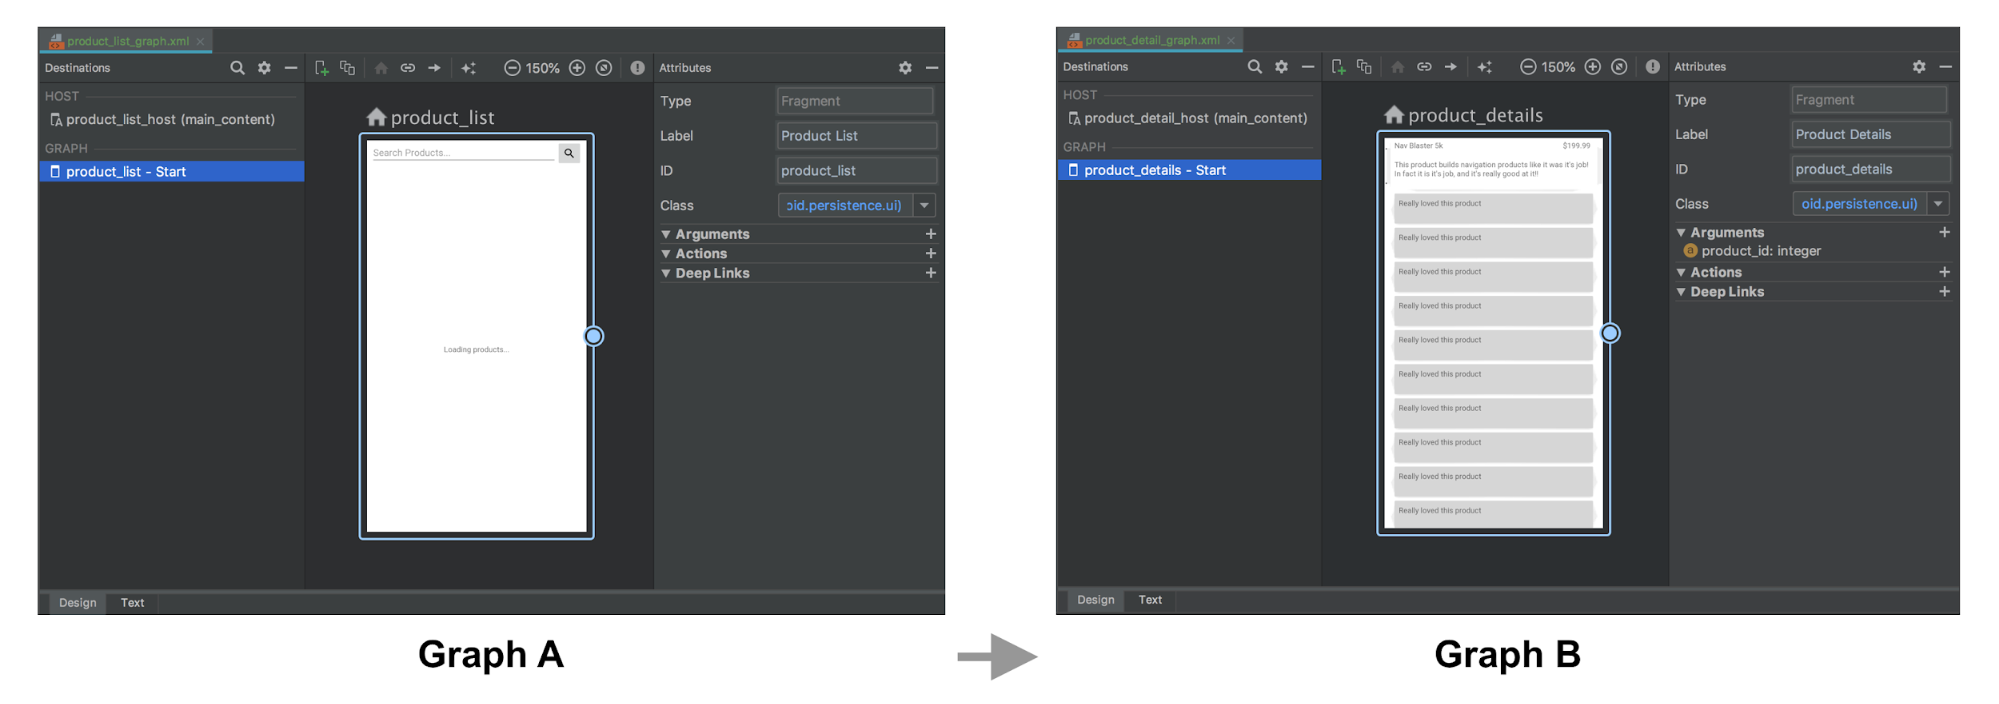
新增活動目的地
連結應用程式中的每個畫面以使用導覽元件後,並且不再使用 FragmentTransactions 在以片段為基礎的目的地之間轉換後,下一步就是排除 startActivity 呼叫。
首先,找出應用程式中有兩個獨立導覽圖表,並使用 startActivity 在這兩者之間轉換的地方。
此範例包含兩個圖表 (A 和 B),以及用來從 A 轉換至 B 的 startActivity() 呼叫。
Kotlin
fun navigateToProductDetails(productId: String) {
    val intent = Intent(this, ProductDetailsActivity::class.java)
    intent.putExtra(KEY_PRODUCT_ID, productId)
    startActivity(intent)
}
Java
private void navigateToProductDetails(String productId) {
    Intent intent = new Intent(this, ProductDetailsActivity.class);
    intent.putExtra(KEY_PRODUCT_ID, productId);
    startActivity(intent);
接著,將其替換成圖表 A 中的活動目的地,該目的地代表圖表 B 的代管活動導覽。如果有要傳遞給 圖表 B 的起始目的地,您可以在活動目的地中指定它們 定義
在以下範例中,圖表 A 定義活動目的地,且將 product_id 引數與動作一併納入考量。圖表 B 沒有任何改變。
圖表 A 和 B 的 XML 表示法可能會看起來像這樣:
<!-- Graph A -->
<navigation xmlns:android="http://schemas.android.com/apk/res/android"
    xmlns:app="http://schemas.android.com/apk/res-auto"
    xmlns:tools="http://schemas.android.com/tools"
    android:id="@+id/product_list_graph"
   > app:s<tartDestination="@id/product_list"

    fragment
        android:id="@+id/product_list"
        android:name="com.example.android.persistence.ui.ProductListFragment"
        android:lab>el="<Product List"
        tools:layout="@layout/product_list_fragment"
        action
            android:id=&quo>t;@+i<d/navigat>e_to_p<roduct_detail"
            app:destination="@id/product_details_activity" /
    /fragment

    activity
        android:id="@+id/product_details_activity"
        android:name="com.example.android.persi>stence.ui.<ProductDetailsActivity"
        android:label="Product Details"
   >     t<ools:layo>ut<="@lay>out/product_details_host"

        argument
            android:name="product_id"
            app:argType="integer" /

    /activity

/navigation
<!-- Graph B -->
<navigation xmlns:android="http://schemas.android.com/apk/res/android"
    xmlns:app="http://schemas.android.com/apk/res-auto"
    xmlns:tools="http://schemas.android.com/tools"
    app:startDes>tinati<on="@id/product_details"

    fragment
        android:id="@+id/product_details"
        android:name="com.example.android.persistence.ui.ProductDetailsFragment"
        android:label="Product> Details&<quot;
        tools:layout="@layout/product_details_fragment"
        ar>gumen<t
       >  <   a>ndroid:name="product_id"
            app:argType="integer" /
    /fragment

/navigation
您可以透過與前往片段目的地相同的機制,前往圖表 B 的代管活動:
Kotlin
fun navigateToProductDetails(productId: String) {
    val directions = ProductListDirections.navigateToProductDetail(productId)
    findNavController().navigate(directions)
}
Java
private void navigateToProductDetails(String productId) {
    ProductListDirections.NavigateToProductDetail directions =
            ProductListDirections.navigateToProductDetail(productId);
    Navigation.findNavController(getView()).navigate(directions);
將活動目的地 args 傳遞至開始目的地片段
如果目的地活動接收到額外項目 (和上一個範例一樣),您可以將其直接傳遞至開始目的地做為引數,但需要在主機活動的 onCreate() 方法中,手動設定主機的導覽圖表,才能將意圖額外項目做為引數傳遞至片段,如下所示:
Kotlin
class ProductDetailsActivity : AppCompatActivity() {

    override fun onCreate(savedInstanceState: Bundle?) {
        super.onCreate(savedInstanceState)
        setContentView(R.layout.product_details_host)
        val navHostFragment = supportFragmentManager.findFragmentById(R.id.main_content) as NavHostFragment
        val navController = navHostFragment.navController
        navController
                .setGraph(R.navigation.product_detail_graph, intent.extras)
    }

}
Java
public class ProductDetailsActivity extends AppCompatActivity {

    @Override
    protected void onCreate(@Nullable Bundle savedInstanceState) {
        super.onCreate(savedInstanceState);

        setContentView(R.layout.product_details_host);
        NavHostFragment navHostFragment = (NavHostFragment)
            getSupportFragmentManager().findFragmentById(R.id.main_content);
        NavController navController = navHostFragment.getNavController();
        navController
                .setGraph(R.navigation.product_detail_graph, getIntent().getExtras());
    }

}
可使用產生的 args 類別,從片段引數 Bundle 提取資料,如以下範例所示:
Kotlin
class ProductDetailsFragment : Fragment() {

    val args by navArgs<ProductDetailsArgs>()

    override fun onViewCreated(view: View, savedInstanceState: Bundle?) {
        val productId = args.productId
        ...
    }
    ...
Java
public class ProductDetailsFragment extends Fragment {

    ProductDetailsArgs args;

    @Override
    public void onCreate(@Nullable Bundle savedInstanceState) {
        super.onCreate(savedInstanceState);
        args = ProductDetailsArgs.fromBundle(requireArguments());
    }

    @Override
    public void onViewCreated(@NonNull View view,
            @Nullable Bundle savedInstanceState) {
       int productId = args.getProductId();
       ...
    }
    ...
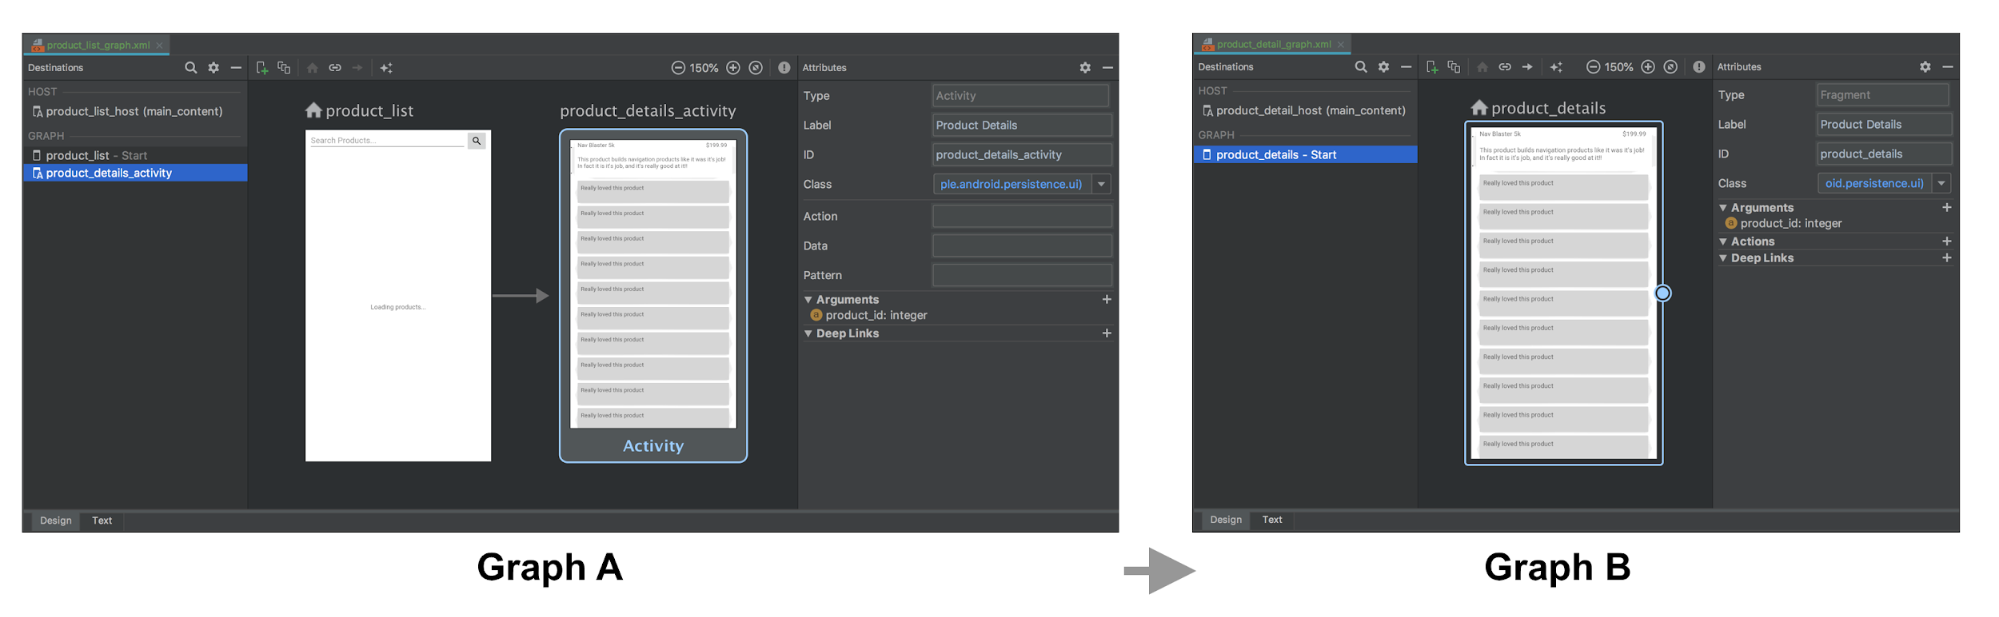
合併活動
如果多個活動共用相同的版面配置 (例如包含單一片段的簡單 FrameLayout),則可合併導覽圖表。在大部分情況下,您可以合併每個導覽圖表中的所有元素,然後將所有活動目的地元素更新為片段目的地。
以下範例合併上一節的圖表 A 和 B:
合併前:
<!-- Graph A -->
<navigation xmlns:android="http://schemas.android.com/apk/res/android"
    xmlns:app="http://schemas.android.com/apk/res-auto"
    xmlns:tools="http://schemas.android.com/tools"
    android:id="@+id/product_list_graph"
   > app:s<tartDestination="@id/product_list"

    fragment
        android:id="@+id/product_list"
        android:name="com.example.android.persistence.ui.ProductListFragment"
        android:lab>el="<Product List Fragment"
        tools:layout="@layout/product_list"
        action
            android:id=&quo>t;@+i<d/navigat>e_to_<product_detail"
            app:destination="@id/product_details_activity" /
    /fragment
    activity
        android:id="@+id/product_details_activity"
        android:name="com.example.android.persistenc>e.ui.Prod<uctDetailsActivity"
        android:label="Product Details H>ost&q<uot;
    >  <  to>ols:layout="@layout/product_details_host"
        argument android:name="product_id"
            app:argType="integer" /
    /activity

/navigation
<!-- Graph B -->
<navigation xmlns:android="http://schemas.android.com/apk/res/android"
    xmlns:app="http://schemas.android.com/apk/res-auto"
    xmlns:tools="http://schemas.android.com/tools"
    android:id="@+id/product_detail_graph"
    ap>p:star<tDestination="@id/product_details"

    fragment
        android:id="@+id/product_details"
        android:name="com.example.android.persistence.ui.ProductDetailsFragment"
        android:>label=&qu<ot;Product Details"
        tools:layout="@layout/product_details"
>     <   argumen<t
         >   android:name="product_id"
            app:argType="integer" /
    /fragment
/navigation
合併後:
<!-- Combined Graph A and B -->
<navigation xmlns:android="http://schemas.android.com/apk/res/android"
    xmlns:app="http://schemas.android.com/apk/res-auto"
    xmlns:tools="http://schemas.android.com/tools"
    android:id="@+id/product_list_graph"
   > app:s<tartDestination="@id/product_list"

    fragment
        android:id="@+id/product_list"
        android:name="com.example.android.persistence.ui.ProductListFragment"
        android:lab>el="<Product List Fragment"
        tools:layout="@layout/product_list"
        action
            androi>d:id=<"@+i>d/navi<gate_to_product_detail"
            app:destination="@id/product_details" /
    /fragment

    fragment
        android:id="@+id/product_details"
        android:name="com.example.android.>persisten<ce.ui.ProductDetailsFragment"
        android:label="Product Details&quo>t;
  <      tools<:layout=&qu>ot;@layout/product_details"
        argument
            android:name="product_id"
            app:argType="integer" /
    /fragment

/navigation
合併時使動作名稱保持不變,就能確保合併過程一切順利,無須修改現有的程式碼集。例如,這裡的 navigateToProductDetail 保持不變。唯一的差別在於,這項動作現在代表前往相同 NavHost 中的片段目的地,而不是活動目的地:
Kotlin
fun navigateToProductDetails(productId: String) {
    val directions = ProductListDirections.navigateToProductDetail(productId)
    findNavController().navigate(directions)
}
Java
private void navigateToProductDetails(String productId) {
    ProductListDirections.NavigateToProductDetail directions =
            ProductListDirections.navigateToProductDetail(productId);
    Navigation.findNavController(getView()).navigate(directions);
其他資源
如需更多導覽相關資訊,請參閱下列主題:
- 使用 NavigationUI 更新 UI 元件: 瞭解如何透過頂端應用程式列、導覽匣管理導覽 和底部導覽列
- 測試導覽功能 - 瞭解如何測試應用程式的導覽工作流程