
OpenGL ES 환경에서 투영 및 카메라 보기를 사용하면 그린 객체를 눈으로 실제 물체를 보는 방식과 더 흡사하게 됩니다. 이 시뮬레이션은 실제 보기는 그린 객체의 좌표를 다음과 같이 수학적 변환하여 수행됩니다.
- 투영 - 이 변환은 그린 객체의 좌표를 기반으로
표시되는
GLSurfaceView의 너비와 높이입니다. 제외 OpenGL ES에서 그린 객체는 창 일반적으로 투영 변환은 변환의 비율이 OpenGL 뷰는 렌더기의onSurfaceChanged()메서드에서 설정되거나 변경됩니다. OpenGL ES 투영과 좌표 매핑은 그리기 위한 좌표 매핑 객체를 사용하여 이 작업을 실행할 수 있습니다. - 카메라 뷰 - 이 변환은 그린 객체의 좌표를 기준으로
가상 카메라 위치입니다. OpenGL ES는 실제 카메라를 정의하는 것이 아니라
객체의 표시를 변환하여 카메라를 시뮬레이션하는 유틸리티 메서드를 제공합니다.
객체를 반환합니다. 카메라 뷰 변환은
GLSurfaceView또는 사용자 액션 또는 애플리케이션의 기능을 알아보겠습니다
이 단원에서는 투영과 카메라 뷰를 만들어 직접 그린 도형에 적용하는 방법을 설명합니다.
내 GLSurfaceView
프로젝션 정의
투영 변환의 데이터는 onSurfaceChanged()에서 계산됩니다.
(GLSurfaceView.Renderer 클래스의 메서드) 다음 예시 코드는
GLSurfaceView의 높이와 너비를 가져와서 이를 사용하여
Matrix.frustumM() 메서드를 사용한 투영 변환 Matrix:
Kotlin
// vPMatrix is an abbreviation for "Model View Projection Matrix"
private val vPMatrix = FloatArray(16)
private val projectionMatrix = FloatArray(16)
private val viewMatrix = FloatArray(16)

override fun onSurfaceChanged(unused: GL10, width: Int, height: Int) {
    GLES20.glViewport(0, 0, width, height)

    val ratio: Float = width.toFloat() / height.toFloat()

    // this projection matrix is applied to object coordinates
    // in the onDrawFrame() method
    Matrix.frustumM(projectionMatrix, 0, -ratio, ratio, -1f, 1f, 3f, 7f)
}
자바
// vPMatrix is an abbreviation for "Model View Projection Matrix"
private final float[] vPMatrix = new float[16];
private final float[] projectionMatrix = new float[16];
private final float[] viewMatrix = new float[16];

@Override
public void onSurfaceChanged(GL10 unused, int width, int height) {
    GLES20.glViewport(0, 0, width, height);

    float ratio = (float) width / height;

    // this projection matrix is applied to object coordinates
    // in the onDrawFrame() method
    Matrix.frustumM(projectionMatrix, 0, -ratio, ratio, -1, 1, 3, 7);
}
이 코드는 투영 행렬 mProjectionMatrix을 채우고 이를 결합하면
다음 섹션에 나와 있는 onDrawFrame() 메서드에서 카메라 뷰 변환을 사용합니다.
참고: 변환에 투영 변환을 적용하기만 하면 그리기 객체는 일반적으로 빈 화면으로 표시됩니다. 일반적으로 카메라와 화면에 모든 내용이 표시되도록 할 수 있습니다.
카메라 보기 정의
카메라 뷰 변환을
렌더러에서 그리기 프로세스의 일부분만 처리할 수 있습니다. 다음 코드 예에서 카메라 뷰는
변환은 Matrix.setLookAtM()
메서드를 사용한 다음 이전에 계산된 투영 행렬과 결합합니다. 결합된
그러면 변환 행렬이 그려진 도형에 전달됩니다.
Kotlin
override fun onDrawFrame(unused: GL10) {
    ...
    // Set the camera position (View matrix)
    Matrix.setLookAtM(viewMatrix, 0, 0f, 0f, 3f, 0f, 0f, 0f, 0f, 1.0f, 0.0f)

    // Calculate the projection and view transformation
    Matrix.multiplyMM(vPMatrix, 0, projectionMatrix, 0, viewMatrix, 0)

    // Draw shape
    triangle.draw(vPMatrix)
자바
@Override
public void onDrawFrame(GL10 unused) {
    ...
    // Set the camera position (View matrix)
    Matrix.setLookAtM(viewMatrix, 0, 0, 0, 3, 0f, 0f, 0f, 0f, 1.0f, 0.0f);

    // Calculate the projection and view transformation
    Matrix.multiplyMM(vPMatrix, 0, projectionMatrix, 0, viewMatrix, 0);

    // Draw shape
    triangle.draw(vPMatrix);
}
투영 및 카메라 변환 적용
위의 예와 같이 결합된 투영과 카메라 보기 변환 매트릭스를 사용하려면
미리보기 섹션에서 먼저 이전에 정의한 꼭짓점 셰이더에 행렬 변수를 추가합니다.
(Triangle 클래스에서:
Kotlin
class Triangle {

    private val vertexShaderCode =
            // This matrix member variable provides a hook to manipulate
            // the coordinates of the objects that use this vertex shader
            "uniform mat4 uMVPMatrix;" +
            "attribute vec4 vPosition;" +
            "void main() {" +
            // the matrix must be included as a modifier of gl_Position
            // Note that the uMVPMatrix factor *must be first* in order
            // for the matrix multiplication product to be correct.
            "  gl_Position = uMVPMatrix * vPosition;" +
            "}"

    // Use to access and set the view transformation
    private var vPMatrixHandle: Int = 0

    ...
}
자바
public class Triangle {

    private final String vertexShaderCode =
        // This matrix member variable provides a hook to manipulate
        // the coordinates of the objects that use this vertex shader
        "uniform mat4 uMVPMatrix;" +
        "attribute vec4 vPosition;" +
        "void main() {" +
        // the matrix must be included as a modifier of gl_Position
        // Note that the uMVPMatrix factor *must be first* in order
        // for the matrix multiplication product to be correct.
        "  gl_Position = uMVPMatrix * vPosition;" +
        "}";

    // Use to access and set the view transformation
    private int vPMatrixHandle;

    ...
}
다음으로 그래픽 객체의 draw() 메서드를 수정하여 결합된
형상에 적용합니다.
Kotlin
fun draw(mvpMatrix: FloatArray) { // pass in the calculated transformation matrix
    ...

    // get handle to shape's transformation matrix
    vPMatrixHandle = GLES20.glGetUniformLocation(mProgram, "uMVPMatrix")

    // Pass the projection and view transformation to the shader
    GLES20.glUniformMatrix4fv(vPMatrixHandle, 1, false, mvpMatrix, 0)

    // Draw the triangle
    GLES20.glDrawArrays(GLES20.GL_TRIANGLES, 0, vertexCount)

    // Disable vertex array
    GLES20.glDisableVertexAttribArray(positionHandle)
}
자바
public void draw(float[] mvpMatrix) { // pass in the calculated transformation matrix
    ...

    // get handle to shape's transformation matrix
    vPMatrixHandle = GLES20.glGetUniformLocation(mProgram, "uMVPMatrix");

    // Pass the projection and view transformation to the shader
    GLES20.glUniformMatrix4fv(vPMatrixHandle, 1, false, mvpMatrix, 0);

    // Draw the triangle
    GLES20.glDrawArrays(GLES20.GL_TRIANGLES, 0, vertexCount);

    // Disable vertex array
    GLES20.glDisableVertexAttribArray(positionHandle);
}
투영과 카메라 뷰 변환을 올바르게 계산하고 적용했으면 그래픽 객체는 올바른 비율로 그려지며 다음과 같이 표시됩니다.
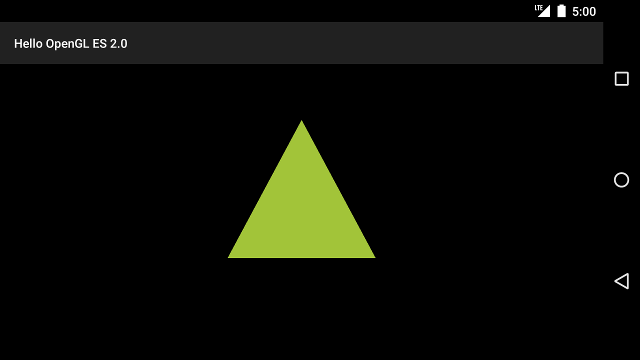
그림 1. 투영 및 카메라 보기를 적용하여 그린 삼각형.
이제 올바른 비율로 형상을 표시하는 애플리케이션을 만들었으므로 도형에 모션을 추가하세요.