
在用户未使用您的应用时,通知可向他们及时提供有关应用事件的简短信息。本文档将介绍如何创建具有各种功能的通知。如需简要了解通知在 Android 上如何显示,请参阅通知概览。 如需查看使用通知的示例代码,请参阅 GitHub 上的 SociaLite 示例。
本页中的代码使用了 AndroidX 库中的 NotificationCompat API。这些 API 允许您添加仅在较新版本 Android 上可用的功能,同时仍向后兼容 Android 9(API 级别 28)。不过,某些功能(例如内嵌回复操作)在较旧版本上相当于空操作。
创建基本通知
最基本、精简形式(也称为折叠形式)的通知会显示一个图标、一个标题和少量文本内容。本部分介绍如何创建用户点按后可启动应用中的 activity 的通知。
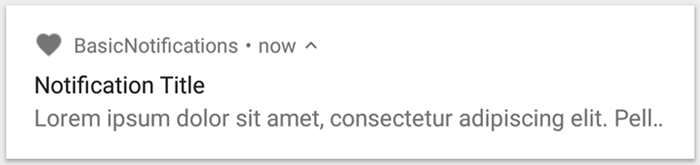
图 1. 带有图标、标题和一些文字的通知。
如需详细了解通知的各个部分,请参阅通知剖析。
声明运行时权限
Android 13(API 级别 33)及更高版本支持一项运行时权限,用于应用发布非豁免通知(包括前台服务 [FGS] 通知)。
需要在应用的清单文件中声明的权限如以下代码段所示:
<manifest ...>
    <uses-permission android:name="android.permission.POST_NOTIFICATIONS"/>
    <application ...>
        ...
    </application>
</manifest>
如需详细了解运行时权限,请参阅通知运行时权限。
设置通知内容
首先,您需要使用 NotificationCompat.Builder 对象设置通知内容和渠道。以下示例展示了如何创建包含下列内容的通知:
小图标,通过
setSmallIcon()设置。这是所必需的唯一用户可见内容。标题,通过
setContentTitle()设置。正文文本,通过
setContentText()设置。通知优先级,通过
setPriority()设置。 优先级决定了通知在 Android 7.1 及更低版本上的干扰程度。对于 Android 8.0 及更高版本,请改为设置渠道重要性,如下一节中所示。
Kotlin
var builder = NotificationCompat.Builder(this, CHANNEL_ID)
        .setSmallIcon(R.drawable.notification_icon)
        .setContentTitle(textTitle)
        .setContentText(textContent)
        .setPriority(NotificationCompat.PRIORITY_DEFAULT)
Java
NotificationCompat.Builder builder = new NotificationCompat.Builder(this, CHANNEL_ID)
        .setSmallIcon(R.drawable.notification_icon)
        .setContentTitle(textTitle)
        .setContentText(textContent)
        .setPriority(NotificationCompat.PRIORITY_DEFAULT);
NotificationCompat.Builder 构造函数要求您提供渠道 ID。这是兼容 Android 8.0(API 级别 26)及更高版本所必需的,但会被较旧版本忽略。
默认情况下,通知的文字内容会被截断以适应单行显示。您可以通过创建展开式通知来显示更多信息。

图 2. 处于收起和展开状态的可展开通知。
如果您想要更长的通知,可以使用 setStyle() 添加样式模板来启用可展开的通知。例如,以下代码会创建更大的文本区域:
Kotlin
var builder = NotificationCompat.Builder(this, CHANNEL_ID)
        .setSmallIcon(R.drawable.notification_icon)
        .setContentTitle("My notification")
        .setContentText("Much longer text that cannot fit one line...")
        <b>.setStyle(NotificationCompat.BigTextStyle()
                .bigText("Much longer text that cannot fit one line..."))</b>
        .setPriority(NotificationCompat.PRIORITY_DEFAULT)
Java
NotificationCompat.Builder builder = new NotificationCompat.Builder(this, CHANNEL_ID)
        .setSmallIcon(R.drawable.notification_icon)
        .setContentTitle("My notification")
        .setContentText("Much longer text that cannot fit one line...")
        <b>.setStyle(new NotificationCompat.BigTextStyle()
                .bigText("Much longer text that cannot fit one line..."))</b>
        .setPriority(NotificationCompat.PRIORITY_DEFAULT);
如需详细了解其他大型通知样式,包括如何添加图片和媒体播放控件,请参阅创建可展开的通知。
创建渠道并设置重要性
必须先通过向 createNotificationChannel() 传递 NotificationChannel 的实例在系统中注册应用的通知渠道,然后才能在 Android 8.0 及更高版本上提供通知。以下代码会受到基于 SDK_INT 版本的条件的限制:
Kotlin
private fun createNotificationChannel() {
    // Create the NotificationChannel, but only on API 26+ because
    // the NotificationChannel class is not in the Support Library.
    if (Build.VERSION.SDK_INT >= Build.VERSION_CODES.O) {
        val name = getString(R.string.channel_name)
        val descriptionText = getString(R.string.channel_description)
        val importance = NotificationManager.IMPORTANCE_DEFAULT
        val channel = NotificationChannel(CHANNEL_ID, name, importance).apply {
            description = descriptionText
        }
        // Register the channel with the system.
        val notificationManager: NotificationManager =
            getSystemService(Context.NOTIFICATION_SERVICE) as NotificationManager
        notificationManager.createNotificationChannel(channel)
    }
}
Java
private void createNotificationChannel() {
    // Create the NotificationChannel, but only on API 26+ because
    // the NotificationChannel class is not in the Support Library.
    if (Build.VERSION.SDK_INT >= Build.VERSION_CODES.O) {
        CharSequence name = getString(R.string.channel_name);
        String description = getString(R.string.channel_description);
        int importance = NotificationManager.IMPORTANCE_DEFAULT;
        NotificationChannel channel = new NotificationChannel(CHANNEL_ID, name, importance);
        channel.setDescription(description);
        // Register the channel with the system; you can't change the importance
        // or other notification behaviors after this.
        NotificationManager notificationManager = getSystemService(NotificationManager.class);
        notificationManager.createNotificationChannel(channel);
    }
}
由于您必须先创建通知渠道,然后才能在 Android 8.0 及更高版本上发布任何通知,因此应在应用启动时立即执行这段代码。反复调用这段代码是安全的,因为创建现有通知渠道不会执行任何操作。
NotificationChannel 构造函数需要一个 importance,它会使用 NotificationManager 类中的一个常量。此参数确定出现任何属于此渠道的通知时如何打断用户。使用 setPriority() 设置优先级,以支持 Android 7.1 及更低版本,如上例所示。
虽然必须按以下示例所示设置通知重要性或优先级,但系统不能保证您会获得提醒行为。在某些情况下,系统可能会根据其他因素更改重要性级别,并且用户始终可以重新定义指定渠道适用的重要性级别。
如需详细了解不同级别的含义,请参阅通知重要性级别。
设置通知的点按操作
每个通知都必须对点按操作做出响应,通常是在应用中打开对应于该通知的 activity。为此,请指定通过 PendingIntent 对象定义的内容 intent,并将其传递给 setContentIntent()。
以下代码段展示了如何创建基本 intent,以在用户点按通知时打开 activity:
Kotlin
// Create an explicit intent for an Activity in your app.
<b>val intent = Intent(this, AlertDetails::class.java).apply {
    flags = Intent.FLAG_ACTIVITY_NEW_TASK or Intent.FLAG_ACTIVITY_CLEAR_TASK
}</b>
val pendingIntent: PendingIntent = PendingIntent.getActivity(this, 0, intent, PendingIntent.FLAG_IMMUTABLE)

val builder = NotificationCompat.Builder(this, CHANNEL_ID)
        .setSmallIcon(R.drawable.notification_icon)
        .setContentTitle("My notification")
        .setContentText("Hello World!")
        .setPriority(NotificationCompat.PRIORITY_DEFAULT)
        // Set the intent that fires when the user taps the notification.
        <b>.setContentIntent(pendingIntent)</b>
        .setAutoCancel(true)
Java
// Create an explicit intent for an Activity in your app.
<b>Intent intent = new Intent(this, AlertDetails.class);
intent.setFlags(Intent.FLAG_ACTIVITY_NEW_TASK | Intent.FLAG_ACTIVITY_CLEAR_TASK);</b>
PendingIntent pendingIntent = PendingIntent.getActivity(this, 0, intent, PendingIntent.FLAG_IMMUTABLE);

NotificationCompat.Builder builder = new NotificationCompat.Builder(this, CHANNEL_ID)
        .setSmallIcon(R.drawable.notification_icon)
        .setContentTitle("My notification")
        .setContentText("Hello World!")
        .setPriority(NotificationCompat.PRIORITY_DEFAULT)
        // Set the intent that fires when the user taps the notification.
        <b>.setContentIntent(pendingIntent)</b>
        .setAutoCancel(true);
此代码会调用 setAutoCancel(),它会在用户点按通知后自动移除通知。
上例中的 intent 标志可确保用户在通过通知打开应用后获得符合预期的导航体验。您可能需要使用它,具体取决于您要启动的 activity 类型,类型可能包括:
专用于响应通知的 activity。 用户在正常使用应用时不会无缘无故想导航到这个 activity,因此该 activity 会启动一个新任务,而不是添加到应用的现有任务和返回栈。这就是以上示例中创建的 Intent 类型。
应用的常规应用流程中存在的 Activity。在这种情况下,启动 activity 会创建返回栈,以便保留用户对返回和向上按钮的预期。
如需详细了解配置通知 intent 的不同方法,请参阅从通知启动 activity。
显示通知
如需显示通知,请调用 NotificationManagerCompat.notify(),并将通知的唯一 ID 和 NotificationCompat.Builder.build() 的结果传递给它。
具体可见以下示例:
Kotlin
with(NotificationManagerCompat.from(this)) {
    if (ActivityCompat.checkSelfPermission(
            this@MainActivity,
            Manifest.permission.POST_NOTIFICATIONS
        ) != PackageManager.PERMISSION_GRANTED
    ) {
        // TODO: Consider calling
        // ActivityCompat#requestPermissions
        // here to request the missing permissions, and then overriding
        // public fun onRequestPermissionsResult(requestCode: Int, permissions: Array<out String>,
        //                                        grantResults: IntArray)
        // to handle the case where the user grants the permission. See the documentation
        // for ActivityCompat#requestPermissions for more details.

        return@with
    }
    // notificationId is a unique int for each notification that you must define.
    notify(NOTIFICATION_ID, builder.build())
}
Java
if (ActivityCompat.checkSelfPermission(this, android.Manifest.permission.POST_NOTIFICATIONS) != PackageManager.PERMISSION_GRANTED) {
    // TODO: Consider calling
    // ActivityCompat#requestPermissions
    // here to request the missing permissions, and then overriding
    // public void onRequestPermissionsResult(int requestCode, String[] permissions,
    //                                        int[] grantResults)
    // to handle the case where the user grants the permission. See the documentation
    // for ActivityCompat#requestPermissions for more details.
    return;
}
NotificationManagerCompat.from(this).notify(NOTIFICATION_ID, builder.build());
请保存您传递到 NotificationManagerCompat.notify() 的通知 ID,因为当您想要更新或移除通知时,需要使用以下 ID。
此外,为了在搭载 Android 13 及更高版本的设备上测试基本通知,请手动开启通知或创建对话框来请求通知。
添加操作按钮
一个通知最多可以提供三个操作按钮,让用户能够快速响应,例如暂停提醒或回复短信。但这些操作按钮不得重复用户在点按通知时执行的操作。
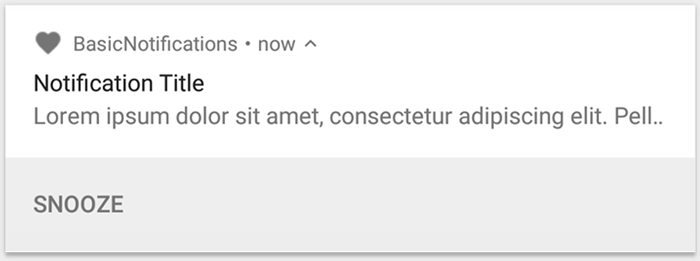
图 3. 带有一个操作按钮的通知。
如需添加操作按钮,请将 PendingIntent 传递给 addAction() 方法。这就像在设置通知的默认点按操作,不同的是不会启动 activity,而是可以完成其他任务,例如启动在后台执行作业的 BroadcastReceiver,这样该操作就不会干扰已经打开的应用。
例如,以下代码演示了如何向特定接收者发送广播:
Kotlin
val ACTION_SNOOZE = "snooze"

<b>val snoozeIntent = Intent(this, MyBroadcastReceiver::class.java).apply {
    action = ACTION_SNOOZE
    putExtra(EXTRA_NOTIFICATION_ID, 0)
}
val snoozePendingIntent: PendingIntent =
    PendingIntent.getBroadcast(this, 0, snoozeIntent, 0)</b>
val builder = NotificationCompat.Builder(this, CHANNEL_ID)
        .setSmallIcon(R.drawable.notification_icon)
        .setContentTitle("My notification")
        .setContentText("Hello World!")
        .setPriority(NotificationCompat.PRIORITY_DEFAULT)
        .setContentIntent(pendingIntent)
        <b>.addAction(R.drawable.ic_snooze, getString(R.string.snooze),
                snoozePendingIntent)</b>
Java
String ACTION_SNOOZE = "snooze"

<b>Intent snoozeIntent = new Intent(this, MyBroadcastReceiver.class);
snoozeIntent.setAction(ACTION_SNOOZE);
snoozeIntent.putExtra(EXTRA_NOTIFICATION_ID, 0);
PendingIntent snoozePendingIntent =
        PendingIntent.getBroadcast(this, 0, snoozeIntent, 0);</b>

NotificationCompat.Builder builder = new NotificationCompat.Builder(this, CHANNEL_ID)
        .setSmallIcon(R.drawable.notification_icon)
        .setContentTitle("My notification")
        .setContentText("Hello World!")
        .setPriority(NotificationCompat.PRIORITY_DEFAULT)
        .setContentIntent(pendingIntent)
        <b>.addAction(R.drawable.ic_snooze, getString(R.string.snooze),
                snoozePendingIntent);</b>
如需详细了解如何构建 BroadcastReceiver 以运行后台工作,请参阅广播概览。
如果您尝试构建包含媒体播放按钮(例如暂停和跳过曲目)的通知,请参阅如何创建包含媒体控件的通知。
添加直接回复操作
Android 7.0(API 级别 24)中引入的直接回复操作可让用户直接在通知中输入文本。然后,文本会传递到您的应用,而无需打开 activity。例如,您可以使用直接回复操作让用户从通知内回复短信或更新任务列表。

图 4. 点按“回复”按钮会打开文本输入框。
直接回复操作在通知中显示为一个额外按钮,可打开文本输入。当用户完成输入后,系统会将文本回复附加到您为通知操作指定的 intent,然后将 intent 发送到您的应用。
添加回复按钮
如需创建支持直接回复的通知操作,请按照以下步骤操作:
- 创建一个可添加到通知操作的
RemoteInput.Builder实例。此类的构造函数接受系统用作文本输入键的字符串。您的应用稍后会使用该键检索输入的文本。 * {Kotlin} ```kotlin // Key for the string that's delivered in the action's intent. private val KEY_TEXT_REPLY = "key_text_reply" var replyLabel: String = resources.getString(R.string.reply_label) var remoteInput: RemoteInput = RemoteInput.Builder(KEY_TEXT_REPLY).run { setLabel(replyLabel) build() } ``` * {Java} ```java // Key for the string that's delivered in the action's intent. private static final String KEY_TEXT_REPLY = "key_text_reply"; String replyLabel = getResources().getString(R.string.reply_label); RemoteInput remoteInput = new RemoteInput.Builder(KEY_TEXT_REPLY) .setLabel(replyLabel) .build(); ``` - 为回复操作创建
PendingIntent。 * {Kotlin} ```kotlin // 构建用于触发回复操作的 PendingIntent。 var replyPendingIntent: PendingIntent = PendingIntent.getBroadcast(applicationContext, conversation.getConversationId(), getMessageReplyIntent(conversation.getConversationId()), PendingIntent.FLAG_UPDATE_CURRENT) ``` * {Java} ```java // 构建用于触发回复操作的 PendingIntent。 PendingIntent replyPendingIntent = PendingIntent.getBroadcast(getApplicationContext(), conversation.getConversationId(), getMessageReplyIntent(conversation.getConversationId()), PendingIntent.FLAG_UPDATE_CURRENT); ``` - 使用
addRemoteInput()将RemoteInput对象附加到操作上。 * {Kotlin} ```kotlin // 创建回复操作并添加远程输入。 var action: NotificationCompat.Action = NotificationCompat.Action.Builder(R.drawable.ic_reply_icon, getString(R.string.label), replyPendingIntent) .addRemoteInput(remoteInput) .build() ``` * {Java} ```java // 创建回复操作并添加远程输入。 NotificationCompat.Action action = new NotificationCompat.Action.Builder(R.drawable.ic_reply_icon, getString(R.string.label), replyPendingIntent) .addRemoteInput(remoteInput) .build(); ``` - 对通知应用操作并发出通知。 * {Kotlin} ```kotlin // 构建通知并添加操作。 val newMessageNotification = Notification.Builder(context, CHANNEL_ID) .setSmallIcon(R.drawable.ic_message) .setContentTitle(getString(R.string.title)) .setContentText(getString(R.string.content)) .addAction(action) .build() // 发布通知。 with(NotificationManagerCompat.from(this)) { notificationManager.notify(notificationId, newMessageNotification) } ``` * {Java} ```java // 构建通知并添加操作。 Notification newMessageNotification = new Notification.Builder(context, CHANNEL_ID) .setSmallIcon(R.drawable.ic_message) .setContentTitle(getString(R.string.title)) .setContentText(getString(R.string.content)) .addAction(action) .build(); // 发布通知。 NotificationManagerCompat notificationManager = NotificationManagerCompat.from(this); notificationManager.notify(notificationId, newMessageNotification); ```
当用户触发通知操作时,系统会提示用户输入回复,如图 4 所示。
从回复中检索用户输入
如需从通知回复界面接收用户输入,请调用 RemoteInput.getResultsFromIntent() 并传入 BroadcastReceiver 收到的 Intent:
Kotlin
private fun getMessageText(intent: Intent): CharSequence? {
    return RemoteInput.getResultsFromIntent(intent)?.getCharSequence(KEY_TEXT_REPLY)
}
Java
private CharSequence getMessageText(Intent intent) {
    Bundle remoteInput = RemoteInput.getResultsFromIntent(intent);
    if (remoteInput != null) {
        return remoteInput.getCharSequence(KEY_TEXT_REPLY);
    }
    return null;
 }
处理完文本后,请使用相同的 ID 和标记(如果使用)调用 NotificationManagerCompat.notify() 来更新通知。若要隐藏直接回复界面并向用户确认他们的回复已收到并得到正确处理,则必须完成该操作。
Kotlin
// Build a new notification, which informs the user that the system
// handled their interaction with the previous notification.
val repliedNotification = Notification.Builder(context, CHANNEL_ID)
        .setSmallIcon(R.drawable.ic_message)
        .setContentText(getString(R.string.replied))
        .build()

// Issue the new notification.
NotificationManagerCompat.from(this).apply {
    notificationManager.notify(notificationId, repliedNotification)
}
Java
// Build a new notification, which informs the user that the system
// handled their interaction with the previous notification.
Notification repliedNotification = new Notification.Builder(context, CHANNEL_ID)
        .setSmallIcon(R.drawable.ic_message)
        .setContentText(getString(R.string.replied))
        .build();

// Issue the new notification.
NotificationManagerCompat notificationManager = NotificationManagerCompat.from(this);
notificationManager.notify(notificationId, repliedNotification);
检索其他数据
处理其他数据类型的方式与 RemoteInput 类似。以下示例使用图片作为输入。
Kotlin
  // Key for the data that's delivered in the action's intent.
  private val KEY_REPLY = "key_reply"
  var replyLabel: String = resources.getString(R.string.reply_label)
  var remoteInput: RemoteInput = RemoteInput.Builder(KEY_REPLY).run {
      setLabel(replyLabel)
      // Allow for image data types in the input
  // This method can be used again to
  // allow for other data types
      setAllowDataType("image/*", true)
      build()
}
调用 RemoteInput#getDataResultsFromIntent 并提取相应的数据。
Kotlin
  import android.app.RemoteInput;
  import android.content.Intent;
  import android.os.Bundle;

  class ReplyReceiver: BroadcastReceiver()  {

      public static final String KEY_DATA = "key_data";

      public static void handleRemoteInput(Intent intent) {
          Bundle dataResults = RemoteInput.getDataResultsFromIntent(intent, KEY_DATA);
          val imageUri: Uri? = dataResults.values.firstOrNull()
          if (imageUri != null) {
              // Extract the image
          try {
                  val inputStream = context.contentResolver.openInputStream(imageUri)
                  val bitmap = BitmapFactory.decodeStream(inputStream)
                  // Display the image
                  // ...
              } catch (e: Exception) {
                  Log.e("ReplyReceiver", "Failed to process image URI", e)
              }
      }
  }
在处理这个新通知时,请使用传递给接收者的 onReceive() 方法的上下文。
通过调用 setRemoteInputHistory() 将回复附加到通知底部。但如果要构建即时通讯应用,应创建消息式通知,并在会话中附加新消息。
如需了解有关即时通讯应用通知的更多建议,请参阅有关即时通讯应用的最佳实践部分。
显示紧急消息
您的应用可能需要显示紧急的时效性消息,例如来电或响铃警报。在这些情况下,您可以将全屏 intent 与通知关联。
调用通知时,根据设备的锁定状态,用户会看到以下情况之一:
- 如果用户设备被锁定,会显示全屏 activity,覆盖锁屏。
- 如果用户设备处于解锁状态,通知会以展开形式显示,其中包含用于处理或关闭通知的选项。
以下代码段展示了如何将通知与全屏 intent 关联:
Kotlin
val fullScreenIntent = Intent(this, ImportantActivity::class.java)
val fullScreenPendingIntent = PendingIntent.getActivity(this, 0,
    fullScreenIntent, PendingIntent.FLAG_UPDATE_CURRENT)

var builder = NotificationCompat.Builder(this, CHANNEL_ID)
        .setSmallIcon(R.drawable.notification_icon)
        .setContentTitle("My notification")
        .setContentText("Hello World!")
        .setPriority(NotificationCompat.PRIORITY_DEFAULT)
        <b>.setFullScreenIntent(fullScreenPendingIntent, true)</b>
Java
Intent fullScreenIntent = new Intent(this, ImportantActivity.class);
PendingIntent fullScreenPendingIntent = PendingIntent.getActivity(this, 0,
        fullScreenIntent, PendingIntent.FLAG_UPDATE_CURRENT);

NotificationCompat.Builder builder = new NotificationCompat.Builder(this, CHANNEL_ID)
        .setSmallIcon(R.drawable.notification_icon)
        .setContentTitle("My notification")
        .setContentText("Hello World!")
        .setPriority(NotificationCompat.PRIORITY_DEFAULT)
        <b>.setFullScreenIntent(fullScreenPendingIntent, true);</b>
设置锁定屏幕公开范围
如需控制锁定屏幕中通知的可见详情级别,请调用 setVisibility() 并指定以下值之一:
VISIBILITY_PUBLIC:通知的完整内容显示在锁屏上。VISIBILITY_SECRET:不在锁定屏幕上显示通知的任何部分。VISIBILITY_PRIVATE:锁定屏幕上仅显示基本信息,例如通知图标和内容标题。不显示通知的完整内容。
当您设置 VISIBILITY_PRIVATE 时,还可以提供通知内容的备用版本,以隐藏特定详细信息。例如,短信应用可能会显示一条通知,提示“您有 3 条新短信”,但是隐藏了短信内容和发件人。如需提供此备用通知,首先请像平时一样使用 NotificationCompat.Builder 创建备用通知。然后,使用 setPublicVersion() 将备用通知附加到普通通知中。
请注意,对于通知在锁定屏幕上是否可见,用户始终拥有最终控制权,并且可以根据应用的通知渠道来控制公开范围。
更新通知
如需在发出通知后对其进行更新,请再次调用 NotificationManagerCompat.notify(),并将之前使用的同一 ID 传递给该方法。如果之前的通知已被关闭,则系统会创建一个新通知。
您可以选择性调用 setOnlyAlertOnce(),这样通知只会在首次出现时打断用户(通过声音、振动或视觉提示),而之后更新则不会再打断用户。
移除通知
除非发生以下情况之一,否则通知仍然可见:
- 用户关闭通知。
- 用户点按通知(如果您在创建通知时调用了
setAutoCancel())。 - 您针对特定的通知 ID 调用了
cancel()。此方法还会删除当前通知。 - 您调用了
cancelAll()方法,该方法将移除之前发出的所有通知。 - 指定时长已过(如果您在创建通知时使用
setTimeoutAfter()设置了超时)。 如果需要,您可以在指定的超时持续时间过去之前取消通知。
有关即时通讯应用的最佳做法
在为消息和聊天应用创建通知时,请考虑下文所列的最佳实践。
使用 MessagingStyle
从 Android 7.0(API 级别 24)开始,Android 提供了专用于消息内容的通知样式模板。使用 NotificationCompat.MessagingStyle 类,您可以更改在通知中显示的多个标签,包括对话标题、其他消息和通知的内容视图。
以下代码段展示了如何使用 MessagingStyle 类自定义通知的样式。
Kotlin
val user = Person.Builder()
    .setIcon(userIcon)
    .setName(userName)
    .build()

val notification = NotificationCompat.Builder(this, CHANNEL_ID)
    .setContentTitle("2 new messages with $sender")
    .setContentText(subject)
    .setSmallIcon(R.drawable.new_message)
    .setStyle(NotificationCompat.MessagingStyle(user)
        .addMessage(messages[1].getText(), messages[1].getTime(), messages[1].getPerson())
        .addMessage(messages[2].getText(), messages[2].getTime(), messages[2].getPerson())
    )
    .build()
Java
Person user = new Person.Builder()
    .setIcon(userIcon)
    .setName(userName)
    .build();

Notification notification = new NotificationCompat.Builder(this, CHANNEL_ID)
    .setContentTitle("2 new messages with " + sender)
    .setContentText(subject)
    .setSmallIcon(R.drawable.new_message)
    .setStyle(new NotificationCompat.MessagingStyle(user)
        .addMessage(messages[1].getText(), messages[1].getTime(), messages[1].getPerson())
        .addMessage(messages[2].getText(), messages[2].getTime(), messages[2].getPerson())
    )
    .build();
从 Android 9.0(API 级别 28)开始,还必须使用 Person 类,才能获得最佳的通知及其头像渲染效果。
使用 NotificationCompat.MessagingStyle 时,请执行以下操作:
- 调用
MessagingStyle.setConversationTitle()为超过两个用户的群聊设置标题。一个好的会话标题可能是群组名称,也可能是会话参与者的列表(如果没有名称)。否则,消息可能会被误以为属于与会话中最近消息发送者的一对一会话。 - 使用
MessagingStyle.setData()方法包含媒体消息,如图片等。支持 image/* 格式的 MIME 类型。
使用直接回复
直接回复功能允许用户以内嵌方式回复消息。
- 在用户通过内嵌回复操作回复后,使用
MessagingStyle.addMessage()更新MessagingStyle通知,并且不要撤消或取消通知。不取消通知可以让用户从通知发送多个回复。 - 如需让内嵌回复操作与 Wear OS 兼容,请调用
Action.WearableExtender.setHintDisplayInlineAction(true)。 - 通过向通知添加历史消息,使用
addHistoricMessage()方法向直接回复会话提供上下文。
启用智能回复
- 如需启用智能回复,请对回复操作调用
setAllowGeneratedResponses(true)。这样,在通知桥接到 Wear OS 设备后,用户就能使用智能回复响应。智能回复响应由一个完全在手表上的机器学习模型使用NotificationCompat.MessagingStyle通知提供的上下文生成,不会将数据上传到互联网上来生成回复。
添加通知元数据
- 分配通知元数据以告知系统在设备处于
Do Not Disturb mode时如何处理应用通知。例如,使用addPerson()或setCategory(Notification.CATEGORY_MESSAGE)方法替换“勿扰”设置。