バージョン対応コンポーネントを使用する
コレクションでコンテンツを整理
必要に応じて、コンテンツの保存と分類を行います。
TabHelper
と CompatTab
の 2 つの実装(Android 3.0 以降用の実装とそれより前のプラットフォーム バージョン用の実装)を用意できたので、次はこれらの実装を実際に使用します。このレッスンでは、2 つの実装を切り替えるロジックの作成方法とバージョン対応レイアウトの作成方法を説明し、最後に下位互換性のある UI コンポーネントの使用方法を示します。
切り替えロジックを追加する
TabHelper
抽象クラスは、現在のデバイスのプラットフォーム バージョンに基づいてバージョン対応の TabHelper
および CompatTab
インスタンスを作成するためのファクトリーとして機能します。
Kotlin
sealed class TabHelper(protected val mActivity: FragmentActivity, protected val tag: String) {
abstract fun setUp()
abstract fun addTab(tab: CompatTab)
// Usage is tabHelper.newTab("tag")
fun newTab(tag: String): CompatTab =
if (Build.VERSION.SDK_INT >= Build.VERSION_CODES.HONEYCOMB) {
CompatTabHoneycomb(mActivity, tag)
} else {
CompatTabEclair(mActivity, tag)
}
companion object {
// Usage is TabHelper.createInstance(activity)
fun createInstance(activity: FragmentActivity): TabHelper =
if (Build.VERSION.SDK_INT >= Build.VERSION_CODES.HONEYCOMB) {
TabHelperHoneycomb(activity)
} else {
TabHelperEclair(activity)
}
}
}
Java
public abstract class TabHelper {
...
// Usage is TabHelper.createInstance(activity)
public static TabHelper createInstance(FragmentActivity activity) {
if (Build.VERSION.SDK_INT >= Build.VERSION_CODES.HONEYCOMB) {
return new TabHelperHoneycomb(activity);
} else {
return new TabHelperEclair(activity);
}
}
// Usage is tabHelper.newTab("tag")
public CompatTab newTab(String tag) {
if (Build.VERSION.SDK_INT >= Build.VERSION_CODES.HONEYCOMB) {
return new CompatTabHoneycomb(mActivity, tag);
} else {
return new CompatTabEclair(mActivity, tag);
}
}
...
}
バージョン対応のアクティビティ レイアウトを作成する
次のステップは、2 つのタブ実装をサポートするアクティビティのレイアウトを用意することです。古い実装(TabHelperEclair
)では、アクティビティ レイアウトに、TabWidget
と TabHost
がタブコンテンツのコンテナとともに含まれるようにする必要があります。
res/layout/main.xml:
<!-- This layout is for API level 5-10 only. -->
<TabHost xmlns:android="http://schemas.android.com/apk/res/android"
android:id="@android:id/tabhost"
android:layout_width="match_parent"
android:layout_height="match_parent">
<LinearLayout
android:orientation="vertical"
android:layout_width="match_parent"
android:layout_height="match_parent"
android:padding="5dp">
<TabWidget
android:id="@android:id/tabs"
android:layout_width="match_parent"
android:layout_height="wrap_content" />
<FrameLayout
android:id="@android:id/tabcontent"
android:layout_width="match_parent"
android:layout_height="0dp"
android:layout_weight="1" />
</LinearLayout>
</TabHost>
TabHelperHoneycomb
実装では、タブ インジケーターが ActionBar
によって提供されるため、必要なのはタブコンテンツを格納する FrameLayout
だけです。
res/layout-v11/main.xml:
<FrameLayout xmlns:android="http://schemas.android.com/apk/res/android"
android:id="@android:id/tabcontent"
android:layout_width="match_parent"
android:layout_height="match_parent" />
実行時に、プラットフォーム バージョンに応じて、インフレートする main.xml
レイアウトのバージョンが Android によって決定されます。そのロジックは、前のセクションで示した、使用する TabHelper
実装を決定するロジックと同じです。
アクティビティで TabHelper を使用する
アクティビティの onCreate()
メソッドで、TabHelper
オブジェクトを取得してタブを追加できます。次のコードを使用します。
Kotlin
override fun onCreate(savedInstanceState: Bundle?) {
...
setContentView(R.layout.main)
TabHelper.createInstance(this).apply {
setUp()
newTab("photos")
.setText(R.string.tab_photos)
.also { photosTab ->
addTab(photosTab)
}
newTab("videos")
.setText(R.string.tab_videos)
.also { videosTab ->
addTab(videosTab)
}
}
}
Java
@Override
public void onCreate(Bundle savedInstanceState) {
setContentView(R.layout.main);
TabHelper tabHelper = TabHelper.createInstance(this);
tabHelper.setUp();
CompatTab photosTab = tabHelper
.newTab("photos")
.setText(R.string.tab_photos);
tabHelper.addTab(photosTab);
CompatTab videosTab = tabHelper
.newTab("videos")
.setText(R.string.tab_videos);
tabHelper.addTab(videosTab);
}
アプリを実行すると、このコードは適切なアクティビティ レイアウトをインフレートして、TabHelperHoneycomb
または TabHelperEclair
オブジェクトをインスタンス化します。実際に使用される具象クラスは、共通の TabHelper
インターフェースを共有するため、アクティビティに対して不透明です。
Android 2.3 と Android 4.0 のデバイスで実行されるこの実装の 2 つのスクリーンショットを以下に示します。
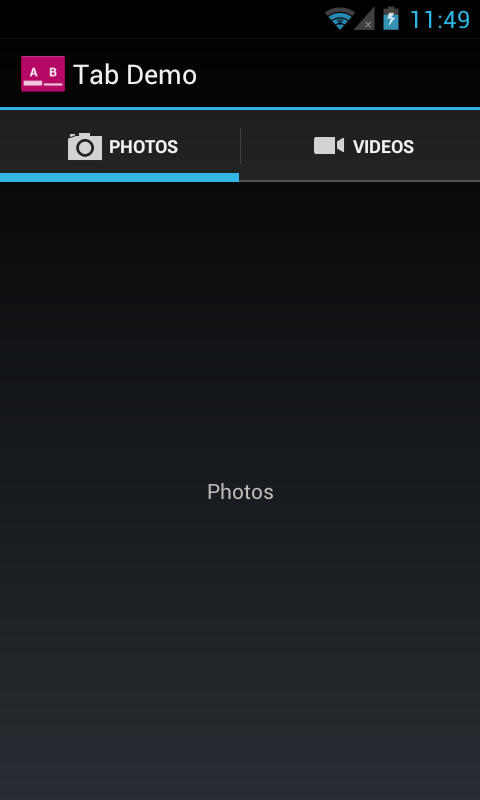
図 1. Android 2.3 デバイス(TabHelperEclair
を使用)と Android 4.0 デバイス(TabHelperHoneycomb
を使用)で実行されている下位互換性のあるタブのスクリーンショットの例
このページのコンテンツやコードサンプルは、コンテンツ ライセンスに記載のライセンスに従います。Java および OpenJDK は Oracle および関連会社の商標または登録商標です。
最終更新日 2025-07-27 UTC。
[null,null,["最終更新日 2025-07-27 UTC。"],[],[],null,["# Use the version-aware component\n\nNow that you have two implementations of `TabHelper` and `CompatTab`---one for Android 3.0 and later and one for earlier versions of the platform---it's time to do something with these implementations. This lesson discusses creating the logic for switching between these implementations, creating version-aware layouts, and finally using the backward-compatible UI component.\n\nAdd the switching logic\n-----------------------\n\nThe `TabHelper` abstract class acts as a [factory](https://en.wikipedia.org/wiki/Factory_(software_concept)) for creating version-appropriate `TabHelper` and `CompatTab` instances, based on the current device's platform version: \n\n### Kotlin\n\n```kotlin\nsealed class TabHelper(protected val mActivity: FragmentActivity, protected val tag: String) {\n\n abstract fun setUp()\n\n abstract fun addTab(tab: CompatTab)\n\n // Usage is tabHelper.newTab(\"tag\")\n fun newTab(tag: String): CompatTab =\n if (Build.VERSION.SDK_INT \u003e= Build.VERSION_CODES.HONEYCOMB) {\n CompatTabHoneycomb(mActivity, tag)\n } else {\n CompatTabEclair(mActivity, tag)\n }\n\n companion object {\n // Usage is TabHelper.createInstance(activity)\n fun createInstance(activity: FragmentActivity): TabHelper =\n if (Build.VERSION.SDK_INT \u003e= Build.VERSION_CODES.HONEYCOMB) {\n TabHelperHoneycomb(activity)\n } else {\n TabHelperEclair(activity)\n }\n }\n}\n```\n\n### Java\n\n```java\npublic abstract class TabHelper {\n ...\n // Usage is TabHelper.createInstance(activity)\n public static TabHelper createInstance(FragmentActivity activity) {\n if (Build.VERSION.SDK_INT \u003e= Build.VERSION_CODES.HONEYCOMB) {\n return new TabHelperHoneycomb(activity);\n } else {\n return new TabHelperEclair(activity);\n }\n }\n\n // Usage is tabHelper.newTab(\"tag\")\n public CompatTab newTab(String tag) {\n if (Build.VERSION.SDK_INT \u003e= Build.VERSION_CODES.HONEYCOMB) {\n return new CompatTabHoneycomb(mActivity, tag);\n } else {\n return new CompatTabEclair(mActivity, tag);\n }\n }\n ...\n}\n```\n\nCreate a version-aware activity layout\n--------------------------------------\n\nThe next step is to provide layouts for your activity that can support the two tab implementations. For the older implementation (`TabHelperEclair`), you need to ensure that your activity layout contains a [TabWidget](/reference/android/widget/TabWidget) and [TabHost](/reference/android/widget/TabHost), along with a container for tab contents:\n\n**res/layout/main.xml:** \n\n```xml\n\u003c!-- This layout is for API level 5-10 only. --\u003e\n\u003cTabHost xmlns:android=\"http://schemas.android.com/apk/res/android\"\n android:id=\"@android:id/tabhost\"\n android:layout_width=\"match_parent\"\n android:layout_height=\"match_parent\"\u003e\n\n \u003cLinearLayout\n android:orientation=\"vertical\"\n android:layout_width=\"match_parent\"\n android:layout_height=\"match_parent\"\n android:padding=\"5dp\"\u003e\n\n \u003cTabWidget\n android:id=\"@android:id/tabs\"\n android:layout_width=\"match_parent\"\n android:layout_height=\"wrap_content\" /\u003e\n\n \u003cFrameLayout\n android:id=\"@android:id/tabcontent\"\n android:layout_width=\"match_parent\"\n android:layout_height=\"0dp\"\n android:layout_weight=\"1\" /\u003e\n\n \u003c/LinearLayout\u003e\n\u003c/TabHost\u003e\n```\n\nFor the `TabHelperHoneycomb` implementation, all you need is a [FrameLayout](/reference/android/widget/FrameLayout) to contain the tab contents, since the tab indicators are provided by the [ActionBar](/reference/android/app/ActionBar):\n\n**res/layout-v11/main.xml:** \n\n```xml\n\u003cFrameLayout xmlns:android=\"http://schemas.android.com/apk/res/android\"\n android:id=\"@android:id/tabcontent\"\n android:layout_width=\"match_parent\"\n android:layout_height=\"match_parent\" /\u003e\n```\n\nAt runtime, Android will decide which version of the `main.xml` layout to inflate depending on the platform version. This is the same logic shown in the previous section to determine which `TabHelper` implementation to use.\n\nUse TabHelper in your activity\n------------------------------\n\nIn your activity's [onCreate()](/reference/android/app/Activity#onCreate(android.os.Bundle)) method, you can obtain a `TabHelper` object and add tabs with the following code: \n\n### Kotlin\n\n```kotlin\noverride fun onCreate(savedInstanceState: Bundle?) {\n ...\n setContentView(R.layout.main)\n\n TabHelper.createInstance(this).apply {\n setUp()\n\n newTab(\"photos\")\n .setText(R.string.tab_photos)\n .also { photosTab -\u003e\n addTab(photosTab)\n }\n\n newTab(\"videos\")\n .setText(R.string.tab_videos)\n .also { videosTab -\u003e\n addTab(videosTab)\n }\n }\n}\n```\n\n### Java\n\n```java\n@Override\npublic void onCreate(Bundle savedInstanceState) {\n setContentView(R.layout.main);\n\n TabHelper tabHelper = TabHelper.createInstance(this);\n tabHelper.setUp();\n\n CompatTab photosTab = tabHelper\n .newTab(\"photos\")\n .setText(R.string.tab_photos);\n tabHelper.addTab(photosTab);\n\n CompatTab videosTab = tabHelper\n .newTab(\"videos\")\n .setText(R.string.tab_videos);\n tabHelper.addTab(videosTab);\n}\n```\n\nWhen running the application, this code inflates the correct activity layout and instantiates either a `TabHelperHoneycomb` or `TabHelperEclair` object. The concrete class that's actually used is opaque to the activity, since they share the common `TabHelper` interface.\n\nBelow are two screenshots of this implementation running on an Android 2.3 and Android 4.0 device.\n\n**Figure 1.** Example screenshots of backward-compatible tabs running on an Android 2.3 device (using `TabHelperEclair`) and an Android 4.0 device (using `TabHelperHoneycomb`)."]]