
特定の状況では、アプリで継続的なアラームや着信などを使用して、ユーザーの注意を早急に引き付けることが必要になります。Android 9(API レベル 28)以前を搭載するデバイスをターゲットとするアプリでは、アプリがバックグラウンドにある間にアクティビティを起動することで、この処理を行うことができます。このドキュメントでは、Android 10(API レベル 29)から Android 13(API レベル 33)を搭載したデバイスでこの動作を実現する方法について説明します。
POST_NOTIFICATIONS 権限を追加する
Android 13 以降では、AndroidManifest.xml ファイルに次の行を追加します。
<manifest ...>
    <uses-permission android:name="android.permission.POST_NOTIFICATIONS"/>
    <application ...>
        ...
    </application>
</manifest>
この ID を取得したら、通知チャンネルを作成できます。
通知チャネルを作成する
通知を適切に表示し、ユーザーがアプリの設定で通知を管理できるように、通知チャンネルを作成します。通知チャンネルの詳細については、通知チャンネルを作成して管理するをご覧ください。
Application クラスの onCreate メソッドで通知チャンネルを作成します。
Kotlin
class DACapp : Application() {
    override fun onCreate() {
        super.onCreate()
        val channel = NotificationChannel(
            CHANNEL_ID,
            "High priority notifications",
            NotificationManager.IMPORTANCE_HIGH
        )

        val notificationManager = getSystemService(Context.NOTIFICATION_SERVICE) as NotificationManager
        notificationManager.createNotificationChannel(channel)
    }
}
ユーザーがアプリを初めて実行すると、アプリの [アプリ情報] システム画面に図 1 のようなものが表示されます。
![アプリの [アプリ情報]、[通知] 画面を示す画像。](https://developer.android.google.cn/static/images/ui/notifications/time-sensitive_notification_channel_empty.png?authuser=0&hl=ja)
通知権限を管理する
Android 13 以降では、ユーザーに通知を表示する前に、通知の権限をリクエストします。
最小の実装は次のようになります。
Kotlin
val permissionLauncher = rememberLauncherForActivityResult(
    contract = ActivityResultContracts.RequestPermission(),
    onResult = { hasNotificationPermission = it }
)
...
Button(
    onClick = {
        if (!hasNotificationPermission) {
            if (Build.VERSION.SDK_INT >= Build.VERSION_CODES.TIRAMISU) {
                permissionLauncher.launch(Manifest.permission.POST_NOTIFICATIONS)
            }
        }
    },
) {
    Text(text = "Request permission")
}
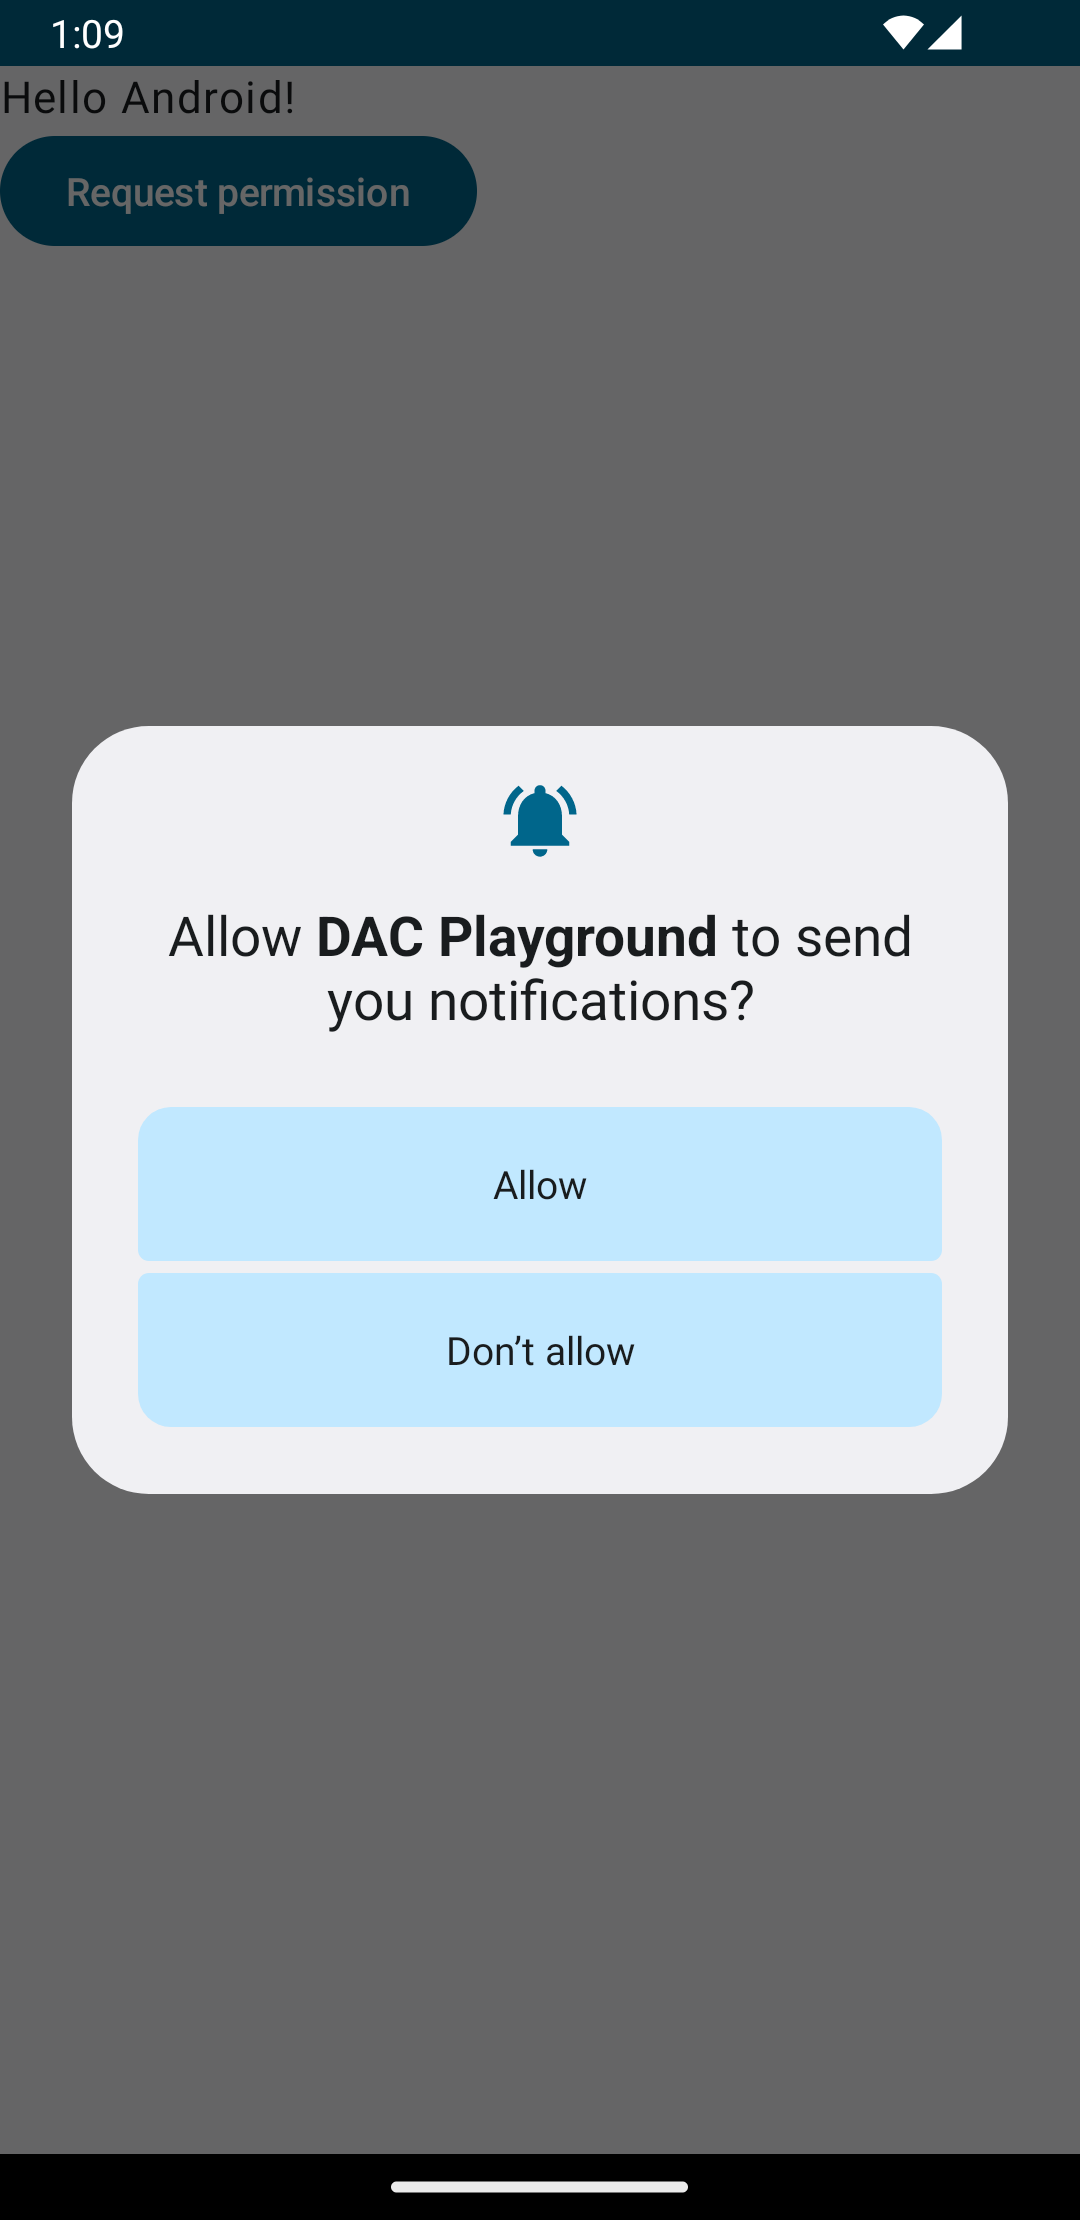
デバイスが Android 13 を搭載している場合、Request
permission ボタンをタップすると、図 2 に示すダイアログがトリガーされます。
ユーザーが権限リクエストを承認すると、アプリの [アプリ情報] セクションは図 3 のようになります。
![通知権限のリクエストが許可された後の [アプリ情報] 画面を示す画像](https://developer.android.google.cn/static/images/ui/notifications/time-sensitive_notification_permission_granted.png?authuser=0&hl=ja)
高優先度通知を作成する
通知を作成する際は、わかりやすいタイトルとメッセージを指定します。
次の例には通知が含まれています。
Kotlin
private fun showNotification() {
    val notificationManager = getSystemService(Context.NOTIFICATION_SERVICE) as NotificationManager

    val notificationBuilder =
        NotificationCompat.Builder(this, CHANNEL_ID)
            .setSmallIcon(R.drawable.baseline_auto_awesome_24)
            .setContentTitle("HIGH PRIORITY")
            .setContentText("Check this dog puppy video NOW!")
            .setPriority(NotificationCompat.PRIORITY_HIGH)
            .setCategory(NotificationCompat.CATEGORY_RECOMMENDATION)

    notificationManager.notify(666, notificationBuilder.build())
}
通知をユーザーに表示する
showNotification() 関数を呼び出すと、次のように通知がトリガーされます。
Kotlin
Button(onClick = { showNotification() }) {
    Text(text = "Show notification")
}
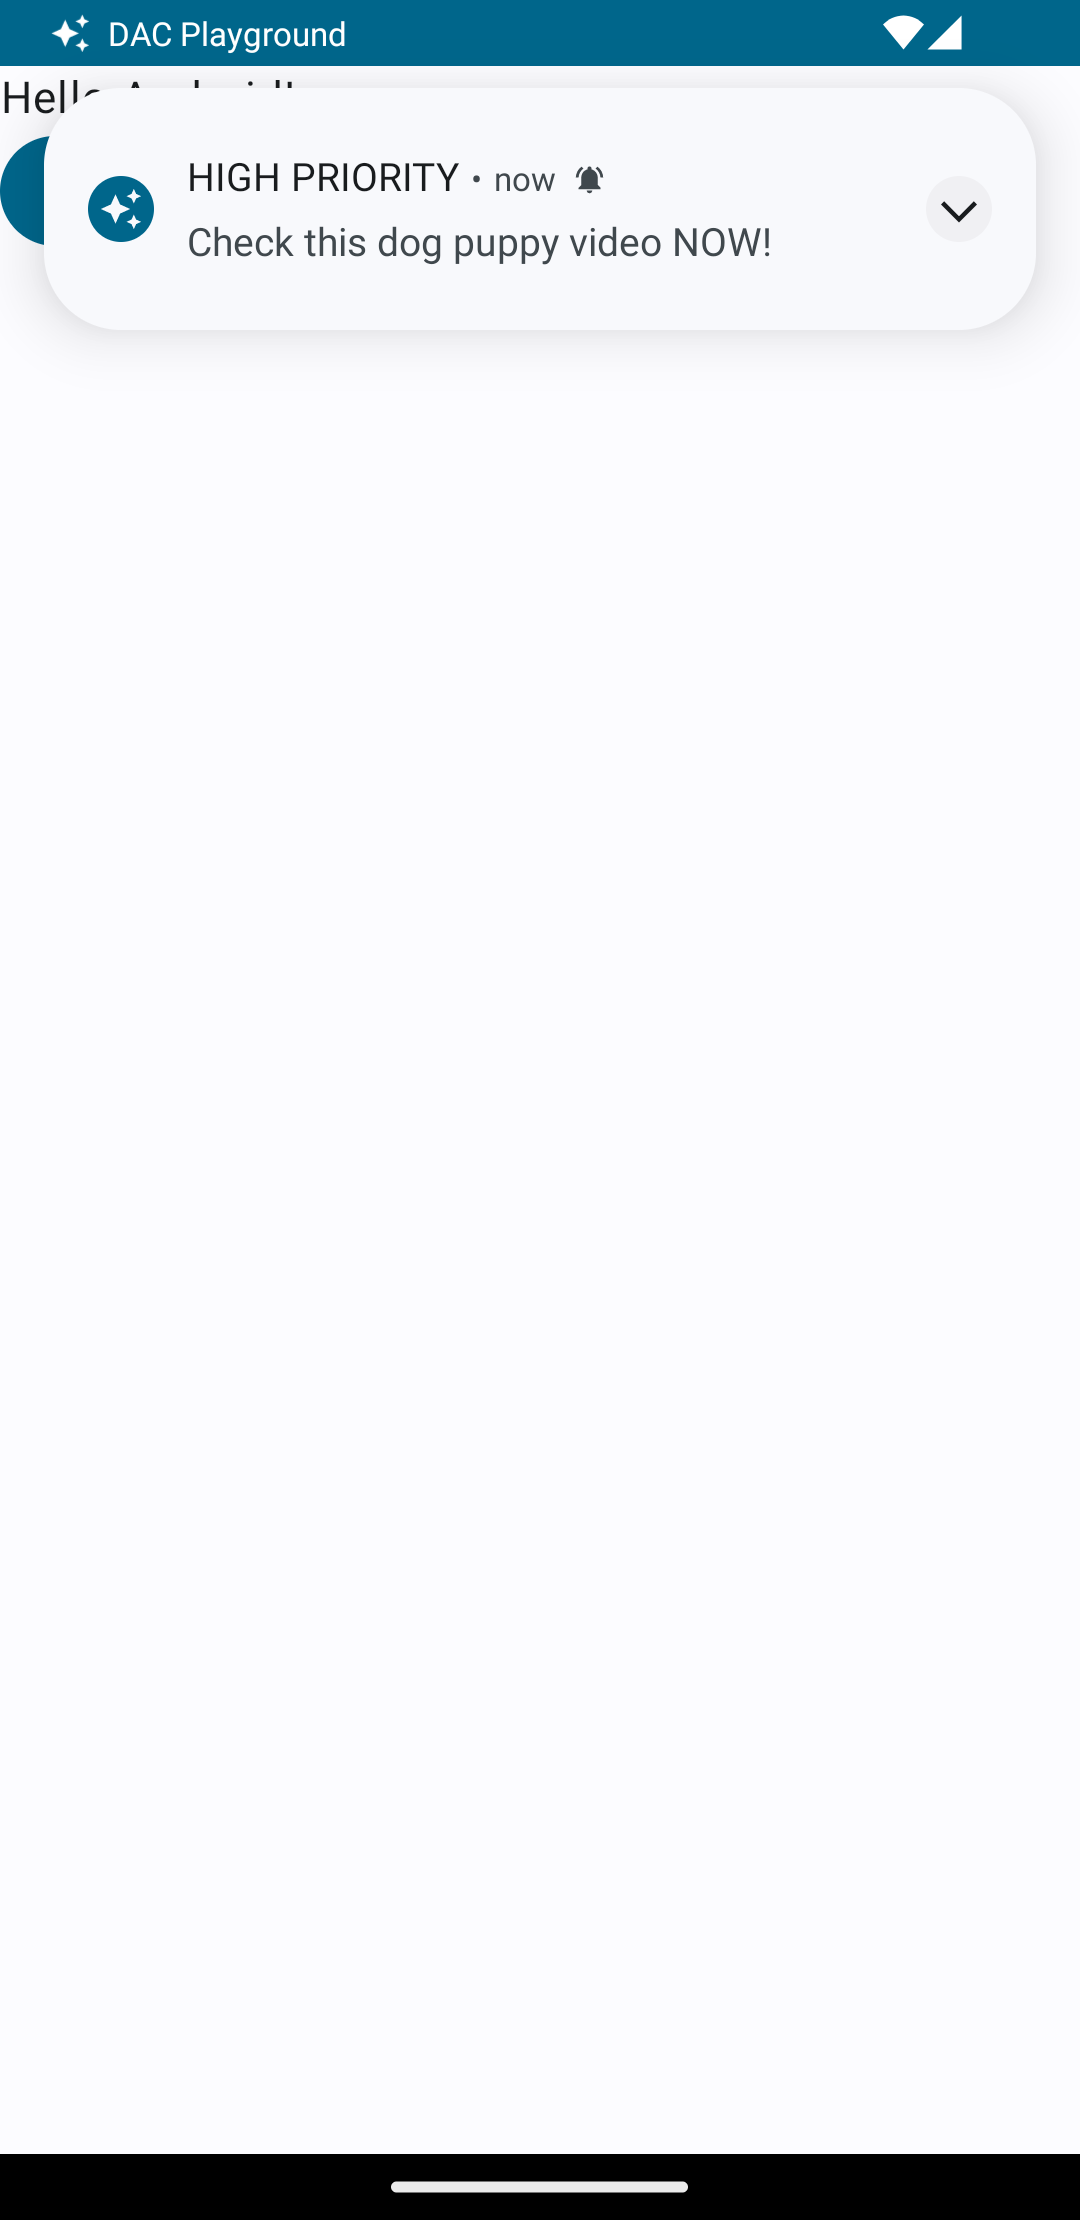
この例の通知は図 4 のようになります。
進行中の通知
ユーザーに通知が表示されたとき、ユーザーはアプリのアラートまたはリマインダーについて承認もしくは却下を選択できます。たとえば、ユーザーは電話の着信に応答するか拒否するかを選択できます。
電話の着信などの継続的な通知は、フォアグラウンド サービスに関連付けます。次のコード スニペットは、フォアグラウンド サービスに関連付けられた通知を表示する方法を示しています。
Kotlin
// Provide a unique integer for the "notificationId" of each notification.
startForeground(notificationId, notification)
Java
// Provide a unique integer for the "notificationId" of each notification.
startForeground(notificationId, notification);