בסביבת OpenGL ES, תצוגות ההקרנה והמצלמה מאפשרות להציג אובייקטים שצוירו דומה יותר לאופן שבו רואים חפצים פיזיים בעיניים. הסימולציה הזאת של צפייה פיזית מתבצעת באמצעות טרנספורמציות מתמטיות של קואורדינטות אובייקט מצוירות:
- היטל – הטרנספורמציה הזו מתאימה את הקואורדינטות של אובייקטים שצוירו בהתבסס על
הרוחב והגובה של
GLSurfaceViewשבהם הם מוצגים. ללא את החישוב הזה, אובייקטים שצוירו על ידי OpenGL ES מוטים על ידי פרופורציות לא שוות של התצוגה חלון. בדרך כלל יש לחשב טרנספורמציה של היטל רק כאשר הפרופורציות תצוגת OpenGL נוצרה או משתנה בשיטתonSurfaceChanged()של כלי הרינדור. למידע נוסף על הקרנות של OpenGL ES ועל מיפוי קואורדינטות, ראו קואורדינטות מיפוי עבור שרטוט אובייקטים. - תצוגת מצלמה – הטרנספורמציה הזו מתאימה את הקואורדינטות של אובייקטים שצוירו על בסיס
את מיקום המצלמה הווירטואלית. חשוב לציין ש-OpenGL ES לא מגדיר מצלמה בפועל
אבל במקום זאת הוא מספק שיטות שימושיות שמדמות מצלמה על ידי טרנספורמציה של התצוגה
של אובייקטים שציירתם. חישוב המרה של תצוגת מצלמה עשוי להתבצע רק פעם אחת לאחר שתבססו את
GLSurfaceView, או עשוי להשתנות באופן דינמי על סמך פעולות של משתמשים או של האפליקציה.
השיעור הזה מתאר כיצד ליצור היטל ותצוגת מצלמה ולהחיל אותם על צורות ששורטטו.
GLSurfaceView.
הגדרת היטל
הנתונים לטרנספורמציה של היטל מחושבים בפונקציה onSurfaceChanged()
של הכיתה GLSurfaceView.Renderer. הקוד לדוגמה הבא
לוקחת את הגובה והרוחב של GLSurfaceView ומשתמשת בהם כדי לאכלס
טרנספורמציה של היטל Matrix באמצעות השיטה Matrix.frustumM():
Kotlin
// vPMatrix is an abbreviation for "Model View Projection Matrix"
private val vPMatrix = FloatArray(16)
private val projectionMatrix = FloatArray(16)
private val viewMatrix = FloatArray(16)

override fun onSurfaceChanged(unused: GL10, width: Int, height: Int) {
    GLES20.glViewport(0, 0, width, height)

    val ratio: Float = width.toFloat() / height.toFloat()

    // this projection matrix is applied to object coordinates
    // in the onDrawFrame() method
    Matrix.frustumM(projectionMatrix, 0, -ratio, ratio, -1f, 1f, 3f, 7f)
}
Java
// vPMatrix is an abbreviation for "Model View Projection Matrix"
private final float[] vPMatrix = new float[16];
private final float[] projectionMatrix = new float[16];
private final float[] viewMatrix = new float[16];

@Override
public void onSurfaceChanged(GL10 unused, int width, int height) {
    GLES20.glViewport(0, 0, width, height);

    float ratio = (float) width / height;

    // this projection matrix is applied to object coordinates
    // in the onDrawFrame() method
    Matrix.frustumM(projectionMatrix, 0, -ratio, ratio, -1, 1, 3, 7);
}
הקוד הזה מאכלס מטריצת היטל, mProjectionMatrix שאותה אפשר לשלב לאחר מכן
עם טרנספורמציה של תצוגת מצלמה בשיטה onDrawFrame(), שמוצגת בקטע הבא.
הערה: פשוט מחילים טרנספורמציה של היטל על בדרך כלל התוצאה של שרטוט היא תצוגה ריקה מאוד. באופן כללי, צריך גם להפעיל מצלמה את השינוי כדי שמשהו יופיע על המסך.
הגדרה של תצוגת מצלמה
משלימים את תהליך הטרנספורמציה של האובייקטים המצוירים על ידי הוספת טרנספורמציה של תצוגת מצלמה כ-
חלק מתהליך השרטוט בכלי לעיבוד. בקוד לדוגמה הבא, בתצוגת המצלמה
הטרנספורמציה מחושבת באמצעות הפונקציה Matrix.setLookAtM()
ואז משולבות עם מטריצת ההיטל שחושבה קודם לכן. השילוב בין
לאחר מכן, מטריצות הטרנספורמציה מועברות לצורה המשורטטת.
Kotlin
override fun onDrawFrame(unused: GL10) {
    ...
    // Set the camera position (View matrix)
    Matrix.setLookAtM(viewMatrix, 0, 0f, 0f, 3f, 0f, 0f, 0f, 0f, 1.0f, 0.0f)

    // Calculate the projection and view transformation
    Matrix.multiplyMM(vPMatrix, 0, projectionMatrix, 0, viewMatrix, 0)

    // Draw shape
    triangle.draw(vPMatrix)
Java
@Override
public void onDrawFrame(GL10 unused) {
    ...
    // Set the camera position (View matrix)
    Matrix.setLookAtM(viewMatrix, 0, 0, 0, 3, 0f, 0f, 0f, 0f, 1.0f, 0.0f);

    // Calculate the projection and view transformation
    Matrix.multiplyMM(vPMatrix, 0, projectionMatrix, 0, viewMatrix, 0);

    // Draw shape
    triangle.draw(vPMatrix);
}
החלת טרנספורמציות הקרנה ומצלמה
כדי להשתמש במטריצת הטרנספורמציה המשולבת של ההיטל ותצוגת המצלמה שמוצגת
תצוגות מקדימות של קטעים, קודם מוסיפים משתנה מטריצה לכלי ההצללה של קודקוד שהוגדר קודם
במחלקה Triangle:
Kotlin
class Triangle {

    private val vertexShaderCode =
            // This matrix member variable provides a hook to manipulate
            // the coordinates of the objects that use this vertex shader
            "uniform mat4 uMVPMatrix;" +
            "attribute vec4 vPosition;" +
            "void main() {" +
            // the matrix must be included as a modifier of gl_Position
            // Note that the uMVPMatrix factor *must be first* in order
            // for the matrix multiplication product to be correct.
            "  gl_Position = uMVPMatrix * vPosition;" +
            "}"

    // Use to access and set the view transformation
    private var vPMatrixHandle: Int = 0

    ...
}
Java
public class Triangle {

    private final String vertexShaderCode =
        // This matrix member variable provides a hook to manipulate
        // the coordinates of the objects that use this vertex shader
        "uniform mat4 uMVPMatrix;" +
        "attribute vec4 vPosition;" +
        "void main() {" +
        // the matrix must be included as a modifier of gl_Position
        // Note that the uMVPMatrix factor *must be first* in order
        // for the matrix multiplication product to be correct.
        "  gl_Position = uMVPMatrix * vPosition;" +
        "}";

    // Use to access and set the view transformation
    private int vPMatrixHandle;

    ...
}
בשלב הבא, צריך לשנות את השיטה draw() של האובייקטים הגרפיים כדי לקבל את השילוב המשולב
במטריצת הטרנספורמציה ולהחיל אותה על הצורה:
Kotlin
fun draw(mvpMatrix: FloatArray) { // pass in the calculated transformation matrix
    ...

    // get handle to shape's transformation matrix
    vPMatrixHandle = GLES20.glGetUniformLocation(mProgram, "uMVPMatrix")

    // Pass the projection and view transformation to the shader
    GLES20.glUniformMatrix4fv(vPMatrixHandle, 1, false, mvpMatrix, 0)

    // Draw the triangle
    GLES20.glDrawArrays(GLES20.GL_TRIANGLES, 0, vertexCount)

    // Disable vertex array
    GLES20.glDisableVertexAttribArray(positionHandle)
}
Java
public void draw(float[] mvpMatrix) { // pass in the calculated transformation matrix
    ...

    // get handle to shape's transformation matrix
    vPMatrixHandle = GLES20.glGetUniformLocation(mProgram, "uMVPMatrix");

    // Pass the projection and view transformation to the shader
    GLES20.glUniformMatrix4fv(vPMatrixHandle, 1, false, mvpMatrix, 0);

    // Draw the triangle
    GLES20.glDrawArrays(GLES20.GL_TRIANGLES, 0, vertexCount);

    // Disable vertex array
    GLES20.glDisableVertexAttribArray(positionHandle);
}
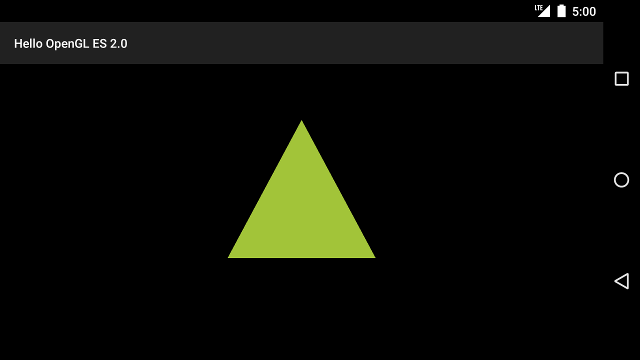
אחרי שחישבתם והחלתם את הטרנספורמציות להקרנה ולתצוגת מצלמה בצורה נכונה, האובייקטים הגרפיים משורטטים בפרופורציות נכונות והם אמורים להיראות כך:

איור 1. משולש ששורטט עם היטל ותצוגת מצלמה.
עכשיו, כשיש לכם אפליקציה שמציגה את הצורות בפרופורציות הנכונות, הגיע הזמן כדי להוסיף תנועה לצורות.

