
Việc chèn phần phụ thuộc hoặc công cụ định vị dịch vụ thủ công trong ứng dụng Android có thể gặp sự cố tùy thuộc vào quy mô của dự án. Bạn có thể hạn chế mức độ phức tạp của dự án khi mở rộng quy mô bằng cách sử dụng Dagger để quản lý các phần phụ thuộc.
Dagger tự động tạo mã bắt chước mã mà bạn đã viết thủ công. Vì được tạo tại thời điểm biên dịch nên mã này có thể truy vết được, và hoạt động hiệu quả hơn so với các giải pháp dựa trên cơ chế phản chiếu khác chẳng hạn như Guice.
Lợi ích của việc sử dụng Dagger
Dagger giúp bạn không phải viết mã nguyên mẫu tẻ nhạt và dễ xảy ra lỗi bằng cách:
Tạo mã
AppContainer(biểu đồ ứng dụng) mà bạn đã triển khai theo cách thủ công trong phần DI thủ công.Tạo nhà máy cho các lớp có trong biểu đồ ứng dụng. Đây là cách các phần phụ thuộc được đáp ứng nội bộ.
Quyết định liệu có sử dụng lại một phần phụ thuộc hay tạo một bản sao mới qua việc sử dụng các phạm vi.
Tạo vùng chứa cho các luồng cụ thể như bạn đã làm với luồng đăng nhập trong phần trước bằng cách sử dụng các thành phần phụ của Dagger. Điều này giúp cải thiện hiệu suất của ứng dụng bằng cách giải phóng các đối tượng trong bộ nhớ khi không còn cần nữa.
Dagger tự động thực hiện tất cả thao tác này tại thời điểm tạo, miễn là bạn khai báo các phần phụ thuộc của một lớp và chỉ định cách đáp ứng các phần phụ thuộc đó bằng các chú thích. Dagger tạo mã tương tự như mã bạn đã viết theo cách thủ công. Bên trong, Dagger tạo một biểu đồ các đối tượng có thể tham chiếu để tìm cách cung cấp một bản sao của lớp. Đối với mọi lớp trong biểu đồ, Dagger tạo một lớp kiểu nhà máy mà nó sử dụng nội bộ để nhận các thực thể thuộc loại đó.
Tại thời điểm tạo, Dagger xem qua mã của bạn và:
Tạo và xác thực các biểu đồ phần phụ thuộc, đảm bảo rằng:
- Các phần phụ thuộc của mọi đối tượng đều có thể được đáp ứng, vì vậy, không có trường hợp ngoại lệ nào về thời gian chạy.
- Không có chu kỳ phụ thuộc nào tồn tại, do đó không có vòng lặp vô hạn.
Tạo các lớp được dùng trong thời gian chạy để tạo đối tượng thực tế và phần phụ thuộc của các đối tượng đó.
Một trường hợp sử dụng đơn giản trong Dagger: Tạo một nhà máy
Để minh họa cách bạn có thể làm việc với Dagger, hãy tạo một nhà máy đơn giản cho lớp UserRepository hiển thị trong sơ đồ sau:
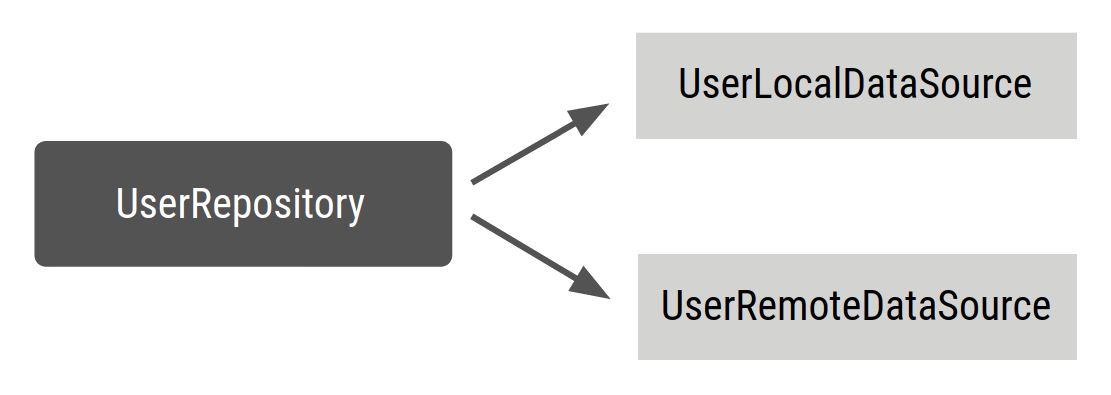
Xác định UserRepository như sau:
Kotlin
class UserRepository(
    private val localDataSource: UserLocalDataSource,
    private val remoteDataSource: UserRemoteDataSource
) { ... }
Java
public class UserRepository {

    private final UserLocalDataSource userLocalDataSource;
    private final UserRemoteDataSource userRemoteDataSource;

    public UserRepository(UserLocalDataSource userLocalDataSource, UserRemoteDataSource userRemoteDataSource) {
        this.userLocalDataSource = userLocalDataSource;
        this.userRemoteDataSource = userRemoteDataSource;
    }

    ...
}
Thêm chú thích @Inject vào hàm khởi tạo UserRepository để Dagger biết cách tạo UserRepository:
Kotlin
// @Inject lets Dagger know how to create instances of this object
class UserRepository @Inject constructor(
    private val localDataSource: UserLocalDataSource,
    private val remoteDataSource: UserRemoteDataSource
) { ... }
Java
public class UserRepository {

    private final UserLocalDataSource userLocalDataSource;
    private final UserRemoteDataSource userRemoteDataSource;

    // @Inject lets Dagger know how to create instances of this object
    @Inject
    public UserRepository(UserLocalDataSource userLocalDataSource, UserRemoteDataSource userRemoteDataSource) {
        this.userLocalDataSource = userLocalDataSource;
        this.userRemoteDataSource = userRemoteDataSource;
    }
}
Trong đoạn mã trên, bạn đang cho Dagger biết:
Cách tạo một bản sao
UserRepositorybằng hàm khởi tạo có chú thích@Inject.Phần phụ thuộc của nó là
UserLocalDataSourcevàUserRemoteDataSource.
Giờ thì Dagger đã biết cách tạo một bản sao của UserRepository, nhưng Dagger không biết cách tạo các phần phụ thuộc của nó. Nếu bạn cũng chú thích các lớp khác, thì Dagger biết cách tạo các lớp đó:
Kotlin
// @Inject lets Dagger know how to create instances of these objects
class UserLocalDataSource @Inject constructor() { ... }
class UserRemoteDataSource @Inject constructor() { ... }
Java
public class UserLocalDataSource {
    @Inject
    public UserLocalDataSource() { }
}

public class UserRemoteDataSource {
    @Inject
    public UserRemoteDataSource() { }
}
Thành phần Dagger
Dagger có thể tạo một biểu đồ các phần phụ thuộc trong dự án để có thể sử dụng nhằm tìm ra vị trí các phần phụ thuộc đó khi cần.
Để khiến Dagger có thể làm được này, bạn cần tạo một giao diện và chú thích giao diện đó bằng
@Component. Dagger tạo một vùng chứa như bạn đã làm với tính năng chèn phần phụ thuộc theo cách thủ công.
Bên trong giao diện @Component, bạn có thể xác định các hàm trả về bản sao của lớp bạn cần (tức là UserRepository). @Component yêu cầu Dagger tạo một vùng chứa có tất cả phần phụ thuộc cần thiết để đáp ứng các loại phần phụ thuộc mà nó hiển thị. Đây được gọi là thành phần Dagger; thành phần này chứa một biểu đồ bao gồm các đối tượng mà Dagger biết cách cung cấp và các phần phụ thuộc tương ứng.
Kotlin
// @Component makes Dagger create a graph of dependencies
@Component
interface ApplicationGraph {
    // The return type  of functions inside the component interface is
    // what can be provided from the container
    fun repository(): UserRepository
}
Java
// @Component makes Dagger create a graph of dependencies
@Component
public interface ApplicationGraph {
    // The return type  of functions inside the component interface is
    // what can be consumed from the graph
    UserRepository userRepository();
}
Khi bạn xây dựng dự án, Dagger sẽ tạo một phương thức triển khai giao diện ApplicationGraph cho bạn là DaggerApplicationGraph. Với trình xử lý chú thích của mình, Dagger tạo một biểu đồ phần phụ thuộc bao gồm các mối quan hệ giữa ba lớp (UserRepository, UserLocalDatasource và UserRemoteDataSource) chỉ với một điểm truy cập: nhận một bản sao UserRepository. Bạn có thể sử dụng bản sao này như sau:
Kotlin
// Create an instance of the application graph
val applicationGraph: ApplicationGraph = DaggerApplicationGraph.create()
// Grab an instance of UserRepository from the application graph
val userRepository: UserRepository = applicationGraph.repository()
Java
// Create an instance of the application graph
ApplicationGraph applicationGraph = DaggerApplicationGraph.create();

// Grab an instance of UserRepository from the application graph
UserRepository userRepository = applicationGraph.userRepository();
Dagger tạo một bản sao mới của UserRepository mỗi khi có yêu cầu.
Kotlin
val applicationGraph: ApplicationGraph = DaggerApplicationGraph.create()

val userRepository: UserRepository = applicationGraph.repository()
val userRepository2: UserRepository = applicationGraph.repository()

assert(userRepository != userRepository2)
Java
ApplicationGraph applicationGraph = DaggerApplicationGraph.create();

UserRepository userRepository = applicationGraph.userRepository();
UserRepository userRepository2 = applicationGraph.userRepository();

assert(userRepository != userRepository2)
Đôi khi, bạn cần có một bản sao riêng biệt của phần phụ thuộc trong một vùng chứa. Bạn có thể mong muốn điều này vì một vài lý do:
Bạn muốn các loại khác sở hữu loại này dưới dạng phần phụ thuộc dùng chung cùng một bản sao, chẳng hạn như nhiều đối tượng
ViewModeltrong luồng đăng nhập bằng cách sử dụng cùng mộtLoginUserData.Việc tạo một đối tượng rất tốn kém, và bạn không muốn tạo một bản sao mới mỗi khi đối tượng đó được khai báo dưới dạng phần phụ thuộc (chẳng hạn như một trình phân tích cú pháp JSON).
Trong ví dụ này, bạn có thể muốn có một bản sao UserRepository riêng biệt có sẵn trong biểu đồ để mỗi khi bạn yêu cầu UserRepository, bạn sẽ luôn nhận được cùng một bản sao. Điều này hữu ích trong ví dụ của bạn vì trong một ứng dụng thực tế có biểu đồ ứng dụng phức tạp hơn, bạn có thể sở hữu nhiều đối tượng ViewModel tùy thuộc vào UserRepository, và bạn không muốn tạo các bản sao mới của UserLocalDataSource và UserRemoteDataSource mỗi khi cần cung cấp UserRepository.
Trong thao tác chèn phần phụ thuộc thủ công, bạn thực hiện việc này bằng cách truyền vào cùng một
bản sao UserRepository đến hàm khởi tạo của các lớp ViewModel; nhưng trong Dagger, do bạn không viết mã đó theo cách thủ công nên bạn phải cho Dagger biết mình muốn sử dụng cùng một bản sao. Bạn có thể thực hiện việc này với các chú thích
phạm vi.
Xác định phạm vi bằng Dagger
Bạn có thể sử dụng các chú thích phạm vi để giới hạn thời gian tồn tại của một đối tượng trong thời gian tồn tại của thành phần đối tượng đó. Điều này có nghĩa là hệ thống sẽ sử dụng cùng một bản sao của phần phụ thuộc mỗi khi bạn cần cung cấp loại đó.
Để có một bản sao UserRepository riêng biệt khi bạn yêu cầu kho lưu trữ trong ApplicationGraph, hãy sử dụng cùng một chú thích phạm vi cho giao diện @Component và UserRepository. Bạn có thể sử dụng chú thích @Singleton đã đi kèm với gói javax.inject mà Dagger sử dụng:
Kotlin
// Scope annotations on a @Component interface informs Dagger that classes annotated
// with this annotation (i.e. @Singleton) are bound to the life of the graph and so
// the same instance of that type is provided every time the type is requested.
@Singleton
@Component
interface ApplicationGraph {
    fun repository(): UserRepository
}

// Scope this class to a component using @Singleton scope (i.e. ApplicationGraph)
@Singleton
class UserRepository @Inject constructor(
    private val localDataSource: UserLocalDataSource,
    private val remoteDataSource: UserRemoteDataSource
) { ... }
Java
// Scope annotations on a @Component interface informs Dagger that classes annotated
// with this annotation (i.e. @Singleton) are scoped to the graph and the same
// instance of that type is provided every time the type is requested.
@Singleton
@Component
public interface ApplicationGraph {
    UserRepository userRepository();
}

// Scope this class to a component using @Singleton scope (i.e. ApplicationGraph)
@Singleton
public class UserRepository {

    private final UserLocalDataSource userLocalDataSource;
    private final UserRemoteDataSource userRemoteDataSource;

    @Inject
    public UserRepository(UserLocalDataSource userLocalDataSource, UserRemoteDataSource userRemoteDataSource) {
        this.userLocalDataSource = userLocalDataSource;
        this.userRemoteDataSource = userRemoteDataSource;
    }
}
Ngoài ra, bạn có thể tạo và sử dụng chú thích phạm vi tuỳ chỉnh. Bạn có thể tạo một chú thích phạm vi như bên dưới:
Kotlin
// Creates MyCustomScope
@Scope
@MustBeDocumented
@Retention(value = AnnotationRetention.RUNTIME)
annotation class MyCustomScope
Java
// Creates MyCustomScope
@Scope
@Retention(RetentionPolicy.RUNTIME)
public @interface MyCustomScope {}
Sau đó, bạn có thể sử dụng hàm này như trước đây:
Kotlin
@MyCustomScope
@Component
interface ApplicationGraph {
    fun repository(): UserRepository
}

@MyCustomScope
class UserRepository @Inject constructor(
    private val localDataSource: UserLocalDataSource,
    private val service: UserService
) { ... }
Java
@MyCustomScope
@Component
public interface ApplicationGraph {
    UserRepository userRepository();
}

@MyCustomScope
public class UserRepository {

    private final UserLocalDataSource userLocalDataSource;
    private final UserRemoteDataSource userRemoteDataSource;

    @Inject
    public UserRepository(UserLocalDataSource userLocalDataSource, UserRemoteDataSource userRemoteDataSource) {
        this.userLocalDataSource = userLocalDataSource;
        this.userRemoteDataSource = userRemoteDataSource;
    }
}
Trong cả hai trường hợp, đối tượng đều được cung cấp cùng một phạm vi dùng để chú thích giao diện @Component. Do đó, mỗi lần gọi applicationGraph.repository(), bạn sẽ nhận được cùng một bản sao của UserRepository.
Kotlin
val applicationGraph: ApplicationGraph = DaggerApplicationGraph.create()

val userRepository: UserRepository = applicationGraph.repository()
val userRepository2: UserRepository = applicationGraph.repository()

assert(userRepository == userRepository2)
Java
ApplicationGraph applicationGraph = DaggerApplicationGraph.create();

UserRepository userRepository = applicationGraph.userRepository();
UserRepository userRepository2 = applicationGraph.userRepository();

assert(userRepository == userRepository2)
Kết luận
Bạn cần nhận thức được những lợi ích của Dagger và các kiến thức cơ bản về cách hoạt động của tính năng này trước khi có thể sử dụng trong các trường hợp phức tạp hơn.
Trong trang tiếp theo, bạn sẽ tìm hiểu cách thêm Dagger vào ứng dụng Android.