
視專案規模而定,在 Android 應用程式中手動插入依附元件或服務定位器可能會有問題。您可以使用 Dagger 管理依附元件,在專案日漸擴大時限制其複雜度。
Dagger 會自動產生程式碼,模擬以手動方式編寫的程式碼。由於程式碼是在編譯時產生,Dagger 比其他反射式解決方案 (例如 Guice) 易於追蹤且效能更佳。
使用 Dagger 的優點
Dagger 提供以下優點,讓您不必編寫繁瑣且容易出錯的樣板程式碼:
產生須在人工 DI 區段中手動實作的
AppContainer程式碼 (應用程式圖表)。為應用程式圖表提供的類別建立工廠。這是在內部提供依附元件的方式。
決定要重複使用依附元件,還是使用「範圍」建立新例項。
按照上一節的登入流程,使用 Dagger「子元件」為特定流程建立容器。這麼做可釋放記憶體中不再需要的物件,提升應用程式效能。
只要宣告類別的依附元件,並使用註解指定提供這些依附元件的方式,Dagger 就會自動在建構期間執行上述所有作業。Dagger 會產生與手動編寫類似的程式碼。Dagger 會在內部建立可參照的物件圖表,找出提供類別例項的方式。對於圖表中的每個類別,Dagger 都會產生一個工廠類型類別供內部使用,取得該類型的例項。
在建構期間,Dagger 會逐步執行程式碼和下列作業:
建構及驗證依附元件圖表,確保下列事項:
- 可提供每個物件的依附元件,不會發生執行階段例外狀況。
- 沒有任何依附元件週期,因此也沒有無限迴圈。
產生類別,用於在執行階段建立實際物件及其依附元件。
Dagger 的簡易用途之一:產生工廠
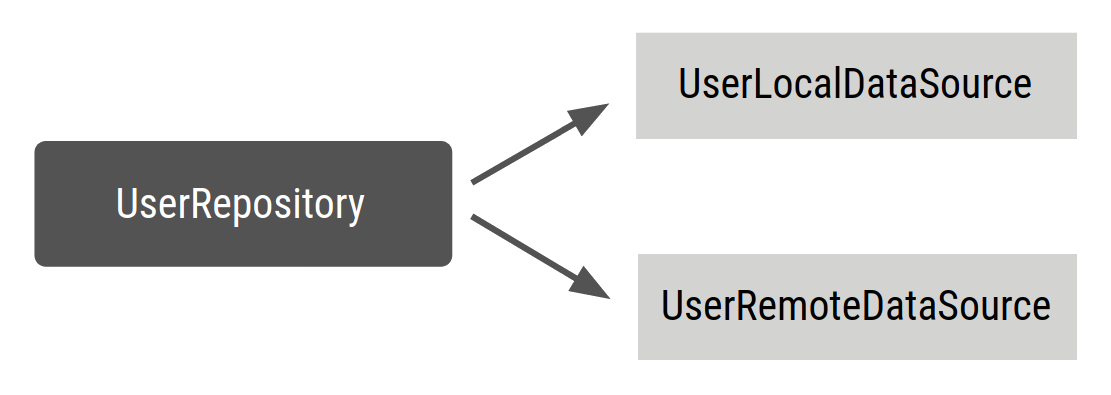
為說明如何使用 Dagger,接下來要為 UserRepository 類別建立簡易的工廠,如下圖所示:
按照以下方式定義 UserRepository:
Kotlin
class UserRepository(
    private val localDataSource: UserLocalDataSource,
    private val remoteDataSource: UserRemoteDataSource
) { ... }
Java
public class UserRepository {

    private final UserLocalDataSource userLocalDataSource;
    private final UserRemoteDataSource userRemoteDataSource;

    public UserRepository(UserLocalDataSource userLocalDataSource, UserRemoteDataSource userRemoteDataSource) {
        this.userLocalDataSource = userLocalDataSource;
        this.userRemoteDataSource = userRemoteDataSource;
    }

    ...
}
在 UserRepository 建構函式中加入 @Inject 註解,指示 Dagger 如何建立 UserRepository:
Kotlin
// @Inject lets Dagger know how to create instances of this object
class UserRepository @Inject constructor(
    private val localDataSource: UserLocalDataSource,
    private val remoteDataSource: UserRemoteDataSource
) { ... }
Java
public class UserRepository {

    private final UserLocalDataSource userLocalDataSource;
    private final UserRemoteDataSource userRemoteDataSource;

    // @Inject lets Dagger know how to create instances of this object
    @Inject
    public UserRepository(UserLocalDataSource userLocalDataSource, UserRemoteDataSource userRemoteDataSource) {
        this.userLocalDataSource = userLocalDataSource;
        this.userRemoteDataSource = userRemoteDataSource;
    }
}
上方程式碼片段會指示 Dagger 以下事項:
如何使用加上
@Inject註解的建構函式建立UserRepository例項。其依附元件為:
UserLocalDataSource和UserRemoteDataSource。
現在,Dagger 知道如何建立 UserRepository 的例項,但不知如何建立其依附元件。如果您也為其他類別加上註解,Dagger 就會知道如何建立依附元件:
Kotlin
// @Inject lets Dagger know how to create instances of these objects
class UserLocalDataSource @Inject constructor() { ... }
class UserRemoteDataSource @Inject constructor() { ... }
Java
public class UserLocalDataSource {
    @Inject
    public UserLocalDataSource() { }
}

public class UserRemoteDataSource {
    @Inject
    public UserRemoteDataSource() { }
}
Dagger 元件
Dagger 可在專案中建立依附元件圖表,用來找出取得所需依附元件的位置。如要讓 Dagger 執行這項作業,請建立介面,並加上 @Component 註解。Dagger 會建立容器,就像手動插入依附元件時一樣。
在 @Component 介面中,您可以定義函式,用於傳回所需類別 (例如 UserRepository) 的例項。@Component 會指示 Dagger 產生容器,其中包含滿足其公開類型的所有必要依附元件。這稱為「Dagger 元件」,其中包含一個圖表,由 Dagger 知道該如何提供的多個物件及其各別依附元件構成。
Kotlin
// @Component makes Dagger create a graph of dependencies
@Component
interface ApplicationGraph {
    // The return type  of functions inside the component interface is
    // what can be provided from the container
    fun repository(): UserRepository
}
Java
// @Component makes Dagger create a graph of dependencies
@Component
public interface ApplicationGraph {
    // The return type  of functions inside the component interface is
    // what can be consumed from the graph
    UserRepository userRepository();
}
建構專案時,Dagger 會替您產生 ApplicationGraph 介面的實作內容:DaggerApplicationGraph。Dagger 使用其註解處理工具建立依附元件圖表,當中包含三個類別 (UserRepository、UserLocalDatasource 和 UserRemoteDataSource) 之間的關係,而且只有一個進入點:取得 UserRepository 例項。您可以按照以下方式使用這個圖表:
Kotlin
// Create an instance of the application graph
val applicationGraph: ApplicationGraph = DaggerApplicationGraph.create()
// Grab an instance of UserRepository from the application graph
val userRepository: UserRepository = applicationGraph.repository()
Java
// Create an instance of the application graph
ApplicationGraph applicationGraph = DaggerApplicationGraph.create();

// Grab an instance of UserRepository from the application graph
UserRepository userRepository = applicationGraph.userRepository();
Dagger 會在每次收到這項要求時建立新的 UserRepository 例項。
Kotlin
val applicationGraph: ApplicationGraph = DaggerApplicationGraph.create()

val userRepository: UserRepository = applicationGraph.repository()
val userRepository2: UserRepository = applicationGraph.repository()

assert(userRepository != userRepository2)
Java
ApplicationGraph applicationGraph = DaggerApplicationGraph.create();

UserRepository userRepository = applicationGraph.userRepository();
UserRepository userRepository2 = applicationGraph.userRepository();

assert(userRepository != userRepository2)
有時候,您會需要在容器中建立特定依附元件的專屬例項,可能的原因包括:
您希望依附元件為此類型的其他類型共用同一個例項,例如登入流程中的多個
ViewModel物件使用同一個LoginUserData。建立物件需要耗用許多資源,您不想在每次將物件宣告為依附元件時建立新的例項 (例如 JSON 剖析器)。
在範例中,您可能會希望在圖表中有一個可用的 UserRepository 專屬例項,這樣一來,每次要求 UserRepository 時,您都可取得同一個例項。這在範例中非常實用,因為實際應用程式的應用程式圖表更為複雜,其中可能會有多個 ViewModel 物件依附 UserRepository,而您不想在每次需要提供 UserRepository 時建立 UserLocalDataSource 和 UserRemoteDataSource 的新例項。
如果手動插入依附元件,只要將同一個 UserRepository 例項傳遞至 ViewModel 類別的建構函式,即可達到這個效果,但在 Dagger 中,由於您未手動編寫該程式碼,就必須指示 Dagger 使用相同的例項,方法是使用「範圍註解」。
使用 Dagger 限定範圍
您可以使用範圍註解,將物件的生命週期限制為其元件的生命週期。這表示每次需要提供該類型時,都會使用特定依附元件的同一個例項。
如要在 ApplicationGraph 中要求存放區時,使用 UserRepository 的專屬例項,請為 @Component 介面和 UserRepository 使用相同的範圍註解。您可以使用 Dagger 所用 javax.inject 套件隨附的 @Singleton 註解:
Kotlin
// Scope annotations on a @Component interface informs Dagger that classes annotated
// with this annotation (i.e. @Singleton) are bound to the life of the graph and so
// the same instance of that type is provided every time the type is requested.
@Singleton
@Component
interface ApplicationGraph {
    fun repository(): UserRepository
}

// Scope this class to a component using @Singleton scope (i.e. ApplicationGraph)
@Singleton
class UserRepository @Inject constructor(
    private val localDataSource: UserLocalDataSource,
    private val remoteDataSource: UserRemoteDataSource
) { ... }
Java
// Scope annotations on a @Component interface informs Dagger that classes annotated
// with this annotation (i.e. @Singleton) are scoped to the graph and the same
// instance of that type is provided every time the type is requested.
@Singleton
@Component
public interface ApplicationGraph {
    UserRepository userRepository();
}

// Scope this class to a component using @Singleton scope (i.e. ApplicationGraph)
@Singleton
public class UserRepository {

    private final UserLocalDataSource userLocalDataSource;
    private final UserRemoteDataSource userRemoteDataSource;

    @Inject
    public UserRepository(UserLocalDataSource userLocalDataSource, UserRemoteDataSource userRemoteDataSource) {
        this.userLocalDataSource = userLocalDataSource;
        this.userRemoteDataSource = userRemoteDataSource;
    }
}
您也可以建立及使用自訂範圍註解。請按照以下方式建立範圍註解:
Kotlin
// Creates MyCustomScope
@Scope
@MustBeDocumented
@Retention(value = AnnotationRetention.RUNTIME)
annotation class MyCustomScope
Java
// Creates MyCustomScope
@Scope
@Retention(RetentionPolicy.RUNTIME)
public @interface MyCustomScope {}
接著,就可按照之前的方式使用範圍註解:
Kotlin
@MyCustomScope
@Component
interface ApplicationGraph {
    fun repository(): UserRepository
}

@MyCustomScope
class UserRepository @Inject constructor(
    private val localDataSource: UserLocalDataSource,
    private val service: UserService
) { ... }
Java
@MyCustomScope
@Component
public interface ApplicationGraph {
    UserRepository userRepository();
}

@MyCustomScope
public class UserRepository {

    private final UserLocalDataSource userLocalDataSource;
    private final UserRemoteDataSource userRemoteDataSource;

    @Inject
    public UserRepository(UserLocalDataSource userLocalDataSource, UserRemoteDataSource userRemoteDataSource) {
        this.userLocalDataSource = userLocalDataSource;
        this.userRemoteDataSource = userRemoteDataSource;
    }
}
在這兩種情況下,都會為物件提供相同範圍,用來為 @Component 介面加上註解。這樣一來,每次呼叫 applicationGraph.repository() 時,都會取得相同的 UserRepository 例項。
Kotlin
val applicationGraph: ApplicationGraph = DaggerApplicationGraph.create()

val userRepository: UserRepository = applicationGraph.repository()
val userRepository2: UserRepository = applicationGraph.repository()

assert(userRepository == userRepository2)
Java
ApplicationGraph applicationGraph = DaggerApplicationGraph.create();

UserRepository userRepository = applicationGraph.userRepository();
UserRepository userRepository2 = applicationGraph.userRepository();

assert(userRepository == userRepository2)
結語
先瞭解 Dagger 的優點及其運作方式的基本概念,才能在更複雜的情境中使用,這點至關重要。
在下一頁中,我們將說明如何將 Dagger 加入 Android 應用程式。