
很多人以為使用基本的版面配置結構
效率最高的版面配置不過,您在應用程式中加入的每個小工具和版面配置
需要初始化、版面配置和繪圖。例如使用巢狀結構
執行個體
LinearLayout
可能導致過度深層的檢視區塊階層。此外,將多個
使用 layout_weight 的 LinearLayout 執行個體
參數的成本可能特別高,因為每個子項都需要進行兩次評估。
當版面配置重複加載時,這一點就特別重要,例如
用在
RecyclerView。
本文件說明如何使用 版面配置檢查器和 Lint 來檢查並最佳化版面配置。
檢查版面配置
Android SDK 工具包含 版面配置檢查器工具 在應用程式執行期間分析版面配置使用這項工具可協助您 找出版面配置效能的效率低落
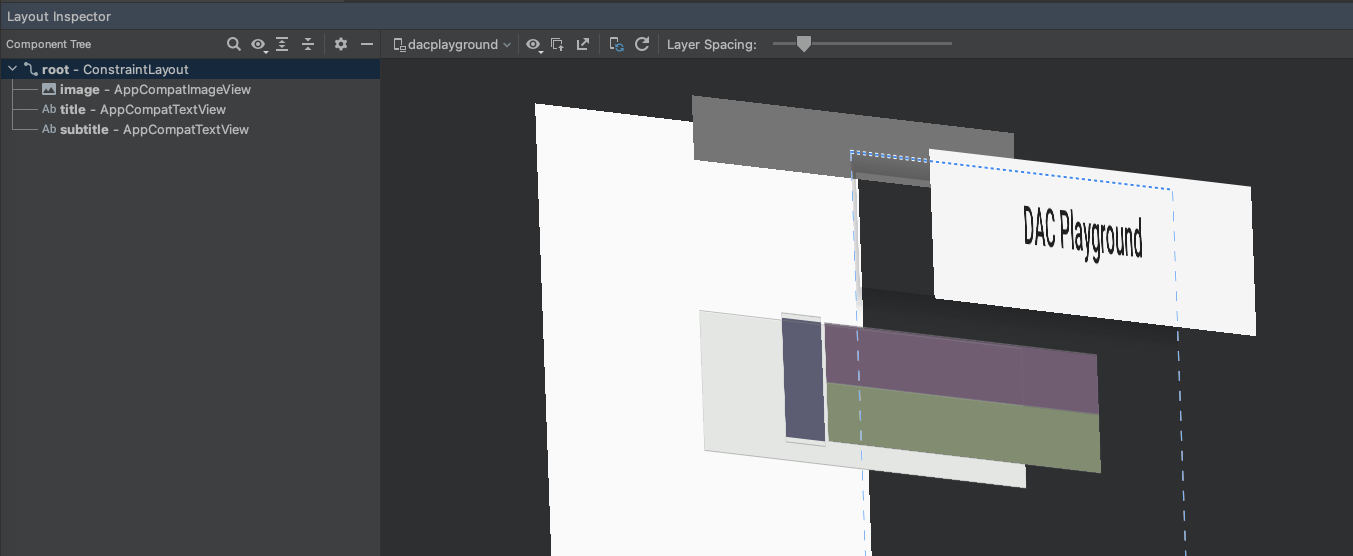
版面配置檢查器可讓您在已連結的裝置上選取執行中的處理程序 模擬器,然後顯示版面配置樹狀結構。每個街區的紅綠燈 呈現 Measure、Layout 和 Draw 效能,幫助您找出 潛在問題。
舉例來說,圖 1 顯示了在
RecyclerView。這個版面配置左側會顯示小型點陣圖圖片
右邊是兩個堆疊的文字項目請特別注意
這類經過多次加載的版面配置
皆經過最佳化調整
可以更快提升效能

RecyclerView。
版面配置檢查器會顯示可用裝置及其執行中的清單 元件。從「Windows」分頁中選擇元件,然後按一下 版面配置檢查器,可供檢視所選元件的版面配置階層。 例如,圖 2 顯示以圖表示的清單項目版面配置 1.
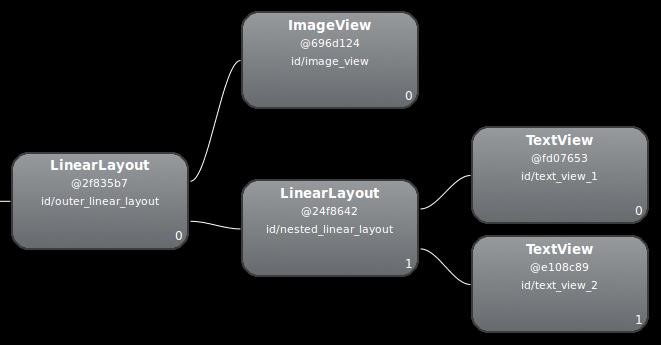
LinearLayout 的巢狀例項。
修改版面配置
由於巢狀結構,上述版面配置的效能減慢
LinearLayout,只要分割
也就是將版面配置調整為淺層和寬
以縮小和深層為主A 罩杯
ConstraintLayout
做為根節點允許的版面配置如果將這個設計轉換成
ConstraintLayout,版面配置會成為雙層階層:
    <androidx.constraintlayout.widget.ConstraintLayout
      xmlns:android="http://schemas.android.com/apk/res/android"
      xmlns:app="http://schemas.android.com/apk/res-auto"
      xmlns:tools="http://schemas.android.com/tools"
      android:id="@+id/root"
      android:layout_width="match_parent"
      android:layout_height="52dp"
      android:background="#e4e6e4"
      android:padding="4dp">

      <ImageView
          android:id="@+id/image"
          android:layout_width="48dp"
          android:layout_height="48dp"
          android:background="#5c5c74"
          android:contentDescription="An example box"
          app:layout_constraintBottom_toBottomOf="parent"
          app:layout_constraintStart_toStartOf="parent"
          app:layout_constraintTop_toTopOf="parent" />

      <TextView
          android:id="@+id/title"
          android:layout_width="0dp"
          android:layout_height="0dp"
          android:layout_marginStart="4dp"
          android:background="#745c74"
          app:layout_constraintBottom_toTopOf="@+id/subtitle"
          app:layout_constraintEnd_toEndOf="parent"
          app:layout_constraintStart_toEndOf="@id/image"
          app:layout_constraintTop_toTopOf="parent" />

      <TextView
          android:id="@+id/subtitle"
          android:layout_width="0dp"
          android:layout_height="0dp"
          android:background="#7e8d6e"
          app:layout_constraintBottom_toBottomOf="parent"
          app:layout_constraintEnd_toEndOf="parent"
          app:layout_constraintStart_toStartOf="@id/title"
          app:layout_constraintTop_toBottomOf="@+id/title" />
  </androidx.constraintlayout.widget.ConstraintLayout>
新版面配置的檢查如下所示:
這個版面配置用於 清單中的項目
最大的差別在於使用 layout_weight
LinearLayout 的設計,可能導致評估速度變慢。這是一個
範例。審慎考量
就必須使用版面配置權重
在一些複雜的版面配置中,系統可能不利於測量相同 UI 這種現象稱為「重複作業」。適用對象 如要進一步瞭解重複稅金及預防方式,請參閱 效能 和檢視區塊階層
使用 lint
建議您執行 Lint 工具 ,搜尋可能的檢視區塊階層最佳化。林特 會取代版面配置最佳化工具,且功能更強大。以下是 Lint 範例 規則:
-
使用複合可繪項目。您可以處理
LinearLayout包含ImageView和TextView更有效率 -
合併根頁框。如果版面配置的根層級為
FrameLayout並不提供背景或邊框間距,您可以將其替換為 合併標記,效率會稍微高一點 - 移除無用的葉子。您可以移除不含任何子項的版面配置,或是 沒有背景—因為沒有背景,讓畫面更平穩 更有效率的版面配置階層
-
移除沒有用的上層項目。您可以移除含有沒有子項的版面配置
兄弟姊妹
ScrollView也沒有背景您也可以 子項檢視畫面直接進入父項檢視畫面,可提高/處理效率 版面配置階層 -
避免使用深度版面配置。如果版面配置的巢狀結構過多,
才需進行建議使用寬鬆版面配置,例如
ConstraintLayout, 。Lint 檢查的預設深度上限為 10。
Lint 工具的另一個優點是將其整合至 Android Studio。林特 自動執行。透過 Android Studio 也可以針對特定建構變數或所有版本執行 Lint 檢查 子類
你也可以在以下位置管理檢查設定檔及設定檢查作業: File > 為 Android Studio設定 >專案 「設定」選項。「檢查設定」頁面會顯示 支援的檢查:
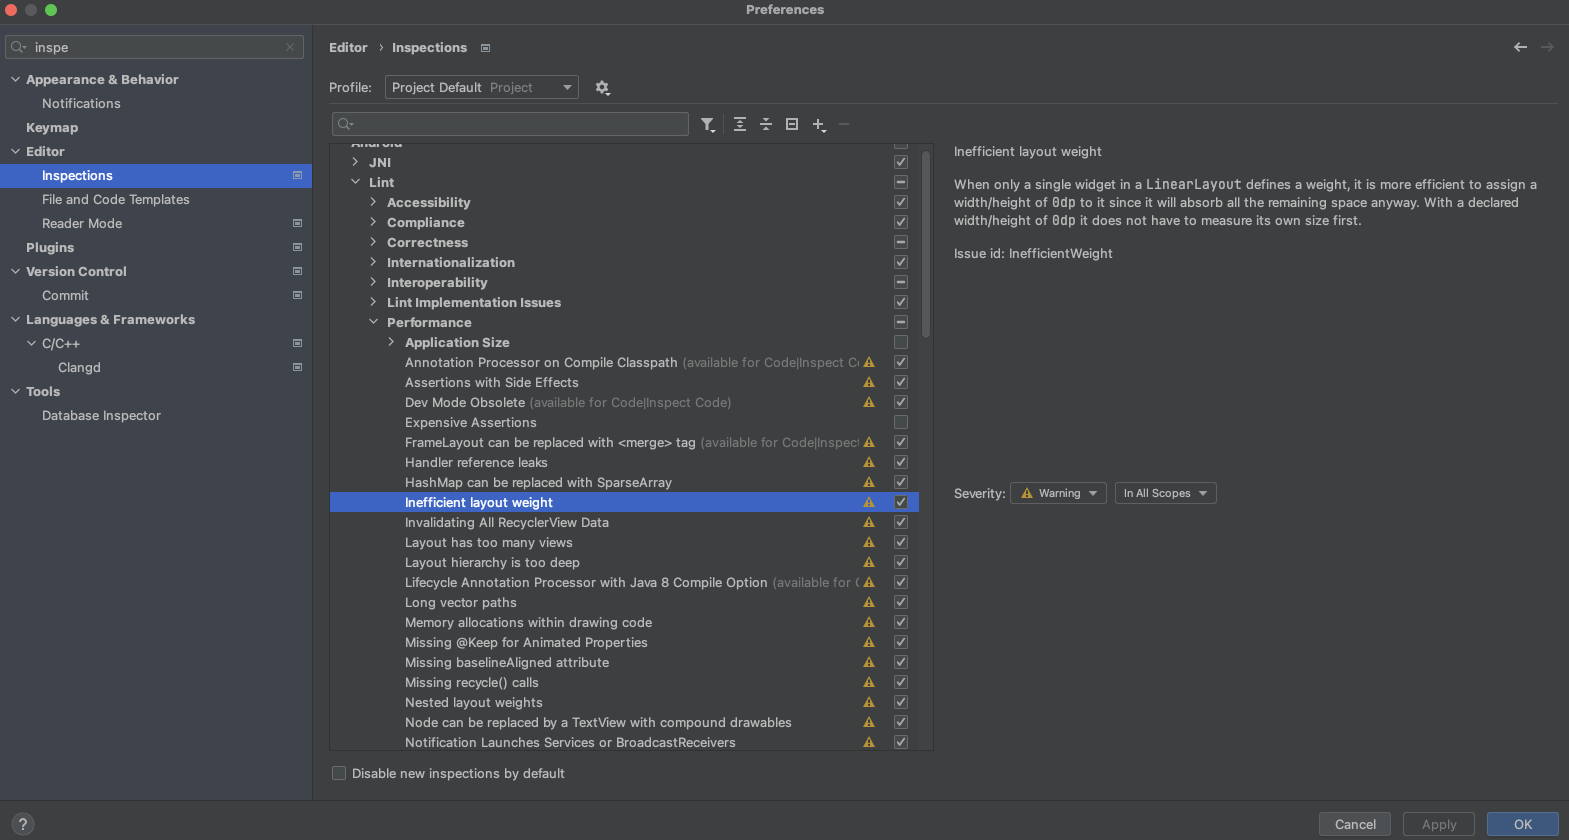
Lint 可以自動修正部分問題、提供建議給其他使用者,以及 直接前往違規行為的程式碼進行審查。