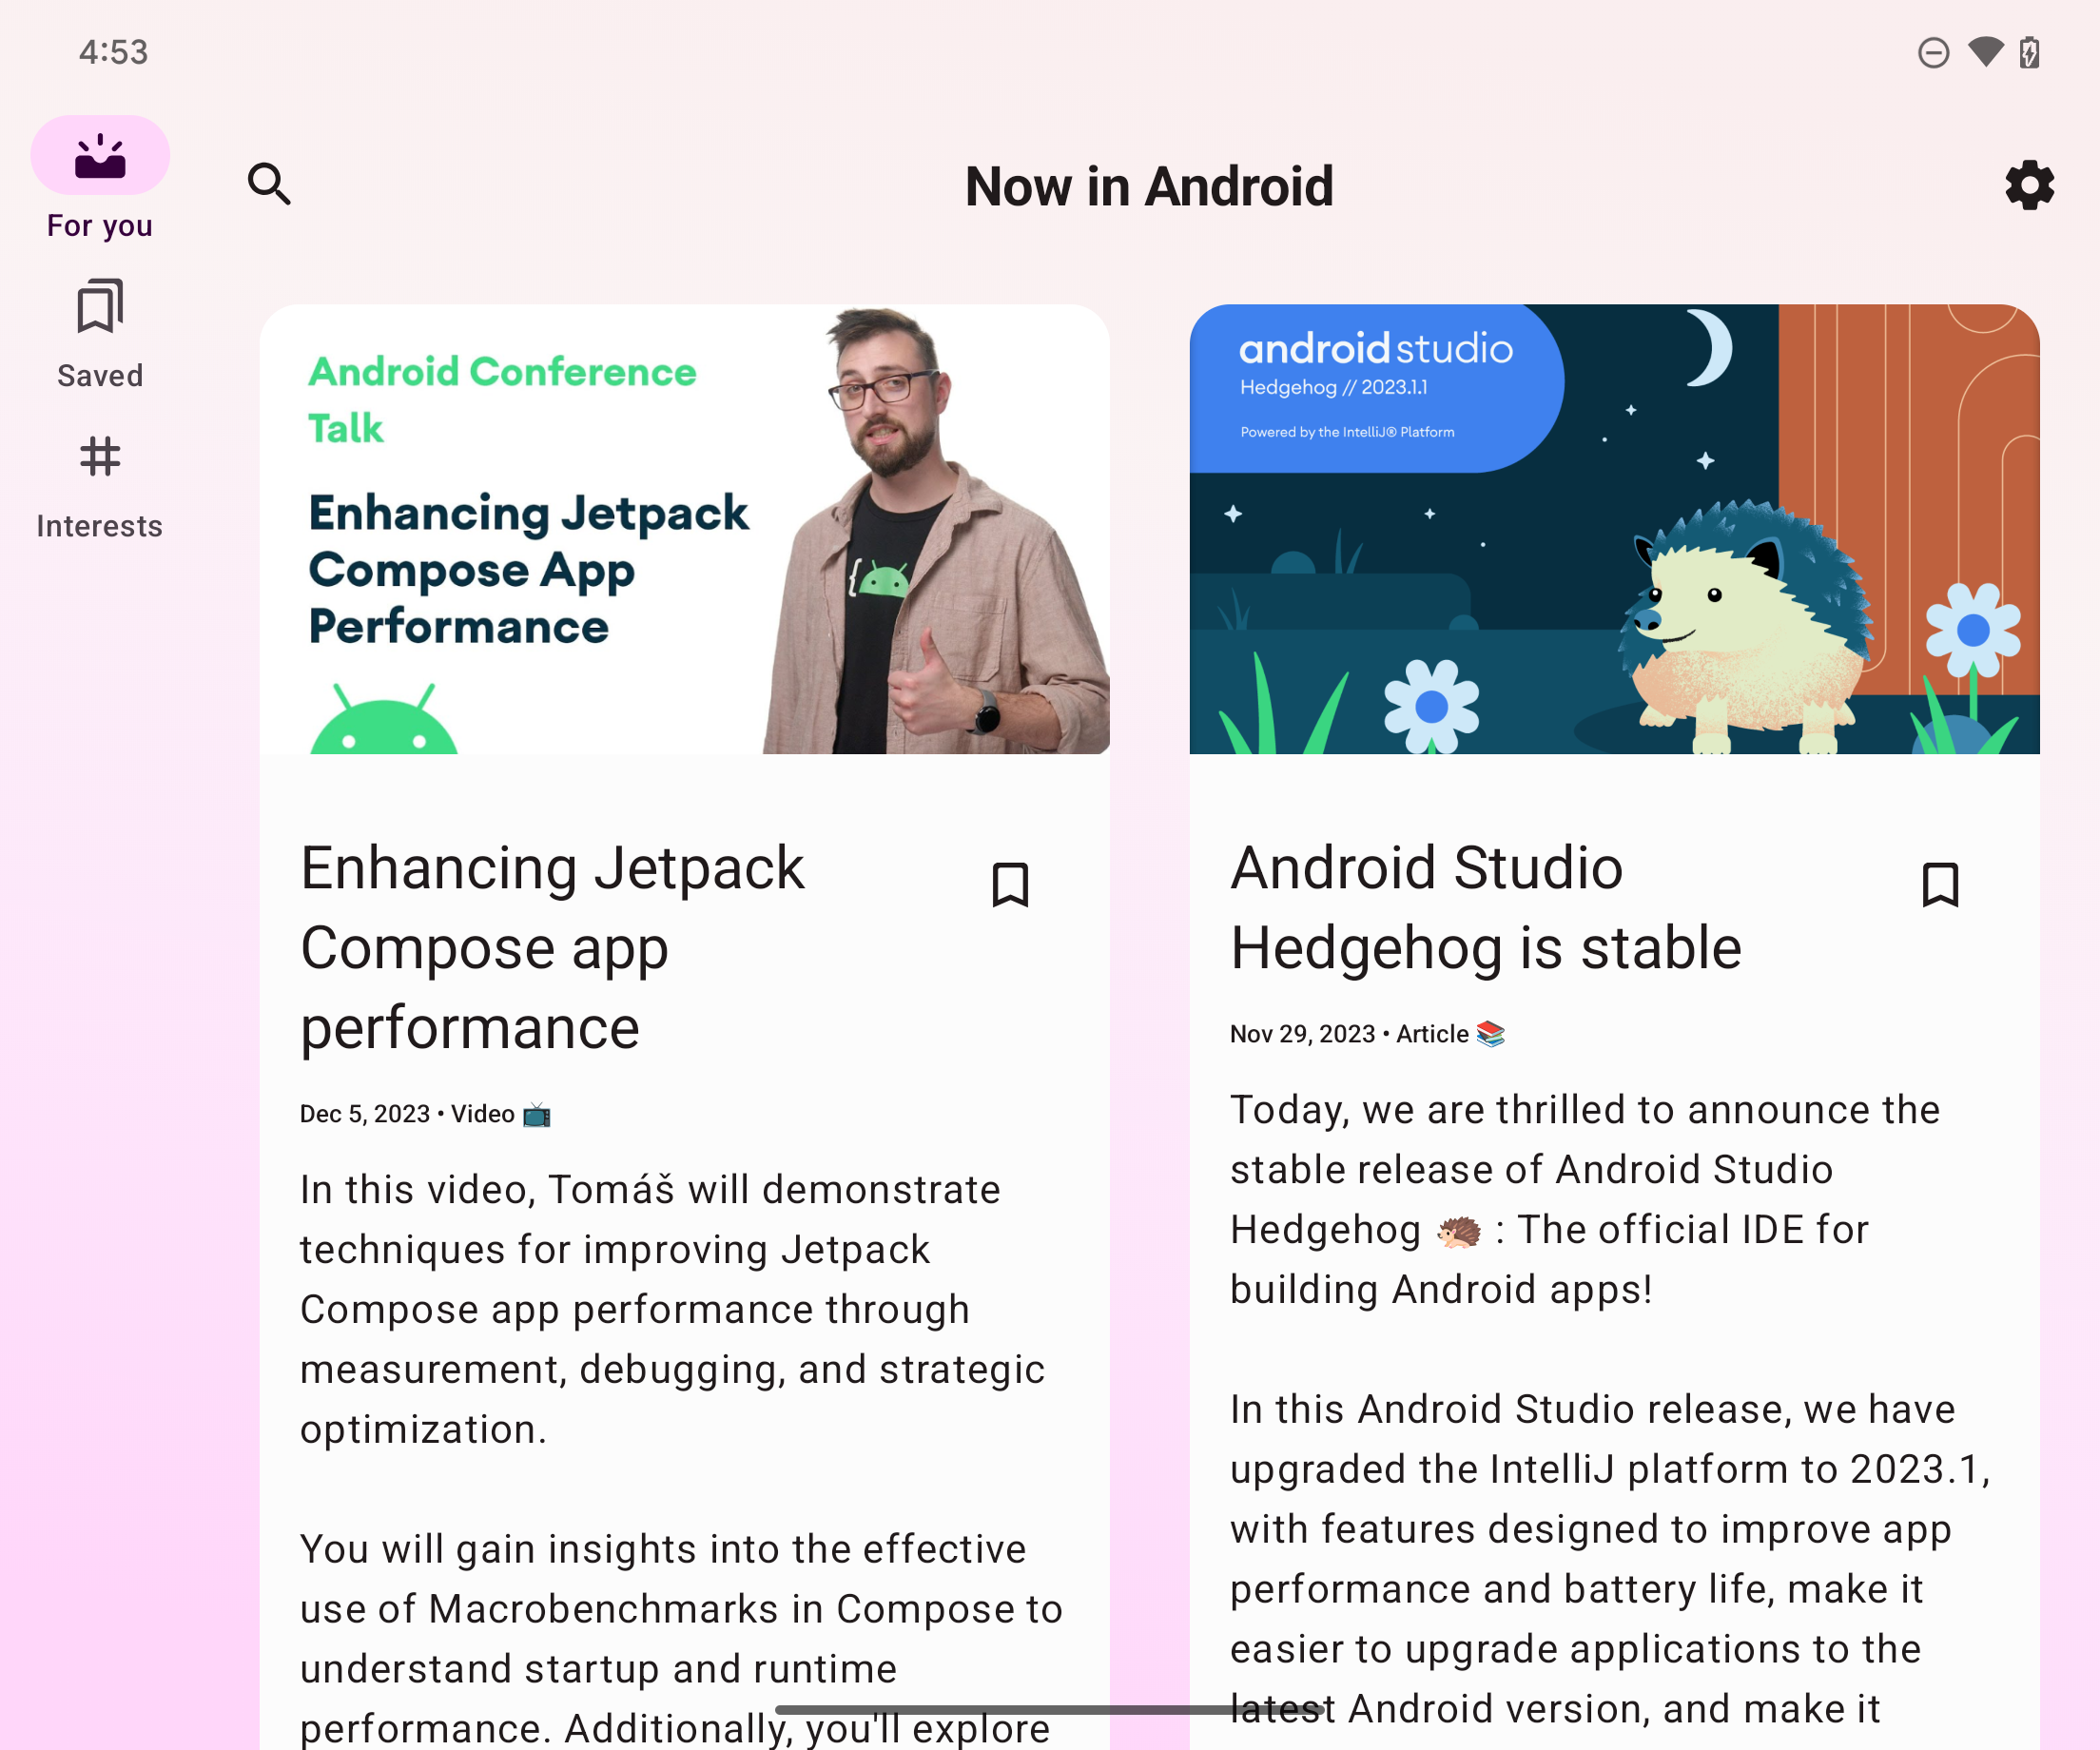
대부분의 앱에는 앱의 기본 탐색 UI를 통해 액세스할 수 있는 몇 가지 최상위 대상이 있습니다. 표준 휴대전화 디스플레이와 같은 소형 창에서는 일반적으로 대상이 창 하단의 탐색 메뉴에 표시됩니다. 태블릿의 전체 화면 앱과 같이 확장된 창에서는 앱 옆에 있는 탐색 레일이 일반적으로 더 나은 선택입니다. 기기의 왼쪽과 오른쪽을 잡고 있는 동안 탐색 컨트롤에 더 쉽게 도달할 수 있기 때문입니다.
NavigationSuiteScaffold은 WindowSizeClass에 따라 적절한 탐색 UI 컴포저블을 표시하여 탐색 UI 간 전환을 간소화합니다. 여기에는 런타임 창 크기 변경 중에 UI를 동적으로 변경하는 것이 포함됩니다. 기본 동작은 다음 UI 구성요소 중 하나를 표시하는 것입니다.
- 너비나 높이가 소형이거나 기기가 테이블탑 자세인 경우 탐색 메뉴
- 기타 모든 항목의 경우 탐색 레일

NavigationSuiteScaffold는 소형 창에 탐색 메뉴를 표시합니다.

NavigationSuiteScaffold는 확장된 창에 탐색 레일을 표시합니다.
종속 항목 추가
NavigationSuiteScaffold는 Material3 적응형 탐색 모음 라이브러리의 일부입니다. 앱 또는 모듈의 build.gradle 파일에 라이브러리의 종속 항목을 추가합니다.
Kotlin
implementation("androidx.compose.material3:material3-adaptive-navigation-suite")
Groovy
implementation 'androidx.compose.material3:material3-adaptive-navigation-suite'
스캐폴드 만들기
NavigationSuiteScaffold의 두 가지 주요 부분은 탐색 모음 항목과 선택한 대상의 콘텐츠입니다. 컴포저블에서 탐색 모음 항목을 직접 정의할 수 있지만, 이러한 항목을 다른 곳(예: enum)에 정의하는 것이 일반적입니다.
enum class AppDestinations( @StringRes val label: Int, val icon: ImageVector, @StringRes val contentDescription: Int ) { HOME(R.string.home, Icons.Default.Home, R.string.home), FAVORITES(R.string.favorites, Icons.Default.Favorite, R.string.favorites), SHOPPING(R.string.shopping, Icons.Default.ShoppingCart, R.string.shopping), PROFILE(R.string.profile, Icons.Default.AccountBox, R.string.profile), }
NavigationSuiteScaffold를 사용하려면 현재 대상을 추적해야 합니다. rememberSaveable를 사용하여 이를 수행할 수 있습니다.
var currentDestination by rememberSaveable { mutableStateOf(AppDestinations.HOME) }
다음 예에서 navigationSuiteItems 매개변수 (NavigationSuiteScope 유형)는 item 함수를 사용하여 개별 대상의 탐색 UI를 정의합니다. 대상 UI는 탐색 메뉴, 레일, 창에서 사용됩니다. 탐색 항목을 만들려면 이전 스니펫에 정의된 AppDestinations를 반복합니다.
NavigationSuiteScaffold( navigationSuiteItems = { AppDestinations.entries.forEach { item( icon = { Icon( it.icon, contentDescription = stringResource(it.contentDescription) ) }, label = { Text(stringResource(it.label)) }, selected = it == currentDestination, onClick = { currentDestination = it } ) } } ) { // TODO: Destination content. }
대상 콘텐츠 람다 내에서 currentDestination 값을 사용하여 표시할 UI를 결정합니다. 앱에서 탐색 라이브러리를 사용하는 경우 여기에서 사용하여 적절한 대상을 표시합니다. when 문으로 충분합니다.
NavigationSuiteScaffold( navigationSuiteItems = { /*...*/ } ) { // Destination content. when (currentDestination) { AppDestinations.HOME -> HomeDestination() AppDestinations.FAVORITES -> FavoritesDestination() AppDestinations.SHOPPING -> ShoppingDestination() AppDestinations.PROFILE -> ProfileDestination() } }
색상 변경
NavigationSuiteScaffold는 스캐폴드가 차지하는 전체 영역(일반적으로 전체 창)에 Surface를 만듭니다. 또한 스캐폴드는 NavigationBar과 같은 특정 탐색 UI를 그립니다.
표면과 탐색 UI는 모두 앱의 테마에 지정된 값을 사용하지만 테마 값을 재정의할 수 있습니다.
containerColor 매개변수는 표면의 색상을 지정합니다. 기본값은 색 구성표의 배경색입니다. contentColor 매개변수는 해당 표면의 콘텐츠 on 색상을 지정합니다. 기본값은 containerColor에 지정된 항목의 '사용' 색상입니다. 예를 들어 containerColor에서 background 색상을 사용하는 경우 contentColor에서는 onBackground 색상을 사용합니다.
색상 시스템의 작동 방식에 관한 자세한 내용은 Compose의 Material Design 3 테마 설정을 참고하세요. 이러한 값을 재정의할 때는 앱이 어두운 모드와 밝은 모드를 지원하도록 테마에 정의된 값을 사용하세요.
NavigationSuiteScaffold( navigationSuiteItems = { /* ... */ }, containerColor = MaterialTheme.colorScheme.primary, contentColor = MaterialTheme.colorScheme.onPrimary, ) { // Content... }
탐색 UI가 NavigationSuiteScaffold 표면 앞에 그려집니다.
UI 색상의 기본값은 NavigationSuiteDefaults.colors()에서 제공하지만 이러한 값을 재정의할 수도 있습니다. 예를 들어 탐색 메뉴의 배경은 투명하게 하고 다른 값은 기본값으로 설정하려면 navigationBarContainerColor를 재정의합니다.
NavigationSuiteScaffold( navigationSuiteItems = { /* ... */ }, navigationSuiteColors = NavigationSuiteDefaults.colors( navigationBarContainerColor = Color.Transparent, ) ) { // Content... }
궁극적으로 탐색 UI의 각 항목을 맞춤설정할 수 있습니다. item 함수를 호출할 때 NavigationSuiteItemColors 인스턴스를 전달할 수 있습니다. 이 클래스는 탐색 메뉴, 탐색 레일, 탐색 드로어의 항목 색상을 지정합니다. 즉, 각 탐색 UI 유형에서 동일한 색상을 사용하거나 필요에 따라 색상을 다르게 지정할 수 있습니다. 모든 항목에 동일한 객체 인스턴스를 사용하고 NavigationSuiteDefaults.itemColors() 함수를 호출하여 변경하려는 항목만 재정의하려면 NavigationSuiteScaffold 수준에서 색상을 정의합니다.
val myNavigationSuiteItemColors = NavigationSuiteDefaults.itemColors( navigationBarItemColors = NavigationBarItemDefaults.colors( indicatorColor = MaterialTheme.colorScheme.primaryContainer, selectedIconColor = MaterialTheme.colorScheme.onPrimaryContainer ), ) NavigationSuiteScaffold( navigationSuiteItems = { AppDestinations.entries.forEach { item( icon = { Icon( it.icon, contentDescription = stringResource(it.contentDescription) ) }, label = { Text(stringResource(it.label)) }, selected = it == currentDestination, onClick = { currentDestination = it }, colors = myNavigationSuiteItemColors, ) } }, ) { // Content... }
탐색 유형 맞춤설정
NavigationSuiteScaffold의 기본 동작은 창 크기 클래스에 따라 탐색 UI를 변경합니다. 하지만 이 동작을 재정의할 수도 있습니다. 예를 들어 앱이 피드에 대해 하나의 큰 콘텐츠 창을 표시하는 경우 앱은 확장된 창에 영구 탐색 메뉴를 사용할 수 있지만 소형 및 중간 창 크기 클래스에는 기본 동작으로 대체될 수 있습니다.
val adaptiveInfo = currentWindowAdaptiveInfo() val customNavSuiteType = with(adaptiveInfo) { if (windowSizeClass.isWidthAtLeastBreakpoint(WIDTH_DP_EXPANDED_LOWER_BOUND)) { NavigationSuiteType.NavigationDrawer } else { NavigationSuiteScaffoldDefaults.calculateFromAdaptiveInfo(adaptiveInfo) } } NavigationSuiteScaffold( navigationSuiteItems = { /* ... */ }, layoutType = customNavSuiteType, ) { // Content... }
추가 리소스
Material Design 안내:
androidx.compose.material3라이브러리 구성요소:
