


Uma caixa de diálogo é uma pequena janela que leva o usuário a tomar uma decisão ou inserir mais informações. Elas não ocupam toda a tela e são normalmente usadas para eventos modais que exijam que usuários realizem uma ação antes de continuar.

A Dialog
classe de base é a classe de base para caixas de diálogo, mas não instancie Dialog
diretamente. Em vez disso, use uma das subclasses a seguir:
AlertDialog- Uma caixa de diálogo pode mostrar um título, até três botões, uma lista de itens selecionáveis ou um layout personalizado.
DatePickerDialogouTimePickerDialog- Uma caixa de diálogo com uma interface predefinida que permite ao usuário selecionar uma data ou hora.
Essas classes definem o estilo e a estrutura da sua caixa de diálogo. Você também precisa de um DialogFragment como um contêiner para sua caixa de diálogo. A classe DialogFragment fornece
todos os controles necessários para criar a caixa de diálogo e gerenciar a aparência dela,
em vez de chamar métodos no objeto Dialog.
O uso de DialogFragment para gerenciar a caixa de diálogo faz com que ela processe corretamente os eventos de ciclo de vida, como quando o usuário toca no botão "Voltar" ou gira a tela. A classe DialogFragment também permite reutilizar a interface da caixa de diálogo como um componente incorporável em uma interface maior, assim como um
tradicional
Fragment—como
quando a interface da caixa de diálogo precisa ser mostrada de modos diferentes em telas grandes e pequenas.
As seções a seguir neste documento descrevem como usar um DialogFragment combinado com um objeto AlertDialog. Se quiser criar um seletor de data ou hora, leia
Adicionar seletores ao seu
app.
Criar um fragmento de caixa de diálogo
É possível criar vários designs de caixas de diálogo, inclusive layouts personalizados e outros descritos em
Caixas de diálogo do Material Design, estendendo DialogFragment e criando uma
AlertDialog no método de callback
onCreateDialog().
Por exemplo, veja a seguir uma AlertDialog básica gerenciada dentro de um DialogFragment:
Kotlin
class StartGameDialogFragment : DialogFragment() {
    override fun onCreateDialog(savedInstanceState: Bundle?): Dialog {
        return activity?.let {
            // Use the Builder class for convenient dialog construction.
            val builder = AlertDialog.Builder(it)
            builder.setMessage("Start game")
                .setPositiveButton("Start") { dialog, id ->
                    // START THE GAME!
                }
                .setNegativeButton("Cancel") { dialog, id ->
                    // User cancelled the dialog.
                }
            // Create the AlertDialog object and return it.
            builder.create()
        } ?: throw IllegalStateException("Activity cannot be null")
    }
}

class OldXmlActivity : AppCompatActivity() {
    override fun onCreate(savedInstanceState: Bundle?) {
        super.onCreate(savedInstanceState)
        setContentView(R.layout.activity_old_xml)

        StartGameDialogFragment().show(supportFragmentManager, "GAME_DIALOG")
    }
}
Java
public class StartGameDialogFragment extends DialogFragment {
    @Override
    public Dialog onCreateDialog(Bundle savedInstanceState) {
        // Use the Builder class for convenient dialog construction.
        AlertDialog.Builder builder = new AlertDialog.Builder(getActivity());
        builder.setMessage(R.string.dialog_start_game)
               .setPositiveButton(R.string.start, new DialogInterface.OnClickListener() {
                   public void onClick(DialogInterface dialog, int id) {
                       // START THE GAME!
                   }
               })
               .setNegativeButton(R.string.cancel, new DialogInterface.OnClickListener() {
                   public void onClick(DialogInterface dialog, int id) {
                       // User cancels the dialog.
                   }
               });
        // Create the AlertDialog object and return it.
        return builder.create();
    }
}
// ...

StartGameDialogFragment().show(supportFragmentManager, "GAME_DIALOG");
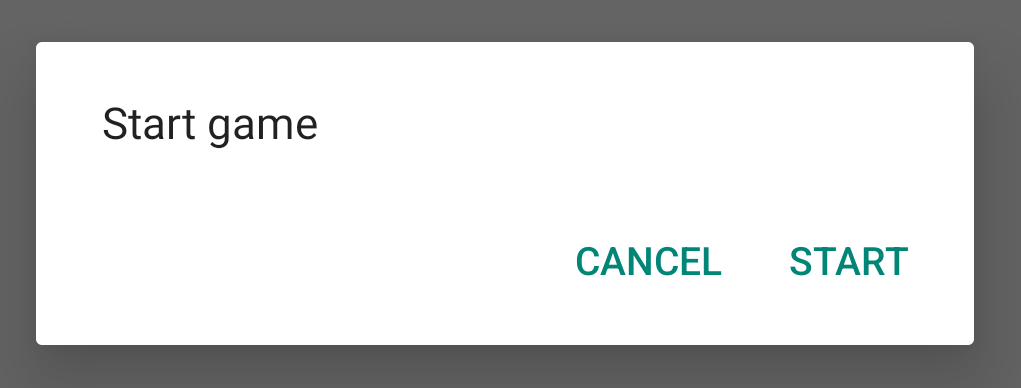
Ao criar uma instância dessa classe e chamar show() nesse objeto, a caixa de diálogo aparece como mostrado na figura a seguir.
A próxima seção fornece mais detalhes sobre o uso das APIs AlertDialog.Builder para a criação de uma caixa de diálogo.
Criar uma caixa de diálogo de alerta
A classe AlertDialog permite que você crie uma variedade de designs de caixas de diálogo, e geralmente é a única classe necessária. Como mostrado na figura a seguir, existem três regiões de uma caixa de diálogo de alerta:
- Título: é opcional e usado somente quando a área do conteúdo está ocupada por uma mensagem detalhada, uma lista ou um layout personalizado. Se for necessário declarar uma mensagem ou pergunta simples, o título não é necessário.
- Área de conteúdo: pode mostrar uma mensagem, uma lista ou outro layout personalizado.
- Botões de ação: pode haver até três botões de ação em uma caixa de diálogo.
A classe AlertDialog.Builder fornece APIs que permitem a criação
de um AlertDialog com esses tipos de conteúdo, inclusive um layout
personalizado.
Para criar um AlertDialog, faça o seguinte:
Kotlin
val builder: AlertDialog.Builder = AlertDialog.Builder(context)
builder
    .setMessage("I am the message")
    .setTitle("I am the title")

val dialog: AlertDialog = builder.create()
dialog.show()
Java
// 1. Instantiate an AlertDialog.Builder with its constructor.
AlertDialog.Builder builder = new AlertDialog.Builder(getActivity());

// 2. Chain together various setter methods to set the dialog characteristics.
builder.setMessage(R.string.dialog_message)
       .setTitle(R.string.dialog_title);

// 3. Get the AlertDialog.
AlertDialog dialog = builder.create();
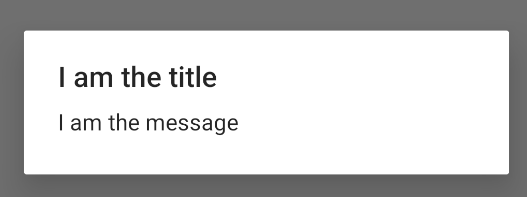
O snippet de código anterior gera esta caixa de diálogo:
Adicionar botões
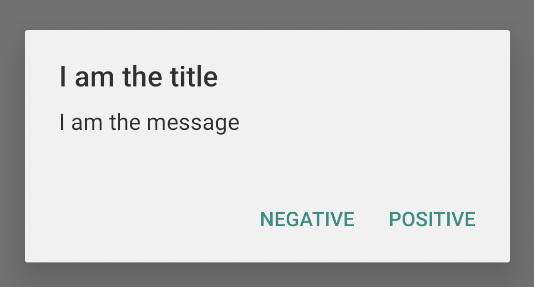
Para adicionar botões de ação como os da figura 2, chame os métodos setPositiveButton() e setNegativeButton():
Kotlin
val builder: AlertDialog.Builder = AlertDialog.Builder(context)
builder
    .setMessage("I am the message")
    .setTitle("I am the title")
    .setPositiveButton("Positive") { dialog, which ->
        // Do something.
    }
    .setNegativeButton("Negative") { dialog, which ->
        // Do something else.
    }

val dialog: AlertDialog = builder.create()
dialog.show()
Java
AlertDialog.Builder builder = new AlertDialog.Builder(getActivity());
// Add the buttons.
builder.setPositiveButton(R.string.ok, new DialogInterface.OnClickListener() {
           public void onClick(DialogInterface dialog, int id) {
               // User taps OK button.
           }
       });
builder.setNegativeButton(R.string.cancel, new DialogInterface.OnClickListener() {
           public void onClick(DialogInterface dialog, int id) {
               // User cancels the dialog.
           }
       });
// Set other dialog properties.
...

// Create the AlertDialog.
AlertDialog dialog = builder.create();
Os set...Button() métodos exigem um título para o
botão (fornecido por um
recurso de string) e
um
DialogInterface.OnClickListener
que defina a ação a ser realizada quando o usuário tocar no botão.
Há três botões de ação que podem ser adicionados:
- Positivo:use essa opção para aceitar e continuar a ação (a ação "OK").
- Negativo:é o que se deve usar para cancelar a ação.
- Neutro: é o que se deve usar quando houver a opção do usuário não querer continuar a ação, mas não necessariamente cancelá-la. Ele aparece entre os botões positivo e negativo. Por exemplo, a ação pode ser "Lembrar mais tarde."
Somente é possível adicionar um dos tipos de cada botão a um AlertDialog. Por exemplo, não é possível ter mais de um botão "positivo".
O snippet de código anterior fornece uma caixa de diálogo de alerta como a seguinte:
Adicionar uma lista
Há três tipos de listas disponíveis nas APIs AlertDialog:
- Uma lista de escolha única tradicional.
- Uma lista de escolha única persistente (botões de opção).
- Uma lista de escolhas múltiplas persistentes (caixas de seleção).
Para criar uma lista de escolha única como a da figura 5, use o método setItems():
Kotlin
val builder: AlertDialog.Builder = AlertDialog.Builder(context)
builder
    .setTitle("I am the title")
    .setPositiveButton("Positive") { dialog, which ->
        // Do something.
    }
    .setNegativeButton("Negative") { dialog, which ->
        // Do something else.
    }
    .setItems(arrayOf("Item One", "Item Two", "Item Three")) { dialog, which ->
        // Do something on item tapped.
    }

val dialog: AlertDialog = builder.create()
dialog.show()
Java
@Override
public Dialog onCreateDialog(Bundle savedInstanceState) {
    AlertDialog.Builder builder = new AlertDialog.Builder(getActivity());
    builder.setTitle(R.string.pick_color)
           .setItems(R.array.colors_array, new DialogInterface.OnClickListener() {
               public void onClick(DialogInterface dialog, int which) {
               // The 'which' argument contains the index position of the selected item.
           }
    });
    return builder.create();
}
Esse snippet de código gera uma caixa de diálogo como a seguinte:
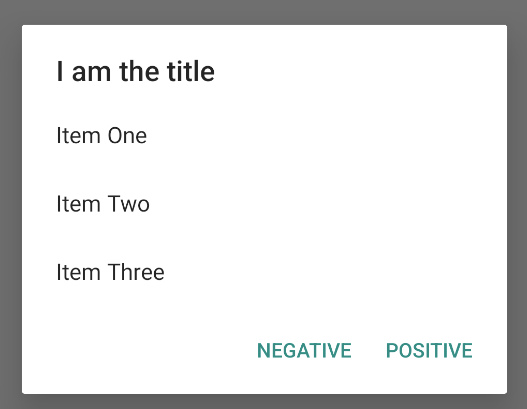
Como a lista aparece na área do conteúdo da caixa de diálogo, a caixa não pode mostrar uma mensagem e uma lista ao mesmo tempo. Defina um título para a caixa de diálogo com setTitle().
Para especificar os itens da lista, chame setItems(), passando uma matriz. Como alternativa, é possível especificar uma lista usando setAdapter().
Isso permite retroceder a lista com dados dinâmicos, como os de um banco de dados, com um ListAdapter.
Se você retroceder a lista com um ListAdapter, use sempre um Loader para que o conteúdo seja carregado de forma assíncrona. Isso é descrito com mais detalhes em
Criar layouts
com um adaptador e
Carregadores.
Adicionar uma lista de escolha única ou de múltipla escolha persistente
Para adicionar uma lista de itens de múltipla escolha (caixas de seleção) ou itens de escolha única (botões de opção), use os métodos setMultiChoiceItems() ou setSingleChoiceItems(), respectivamente.
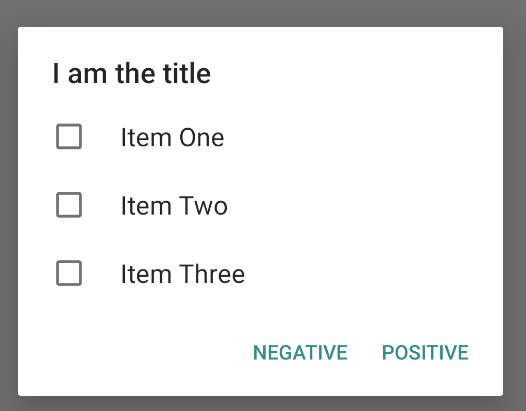
Por exemplo, veja como criar uma lista de múltipla escolha como a ilustrada na figura 6, que salva os itens selecionados em um ArrayList:
Kotlin
val builder: AlertDialog.Builder = AlertDialog.Builder(context)
builder
    .setTitle("I am the title")
    .setPositiveButton("Positive") { dialog, which ->
        // Do something.
    }
    .setNegativeButton("Negative") { dialog, which ->
        // Do something else.
    }
    .setMultiChoiceItems(
        arrayOf("Item One", "Item Two", "Item Three"), null) { dialog, which, isChecked ->
        // Do something.
    }

val dialog: AlertDialog = builder.create()
dialog.show()
Java
@Override
public Dialog onCreateDialog(Bundle savedInstanceState) {
    selectedItems = new ArrayList();  // Where we track the selected items
    AlertDialog.Builder builder = new AlertDialog.Builder(getActivity());
    // Set the dialog title.
    builder.setTitle(R.string.pick_toppings)
    // Specify the list array, the items to be selected by default (null for
    // none), and the listener through which to receive callbacks when items
    // are selected.
           .setMultiChoiceItems(R.array.toppings, null,
                      new DialogInterface.OnMultiChoiceClickListener() {
               @Override
               public void onClick(DialogInterface dialog, int which,
                       boolean isChecked) {
                   if (isChecked) {
                       // If the user checks the item, add it to the selected
                       // items.
                       selectedItems.add(which);
                   } else if (selectedItems.contains(which)) {
                       // If the item is already in the array, remove it.
                       selectedItems.remove(which);
                   }
               }
           })
    // Set the action buttons
           .setPositiveButton(R.string.ok, new DialogInterface.OnClickListener() {
               @Override
               public void onClick(DialogInterface dialog, int id) {
                   // User taps OK, so save the selectedItems results
                   // somewhere or return them to the component that opens the
                   // dialog.
                   ...
               }
           })
           .setNegativeButton(R.string.cancel, new DialogInterface.OnClickListener() {
               @Override
               public void onClick(DialogInterface dialog, int id) {
                   ...
               }
           });

    return builder.create();
}
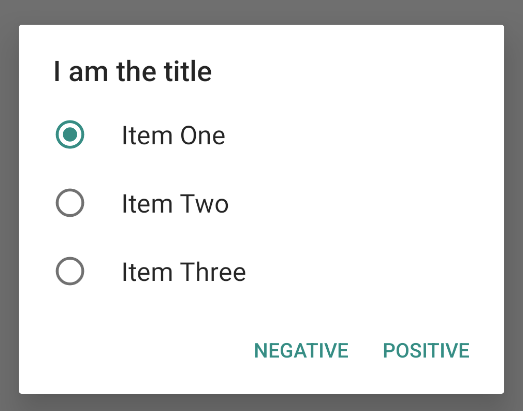
Uma caixa de diálogo de alerta de escolha única pode ser obtida assim:
Kotlin
val builder: AlertDialog.Builder = AlertDialog.Builder(context)
builder
    .setTitle("I am the title")
    .setPositiveButton("Positive") { dialog, which ->
        // Do something.
    }
    .setNegativeButton("Negative") { dialog, which ->
        // Do something else.
    }
    .setSingleChoiceItems(
        arrayOf("Item One", "Item Two", "Item Three"), 0
    ) { dialog, which ->
        // Do something.
    }

val dialog: AlertDialog = builder.create()
dialog.show()
Java
        String[] choices = {"Item One", "Item Two", "Item Three"};

        AlertDialog.Builder builder = AlertDialog.Builder(context);
        builder
                .setTitle("I am the title")
                .setPositiveButton("Positive", (dialog, which) -> {

                })
                .setNegativeButton("Negative", (dialog, which) -> {

                })
                .setSingleChoiceItems(choices, 0, (dialog, which) -> {

                });

        AlertDialog dialog = builder.create();
        dialog.show();
Isso resulta no exemplo a seguir:
Criar um layout personalizado
Se você quiser um layout personalizado em uma caixa de diálogo, crie um layout e adicione-o ao
AlertDialog chamando
setView()
no seu AlertDialog.Builder objeto.
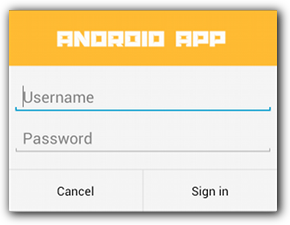
Por padrão, o layout personalizado preenche a janela da caixa de diálogo, mas ainda é possível usar métodos AlertDialog.Builder para adicionar botões e um título.
Por exemplo, veja o arquivo de layout para o layout de caixa de diálogo personalizado anterior:
res/layout/dialog_signin.xml
<LinearLayout xmlns:android="http://schemas.android.com/apk/res/android"
    android:orientation="vertical"
    android:layout_width="wrap_content"
    android:layout_height="wrap_content">
    <ImageView
        android:src="@drawable/header_logo"
        android:layout_width="match_parent"
        android:layout_height="64dp"
        android:scaleType="center"
        android:background="#FFFFBB33"
        android:contentDescription="@string/app_name" />
    <EditText
        android:id="@+id/username"
        android:inputType="textEmailAddress"
        android:layout_width="match_parent"
        android:layout_height="wrap_content"
        android:layout_marginTop="16dp"
        android:layout_marginLeft="4dp"
        android:layout_marginRight="4dp"
        android:layout_marginBottom="4dp"
        android:hint="@string/username" />
    <EditText
        android:id="@+id/password"
        android:inputType="textPassword"
        android:layout_width="match_parent"
        android:layout_height="wrap_content"
        android:layout_marginTop="4dp"
        android:layout_marginLeft="4dp"
        android:layout_marginRight="4dp"
        android:layout_marginBottom="16dp"
        android:fontFamily="sans-serif"
        android:hint="@string/password"/>
</LinearLayout>
Para inflar o layout no DialogFragment, receba um
LayoutInflater
com
getLayoutInflater()
e chame
inflate().
O primeiro parâmetro é o ID do recurso de layout, e o segundo é uma visualização da família para o layout. Você pode chamar setView() para colocar o layout na caixa de diálogo. Esta chamada é mostrada no exemplo abaixo.
Kotlin
override fun onCreateDialog(savedInstanceState: Bundle?): Dialog {
    return activity?.let {
        val builder = AlertDialog.Builder(it)
        // Get the layout inflater.
        val inflater = requireActivity().layoutInflater;

        // Inflate and set the layout for the dialog.
        // Pass null as the parent view because it's going in the dialog
        // layout.
        builder.setView(inflater.inflate(R.layout.dialog_signin, null))
                // Add action buttons.
                .setPositiveButton(R.string.signin,
                        DialogInterface.OnClickListener { dialog, id ->
                            // Sign in the user.
                        })
                .setNegativeButton(R.string.cancel,
                        DialogInterface.OnClickListener { dialog, id ->
                            getDialog().cancel()
                        })
        builder.create()
    } ?: throw IllegalStateException("Activity cannot be null")
}
Java
@Override
public Dialog onCreateDialog(Bundle savedInstanceState) {
    AlertDialog.Builder builder = new AlertDialog.Builder(getActivity());
    // Get the layout inflater.
    LayoutInflater inflater = requireActivity().getLayoutInflater();

    // Inflate and set the layout for the dialog.
    // Pass null as the parent view because it's going in the dialog layout.
    builder.setView(inflater.inflate(R.layout.dialog_signin, null))
    // Add action buttons
           .setPositiveButton(R.string.signin, new DialogInterface.OnClickListener() {
               @Override
               public void onClick(DialogInterface dialog, int id) {
                   // Sign in the user.
               }
           })
           .setNegativeButton(R.string.cancel, new DialogInterface.OnClickListener() {
               public void onClick(DialogInterface dialog, int id) {
                   LoginDialogFragment.this.getDialog().cancel();
               }
           });
    return builder.create();
}
Se você quiser uma caixa de diálogo personalizada, poderá mostrar uma Activity como uma caixa de diálogo em vez de usar as APIs Dialog. Crie uma atividade e
defina o tema como
Theme.Holo.Dialog
no
<activity>
elemento do manifesto:
<activity android:theme="@android:style/Theme.Holo.Dialog" >
Agora a atividade é mostrada em uma janela da caixa de diálogo em vez de tela cheia.
Direcionar eventos de volta ao host da caixa de diálogo
Quando o usuário toca em um dos botões de ação da caixa de diálogo ou seleciona um item da lista, o DialogFragment pode realizar a ação necessária por conta própria, mas normalmente será preciso fornecer o evento à atividade ou ao fragmento que abre a caixa de diálogo. Para fazer isso, defina uma interface com um método para cada tipo de evento de clique. Em seguida, implemente essa interface no componente host que recebe os eventos de ação da caixa de diálogo.
Por exemplo, veja um DialogFragment que define uma interface usada para a entrega de eventos de volta à atividade do host:
Kotlin
class NoticeDialogFragment : DialogFragment() {
    // Use this instance of the interface to deliver action events.
    internal lateinit var listener: NoticeDialogListener

    // The activity that creates an instance of this dialog fragment must
    // implement this interface to receive event callbacks. Each method passes
    // the DialogFragment in case the host needs to query it.
    interface NoticeDialogListener {
        fun onDialogPositiveClick(dialog: DialogFragment)
        fun onDialogNegativeClick(dialog: DialogFragment)
    }

    // Override the Fragment.onAttach() method to instantiate the
    // NoticeDialogListener.
    override fun onAttach(context: Context) {
        super.onAttach(context)
        // Verify that the host activity implements the callback interface.
        try {
            // Instantiate the NoticeDialogListener so you can send events to
            // the host.
            listener = context as NoticeDialogListener
        } catch (e: ClassCastException) {
            // The activity doesn't implement the interface. Throw exception.
            throw ClassCastException((context.toString() +
                    " must implement NoticeDialogListener"))
        }
    }
}
Java
public class NoticeDialogFragment extends DialogFragment {

    // The activity that creates an instance of this dialog fragment must
    // implement this interface to receive event callbacks. Each method passes
    // the DialogFragment in case the host needs to query it.
    public interface NoticeDialogListener {
        public void onDialogPositiveClick(DialogFragment dialog);
        public void onDialogNegativeClick(DialogFragment dialog);
    }

    // Use this instance of the interface to deliver action events.
    NoticeDialogListener listener;

    // Override the Fragment.onAttach() method to instantiate the
    // NoticeDialogListener.
    @Override
    public void onAttach(Context context) {
        super.onAttach(context);
        // Verify that the host activity implements the callback interface.
        try {
            // Instantiate the NoticeDialogListener so you can send events to
            // the host.
            listener = (NoticeDialogListener) context;
        } catch (ClassCastException e) {
            // The activity doesn't implement the interface. Throw exception.
            throw new ClassCastException(activity.toString()
                    + " must implement NoticeDialogListener");
        }
    }
    ...
}
A atividade que hospeda a caixa de diálogo cria uma instância da caixa com o construtor do fragmento da caixa de diálogo e recebe os eventos dela por um implementação da interface NoticeDialogListener:
Kotlin
class MainActivity : FragmentActivity(),
        NoticeDialogFragment.NoticeDialogListener {

    fun showNoticeDialog() {
        // Create an instance of the dialog fragment and show it.
        val dialog = NoticeDialogFragment()
        dialog.show(supportFragmentManager, "NoticeDialogFragment")
    }

    // The dialog fragment receives a reference to this Activity through the
    // Fragment.onAttach() callback, which it uses to call the following
    // methods defined by the NoticeDialogFragment.NoticeDialogListener
    // interface.
    override fun onDialogPositiveClick(dialog: DialogFragment) {
        // User taps the dialog's positive button.
    }

    override fun onDialogNegativeClick(dialog: DialogFragment) {
        // User taps the dialog's negative button.
    }
}
Java
public class MainActivity extends FragmentActivity
                          implements NoticeDialogFragment.NoticeDialogListener{
    ...
    public void showNoticeDialog() {
        // Create an instance of the dialog fragment and show it.
        DialogFragment dialog = new NoticeDialogFragment();
        dialog.show(getSupportFragmentManager(), "NoticeDialogFragment");
    }

    // The dialog fragment receives a reference to this Activity through the
    // Fragment.onAttach() callback, which it uses to call the following
    // methods defined by the NoticeDialogFragment.NoticeDialogListener
    // interface.
    @Override
    public void onDialogPositiveClick(DialogFragment dialog) {
        // User taps the dialog's positive button.
        ...
    }

    @Override
    public void onDialogNegativeClick(DialogFragment dialog) {
        // User taps the dialog's negative button.
        ...
    }
}
Como a atividade do host implementa o NoticeDialogListener, que é aplicado pelo método de callback onAttach() mostrado no exemplo anterior, o fragmento da caixa de diálogo pode usar os métodos de callback da interface para entregar eventos de clique à atividade:
Kotlin
    override fun onCreateDialog(savedInstanceState: Bundle): Dialog {
        return activity?.let {
            // Build the dialog and set up the button click handlers.
            val builder = AlertDialog.Builder(it)

            builder.setMessage(R.string.dialog_start_game)
                    .setPositiveButton(R.string.start,
                            DialogInterface.OnClickListener { dialog, id ->
                                // Send the positive button event back to the
                                // host activity.
                                listener.onDialogPositiveClick(this)
                            })
                    .setNegativeButton(R.string.cancel,
                            DialogInterface.OnClickListener { dialog, id ->
                                // Send the negative button event back to the
                                // host activity.
                                listener.onDialogNegativeClick(this)
                            })

            builder.create()
        } ?: throw IllegalStateException("Activity cannot be null")
    }
Java
public class NoticeDialogFragment extends DialogFragment {
    ...
    @Override
    public Dialog onCreateDialog(Bundle savedInstanceState) {
        // Build the dialog and set up the button click handlers.
        AlertDialog.Builder builder = new AlertDialog.Builder(getActivity());
        builder.setMessage(R.string.dialog_start_game)
               .setPositiveButton(R.string.start, new DialogInterface.OnClickListener() {
                   public void onClick(DialogInterface dialog, int id) {
                       // Send the positive button event back to the host activity.
                       listener.onDialogPositiveClick(NoticeDialogFragment.this);
                   }
               })
               .setNegativeButton(R.string.cancel, new DialogInterface.OnClickListener() {
                   public void onClick(DialogInterface dialog, int id) {
                       // Send the negative button event back to the host activity.
                       listener.onDialogNegativeClick(NoticeDialogFragment.this);
                   }
               });
        return builder.create();
    }
}
Mostrar uma caixa de diálogo
Para mostrar a caixa de diálogo, crie uma instância do DialogFragment e chame show(), transmitindo o FragmentManager e um nome de tag para o fragmento da caixa de diálogo.
Você pode receber o FragmentManager chamando
getSupportFragmentManager()
da
FragmentActivity
ou chamando
getParentFragmentManager()
de um Fragment. Confira o exemplo a seguir:
Kotlin
fun confirmStartGame() {
    val newFragment = StartGameDialogFragment()
    newFragment.show(supportFragmentManager, "game")
}
Java
public void confirmStartGame() {
    DialogFragment newFragment = new StartGameDialogFragment();
    newFragment.show(getSupportFragmentManager(), "game");
}
O segundo argumento, "game", é um nome de tag exclusivo que o sistema usa para salvar e restaurar o estado do fragmento quando necessário. A tag também permite receber um identificador do fragmento chamando findFragmentByTag().
Mostrar uma caixa de diálogo em tela cheia ou como um fragmento incorporado
Talvez você queira que uma parte do design da interface apareça como uma caixa de diálogo em algumas situações e como uma tela cheia ou fragmento incorporado em outras. Você também pode querer que ela apareça de maneira diferente, dependendo do tamanho da tela do dispositivo. A classe
DialogFragment oferece flexibilidade para realizar isso,
porque ela pode se comportar como um Fragment incorporável.
Contudo, não é possível usar AlertDialog.Builder nem outros
Dialog objetos para criar a caixa de diálogo nesse caso. Se quiser que o DialogFragment seja incorporável, defina a interface da caixa de diálogo em um layout e carregue o layout no callback onCreateView().
Veja um exemplo de DialogFragment que pode aparecer tanto como caixa de diálogo quanto como fragmento incorporável, usando um layout chamado purchase_items.xml:
Kotlin
class CustomDialogFragment : DialogFragment() {

    // The system calls this to get the DialogFragment's layout, regardless of
    // whether it's being displayed as a dialog or an embedded fragment.
    override fun onCreateView(
            inflater: LayoutInflater,
            container: ViewGroup?,
            savedInstanceState: Bundle?
    ): View {
        // Inflate the layout to use as a dialog or embedded fragment.
        return inflater.inflate(R.layout.purchase_items, container, false)
    }

    // The system calls this only when creating the layout in a dialog.
    override fun onCreateDialog(savedInstanceState: Bundle): Dialog {
        // The only reason you might override this method when using
        // onCreateView() is to modify the dialog characteristics. For example,
        // the dialog includes a title by default, but your custom layout might
        // not need it. Here, you can remove the dialog title, but you must
        // call the superclass to get the Dialog.
        val dialog = super.onCreateDialog(savedInstanceState)
        dialog.requestWindowFeature(Window.FEATURE_NO_TITLE)
        return dialog
    }
}
Java
public class CustomDialogFragment extends DialogFragment {
    // The system calls this to get the DialogFragment's layout, regardless of
    // whether it's being displayed as a dialog or an embedded fragment.
    @Override
    public View onCreateView(LayoutInflater inflater, ViewGroup container,
            Bundle savedInstanceState) {
        // Inflate the layout to use as a dialog or embedded fragment.
        return inflater.inflate(R.layout.purchase_items, container, false);
    }

    // The system calls this only when creating the layout in a dialog.
    @Override
    public Dialog onCreateDialog(Bundle savedInstanceState) {
        // The only reason you might override this method when using
        // onCreateView() is to modify the dialog characteristics. For example,
        // the dialog includes a title by default, but your custom layout might
        // not need it. Here, you can remove the dialog title, but you must
        // call the superclass to get the Dialog.
        Dialog dialog = super.onCreateDialog(savedInstanceState);
        dialog.requestWindowFeature(Window.FEATURE_NO_TITLE);
        return dialog;
    }
}
O exemplo a seguir determina se o fragmento será mostrado como uma caixa de diálogo ou uma interface de tela cheia, com base no tamanho da tela:
Kotlin
fun showDialog() {
    val fragmentManager = supportFragmentManager
    val newFragment = CustomDialogFragment()
    if (isLargeLayout) {
        // The device is using a large layout, so show the fragment as a
        // dialog.
        newFragment.show(fragmentManager, "dialog")
    } else {
        // The device is smaller, so show the fragment fullscreen.
        val transaction = fragmentManager.beginTransaction()
        // For a polished look, specify a transition animation.
        transaction.setTransition(FragmentTransaction.TRANSIT_FRAGMENT_OPEN)
        // To make it fullscreen, use the 'content' root view as the container
        // for the fragment, which is always the root view for the activity.
        transaction
                .add(android.R.id.content, newFragment)
                .addToBackStack(null)
                .commit()
    }
}
Java
public void showDialog() {
    FragmentManager fragmentManager = getSupportFragmentManager();
    CustomDialogFragment newFragment = new CustomDialogFragment();

    if (isLargeLayout) {
        // The device is using a large layout, so show the fragment as a
        // dialog.
        newFragment.show(fragmentManager, "dialog");
    } else {
        // The device is smaller, so show the fragment fullscreen.
        FragmentTransaction transaction = fragmentManager.beginTransaction();
        // For a polished look, specify a transition animation.
        transaction.setTransition(FragmentTransaction.TRANSIT_FRAGMENT_OPEN);
        // To make it fullscreen, use the 'content' root view as the container
        // for the fragment, which is always the root view for the activity.
        transaction.add(android.R.id.content, newFragment)
                   .addToBackStack(null).commit();
    }
}
Para mais informações sobre a realização de transações de fragmentos, consulte Fragmentos.
Nesse exemplo, o booleano mIsLargeLayout especifica se o dispositivo atual precisa usar o projeto de layout grande do app e mostrar esse fragmento como uma caixa de diálogo em vez de tela cheia. O melhor modo de definir esse tipo de
booleano é declarar um
valor de recurso bool com um
valor de recurso
alternativo para diferentes tamanhos de tela. Por exemplo, veja duas versões de recurso bool para diferentes tamanhos de tela:
res/values/bools.xml
<!-- Default boolean values -->
<resources>
    <bool name="large_layout">false</bool>
</resources>
res/values-large/bools.xml
<!-- Large screen boolean values -->
<resources>
    <bool name="large_layout">true</bool>
</resources>
Assim, é possível inicializar o valor mIsLargeLayout durante o método onCreate() da atividade, conforme mostrado no exemplo a seguir:
Kotlin
override fun onCreate(savedInstanceState: Bundle?) {
    super.onCreate(savedInstanceState)
    setContentView(R.layout.activity_main)

    isLargeLayout = resources.getBoolean(R.bool.large_layout)
}
Java
boolean isLargeLayout;

@Override
public void onCreate(Bundle savedInstanceState) {
    super.onCreate(savedInstanceState);
    setContentView(R.layout.activity_main);

    isLargeLayout = getResources().getBoolean(R.bool.large_layout);
}
Mostrar uma atividade como uma caixa de diálogo em telas grandes
Em vez de mostrar uma caixa de diálogo como uma interface de tela cheia em telas pequenas, é possível ter o mesmo resultado mostrando uma Activity como uma caixa de diálogo em telas grandes. A abordagem escolhida depende do projeto do app, mas a exibição de uma atividade como caixa de diálogo normalmente é útil quando o app já está projetado para telas pequenas e é preciso melhorar a experiência em tablets mostrando uma atividade de vida curta como uma caixa de diálogo.
Para mostrar uma atividade como uma caixa de diálogo somente em telas grandes, aplique o
Theme.Holo.DialogWhenLarge
tema no <activity> elemento do manifesto:
<activity android:theme="@android:style/Theme.Holo.DialogWhenLarge" >
Para mais informações sobre como estilizar as atividades com temas, consulte Estilos e temas.
Dispensar uma caixa de diálogo
Quando o usuário toca em um botão de ação criado com um AlertDialog.Builder, o sistema dispensa a caixa de diálogo.
O sistema também dispensa a caixa de diálogo quando o usuário toca em um item em uma lista da caixa de diálogo, exceto quando a lista usa botões de opção ou caixas de seleção. Caso contrário, será possível dispensá-la manualmente chamando dismiss() no DialogFragment.
Caso seja necessário realizar determinadas ações quando a caixa de diálogo é dispensada, será possível implementar o método onDismiss() no DialogFragment.
Também é possível cancelar uma caixa de diálogo. Esse é um evento especial que indica que o usuário está saindo da caixa de diálogo sem concluir a tarefa. Isso ocorre se o usuário tocar no botão "Voltar" ou tocar na tela fora da área da caixa de diálogo ou se você chamar explicitamente cancel() no Dialog, como em resposta a um botão "Cancelar" na caixa de diálogo.
Como mostrado no exemplo anterior, é possível responder ao evento de cancelamento implementando onCancel() na classe DialogFragment.