
يعد جعل الأجسام تتحرك وفقًا لبرنامج محدد مسبقًا مثل المثلث الدوّار أمرًا مفيدًا
التي ستلفت انتباهك، ولكن ماذا لو أردت أن يتفاعل المستخدمون مع رسومات OpenGL ES؟
العامل الأساسي لجعل لمس تطبيق OpenGL ES تفاعليًا هو توسيع نطاق تنفيذ
GLSurfaceView لإلغاء
onTouchEvent() للاستماع إلى أحداث اللمس.
يوضّح لك هذا الدرس كيفية الاستماع إلى أحداث اللمس للسماح للمستخدمين بتدوير عنصر OpenGL ES.
إعداد أداة معالجة لمس الجهاز
لكي يستجيب تطبيق OpenGL ES لأحداث اللمس، يجب تنفيذ
طريقة واحدة (onTouchEvent()) في
صف واحد (GLSurfaceView). يوضّح مثال التنفيذ أدناه كيفية الاستماع إلى
MotionEvent.ACTION_MOVE حدث وترجمته إلى
زاوية دوران لشكل ما.
Kotlin
private const val TOUCH_SCALE_FACTOR: Float = 180.0f / 320f
...
private var previousX: Float = 0f
private var previousY: Float = 0f

override fun onTouchEvent(e: MotionEvent): Boolean {
    // MotionEvent reports input details from the touch screen
    // and other input controls. In this case, you are only
    // interested in events where the touch position changed.

    val x: Float = e.x
    val y: Float = e.y

    when (e.action) {
        MotionEvent.ACTION_MOVE -> {

            var dx: Float = x - previousX
            var dy: Float = y - previousY

            // reverse direction of rotation above the mid-line
            if (y > height / 2) {
                dx *= -1
            }

            // reverse direction of rotation to left of the mid-line
            if (x < width / 2) {
                dy *= -1
            }

            renderer.angle += (dx + dy) * TOUCH_SCALE_FACTOR
            requestRender()
        }
    }

    previousX = x
    previousY = y
    return true
}
Java
private final float TOUCH_SCALE_FACTOR = 180.0f / 320;
private float previousX;
private float previousY;

@Override
public boolean onTouchEvent(MotionEvent e) {
    // MotionEvent reports input details from the touch screen
    // and other input controls. In this case, you are only
    // interested in events where the touch position changed.

    float x = e.getX();
    float y = e.getY();

    switch (e.getAction()) {
        case MotionEvent.ACTION_MOVE:

            float dx = x - previousX;
            float dy = y - previousY;

            // reverse direction of rotation above the mid-line
            if (y > getHeight() / 2) {
              dx = dx * -1 ;
            }

            // reverse direction of rotation to left of the mid-line
            if (x < getWidth() / 2) {
              dy = dy * -1 ;
            }

            renderer.setAngle(
                    renderer.getAngle() +
                    ((dx + dy) * TOUCH_SCALE_FACTOR));
            requestRender();
    }

    previousX = x;
    previousY = y;
    return true;
}
لاحظ أنه بعد حساب زاوية الدوران، تستدعي هذه الطريقة
requestRender() لإبلاغ
للعارض أن الوقت قد حان لعرض الإطار. هذا النهج هو الأكثر فعالية في هذا المثال
لأنه لا يلزم إعادة رسم الإطار ما لم يكن هناك تغيير في التدوير. ومع ذلك،
ليس لها أي تأثير على الكفاءة ما لم تطلب أيضًا إعادة الرسم عند
تتغير البيانات باستخدام setRenderMode()
لذا تأكَّد من أنّ هذا السطر لم يتم التعليق عليه في العارض:
Kotlin
class MyGlSurfaceView(context: Context) : GLSurfaceView(context) {

    init {
        // Render the view only when there is a change in the drawing data
        renderMode = GLSurfaceView.RENDERMODE_WHEN_DIRTY
    }
}
Java
public MyGLSurfaceView(Context context) {
    ...
    // Render the view only when there is a change in the drawing data
    setRenderMode(GLSurfaceView.RENDERMODE_WHEN_DIRTY);
}
إظهار زاوية الدوران
يتطلب الرمز النموذجي أعلاه أن تعرض زاوية التدوير من خلال العارض من خلال
إضافة عضو عام. لأنّ رمز العارض يعمل على سلسلة محادثات منفصلة عن المستخدم الرئيسي
سلسلة واجهة المستخدم في تطبيقك، يجب تعريف هذا المتغير العام على أنه volatile.
فيما يلي التعليمة البرمجية لتعريف المتغير وكشف زوج الحصول على القيمة ودالة setter:
Kotlin
class MyGLRenderer4 : GLSurfaceView.Renderer {

    @Volatile
    var angle: Float = 0f
}
Java
public class MyGLRenderer implements GLSurfaceView.Renderer {
    ...

    public volatile float mAngle;

    public float getAngle() {
        return mAngle;
    }

    public void setAngle(float angle) {
        mAngle = angle;
    }
}
تطبيق التناوب
لتطبيق التدوير الذي تم إنشاؤه باستخدام الإدخال باللمس، ضع تعليقًا على الرمز الذي ينشئ زاوية أضِف متغيّرًا يحتوي على الزاوية الناتجة عن إدخال اللمس:
Kotlin
override fun onDrawFrame(gl: GL10) {
    ...
    val scratch = FloatArray(16)

    // Create a rotation for the triangle
    // long time = SystemClock.uptimeMillis() % 4000L;
    // float angle = 0.090f * ((int) time);
    Matrix.setRotateM(rotationMatrix, 0, angle, 0f, 0f, -1.0f)

    // Combine the rotation matrix with the projection and camera view
    // Note that the mvpMatrix factor *must be first* in order
    // for the matrix multiplication product to be correct.
    Matrix.multiplyMM(scratch, 0, mvpMatrix, 0, rotationMatrix, 0)

    // Draw triangle
    triangle.draw(scratch)
}
Java
public void onDrawFrame(GL10 gl) {
    ...
    float[] scratch = new float[16];

    // Create a rotation for the triangle
    // long time = SystemClock.uptimeMillis() % 4000L;
    // float angle = 0.090f * ((int) time);
    Matrix.setRotateM(rotationMatrix, 0, mAngle, 0, 0, -1.0f);

    // Combine the rotation matrix with the projection and camera view
    // Note that the vPMatrix factor *must be first* in order
    // for the matrix multiplication product to be correct.
    Matrix.multiplyMM(scratch, 0, vPMatrix, 0, rotationMatrix, 0);

    // Draw triangle
    mTriangle.draw(scratch);
}
عند الانتهاء من الخطوات الموضحة أعلاه، شغِّل البرنامج واسحب إصبعك فوق لتدوير المثلث:
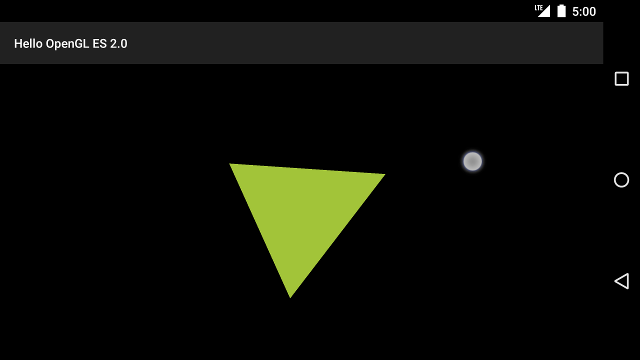
الشكل 1. يتم تدوير المثلث عن طريق الإدخال باللمس (الدائرة تُظهر اللمسات). الموقع).