界面组件可通过特定的互动响应方式,向设备用户提供反馈。每个组件都有自己的互动响应方式,这有助于用户了解互动如何进行。例如,如果用户轻触设备触摸屏上的某个按钮,该按钮可能会以某种方式发生变化,比如添加突出显示颜色。此变化可让用户知道他们触摸了该按钮。如果用户不想这样做,他们就会拖动手指至按钮范围外再松开,否则就会激活按钮。
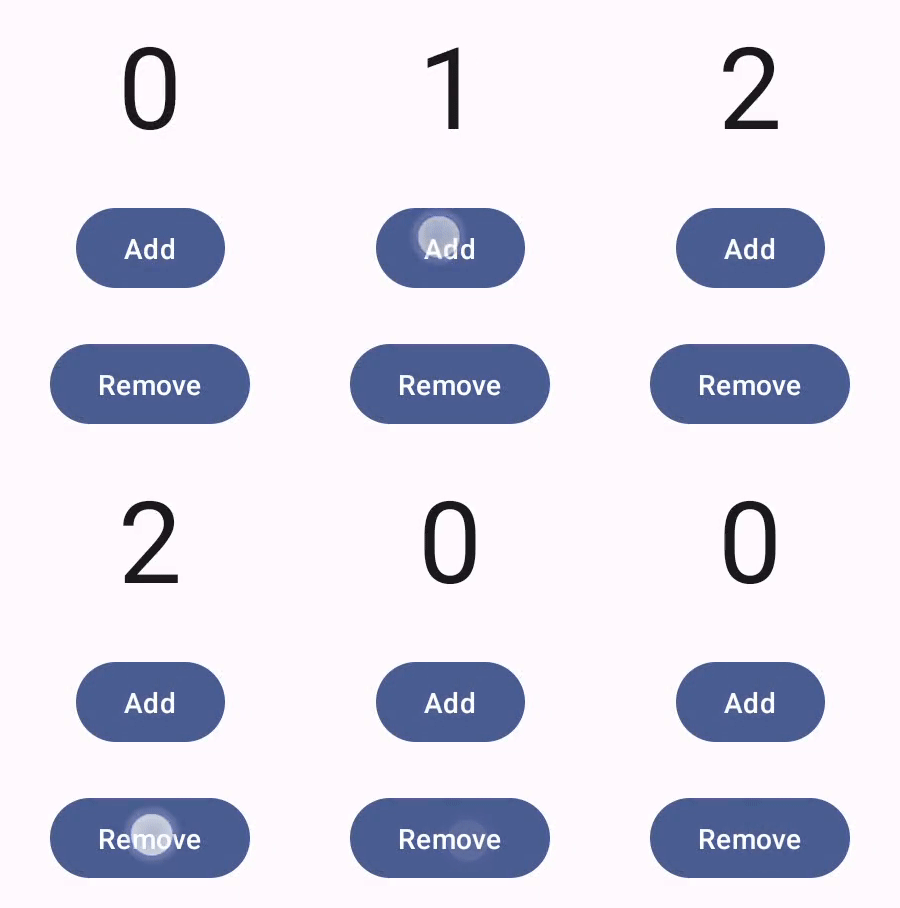
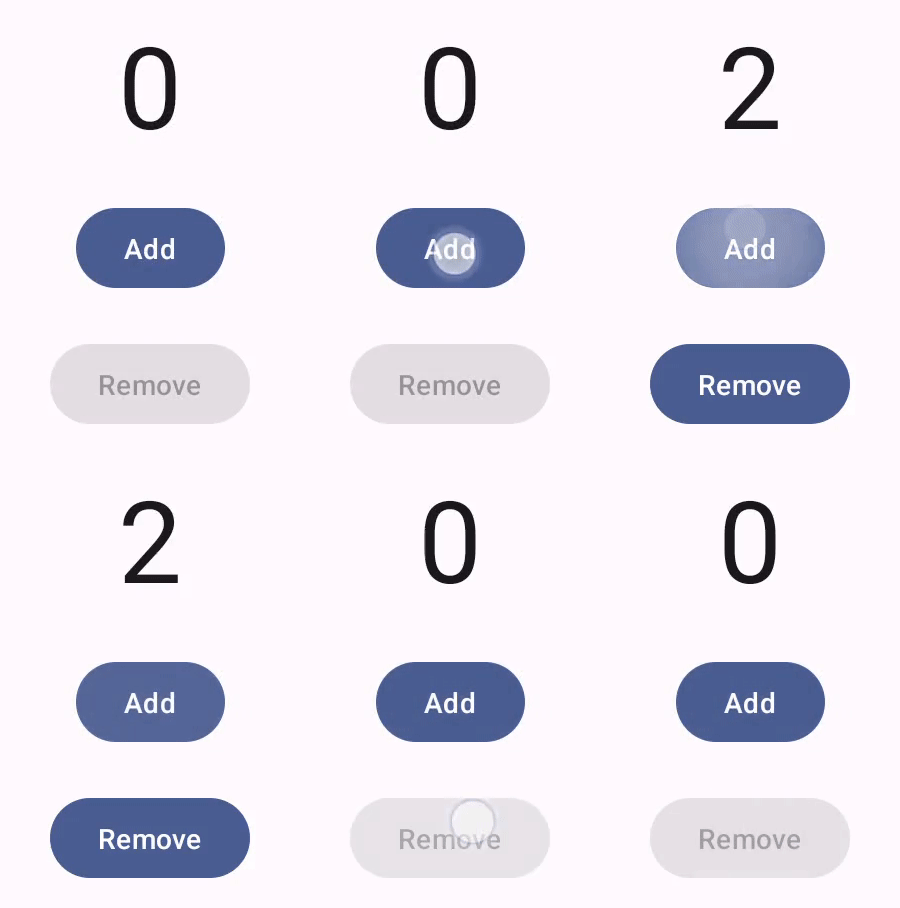
Compose 手势文档介绍了 Compose 组件如何处理低级指针事件(例如指针移动和点击)。Compose 默认会将这些低级别事件抽象化处理为更高级别的互动,例如,一系列指针事件合起来可产生“按下和松开按钮”的效果。了解这类更高级别的抽象化处理,您就可以更好地自定义界面对用户的响应方式。例如,您可能想要自定义组件在与用户互动时外观如何变化,或者想要保留这些用户操作的日志。本文档为您提供了相关信息,以便您了解如何修改标准界面元素或设计自己的界面元素。
互动
在许多情况下,您无需了解 Compose 组件如何解读用户互动。例如,Button 通过 Modifier.clickable 来判断用户是否点击了按钮。如果您要在应用中添加一个普通的按钮,可以定义该按钮的 onClick 代码,而 Modifier.clickable 将会适时运行该代码。这意味着,您不必知道用户是点按了屏幕还是通过键盘选择了该按钮;Modifier.clickable 会知道用户执行了点击操作,并通过运行 onClick 代码来做出响应。
不过,如果您想自定义界面组件对用户行为的响应方式,则可能需要详细了解背后的运作原理。本部分将对此进行说明。
当用户与界面组件互动时,系统会生成多个 Interaction 事件来表示其行为。例如,如果用户轻触某个按钮,该按钮会生成 PressInteraction.Press。如果用户在按钮范围内松开手指,系统就会生成 PressInteraction.Release,让按钮知道点击已完成。相反,如果用户将手指拖动到按钮范围外再松开,按钮就会生成 PressInteraction.Cancel,表示按下按钮的操作已取消,并未完成。
这些互动无预设立场。也就是说,这些低级别互动事件不会解读用户操作的含义或序列,也不会解读用户操作的优先顺序。
这些互动通常成对出现,包含起始互动和结尾互动。第二次互动包含对第一次互动的引用。例如,如果用户轻触某个按钮后松开手指,轻触操作会生成 PressInteraction.Press 互动,松开操作则会生成 PressInteraction.Release。Release 具有 press 属性,用于识别初始 PressInteraction.Press。
您可以观察特定组件的 InteractionSource 来查看其互动。InteractionSource 以 Kotlin Flow 为基础,因此您可以像使用任何其他数据流时一样从该数据流中收集互动。如需详细了解此设计决策,请参阅照亮互动博文。
互动状态
您可以同时自行跟踪互动,以扩展组件的内置功能。例如,您可能希望某个按钮在被按下时改变颜色。最简单的互动跟踪方法就是观察相应的互动状态。InteractionSource 提供了多种方法来获取各种互动状态。例如,如果您想查看是否按下了特定按钮,可以调用其 InteractionSource.collectIsPressedAsState() 方法:
val interactionSource = remember { MutableInteractionSource() } val isPressed by interactionSource.collectIsPressedAsState() Button( onClick = { /* do something */ }, interactionSource = interactionSource ) { Text(if (isPressed) "Pressed!" else "Not pressed") }
除 collectIsPressedAsState() 之外,Compose 还提供了 collectIsFocusedAsState()、collectIsDraggedAsState() 和 collectIsHoveredAsState()。这些方法实际上是基于较低级别 InteractionSource API 的便捷方法。在某些情况下,建议您直接使用这些较低级别的函数。
例如,假设您需要知道用户是否按下并拖动了按钮。如果您同时使用 collectIsPressedAsState() 和 collectIsDraggedAsState(),Compose 会执行大量重复工作,且无法保证互动顺序正确。对于这类情况,您可能需要直接使用 InteractionSource。如需详细了解如何使用 InteractionSource 自行跟踪互动情况,请参阅使用 InteractionSource。
以下部分介绍了如何分别使用 InteractionSource 和 MutableInteractionSource 来使用和发出互动。
使用和发出 Interaction
InteractionSource 表示 Interactions 的只读流,无法向 InteractionSource 发出 Interaction。如需发出 Interaction,您需要使用 MutableInteractionSource,后者扩展自 InteractionSource。
修饰符和组件可以消耗、发出或同时消耗和发出 Interactions。以下部分介绍了如何使用修饰符和组件来使用和发出互动。
消耗修饰符示例
对于在聚焦状态下绘制边框的修饰符,您只需要观察 Interactions,因此可以接受 InteractionSource:
fun Modifier.focusBorder(interactionSource: InteractionSource): Modifier { // ... }
从函数签名中可以清楚地看出,此修饰符是 consumer,它可以消耗 Interaction,但不能发出 Interaction。
生成修饰符示例
对于处理悬停事件(例如 Modifier.hoverable)的修饰符,您需要发出 Interactions,并接受 MutableInteractionSource 作为参数:
fun Modifier.hover(interactionSource: MutableInteractionSource, enabled: Boolean): Modifier { // ... }
此修饰符是一个生产者 - 它可以利用提供的 MutableInteractionSource 在悬停或取消悬停时发出 HoverInteractions。
构建可使用和生成内容的组件
Material Button 等高级别组件既是生产者,也是消费者。它们可以处理输入和焦点事件,还会根据这些事件更改外观,例如显示涟漪或为其高度设置动画效果。因此,它们直接将 MutableInteractionSource 作为参数公开,以便您可以提供自己的记忆实例:
@Composable fun Button( onClick: () -> Unit, modifier: Modifier = Modifier, enabled: Boolean = true, // exposes MutableInteractionSource as a parameter interactionSource: MutableInteractionSource? = null, elevation: ButtonElevation? = ButtonDefaults.elevatedButtonElevation(), shape: Shape = MaterialTheme.shapes.small, border: BorderStroke? = null, colors: ButtonColors = ButtonDefaults.buttonColors(), contentPadding: PaddingValues = ButtonDefaults.ContentPadding, content: @Composable RowScope.() -> Unit ) { /* content() */ }
这样便可将 MutableInteractionSource 从组件中提升出来,并观察组件生成的所有 Interaction。您可以使用此属性来控制相应组件或界面中任何其他组件的外观。
如果您要构建自己的交互式高级别组件,建议您以这种方式将 MutableInteractionSource 作为参数公开。除了遵循状态提升最佳实践之外,这还使得读取和控制组件的视觉状态变得简单,就像读取和控制任何其他类型的状态(例如启用状态)一样。
Compose 遵循分层架构方法,因此高级 Material 组件构建在基础构建块之上,这些构建块可生成控制涟漪和其他视觉效果所需的 Interaction。基础库提供高级别互动修饰符,例如 Modifier.hoverable、Modifier.focusable 和 Modifier.draggable。
如需构建对悬停事件做出响应的组件,您只需使用 Modifier.hoverable 并传递 MutableInteractionSource 作为参数即可。每当鼠标悬停在组件上时,该组件都会发出 HoverInteraction,您可以使用此功能来更改组件的显示方式。
// This InteractionSource will emit hover interactions val interactionSource = remember { MutableInteractionSource() } Box( Modifier .size(100.dp) .hoverable(interactionSource = interactionSource), contentAlignment = Alignment.Center ) { Text("Hello!") }
如需使此组件也可聚焦,您可以添加 Modifier.focusable 并传递相同的 MutableInteractionSource 作为参数。现在,HoverInteraction.Enter/Exit 和 FocusInteraction.Focus/Unfocus 均通过同一 MutableInteractionSource 发出,您可以在同一位置自定义这两种互动的外观:
// This InteractionSource will emit hover and focus interactions val interactionSource = remember { MutableInteractionSource() } Box( Modifier .size(100.dp) .hoverable(interactionSource = interactionSource) .focusable(interactionSource = interactionSource), contentAlignment = Alignment.Center ) { Text("Hello!") }
Modifier.clickable 是比 hoverable 和 focusable 更高级别的抽象概念 - 如果组件可点击,则它隐式可悬停,并且可点击的组件也应可聚焦。您可以使用 Modifier.clickable 创建一个处理悬停、焦点和按压互动的组件,而无需组合较低级别的 API。如果您还想让组件可点击,可以将 hoverable 和 focusable 替换为 clickable:
// This InteractionSource will emit hover, focus, and press interactions val interactionSource = remember { MutableInteractionSource() } Box( Modifier .size(100.dp) .clickable( onClick = {}, interactionSource = interactionSource, // Also show a ripple effect indication = ripple() ), contentAlignment = Alignment.Center ) { Text("Hello!") }
使用 InteractionSource
如果您需要低级别的组件互动信息,可以为该组件的 InteractionSource 使用标准 Flow API。例如,假设您想要维护 InteractionSource 的按下和拖动互动列表。以下代码会执行一半的工作,在发生新的按下互动时立即将其添加到列表中:
val interactionSource = remember { MutableInteractionSource() } val interactions = remember { mutableStateListOf<Interaction>() } LaunchedEffect(interactionSource) { interactionSource.interactions.collect { interaction -> when (interaction) { is PressInteraction.Press -> { interactions.add(interaction) } is DragInteraction.Start -> { interactions.add(interaction) } } } }
但是,除了添加新的互动之外,您还必须在互动结束(例如,用户将手指从组件上松开)时移除互动。这很简单,因为结尾互动一律带有对关联的起始互动的引用。以下代码展示了如何移除已结束的互动:
val interactionSource = remember { MutableInteractionSource() } val interactions = remember { mutableStateListOf<Interaction>() } LaunchedEffect(interactionSource) { interactionSource.interactions.collect { interaction -> when (interaction) { is PressInteraction.Press -> { interactions.add(interaction) } is PressInteraction.Release -> { interactions.remove(interaction.press) } is PressInteraction.Cancel -> { interactions.remove(interaction.press) } is DragInteraction.Start -> { interactions.add(interaction) } is DragInteraction.Stop -> { interactions.remove(interaction.start) } is DragInteraction.Cancel -> { interactions.remove(interaction.start) } } } }
现在,如果您想知道该组件目前是否处于按下或拖动状态,只需检查 interactions 是否为空即可:
val isPressedOrDragged = interactions.isNotEmpty()
如果您想知道最近一次互动是什么,只需查看列表中的最后一项即可。例如,以下代码展示了 Compose 水波纹效果在执行时如何确定最近一次互动适用的状态遮罩层:
val lastInteraction = when (interactions.lastOrNull()) { is DragInteraction.Start -> "Dragged" is PressInteraction.Press -> "Pressed" else -> "No state" }
由于所有 Interaction 都遵循相同的结构,因此在处理不同类型的用户互动时,代码差异不大,总体模式相同。
请注意,本部分中的前几个示例表示使用 State 的互动的 Flow - 这使得观察更新后的值变得非常简单,因为读取状态值会自动导致重组。不过,合成是按帧进行批处理的。这意味着,如果状态发生变化,然后在同一帧内又变回原来的状态,那么观察该状态的组件将不会看到变化。
这对于互动非常重要,因为互动通常会在同一帧内开始和结束。例如,使用上一个示例和 Button:
val interactionSource = remember { MutableInteractionSource() } val isPressed by interactionSource.collectIsPressedAsState() Button(onClick = { /* do something */ }, interactionSource = interactionSource) { Text(if (isPressed) "Pressed!" else "Not pressed") }
如果按压操作在同一帧内开始和结束,则文本永远不会显示为“Pressed!”。在大多数情况下,这不会造成问题,因为显示如此短时间的视觉效果会导致闪烁,用户不会很明显地注意到。在某些情况下(例如显示涟漪效应或类似动画),您可能希望至少显示最短时间的效果,而不是在不再按按钮时立即停止。为此,您可以直接从收集 lambda 内部开始和停止动画,而不是写入状态。如需查看此模式的示例,请参阅使用动画边框构建高级 Indication 部分。
示例:构建具有自定义互动处理功能的组件
如需了解如何构建包含自定义输入响应的组件,请参考以下修改后的按钮示例。在此示例中,假设您想在用户按下按钮时使按钮外观发生变化:
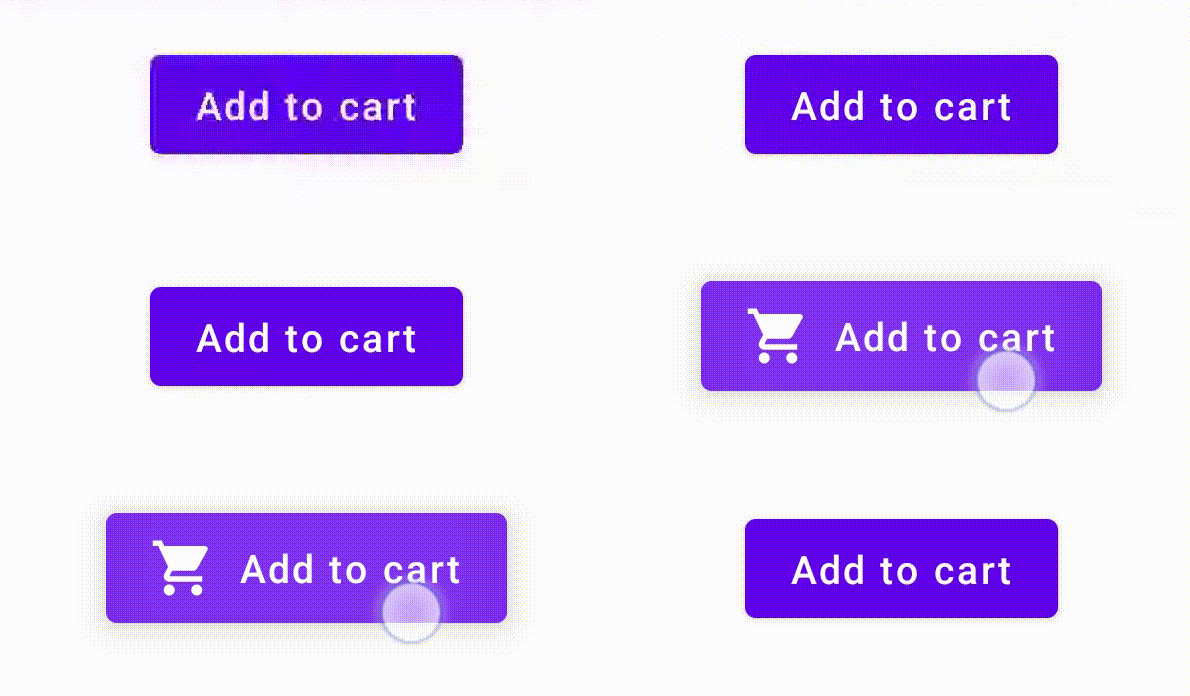
为此,请基于 Button 构建自定义可组合项,并让其利用额外的 icon 参数来绘制图标(在本示例中为购物车图标)。您需要调用 collectIsPressedAsState() 来跟踪用户手指是否悬停在按钮上;如果悬停在按钮上,则添加图标。代码如下所示:
@Composable fun PressIconButton( onClick: () -> Unit, icon: @Composable () -> Unit, text: @Composable () -> Unit, modifier: Modifier = Modifier, interactionSource: MutableInteractionSource? = null ) { val isPressed = interactionSource?.collectIsPressedAsState()?.value ?: false Button( onClick = onClick, modifier = modifier, interactionSource = interactionSource ) { AnimatedVisibility(visible = isPressed) { if (isPressed) { Row { icon() Spacer(Modifier.size(ButtonDefaults.IconSpacing)) } } } text() } }
使用新的可组合项,如下所示:
PressIconButton( onClick = {}, icon = { Icon(Icons.Filled.ShoppingCart, contentDescription = null) }, text = { Text("Add to cart") } )
由于这个新的 PressIconButton 以现有 Material Button 为基础,因此会照常响应用户互动。当用户按下按钮时,按钮的不透明度会稍微改变,就像一般的 Material Button 一样。
使用 Indication 创建和应用可重复使用的自定义效果
在前面的部分中,您学习了如何更改组件的一部分以响应不同的 Interaction,例如在按下时显示图标。同样的方法也可用于更改您提供给组件的参数值,或更改组件内显示的内容,但仅适用于单个组件。通常,应用或设计系统会有一个用于有状态视觉效果的通用系统,该效果应以一致的方式应用于所有组件。
如果您要构建这种设计系统,则很难自定义一个组件并将此自定义设置重用于其他组件,原因如下:
- 设计系统中的每个组件都需要相同的样板
- 很容易忘记将此效果应用于新建的组件和自定义可点击组件
- 可能难以将自定义效果与其他效果结合使用
为避免这些问题并轻松在整个系统中扩缩自定义组件,您可以使用 Indication。Indication 表示可重用的视觉效果,可应用于应用或设计系统中的多个组件。Indication 分为两部分:
IndicationNodeFactory:用于创建Modifier.Node实例的工厂,该实例可为组件呈现视觉效果。对于在组件之间不会发生变化的更简单实现,这可以是一个单例(对象),并在整个应用中重复使用。这些实例可以是有状态的,也可以是无状态的。由于它们是按组件创建的,因此可以从
CompositionLocal中检索值,以更改它们在特定组件中的显示方式或行为,就像任何其他Modifier.Node一样。Modifier.indication:一种为组件绘制Indication的修饰符。Modifier.clickable和其他高级别互动修饰符直接接受指示参数,因此它们不仅会发出Interaction,还可以为发出的Interaction绘制视觉效果。因此,对于简单情况,您只需使用Modifier.clickable,而无需使用Modifier.indication。
将效果替换为 Indication
本部分介绍如何将应用于某个特定按钮的手动缩放效果替换为可在多个组件中重复使用的等效指示。
以下代码创建了一个在按下时向下缩放的按钮:
val interactionSource = remember { MutableInteractionSource() } val isPressed by interactionSource.collectIsPressedAsState() val scale by animateFloatAsState(targetValue = if (isPressed) 0.9f else 1f, label = "scale") Button( modifier = Modifier.scale(scale), onClick = { }, interactionSource = interactionSource ) { Text(if (isPressed) "Pressed!" else "Not pressed") }
如需将上述代码段中的缩放效果转换为 Indication,请按以下步骤操作:
创建负责应用缩放效果的
Modifier.Node。 附加后,节点会观察互动来源,与之前的示例类似。此处的唯一区别在于,它直接启动动画,而不是将传入的互动转换为状态。节点需要实现
DrawModifierNode,以便它可以替换ContentDrawScope#draw(),并使用与 Compose 中任何其他图形 API 相同的绘制命令来呈现缩放效果。调用
drawContent()(从ContentDrawScope接收器中获取)将绘制Indication应应用到的实际组件,因此您只需在缩放转换中调用此函数。请确保您的Indication实现始终会在某个时间点调用drawContent();否则,您应用Indication的组件将不会绘制。private class ScaleNode(private val interactionSource: InteractionSource) : Modifier.Node(), DrawModifierNode { var currentPressPosition: Offset = Offset.Zero val animatedScalePercent = Animatable(1f) private suspend fun animateToPressed(pressPosition: Offset) { currentPressPosition = pressPosition animatedScalePercent.animateTo(0.9f, spring()) } private suspend fun animateToResting() { animatedScalePercent.animateTo(1f, spring()) } override fun onAttach() { coroutineScope.launch { interactionSource.interactions.collectLatest { interaction -> when (interaction) { is PressInteraction.Press -> animateToPressed(interaction.pressPosition) is PressInteraction.Release -> animateToResting() is PressInteraction.Cancel -> animateToResting() } } } } override fun ContentDrawScope.draw() { scale( scale = animatedScalePercent.value, pivot = currentPressPosition ) { this@draw.drawContent() } } }
创建
IndicationNodeFactory。它的唯一职责是为提供的互动来源创建新的节点实例。由于没有用于配置指示的参数,因此工厂可以是对象:object ScaleIndication : IndicationNodeFactory { override fun create(interactionSource: InteractionSource): DelegatableNode { return ScaleNode(interactionSource) } override fun equals(other: Any?): Boolean = other === ScaleIndication override fun hashCode() = 100 }
Modifier.clickable在内部使用Modifier.indication,因此要使用ScaleIndication创建可点击的组件,您只需将Indication作为参数提供给clickable:Box( modifier = Modifier .size(100.dp) .clickable( onClick = {}, indication = ScaleIndication, interactionSource = null ) .background(Color.Blue), contentAlignment = Alignment.Center ) { Text("Hello!", color = Color.White) }
这样一来,您还可以使用自定义
Indication轻松构建高级别可重用组件 - 按钮可能如下所示:@Composable fun ScaleButton( onClick: () -> Unit, modifier: Modifier = Modifier, enabled: Boolean = true, interactionSource: MutableInteractionSource? = null, shape: Shape = CircleShape, content: @Composable RowScope.() -> Unit ) { Row( modifier = modifier .defaultMinSize(minWidth = 76.dp, minHeight = 48.dp) .clickable( enabled = enabled, indication = ScaleIndication, interactionSource = interactionSource, onClick = onClick ) .border(width = 2.dp, color = Color.Blue, shape = shape) .padding(horizontal = 16.dp, vertical = 8.dp), horizontalArrangement = Arrangement.Center, verticalAlignment = Alignment.CenterVertically, content = content ) }
然后,您可以按以下方式使用该按钮:
ScaleButton(onClick = {}) { Icon(Icons.Filled.ShoppingCart, "") Spacer(Modifier.padding(10.dp)) Text(text = "Add to cart!") }
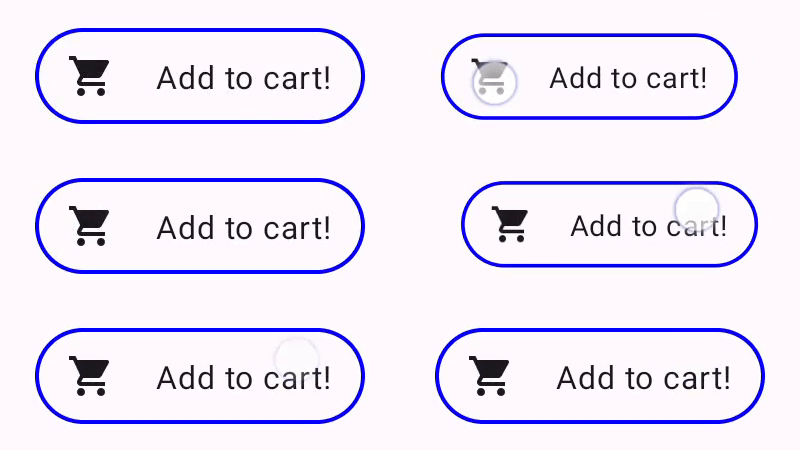
Indication 构建的按钮。构建具有动画边框的高级 Indication
Indication 不仅限于转换效果,例如缩放组件。由于 IndicationNodeFactory 会返回 Modifier.Node,因此您可以像使用其他绘制 API 一样,在内容上方或下方绘制任何类型的效果。例如,您可以在按压组件时,在组件周围绘制动画边框,并在组件顶部绘制叠加层:
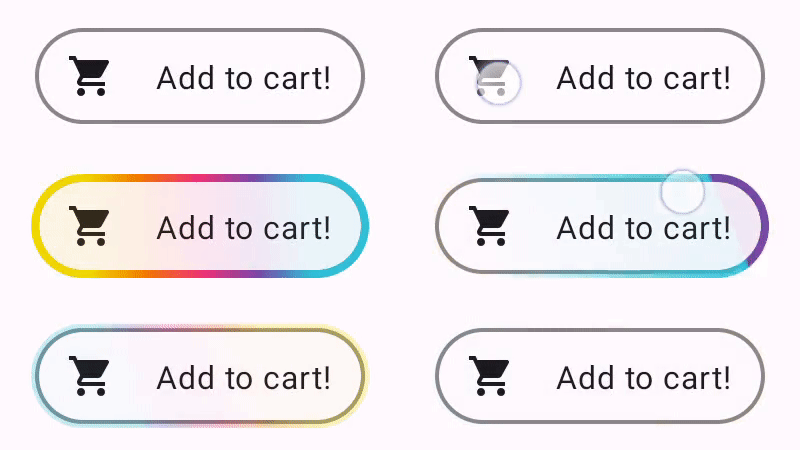
Indication 绘制的动画边框效果。此处的 Indication 实现与上一个示例非常相似,只是创建了一个包含一些参数的节点。由于动画边框取决于使用 Indication 的组件的形状和边框,因此 Indication 实现还需要将形状和边框宽度作为参数提供:
data class NeonIndication(private val shape: Shape, private val borderWidth: Dp) : IndicationNodeFactory { override fun create(interactionSource: InteractionSource): DelegatableNode { return NeonNode( shape, // Double the border size for a stronger press effect borderWidth * 2, interactionSource ) } }
即使绘制代码更复杂,Modifier.Node 实现的概念也相同。与之前一样,它会在附加时观察 InteractionSource,启动动画,并实现 DrawModifierNode 以在内容顶部绘制效果:
private class NeonNode( private val shape: Shape, private val borderWidth: Dp, private val interactionSource: InteractionSource ) : Modifier.Node(), DrawModifierNode { var currentPressPosition: Offset = Offset.Zero val animatedProgress = Animatable(0f) val animatedPressAlpha = Animatable(1f) var pressedAnimation: Job? = null var restingAnimation: Job? = null private suspend fun animateToPressed(pressPosition: Offset) { // Finish any existing animations, in case of a new press while we are still showing // an animation for a previous one restingAnimation?.cancel() pressedAnimation?.cancel() pressedAnimation = coroutineScope.launch { currentPressPosition = pressPosition animatedPressAlpha.snapTo(1f) animatedProgress.snapTo(0f) animatedProgress.animateTo(1f, tween(450)) } } private fun animateToResting() { restingAnimation = coroutineScope.launch { // Wait for the existing press animation to finish if it is still ongoing pressedAnimation?.join() animatedPressAlpha.animateTo(0f, tween(250)) animatedProgress.snapTo(0f) } } override fun onAttach() { coroutineScope.launch { interactionSource.interactions.collect { interaction -> when (interaction) { is PressInteraction.Press -> animateToPressed(interaction.pressPosition) is PressInteraction.Release -> animateToResting() is PressInteraction.Cancel -> animateToResting() } } } } override fun ContentDrawScope.draw() { val (startPosition, endPosition) = calculateGradientStartAndEndFromPressPosition( currentPressPosition, size ) val brush = animateBrush( startPosition = startPosition, endPosition = endPosition, progress = animatedProgress.value ) val alpha = animatedPressAlpha.value drawContent() val outline = shape.createOutline(size, layoutDirection, this) // Draw overlay on top of content drawOutline( outline = outline, brush = brush, alpha = alpha * 0.1f ) // Draw border on top of overlay drawOutline( outline = outline, brush = brush, alpha = alpha, style = Stroke(width = borderWidth.toPx()) ) } /** * Calculates a gradient start / end where start is the point on the bounding rectangle of * size [size] that intercepts with the line drawn from the center to [pressPosition], * and end is the intercept on the opposite end of that line. */ private fun calculateGradientStartAndEndFromPressPosition( pressPosition: Offset, size: Size ): Pair<Offset, Offset> { // Convert to offset from the center val offset = pressPosition - size.center // y = mx + c, c is 0, so just test for x and y to see where the intercept is val gradient = offset.y / offset.x // We are starting from the center, so halve the width and height - convert the sign // to match the offset val width = (size.width / 2f) * sign(offset.x) val height = (size.height / 2f) * sign(offset.y) val x = height / gradient val y = gradient * width // Figure out which intercept lies within bounds val intercept = if (abs(y) <= abs(height)) { Offset(width, y) } else { Offset(x, height) } // Convert back to offsets from 0,0 val start = intercept + size.center val end = Offset(size.width - start.x, size.height - start.y) return start to end } private fun animateBrush( startPosition: Offset, endPosition: Offset, progress: Float ): Brush { if (progress == 0f) return TransparentBrush // This is *expensive* - we are doing a lot of allocations on each animation frame. To // recreate a similar effect in a performant way, it would be better to create one large // gradient and translate it on each frame, instead of creating a whole new gradient // and shader. The current approach will be janky! val colorStops = buildList { when { progress < 1 / 6f -> { val adjustedProgress = progress * 6f add(0f to Blue) add(adjustedProgress to Color.Transparent) } progress < 2 / 6f -> { val adjustedProgress = (progress - 1 / 6f) * 6f add(0f to Purple) add(adjustedProgress * MaxBlueStop to Blue) add(adjustedProgress to Blue) add(1f to Color.Transparent) } progress < 3 / 6f -> { val adjustedProgress = (progress - 2 / 6f) * 6f add(0f to Pink) add(adjustedProgress * MaxPurpleStop to Purple) add(MaxBlueStop to Blue) add(1f to Blue) } progress < 4 / 6f -> { val adjustedProgress = (progress - 3 / 6f) * 6f add(0f to Orange) add(adjustedProgress * MaxPinkStop to Pink) add(MaxPurpleStop to Purple) add(MaxBlueStop to Blue) add(1f to Blue) } progress < 5 / 6f -> { val adjustedProgress = (progress - 4 / 6f) * 6f add(0f to Yellow) add(adjustedProgress * MaxOrangeStop to Orange) add(MaxPinkStop to Pink) add(MaxPurpleStop to Purple) add(MaxBlueStop to Blue) add(1f to Blue) } else -> { val adjustedProgress = (progress - 5 / 6f) * 6f add(0f to Yellow) add(adjustedProgress * MaxYellowStop to Yellow) add(MaxOrangeStop to Orange) add(MaxPinkStop to Pink) add(MaxPurpleStop to Purple) add(MaxBlueStop to Blue) add(1f to Blue) } } } return linearGradient( colorStops = colorStops.toTypedArray(), start = startPosition, end = endPosition ) } companion object { val TransparentBrush = SolidColor(Color.Transparent) val Blue = Color(0xFF30C0D8) val Purple = Color(0xFF7848A8) val Pink = Color(0xFFF03078) val Orange = Color(0xFFF07800) val Yellow = Color(0xFFF0D800) const val MaxYellowStop = 0.16f const val MaxOrangeStop = 0.33f const val MaxPinkStop = 0.5f const val MaxPurpleStop = 0.67f const val MaxBlueStop = 0.83f } }
这里的主要区别在于,animateToResting() 函数现在具有动画的最短时长,因此即使立即松开按压,按压动画也会继续。此外,系统还处理了 animateToPressed 开始时的多次快速按压操作 - 如果在现有按压或静止动画期间发生按压,系统会取消之前的动画,并从头开始播放按压动画。为了支持多个并发效果(例如水波纹效果,其中新的水波纹动画将绘制在其他水波纹之上),您可以在列表中跟踪动画,而不是取消现有动画并启动新动画。
为您推荐
- 注意:当 JavaScript 处于关闭状态时,系统会显示链接文字
- 了解手势
- Kotlin 对 Jetpack Compose 的支持
- Material 组件和布局

