


使用基本的布局结构可打造最高效的布局,这是一种常见的误解。但无论如何,您添加到应用中的每个 widget 和布局都需要进行初始化、布局和绘制。例如,使用 LinearLayout 的嵌套实例会导致视图层次结构过深。此外,嵌套多个使用 layout_weight 参数的 LinearLayout 实例成本非常高,因为每个子级都需要测量两次。
如果要反复膨胀布局(例如,在 RecyclerView 中使用时),则要特别注意这方面。
本文档介绍了如何使用 布局检查器和 lint来检查和优化布局。
检查布局
Android SDK 工具套件包含 布局检查器工具,可让 您在应用运行时分析布局。此工具可帮助您发现布局性能方面的低效之处。
利用布局检查器,您可以在已连接的设备或模拟器上选择正在运行的进程,然后显示布局树。各个块上的信号灯代表其测量、布局和绘制性能,有助于您识别潜在问题。
例如,图 1 显示了用作 RecyclerView 中的一项元素的布局。此布局左侧显示了一张小小的位图,而右侧则显示了两个堆叠的文本元素。尤其重要的是,您要确保那些会多次膨胀的布局(例如此布局)经过了充分优化,因为优化的性能收益会成倍地提升。

RecyclerView.
布局检查器会显示可用设备及其正在运行的组件的列表。从 Windows 标签页中选择您的组件,然后点击 布局检查器 查看所选组件的布局层次结构。例如,图 2 显示了图 1 所示列表项的布局。
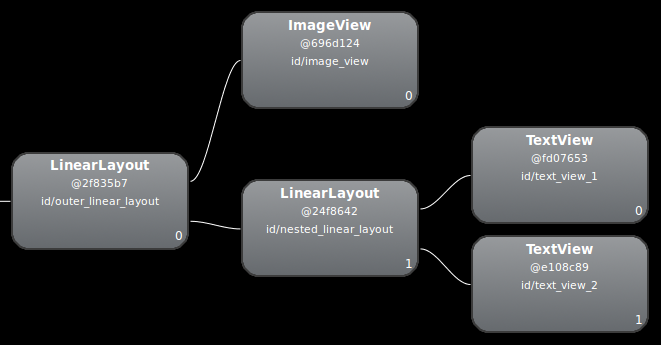
LinearLayout 实例。修改布局
由于上述布局的性能因嵌套的 LinearLayout 而有所下降,因此可以通过展平布局(使布局变浅变宽,而非变窄变深)来提高性能。作为根节点的 ConstraintLayout 支持此类布局。将此设计转换为使用 ConstraintLayout 后,该布局便会成为一个两层的层次结构:
    <androidx.constraintlayout.widget.ConstraintLayout
      xmlns:android="http://schemas.android.com/apk/res/android"
      xmlns:app="http://schemas.android.com/apk/res-auto"
      xmlns:tools="http://schemas.android.com/tools"
      android:id="@+id/root"
      android:layout_width="match_parent"
      android:layout_height="52dp"
      android:background="#e4e6e4"
      android:padding="4dp">

      <ImageView
          android:id="@+id/image"
          android:layout_width="48dp"
          android:layout_height="48dp"
          android:background="#5c5c74"
          android:contentDescription="An example box"
          app:layout_constraintBottom_toBottomOf="parent"
          app:layout_constraintStart_toStartOf="parent"
          app:layout_constraintTop_toTopOf="parent" />

      <TextView
          android:id="@+id/title"
          android:layout_width="0dp"
          android:layout_height="0dp"
          android:layout_marginStart="4dp"
          android:background="#745c74"
          app:layout_constraintBottom_toTopOf="@+id/subtitle"
          app:layout_constraintEnd_toEndOf="parent"
          app:layout_constraintStart_toEndOf="@id/image"
          app:layout_constraintTop_toTopOf="parent" />

      <TextView
          android:id="@+id/subtitle"
          android:layout_width="0dp"
          android:layout_height="0dp"
          android:background="#7e8d6e"
          app:layout_constraintBottom_toBottomOf="parent"
          app:layout_constraintEnd_toEndOf="parent"
          app:layout_constraintStart_toStartOf="@id/title"
          app:layout_constraintTop_toBottomOf="@+id/title" />
  </androidx.constraintlayout.widget.ConstraintLayout>
检查新布局是否如下所示:
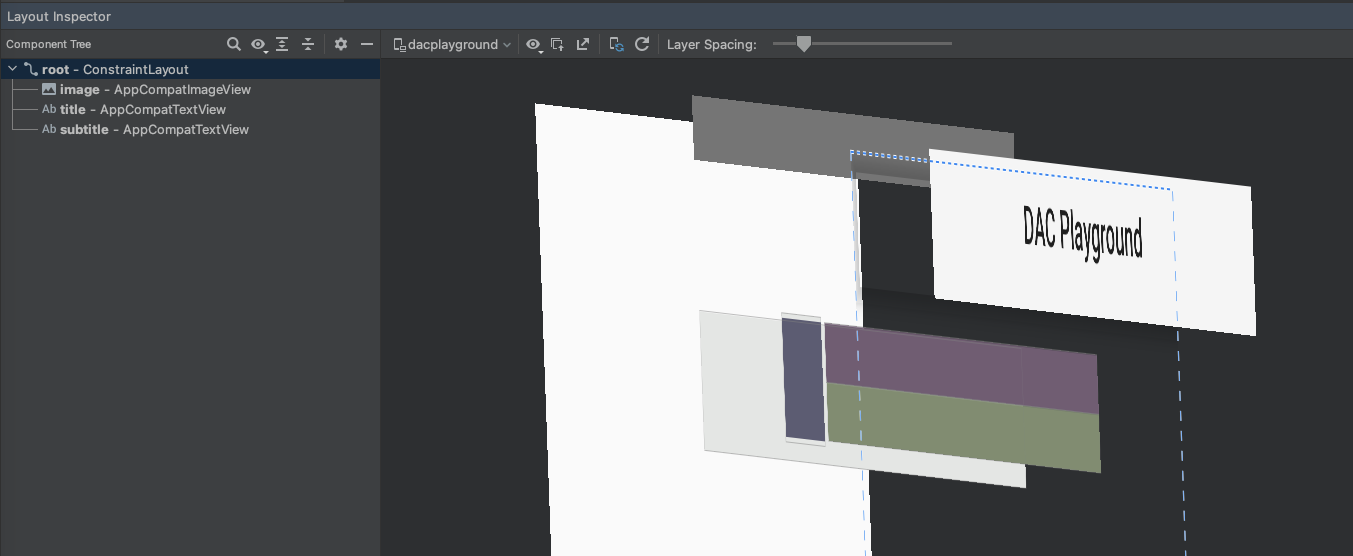
这些收益会成倍地提升性能,原因在于此布局会用于列表中的每一项元素。
大部分差异都是由在 LinearLayout 设计中使用 layout_weight 造成的,这会减缓测量速度。这只是如何恰当地使用每个布局的一个示例, 您应仔细考虑是否有必要使用布局权重。
在一些复杂的布局中,系统可能会浪费时间和资源来多次测量同一个界面元素。这种现象称为“双重征税”。 如需详细了解双重征税以及如何防止出现这种情况,请参阅 性能 和视图层次结构。
使用 lint
一种很好的做法是,对布局文件运行 lint 工具 来搜索可能的视图层次结构优化机会。lint 取代了 layoutopt 工具,并提供了更加强大的功能。以下是 lint 规则的示例:
-
使用复合可绘制对象。您可以更高效地将包含
ImageView和TextView的LinearLayout作为复合可绘制对象进行处理。 -
合并根框架。如果布局的根是未提供背景或内边距的
FrameLayout,则可以将其替换为稍微高效一些的 merge 标记。 - 移除无用的叶项。您可以移除没有子级或 没有背景的布局(因为它不可见),以使布局层次结构更加扁平高效。
-
移除无用的父级。您可以移除含有子级但没有
同级、不是
ScrollView或根布局且没有背景的布局。您还可以将 子视图直接移动到父级,以使布局层次结构更加扁平高效。 -
避免深层布局。嵌套过多的布局会降低
性能。可以考虑使用
ConstraintLayout, 等比较扁平的布局来提高性能。lint 检查的默认最大深度为 10。
lint 工具的另一项优势是,它已集成到 Android Studio 中。Lint 会在您编译程序时自动运行。借助 Android Studio,您还可以针对特定 build 变体或针对所有 build 变体运行 lint 检查。
您还可以在 Android Studio 中使用 File > Settings > Project Settings 选项来管理检查配置文件并对检查进行配置。系统会显示“Inspection Configuration”页面,其中包含支持的检查:
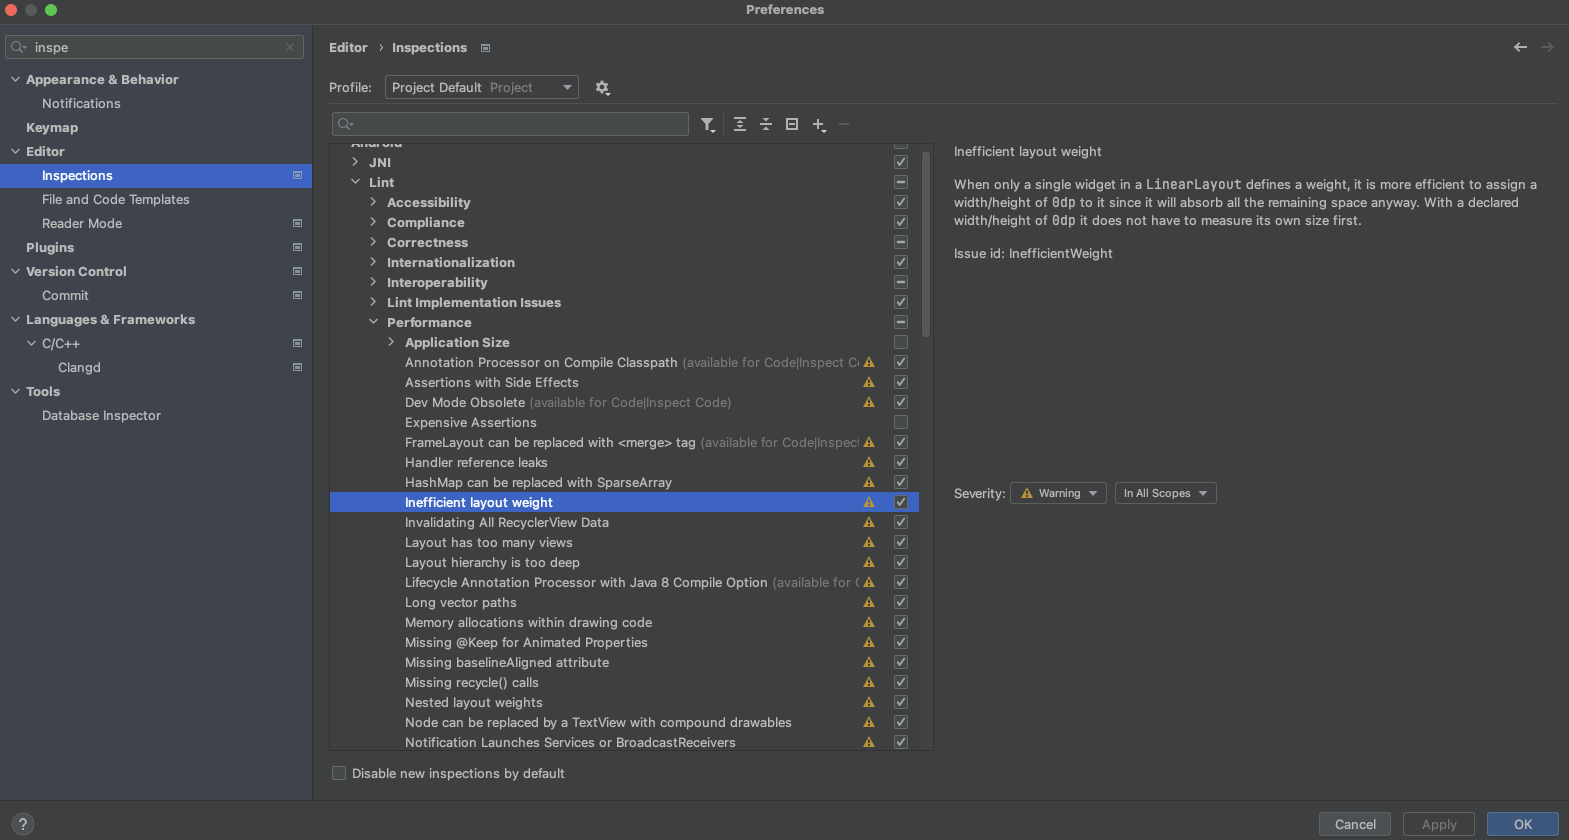
Lint 能够自动修复某些问题、提供有助于解决其他问题的建议,以及直接跳转到违规代码进行审核。