
Вы можете настраивать изображения, используя свойства составного объекта Image ( contentScale , colorFilter ). Вы также можете применять существующие модификаторы для применения различных эффектов к вашему Image . Модификаторы можно использовать для любого составного объекта , а не только для Image , тогда как contentScale и colorFilter являются явными параметрами составного объекта Image .
Масштабирование контента
Укажите параметр contentScale , чтобы обрезать или изменить масштаб изображения внутри его границ. По умолчанию, если вы не укажете параметр contentScale , будет использоваться ContentScale.Fit .
В следующем примере размер составного Image ограничен 150dp с рамкой, а фон составного Image установлен на желтый цвет, чтобы продемонстрировать различные параметры ContentScale представленные в таблице ниже.
val imageModifier = Modifier .size(150.dp) .border(BorderStroke(1.dp, Color.Black)) .background(Color.Yellow) Image( painter = painterResource(id = R.drawable.dog), contentDescription = stringResource(id = R.string.dog_content_description), contentScale = ContentScale.Fit, modifier = imageModifier )
Установка различных параметров ContentScale приводит к различным результатам. Следующая таблица поможет вам выбрать правильный режим ContentScale :
| Исходное изображение | 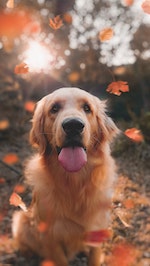 | 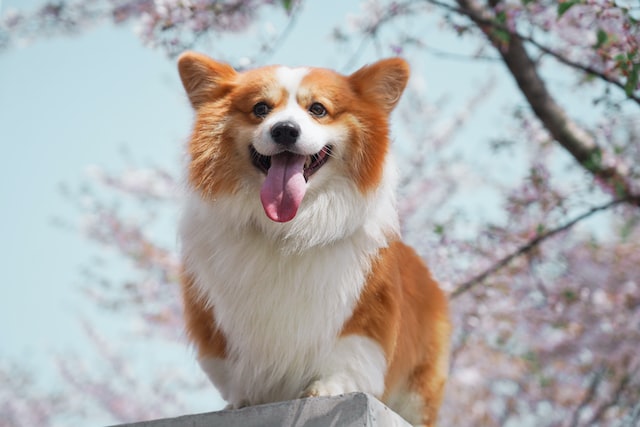 |
ContentScale | Результат - Портретное изображение: | Результат - Пейзажное изображение: |
ContentScale.Fit : Масштабирует изображение равномерно, сохраняя соотношение сторон (по умолчанию). Если размер содержимого меньше заданного, изображение масштабируется до размеров, соответствующих границам. | 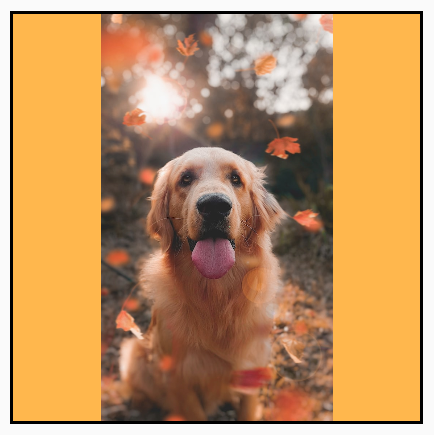 |  |
ContentScale.Crop : Обрезать изображение по центру в пределах доступного пространства. |  |  |
ContentScale.FillHeight : Масштабирует исходный объект, сохраняя соотношение сторон, так чтобы границы соответствовали высоте целевого объекта. |  | 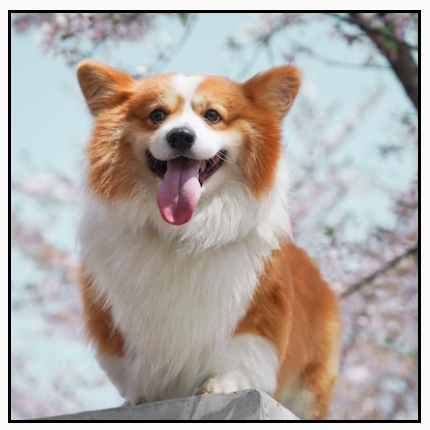 |
ContentScale.FillWidth : Масштабировать исходный код, сохраняя соотношение сторон, так чтобы границы соответствовали ширине целевого объекта. |  |  |
ContentScale.FillBounds : Неравномерно масштабирует контент по вертикали и горизонтали, чтобы заполнить целевые границы. (Примечание: это искажает изображения, если вы помещаете их в контейнеры, которые не соответствуют точному соотношению сторон изображения). | 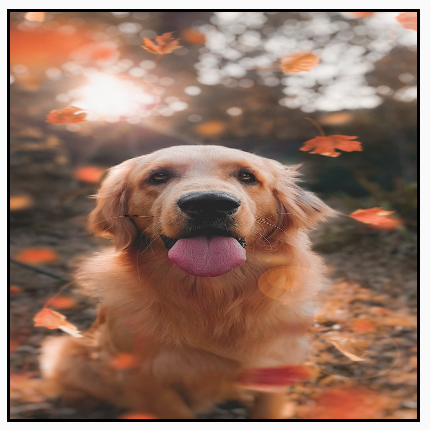 | 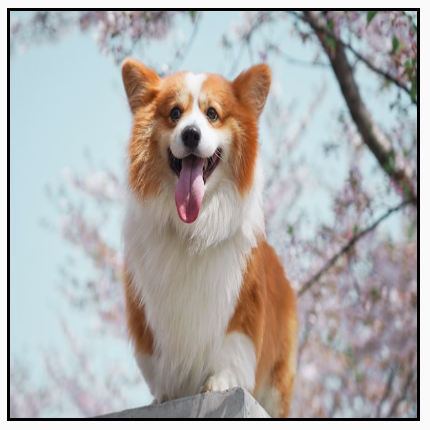 |
ContentScale.Inside : Масштабирует исходный контент таким образом, чтобы соотношение сторон оставалось в пределах границ целевого объекта. Если исходный контент меньше или равен целевому по обоим измерениям, он ведет себя аналогично None . Контент всегда будет находиться в пределах границ. Если контент меньше границ, масштабирование не применяется. | Исходное изображение превышает допустимые размеры:  Исходное изображение меньше допустимого размера: Исходное изображение меньше допустимого размера: 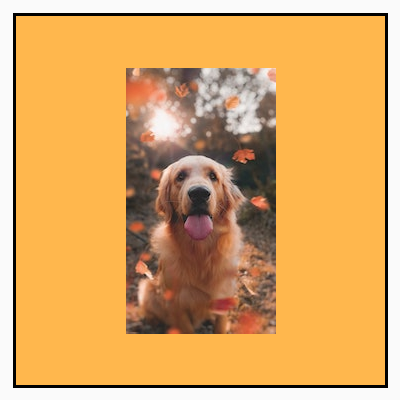 | Исходное изображение превышает допустимые размеры: 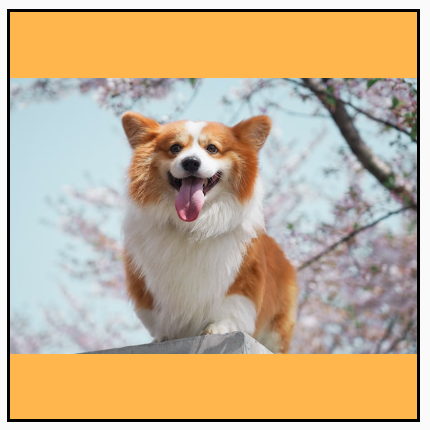 Исходное изображение меньше допустимого размера: Исходное изображение меньше допустимого размера: 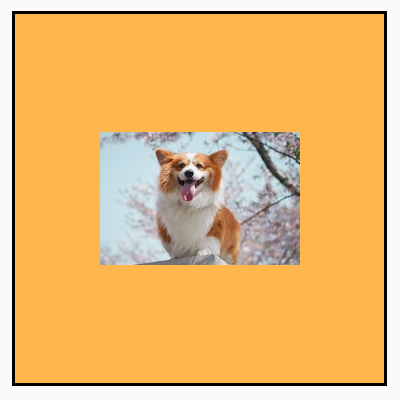 |
ContentScale.None : Не применять масштабирование к исходному контенту. Если контент меньше границ целевого пространства, он не будет масштабирован для соответствия этой области. | Исходное изображение превышает допустимые размеры:  Исходное изображение меньше допустимого размера: Исходное изображение меньше допустимого размера: | Исходное изображение превышает допустимые размеры:  Исходное изображение меньше допустимого размера: Исходное изображение меньше допустимого размера: |
Обрезка Image , которое можно скомпоновать с фигурой.
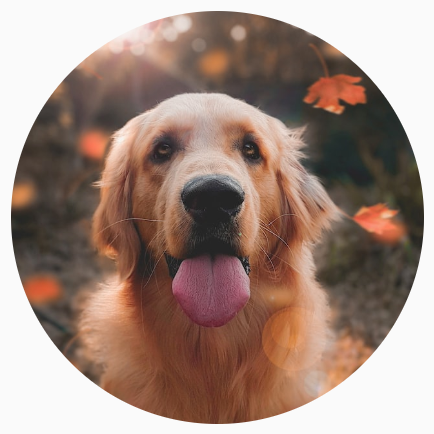
Чтобы изображение поместилось в фигуру, используйте встроенный модификатор clip (clip). Чтобы обрезать изображение до круглой формы, используйте Modifier.clip(CircleShape) :
Image( painter = painterResource(id = R.drawable.dog), contentDescription = stringResource(id = R.string.dog_content_description), contentScale = ContentScale.Crop, modifier = Modifier .size(200.dp) .clip(CircleShape) )
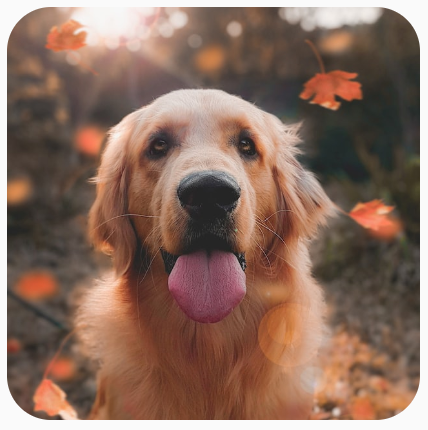
CircleShape . Для закругления углов используйте Modifier.clip(RoundedCornerShape(16.dp) ), указав размер углов, которые вы хотите закруглить:
Image( painter = painterResource(id = R.drawable.dog), contentDescription = stringResource(id = R.string.dog_content_description), contentScale = ContentScale.Crop, modifier = Modifier .size(200.dp) .clip(RoundedCornerShape(16.dp)) )
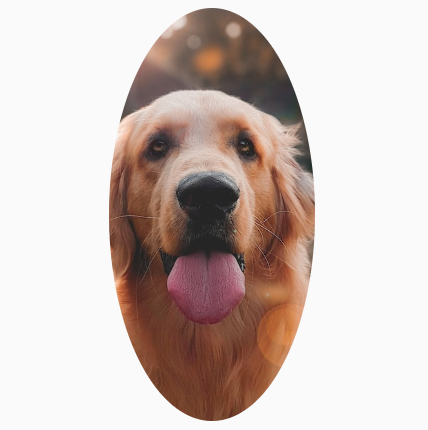
RoundedCornerShape . Вы также можете создать собственную форму обрезки, расширив Shape и указав Path , вокруг которого будет происходить обрезка:
class SquashedOval : Shape { override fun createOutline( size: Size, layoutDirection: LayoutDirection, density: Density ): Outline { val path = Path().apply { // We create an Oval that starts at ¼ of the width, and ends at ¾ of the width of the container. addOval( Rect( left = size.width / 4f, top = 0f, right = size.width * 3 / 4f, bottom = size.height ) ) } return Outline.Generic(path = path) } } Image( painter = painterResource(id = R.drawable.dog), contentDescription = stringResource(id = R.string.dog_content_description), contentScale = ContentScale.Crop, modifier = Modifier .size(200.dp) .clip(SquashedOval()) )
Добавить рамку к составному Image
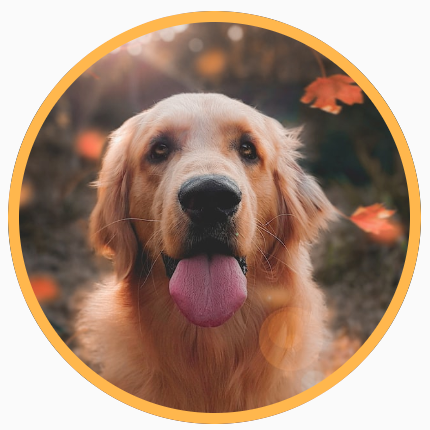
Распространенная операция — это объединение методов Modifier.border() и Modifier.clip() для создания рамки вокруг изображения:
val borderWidth = 4.dp Image( painter = painterResource(id = R.drawable.dog), contentDescription = stringResource(id = R.string.dog_content_description), contentScale = ContentScale.Crop, modifier = Modifier .size(150.dp) .border( BorderStroke(borderWidth, Color.Yellow), CircleShape ) .padding(borderWidth) .clip(CircleShape) )
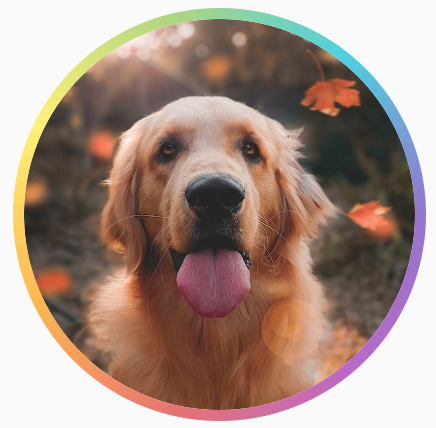
Для создания градиентной рамки можно использовать API Brush , чтобы нарисовать радужную градиентную рамку вокруг изображения:
val rainbowColorsBrush = remember { Brush.sweepGradient( listOf( Color(0xFF9575CD), Color(0xFFBA68C8), Color(0xFFE57373), Color(0xFFFFB74D), Color(0xFFFFF176), Color(0xFFAED581), Color(0xFF4DD0E1), Color(0xFF9575CD) ) ) } val borderWidth = 4.dp Image( painter = painterResource(id = R.drawable.dog), contentDescription = stringResource(id = R.string.dog_content_description), contentScale = ContentScale.Crop, modifier = Modifier .size(150.dp) .border( BorderStroke(borderWidth, rainbowColorsBrush), CircleShape ) .padding(borderWidth) .clip(CircleShape) )
Задайте пользовательское соотношение сторон
Чтобы преобразовать изображение в пользовательское соотношение сторон, используйте Modifier.aspectRatio(16f/9f) чтобы задать пользовательское соотношение сторон для изображения (или любого составного объекта).
Image( painter = painterResource(id = R.drawable.dog), contentDescription = stringResource(id = R.string.dog_content_description), modifier = Modifier.aspectRatio(16f / 9f) )

Modifier.aspectRatio(16f/9f) к Image .Цветовой фильтр: преобразование цветов пикселей изображения.
Компонент Image composable имеет параметр colorFilter , который позволяет изменять выходные параметры отдельных пикселей изображения.
Оттеночные изображения
Использование ColorFilter.tint(color, blendMode) применяет режим наложения с заданным цветом к вашему составному Image . ColorFilter.tint(color, blendMode) использует BlendMode.SrcIn для тонирования содержимого, то есть заданный цвет отображается там, где изображение показано на экране. Это полезно для значков и векторной графики, которые необходимо оформить по-разному.
Image( painter = painterResource(id = R.drawable.baseline_directions_bus_24), contentDescription = stringResource(id = R.string.bus_content_description), colorFilter = ColorFilter.tint(Color.Yellow) )

ColorFilter.tint с BlendMode.SrcIn . Использование других BlendMode приводит к различным эффектам. Например, установка BlendMode.Darken вместе с Color.Green для изображения дает следующий результат:
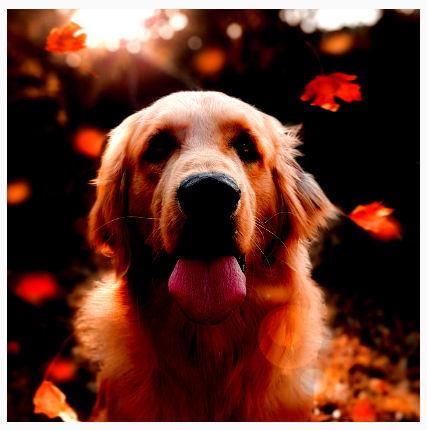
Image( painter = painterResource(id = R.drawable.dog), contentDescription = stringResource(id = R.string.dog_content_description), colorFilter = ColorFilter.tint(Color.Green, blendMode = BlendMode.Darken) )
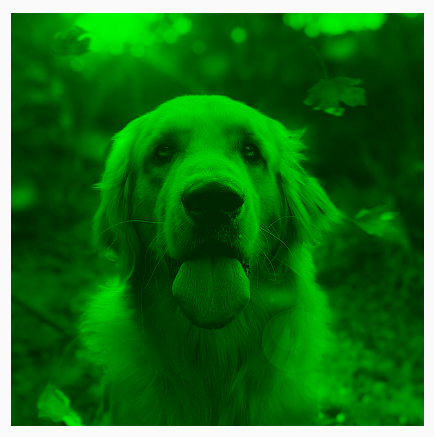
Color.Green tint с BlendMode.Darken . Для получения более подробной информации о различных доступных режимах смешивания см. справочную документацию по режимам BlendMode .
Примените фильтр Image с цветовой матрицей.
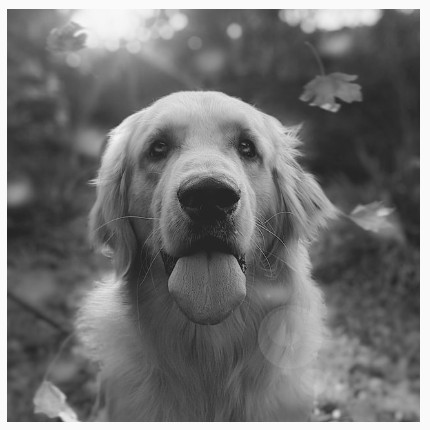
Преобразуйте изображение, используя опцию ColorFilter в цветовой матрице. Например, чтобы применить черно-белый фильтр к изображению, вы можете использовать ColorMatrix и установить насыщенность на 0f .
Image( painter = painterResource(id = R.drawable.dog), contentDescription = stringResource(id = R.string.dog_content_description), colorFilter = ColorFilter.colorMatrix(ColorMatrix().apply { setToSaturation(0f) }) )
Настройте контрастность или яркость составного Image .
Для изменения контраста и яркости изображения можно использовать ColorMatrix для изменения значений:
val contrast = 2f // 0f..10f (1 should be default) val brightness = -180f // -255f..255f (0 should be default) val colorMatrix = floatArrayOf( contrast, 0f, 0f, 0f, brightness, 0f, contrast, 0f, 0f, brightness, 0f, 0f, contrast, 0f, brightness, 0f, 0f, 0f, 1f, 0f ) Image( painter = painterResource(id = R.drawable.dog), contentDescription = stringResource(id = R.string.dog_content_description), colorFilter = ColorFilter.colorMatrix(ColorMatrix(colorMatrix)) )
ColorMatrix . Инвертировать цвета составного Image
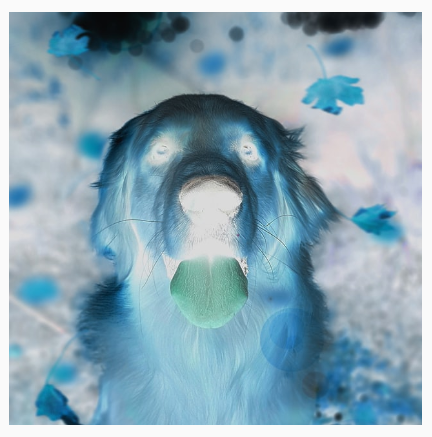
Чтобы инвертировать цвета изображения, установите ColorMatrix так, чтобы он инвертировал цвета:
val colorMatrix = floatArrayOf( -1f, 0f, 0f, 0f, 255f, 0f, -1f, 0f, 0f, 255f, 0f, 0f, -1f, 0f, 255f, 0f, 0f, 0f, 1f, 0f ) Image( painter = painterResource(id = R.drawable.dog), contentDescription = stringResource(id = R.string.dog_content_description), colorFilter = ColorFilter.colorMatrix(ColorMatrix(colorMatrix)) )
Размытие составного Image
Для размытия изображения используйте Modifier.blur() , указав radiusX и radiusY , которые определяют радиус размытия в горизонтальном и вертикальном направлениях соответственно.
Image( painter = painterResource(id = R.drawable.dog), contentDescription = stringResource(id = R.string.dog_content_description), contentScale = ContentScale.Crop, modifier = Modifier .size(150.dp) .blur( radiusX = 10.dp, radiusY = 10.dp, edgeTreatment = BlurredEdgeTreatment(RoundedCornerShape(8.dp)) ) )
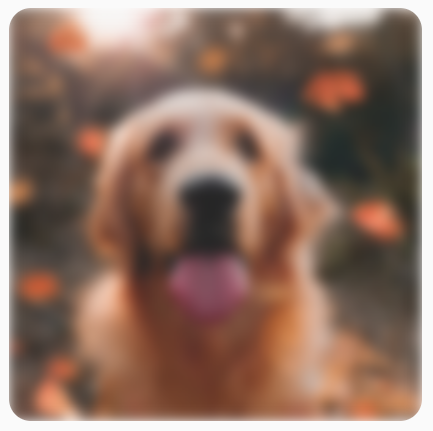
BlurEffect примененный к изображению. При размытии Images рекомендуется использовать BlurredEdgeTreatment(Shape) вместо BlurredEdgeTreatment.Unbounded , поскольку последний используется для размытия произвольных элементов, которые, как ожидается, будут отображаться за пределами исходного содержимого. Для изображений, скорее всего, они не будут отображаться за пределами содержимого, тогда как размытие скругленного прямоугольника может потребовать этого различия.
Например, если мы установим для предыдущего изображения параметр BlurredEdgeTreatment в Unbounded , края изображения будут выглядеть размытыми, а не резкими:
Image( painter = painterResource(id = R.drawable.dog), contentDescription = stringResource(id = R.string.dog_content_description), contentScale = ContentScale.Crop, modifier = Modifier .size(150.dp) .blur( radiusX = 10.dp, radiusY = 10.dp, edgeTreatment = BlurredEdgeTreatment.Unbounded ) .clip(RoundedCornerShape(8.dp)) )

BlurEdgeTreatment.Unbounded .Рекомендуем вам
- Примечание: текст ссылки отображается, когда JavaScript отключен.
- Модификаторы графики
- Загрузка изображений
- Материальные иконки