Restez organisé à l'aide des collections
Enregistrez et classez les contenus selon vos préférences.
Utilisez des info-bulles pour ajouter du contexte à un bouton ou à un autre élément d'UI.
Il existe deux types d'info-bulles :
Info-bulles simples : décrivent les éléments ou les actions des boutons d'icône.
Info-bulles enrichies : fournissent plus de détails, par exemple en décrivant la valeur d'une fonctionnalité. Il peut également inclure un titre, un lien et des boutons facultatifs.
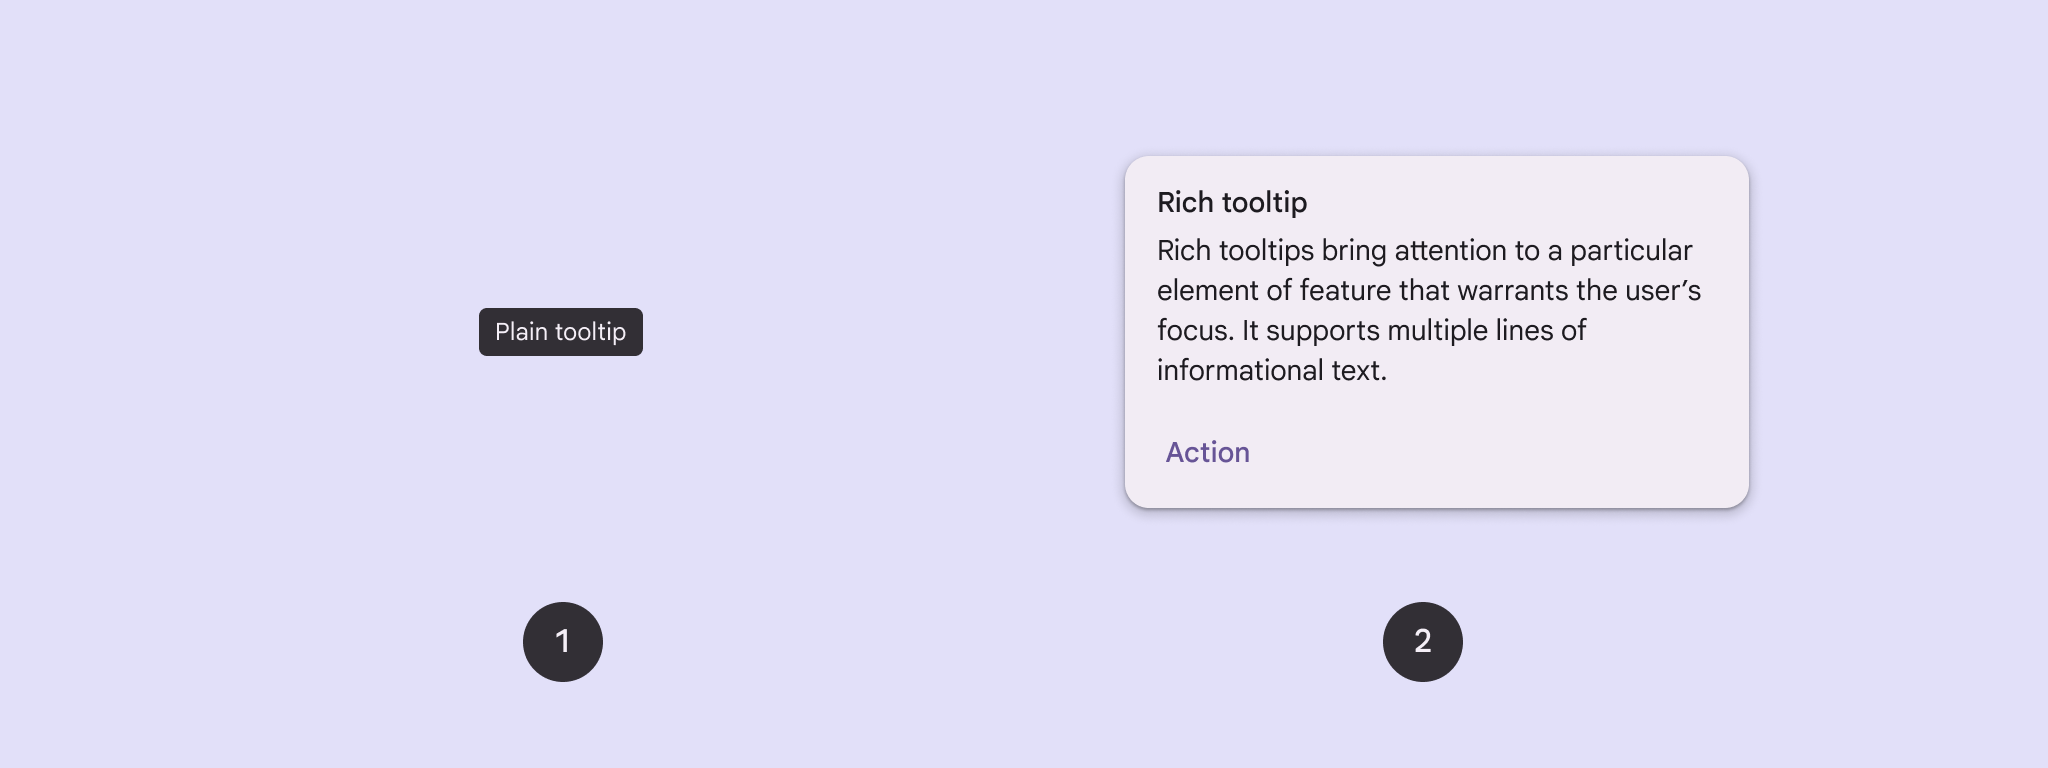
Figure 1. Info-bulle en texte brut (1) et info-bulle enrichie (2).
Surface d'API
Vous pouvez utiliser le composable TooltipBox pour implémenter des info-bulles dans votre application.
Vous contrôlez l'apparence de TooltipBox avec ces principaux paramètres :
positionProvider : place l'info-bulle par rapport au contenu de l'ancrage. Vous utilisez généralement un fournisseur de position par défaut à partir de TooltipDefaults, mais vous pouvez fournir le vôtre si vous avez besoin d'une logique de positionnement personnalisée.
tooltip : composable contenant le contenu de l'info-bulle. Vous utilisez généralement les composables PlainTooltip ou RichTooltip.
Utilisez PlainTooltip pour décrire les éléments ou les actions des boutons d'icône.
Utilisez RichTooltip pour fournir plus de détails, par exemple pour décrire la valeur d'une fonctionnalité. Les info-bulles enrichies peuvent inclure un titre, un lien et des boutons facultatifs.
state : conteneur d'état contenant la logique d'UI et l'état des éléments pour cette info-bulle.
content : contenu composable auquel l'info-bulle est ancrée.
Afficher une info-bulle simple
Utilisez un info-bulle simple pour décrire brièvement un élément d'interface utilisateur. Cet extrait de code affiche une info-bulle simple au-dessus d'un bouton d'icône intitulé "Ajouter aux favoris" :
@ComposablefunPlainTooltipExample(modifier:Modifier=Modifier,plainTooltipText:String="Add to favorites"){TooltipBox(modifier=modifier,positionProvider=TooltipDefaults.rememberPlainTooltipPositionProvider(),tooltip={PlainTooltip{Text(plainTooltipText)}},state=rememberTooltipState()){IconButton(onClick={/* Do something... */}){Icon(imageVector=Icons.Filled.Favorite,contentDescription="Add to favorites")}}}
IconButton crée un bouton cliquable avec une icône.
Icon(...) affiche une icône en forme de cœur dans le bouton.
Lorsqu'un utilisateur interagit avec IconButton, TooltipBox affiche l'info-bulle avec le texte "Ajouter aux favoris". Selon l'appareil, les utilisateurs peuvent déclencher l'info-bulle de différentes manières :
Pointeur survolant l'icône
Appuyer de manière prolongée sur l'icône sur un appareil mobile
Résultat
Cet exemple produit une info-bulle simple au-dessus d'une icône :
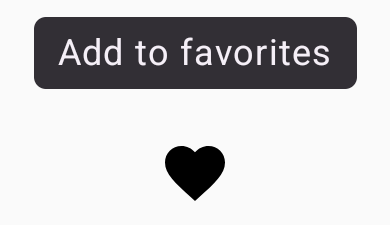
Figure 2 Info-bulle simple qui s'affiche lorsqu'un utilisateur pointe sur l'icône en forme de cœur ou appuie de manière prolongée dessus.
Afficher une info-bulle enrichie
Utilisez une info-bulle enrichie pour fournir plus de contexte sur un élément de l'UI. Cet exemple crée un info-bulle enrichi multiligne avec un titre ancré à un Icon :
@ComposablefunRichTooltipExample(modifier:Modifier=Modifier,richTooltipSubheadText:String="Rich Tooltip",richTooltipText:String="Rich tooltips support multiple lines of informational text."){TooltipBox(modifier=modifier,positionProvider=TooltipDefaults.rememberRichTooltipPositionProvider(),tooltip={RichTooltip(title={Text(richTooltipSubheadText)}){Text(richTooltipText)}},state=rememberTooltipState()){IconButton(onClick={/* Icon button's click event */}){Icon(imageVector=Icons.Filled.Info,contentDescription="Show more information")}}}
TooltipBox gère les écouteurs d'événements pour les interactions utilisateur et met à jour TooltipState en conséquence. Lorsque TooltipState indique que l'info-bulle doit être affichée, le lambda de l'info-bulle s'exécute et TooltipBox affiche RichTooltip. TooltipBox sert d'ancrage et de conteneur pour le contenu et l'info-bulle.
Dans ce cas, le contenu est un composant IconButton, qui fournit le comportement d'action tactile. Lorsque l'utilisateur appuie de manière prolongée (sur les appareils tactiles) ou pointe (avec le pointeur de la souris) n'importe où dans le contenu de TooltipBox, l'info-bulle s'affiche pour fournir plus d'informations.
Le composable RichTooltip définit le contenu de l'info-bulle, y compris le titre et le corps du texte.
TooltipDefaults.rememberRichTooltipPositionProvider() fournit des informations de positionnement pour les info-bulles enrichies.
Résultat
Cet exemple produit un info-bulle enrichi avec un titre associé à une icône d'information :
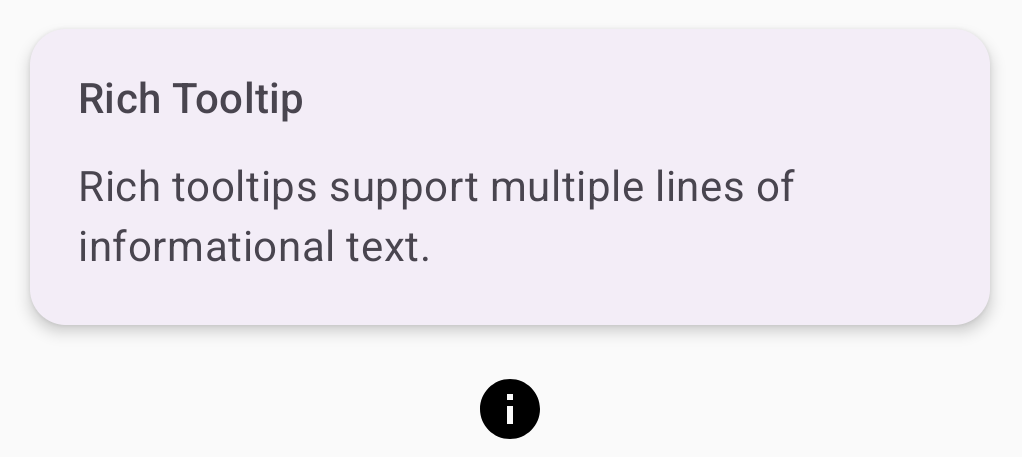
Figure 3 Info-bulle enrichie avec un titre et une icône d'information.
Personnaliser une info-bulle enrichie
Cet extrait de code affiche une info-bulle enrichie avec un titre, des actions personnalisées et un caret (flèche) personnalisé affiché au-dessus d'un bouton avec icône de caméra :
@ComposablefunAdvancedRichTooltipExample(modifier:Modifier=Modifier,richTooltipSubheadText:String="Custom Rich Tooltip",richTooltipText:String="Rich tooltips support multiple lines of informational text.",richTooltipActionText:String="Dismiss"){valtooltipState=rememberTooltipState()valcoroutineScope=rememberCoroutineScope()TooltipBox(modifier=modifier,positionProvider=TooltipDefaults.rememberRichTooltipPositionProvider(),tooltip={RichTooltip(title={Text(richTooltipSubheadText)},action={Row{TextButton(onClick={coroutineScope.launch{tooltipState.dismiss()}}){Text(richTooltipActionText)}}},caretSize=DpSize(32.dp,16.dp)){Text(richTooltipText)}},state=tooltipState){IconButton(onClick={coroutineScope.launch{tooltipState.show()}}){Icon(imageVector=Icons.Filled.Camera,contentDescription="Open camera")}}}
Un RichToolTip affiche une info-bulle avec un titre et une action de fermeture.
Lorsqu'elle est activée, soit par un appui prolongé, soit en pointant sur le contenu ToolTipBox avec le pointeur de la souris, l'info-bulle s'affiche pendant environ une seconde.
Vous pouvez fermer cet info-bulle en appuyant ailleurs sur l'écran ou en utilisant le bouton d'action "Fermer".
Lorsque l'action de fermeture s'exécute, le système lance une coroutine pour appeler tooltipState.dismiss. Cela permet de vérifier que l'exécution de l'action n'est pas bloquée pendant l'affichage de l'info-bulle.
onClick = coroutineScope.launch { tooltipState.show() } } lance une coroutine pour afficher manuellement l'info-bulle à l'aide de tooltipState.show.
Le paramètre action permet d'ajouter des éléments interactifs à un info-bulle, comme un bouton.
Le paramètre caretSize modifie la taille de la flèche de l'info-bulle.
Résultat
Cet exemple génère le résultat suivant :
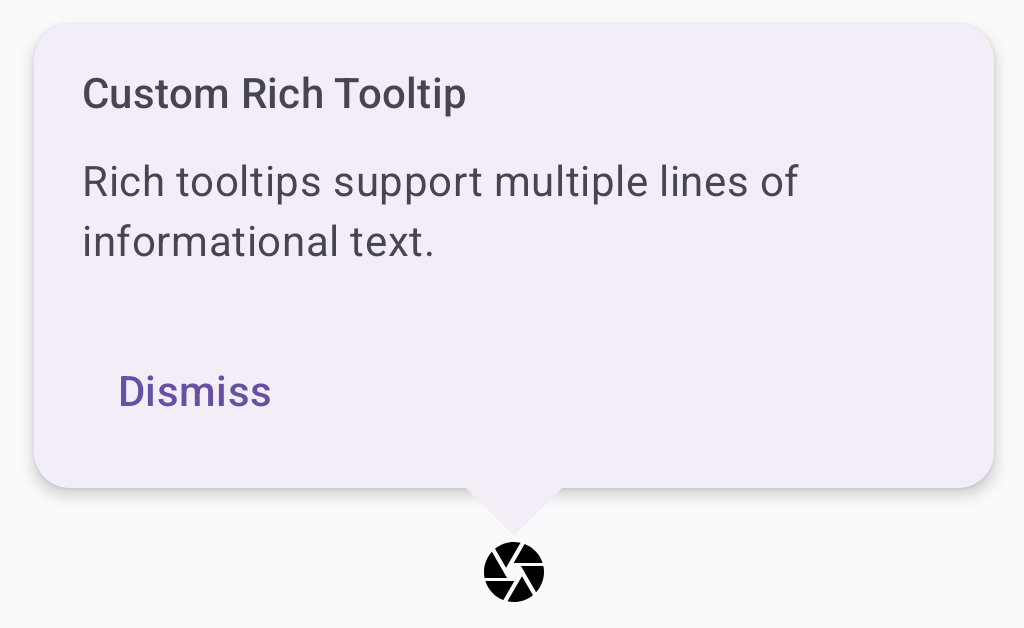
Figure 4. Info-bulle enrichie personnalisée avec une action de fermeture ancrée à une icône de caméra.
Le contenu et les exemples de code de cette page sont soumis aux licences décrites dans la Licence de contenu. Java et OpenJDK sont des marques ou des marques déposées d'Oracle et/ou de ses sociétés affiliées.
Dernière mise à jour le 2025/08/28 (UTC).
[null,null,["Dernière mise à jour le 2025/08/28 (UTC)."],[],[],null,["Use [tooltips](https://m3.material.io/components/tooltips/overview) to add context to a button or other UI element.\nThere are two types of tooltips:\n\n- **Plain tooltips**: Describe elements or actions of icon buttons.\n- **Rich tooltips**: Provide more detail, such as describing the value of a feature. Can also include an optional title, link, and buttons.\n\n**Figure 1.** A plain tooltip (1) and a rich tooltip (2).\n\nAPI surface\n\nYou can use the [`TooltipBox`](/reference/kotlin/androidx/compose/material3/package-summary#TooltipBox(androidx.compose.ui.window.PopupPositionProvider,kotlin.Function1,androidx.compose.material3.TooltipState,androidx.compose.ui.Modifier,kotlin.Function0,kotlin.Boolean,kotlin.Boolean,kotlin.Function0)) composable to implement tooltips in your app.\nYou control [`TooltipBox`](/reference/kotlin/androidx/compose/material3/package-summary#TooltipBox(androidx.compose.ui.window.PopupPositionProvider,kotlin.Function1,androidx.compose.material3.TooltipState,androidx.compose.ui.Modifier,kotlin.Function0,kotlin.Boolean,kotlin.Boolean,kotlin.Function0)) appearance with these main parameters:\n\n- `positionProvider`: Places the tooltip relative to the anchor content. You typically use a default position provider from the `TooltipDefaults`, or you can provide your own if you need custom positioning logic.\n- `tooltip`: The composable that contains the tooltip's content. You typically use either the `PlainTooltip` or `RichTooltip` composables.\n - Use `PlainTooltip` to describe elements or actions of icon buttons.\n - Use `RichTooltip` to provide more details, like describing the value of a feature. Rich tooltips can include an optional title, link, and buttons.\n- `state`: The state holder that contains the UI logic and element state for this tooltip.\n- `content`: The composable content that the tooltip is anchored to.\n\nDisplay a plain tooltip\n\nUse a plain tooltip to briefly describe a UI element. This code snippet displays\na plain tooltip on top of an icon button, labeled \"Add to favorites\":\n\n\n```kotlin\n@Composable\nfun PlainTooltipExample(\n modifier: Modifier = Modifier,\n plainTooltipText: String = \"Add to favorites\"\n) {\n TooltipBox(\n modifier = modifier,\n positionProvider = TooltipDefaults.rememberPlainTooltipPositionProvider(),\n tooltip = {\n PlainTooltip { Text(plainTooltipText) }\n },\n state = rememberTooltipState()\n ) {\n IconButton(onClick = { /* Do something... */ }) {\n Icon(\n imageVector = Icons.Filled.Favorite,\n contentDescription = \"Add to favorites\"\n )\n }\n }\n}\nhttps://github.com/android/snippets/blob/dd30aee903e8c247786c064faab1a9ca8d10b46e/compose/snippets/src/main/java/com/example/compose/snippets/components/Tooltips.kt#L74-L95\n```\n\n\u003cbr /\u003e\n\nKey points about the code\n\n- `TooltipBox` generates a tooltip with the text \"Add to favorites\".\n - [`TooltipDefaults.rememberPlainTooltipPositionProvider()`](/reference/kotlin/androidx/compose/material3/TooltipDefaults?#rememberPlainTooltipPositionProvider(androidx.compose.ui.unit.Dp)) provides default positioning for plain tooltips.\n - `tooltip` is a lambda function that defines the tooltip's content using the [`PlainTooltip`](/reference/kotlin/androidx/compose/material3/TooltipScope#(androidx.compose.material3.TooltipScope).PlainTooltip(androidx.compose.ui.Modifier,androidx.compose.ui.unit.DpSize,androidx.compose.ui.unit.Dp,androidx.compose.ui.graphics.Shape,androidx.compose.ui.graphics.Color,androidx.compose.ui.graphics.Color,androidx.compose.ui.unit.Dp,androidx.compose.ui.unit.Dp,kotlin.Function0)) composable.\n - `Text(plainTooltipText)` displays the text within the tooltip.\n - [`tooltipState`](/reference/kotlin/androidx/compose/material3/TooltipState) controls the state of the tooltip.\n- `IconButton` creates a clickable button with an icon.\n - `Icon(...)` displays a heart icon within the button.\n - When a user interacts with the `IconButton`, `TooltipBox` shows the tooltip with the text \"Add to favorites\". Depending on the device, users can trigger the tooltip in the following ways:\n - Hovering over the icon with a cursor\n - Long-pressing the icon on a mobile device\n\nResult\n\nThis example produces a plain tooltip on top of an icon:\n**Figure 2.**A plain tooltip that appears when a user hovers over or long-presses the heart icon.\n\nDisplay a rich tooltip\n\nUse a rich tooltip to provide additional context about a UI element. This\nexample creates a multi-line rich tooltip with a title that is anchored to an\n`Icon`:\n\n\n```kotlin\n@Composable\nfun RichTooltipExample(\n modifier: Modifier = Modifier,\n richTooltipSubheadText: String = \"Rich Tooltip\",\n richTooltipText: String = \"Rich tooltips support multiple lines of informational text.\"\n) {\n TooltipBox(\n modifier = modifier,\n positionProvider = TooltipDefaults.rememberRichTooltipPositionProvider(),\n tooltip = {\n RichTooltip(\n title = { Text(richTooltipSubheadText) }\n ) {\n Text(richTooltipText)\n }\n },\n state = rememberTooltipState()\n ) {\n IconButton(onClick = { /* Icon button's click event */ }) {\n Icon(\n imageVector = Icons.Filled.Info,\n contentDescription = \"Show more information\"\n )\n }\n }\n}https://github.com/android/snippets/blob/dd30aee903e8c247786c064faab1a9ca8d10b46e/compose/snippets/src/main/java/com/example/compose/snippets/components/Tooltips.kt#L106-L131\n```\n\n\u003cbr /\u003e\n\nKey points about the code\n\n- `TooltipBox` handles the event listeners for user interactions and updates `TooltipState` accordingly. When `TooltipState` indicates that the tooltip should be shown, the tooltip lambda executes, and `TooltipBox` displays the `RichTooltip`. The `TooltipBox` acts as the anchor and container for both content and the tooltip.\n - In this case, the content is an `IconButton` component, which provides the tappable action behavior. When long-pressed (on touch devices) or hovered over (as with the mouse pointer) anywhere in `TooltipBox`'s content, the tooltip will display to show more information.\n- The `RichTooltip` composable defines the tooltip's content, including the title and body text. [`TooltipDefaults.rememberRichTooltipPositionProvider()`](/reference/kotlin/androidx/compose/material3/TooltipDefaults?#rememberRichTooltipPositionProvider(androidx.compose.ui.unit.Dp)) provides positioning information for rich tooltips.\n\nResult\n\nThis example produces a rich tooltip with a title attached to an information\nicon:\n**Figure 3.**A rich tooltip with a title and an information icon.\n\nCustomize a rich tooltip\n\nThis code snippet displays a rich tooltip with a title, custom actions, and a\ncustom caret (arrow) displayed on top of a camera icon button:\n\n\n```kotlin\n@Composable\nfun AdvancedRichTooltipExample(\n modifier: Modifier = Modifier,\n richTooltipSubheadText: String = \"Custom Rich Tooltip\",\n richTooltipText: String = \"Rich tooltips support multiple lines of informational text.\",\n richTooltipActionText: String = \"Dismiss\"\n) {\n val tooltipState = rememberTooltipState()\n val coroutineScope = rememberCoroutineScope()\n\n TooltipBox(\n modifier = modifier,\n positionProvider = TooltipDefaults.rememberRichTooltipPositionProvider(),\n tooltip = {\n RichTooltip(\n title = { Text(richTooltipSubheadText) },\n action = {\n Row {\n TextButton(onClick = {\n coroutineScope.launch {\n tooltipState.dismiss()\n }\n }) {\n Text(richTooltipActionText)\n }\n }\n },\n caretSize = DpSize(32.dp, 16.dp)\n ) {\n Text(richTooltipText)\n }\n },\n state = tooltipState\n ) {\n IconButton(onClick = {\n coroutineScope.launch {\n tooltipState.show()\n }\n }) {\n Icon(\n imageVector = Icons.Filled.Camera,\n contentDescription = \"Open camera\"\n )\n }\n }\n}https://github.com/android/snippets/blob/dd30aee903e8c247786c064faab1a9ca8d10b46e/compose/snippets/src/main/java/com/example/compose/snippets/components/Tooltips.kt#L142-L187\n```\n\n\u003cbr /\u003e\n\nKey points about the code\n\n- A `RichToolTip` displays a tooltip with a title and dismiss action.\n- When activated, either by a long-press or hovering over the `ToolTipBox` content with the mouse pointer, the tooltip is displayed for about one second. You can dismiss this tooltip by either tapping elsewhere on the screen or using the dismiss action button.\n- When the dismiss action executes, the system launches a coroutine to call `tooltipState.dismiss`. This verifies the action execution isn't blocked while the tooltip is displayed.\n- `onClick = coroutineScope.launch { tooltipState.show() } }` launches a coroutine to manually show the tooltip using `tooltipState.show`.\n- The `action` parameter allows for the adding of interactive elements to a tooltip, such as a button.\n- The `caretSize` parameter modifies the size of the tooltip's arrow.\n\nResult\n\nThis example produces the following:\n**Figure 4.** A custom rich tooltip with a dismiss action anchored to a camera icon.\n\nAdditional resources\n\n- Material Design: [Tooltips](https://m3.material.io/components/tooltips/overview)"]]