

提供有关如何在 Android 中创建自定义触感反馈效果的示例和指南,包括使用 VibrationEffect.Builder 的时间轴锚定组合、自定义振动模式和高级波形包络线。 keywords_public: > Android、触感反馈、自定义效果、振动、触感反馈 API、振动模式、VibrationEffect.Builder、组合、触感反馈基元、波形包络线、界面
本页介绍了如何在 Android 应用中使用不同的触感反馈 API 创建超出标准振动波形的自定义效果。
本页包含以下示例:
- 具有
VibrationEffect.Builder的时间轴锚定合成- 使用预设进行合成:按顺序排列预定义的触感。
- 使用包络和预设进行合成:沿时间轴组合包络和预设。
- 重复使用和移动活动:移动和重复使用现有乐曲活动。
- 重复合成:创建重复的时间轴效果。
- 自定义振动模式
- 振动基元组合
- 带包络的振动波形
如需更多示例,请参阅为事件添加触感反馈,并始终遵循触感设计原则。
使用回退来处理设备兼容性问题
实现自定义触感效果时,设备兼容性和回退行为取决于您选择的 API 表面:
VibrationEffect.Builder(推荐):从 Android 16 (26Q4) 开始,使用VibrationEffect.Builder创建的效果包含自动框架级回退。如果设备本身不支持所请求的Preset或基本Envelope,框架会在播放时尽力将其自动转换为合适的替代项。在播放使用VibrationEffect.Builder组成的特效之前,您无需手动检查每个基元的设备功能。- 例外情况:使用
WaveformEnvelopeBuilder创建的高级波形包络不支持自动回退,因为它们依赖于特定的硬件频次映射 (FOAM)。如果不支持,则不会播放。
- 例外情况:使用
VibrationEffect.Composition:使用startComposition()API 创建的合成没有自动回退。如果组合包含哪怕一个不受支持的原语,整个振动也会无法播放。您必须使用vibrator.arePrimitivesSupported()手动检查功能。- 具有振幅控制功能的波形:在缺少振幅控制功能的设备上,非零振幅会向上舍入到 100%。检查
vibrator.hasAmplitudeControl(),并在需要时回退到明确设计的开启/关闭模式。
触感基元的使用
Android 包含多种在振幅和频率方面各不相同的触感基元。您可以单独使用一个基元,也可以组合使用多个基元来实现丰富的触感效果。
- 使用 50 毫秒或更长的延迟时间,以便在两个原语之间形成可辨别的间隙,同时尽可能考虑原语时长。
- 使用相差 1.4 倍或以上的比例,以便更好地感知强度差异。
使用 0.5、0.7 和 1.0 的缩放比例来创建低强度、中强度和高强度的图元。
创建自定义振动模式
振动模式通常用于注意力触感反馈,例如通知和铃声。Vibrator 服务可以播放长时间的振动模式,这些模式会随时间改变振动幅度。此类效果称为波形。
波形效果通常可以感知到,但如果在安静的环境中播放,突发的长时间振动可能会使用户受到惊吓。过快地增加到目标振幅也可能会产生能听到的嗡嗡声。设计波形图案,以平滑振幅过渡,从而营造升降效果。
振动模式示例
以下部分提供了多个振动模式示例:
公开范围渐增模式
波形表示为 VibrationEffect,包含以下三个参数:
- 时间:一个数组,包含每个波形段的持续时间(以毫秒为单位)。
- 振幅:第一个实参中指定的每个时长的所需振动幅度,以 0 到 255 之间的整数值表示,其中 0 表示振动器处于“关闭状态”,255 表示设备的最大振幅。
- 重复索引:第一个实参中指定的数组中开始重复波形的索引,如果只播放一次模式,则为 -1。
下面是一个波形示例,它会脉冲两次,两次脉冲之间有 350 毫秒的暂停时间。第一个脉冲是平稳地升至最大振幅,第二个脉冲是快速升至最大振幅。以负重复索引值表示在末尾停止。
Kotlin
val timings: LongArray = longArrayOf(
    50, 50, 50, 50, 50, 100, 350, 25, 25, 25, 25, 200)
val amplitudes: IntArray = intArrayOf(
    33, 51, 75, 113, 170, 255, 0, 38, 62, 100, 160, 255)
val repeatIndex = -1 // Don't repeat.

vibrator.vibrate(VibrationEffect.createWaveform(
    timings, amplitudes, repeatIndex))
Java
long[] timings = new long[] {
    50, 50, 50, 50, 50, 100, 350, 25, 25, 25, 25, 200 };
int[] amplitudes = new int[] {
    33, 51, 75, 113, 170, 255, 0, 38, 62, 100, 160, 255 };
int repeatIndex = -1; // Don't repeat.

vibrator.vibrate(VibrationEffect.createWaveform(
    timings, amplitudes, repeatIndex));
重复模式
波形也可以重复播放,直到取消为止。创建重复波形的方法是设置一个非负的 repeat 参数。播放重复波形时,振动会一直持续,直到在服务中明确取消为止:
Kotlin
void startVibrating() {
val timings: LongArray = longArrayOf(50, 50, 100, 50, 50)
val amplitudes: IntArray = intArrayOf(64, 128, 255, 128, 64)
val repeat = 1 // Repeat from the second entry, index = 1.
VibrationEffect repeatingEffect = VibrationEffect.createWaveform(
    timings, amplitudes, repeat)
// repeatingEffect can be used in multiple places.

vibrator.vibrate(repeatingEffect)
}

void stopVibrating() {
vibrator.cancel()
}
Java
void startVibrating() {
long[] timings = new long[] { 50, 50, 100, 50, 50 };
int[] amplitudes = new int[] { 64, 128, 255, 128, 64 };
int repeat = 1; // Repeat from the second entry, index = 1.
VibrationEffect repeatingEffect = VibrationEffect.createWaveform(
    timings, amplitudes, repeat);
// repeatingEffect can be used in multiple places.

vibrator.vibrate(repeatingEffect);
}

void stopVibrating() {
vibrator.cancel();
}
这对于需要用户采取行动来确认的间歇性事件非常有用。此类事件的示例包括来电和触发的闹钟。
包含回退的模式
控制振动的振幅是一项依赖于硬件的功能。在没有此功能的低端设备上播放波形会导致设备在振幅数组中的每个正条目处以最大振幅振动。如果您的应用需要适应此类设备,请使用在相应条件下播放时不会产生嗡嗡声的振动模式,或者设计一个更简单的开/关模式作为后备方案。
Kotlin
if (vibrator.hasAmplitudeControl()) {
  vibrator.vibrate(VibrationEffect.createWaveform(
    smoothTimings, amplitudes, smoothRepeatIdx))
} else {
  vibrator.vibrate(VibrationEffect.createWaveform(
    onOffTimings, onOffRepeatIdx))
}
Java
if (vibrator.hasAmplitudeControl()) {
  vibrator.vibrate(VibrationEffect.createWaveform(
    smoothTimings, amplitudes, smoothRepeatIdx));
} else {
  vibrator.vibrate(VibrationEffect.createWaveform(
    onOffTimings, onOffRepeatIdx));
}
使用 VibrationEffect.Builder 的时间轴锚定合成
从 Android 16(2026 年第 4 季度)开始,VibrationEffect.Builder 是用于创建复杂振动效果和振动组合的首选 API。它允许您通过使用 startTimeMillis 沿绝对时间轴对离散触感元素进行排序,从而构建富有表现力的触感。
VibrationEffect.Builder 支持组合多种振动类型:
- 预设:预定义的触感脉冲 (
VibrationEffect.Preset),例如点击和滴答声。 - 包络:动态连续波形,包括与硬件无关的基本包络 (
BasicEnvelopeBuilder) 和高级调频包络 (WaveformEnvelopeBuilder)。 - 现有 VibrationEffect:使用
addEvents()或构造函数复制导入的原始组合 (VibrationEffect.Composition)、步进波形 (VibrationEffect.createWaveform)、预定义效果 (VibrationEffect.createPredefined) 和一次性效果 (VibrationEffect.createOneShot)。 - 重复序列:使用
setRepeatingEffect()配置的连续模式。
使用 VibrationEffect.Builder 构建的振动在其元素(包括预设、基本包络和组合振动效果)中内置了框架级自动回退,可确保在不同设备上提供一致的用户体验,而无需手动检查功能。(使用 WaveformEnvelopeBuilder 创建的高级波形包络需要硬件支持,并且没有自动回退支持。)
使用预设进行撰写
使用 VibrationEffect.Preset 可向乐章添加常见的预定义短促触感脉冲(例如 PRESET_CLICK、PRESET_TICK 或 PRESET_LOW_TICK)。预设由设备制造商实现,可提供清脆、短暂且令人愉悦的振动,符合清晰触感反馈的触感反馈原则。如需详细了解这些功能及其运作方式,请参阅振动执行器入门。
预设项取代了 VibrationEffect.Composition API 中的简短原语。
对于较长或连续的触感(例如逐渐增强和减弱),请改用包络波形 (PWLE)。
每个预设都可以分配一个介于 0.0f 和 1.0f 之间的可选缩放比例,并放置在乐曲开始时的一个明确的开始时间(以毫秒为单位)。
Kotlin
val clickPreset = VibrationEffect.Preset.create(
    VibrationEffect.Preset.PRESET_CLICK, /* scale= */ 0.8f
)
val tickPreset = VibrationEffect.Preset.create(
    VibrationEffect.Preset.PRESET_TICK, /* scale= */ 0.5f
)

val effect = VibrationEffect.Builder()
    .addPreset(/* startTimeMillis= */ 0L, clickPreset)
    .addPreset(/* startTimeMillis= */ 100L, tickPreset)
    .build()

vibrator.vibrate(effect)
Java
VibrationEffect.Preset clickPreset = VibrationEffect.Preset.create(
    VibrationEffect.Preset.PRESET_CLICK, /* scale= */ 0.8f
);
VibrationEffect.Preset tickPreset = VibrationEffect.Preset.create(
    VibrationEffect.Preset.PRESET_TICK, /* scale= */ 0.5f
);

VibrationEffect effect = new VibrationEffect.Builder()
    .addPreset(/* startTimeMillis= */ 0L, clickPreset)
    .addPreset(/* startTimeMillis= */ 100L, tickPreset)
    .build();

vibrator.vibrate(effect);
使用包络和预设进行合成
您可以将 VibrationEffect.Envelope 实例(使用 BasicEnvelopeBuilder 或 WaveformEnvelopeBuilder 创建)与预设无缝结合,以创建丰富多段的触感模式。
以下示例演示了如何播放平滑的升降包络,然后播放急促的点击预设:
Kotlin
val basicEnvelope = VibrationEffect.Envelope.create(
    VibrationEffect.BasicEnvelopeBuilder()
        .setInitialSharpness(0.0f)
        .addControlPoint(1.0f, 1.0f, 300L)
        .addControlPoint(0.0f, 0.5f, 100L)
)
val clickPreset = VibrationEffect.Preset.create(
    VibrationEffect.Preset.PRESET_CLICK, 0.9f
)

val mixedEffect = VibrationEffect.Builder()
    .addEnvelope(/* startTimeMillis= */ 0L, basicEnvelope)
    .addPreset(/* startTimeMillis= */ 450L, clickPreset)
    .build()

vibrator.vibrate(mixedEffect)
Java
VibrationEffect.Envelope basicEnvelope = VibrationEffect.Envelope.create(
    new VibrationEffect.BasicEnvelopeBuilder()
        .setInitialSharpness(0.0f)
        .addControlPoint(1.0f, 1.0f, 300L)
        .addControlPoint(0.0f, 0.5f, 100L)
);
VibrationEffect.Preset clickPreset = VibrationEffect.Preset.create(
    VibrationEffect.Preset.PRESET_CLICK, 0.9f
);

VibrationEffect mixedEffect = new VibrationEffect.Builder()
    .addEnvelope(/* startTimeMillis= */ 0L, basicEnvelope)
    .addPreset(/* startTimeMillis= */ 450L, clickPreset)
    .build();

vibrator.vibrate(mixedEffect);
重复使用和调整现有活动
如需重用或串联现有 VibrationEffect(包括 VibrationEffect.Composition),请使用 getEvents() 检索其 VibrationEffect.Event 对象列表,并使用 addEvents(startTimeShiftMillis, events) 通过偏移量附加这些对象(或直接将效果传递给 VibrationEffect.Builder(effect) 构造函数)。以这种方式导入 VibrationEffect.Composition 实例时,框架会自动将其原语转换为预设,从而实现运行时回退支持。
Kotlin
val existingEffect = VibrationEffect.Builder()
    .addPreset(
        0L,
        VibrationEffect.Preset.create(VibrationEffect.Preset.PRESET_CLICK)
    )
    .addPreset(
        80L,
        VibrationEffect.Preset.create(VibrationEffect.Preset.PRESET_TICK)
    )
    .build()

// Shift and append the existing events 200ms into the new composition.
val combinedEffect = VibrationEffect.Builder()
    .addEvents(/* startTimeShiftMillis= */ 200L, existingEffect.events)
    .build()

vibrator.vibrate(combinedEffect)
Java
VibrationEffect existingEffect = new VibrationEffect.Builder()
    .addPreset(
        0L,
        VibrationEffect.Preset.create(VibrationEffect.Preset.PRESET_CLICK)
    )
    .addPreset(
        80L,
        VibrationEffect.Preset.create(VibrationEffect.Preset.PRESET_TICK)
    )
    .build();

// Shift and append the existing events 200ms into the new composition.
VibrationEffect combinedEffect = new VibrationEffect.Builder()
    .addEvents(/* startTimeShiftMillis= */ 200L, existingEffect.getEvents())
    .build();

vibrator.vibrate(combinedEffect);
创建重复的乐曲
使用 setRepeatingEffect(startTimeMillis, repeatingEffect, durationMillis) 向合成添加重复模式:
Kotlin
val repeatingPattern = VibrationEffect.Builder()
    .addPreset(
        0L,
        VibrationEffect.Preset.create(
            VibrationEffect.Preset.PRESET_CLICK, 1.0f
        )
    )
    .addPreset(
        150L,
        VibrationEffect.Preset.create(
            VibrationEffect.Preset.PRESET_LOW_TICK, 0.6f
        )
    )
    .build()

val repeatingEffect = VibrationEffect.Builder()
    .setRepeatingEffect(
        /* startTimeMillis= */ 0L,
        /* effect= */ repeatingPattern,
        /* durationMillis= */ 300L
    )
    .build()

vibrator.vibrate(repeatingEffect)
Java
VibrationEffect repeatingPattern = new VibrationEffect.Builder()
    .addPreset(
        0L,
        VibrationEffect.Preset.create(
            VibrationEffect.Preset.PRESET_CLICK, 1.0f
        )
    )
    .addPreset(
        150L,
        VibrationEffect.Preset.create(
            VibrationEffect.Preset.PRESET_LOW_TICK, 0.6f
        )
    )
    .build();

VibrationEffect repeatingEffect = new VibrationEffect.Builder()
    .setRepeatingEffect(
        /* startTimeMillis= */ 0L,
        /* effect= */ repeatingPattern,
        /* durationMillis= */ 300L
    )
    .build();

vibrator.vibrate(repeatingEffect);
时间安排、验证和漂移管理
使用 VibrationEffect.Builder 设计乐曲时,请谨记以下时间安排和验证规则:
- 严格递增的开始时间:添加到构建器的每个元素的
startTimeMillis都必须严格大于或等于前一个元素的开始时间。 - 构建时验证:构建器在
build()时使用已知的元素时长(或预设的 1 毫秒最小值)尽力执行验证。如果检测到不可能出现的重叠,则抛出IllegalArgumentException。 - 播放顺序偏移:如果前一个振动元素在下一个元素的开始时间到达时仍在实际播放,框架会自动将下一个元素偏移到最早的可用时间段。这样可确保事件不会重叠,也不会丢失任何振动,但如果事件安排得过于紧密,可能会出现轻微的时间漂移。为最大限度地减少漂移,请在连续的触感反馈事件之间留出足够的时间(例如 50 毫秒或更长时间)。
创建振动原语组合
本部分介绍如何使用 VibrationEffect.Composition 组合振动。本页前面介绍的合成原语由设备制造商实现。它们可提供清脆、短暂且令人愉悦的振动,符合清晰触感反馈的触感反馈原则。如需详细了解这些功能及其工作原理,请参阅振动执行器入门指南。
与 VibrationEffect.Builder 不同,VibrationEffect.Composition API 不会针对不受支持的原语自动回退。因此:
在激活高级触感反馈之前,请检查指定设备是否支持您使用的所有基元。
停用不受支持的一致体验集,而不仅仅是缺少原语的效果。
- Kotlin:
val fallbackEffect = VibrationEffect.Builder(compositionEffect).build()(或.addEvents(0L, compositionEffect.events)) - Java:
VibrationEffect fallbackEffect =new VibrationEffect.Builder(compositionEffect).build();(或.addEvents(0L, compositionEffect.getEvents()))
如果使用 VibrationEffect.Builder 构建,框架会将合成原语转换为预设,并在用户的设备上不支持任何原语时自动提供运行时回退。
组合振动效果
您可以使用 VibrationEffect.Composition 创建组合振动效果。以下示例展示了缓慢上升效果,随后是急促的点击效果:
Kotlin
vibrator.vibrate(
    VibrationEffect.startComposition().addPrimitive(
    VibrationEffect.Composition.PRIMITIVE_SLOW_RISE
    ).addPrimitive(
    VibrationEffect.Composition.PRIMITIVE_CLICK
    ).compose()
)
Java
vibrator.vibrate(
    VibrationEffect.startComposition()
        .addPrimitive(VibrationEffect.Composition.PRIMITIVE_SLOW_RISE)
        .addPrimitive(VibrationEffect.Composition.PRIMITIVE_CLICK)
        .compose());
通过添加按顺序播放的基元来创建乐曲。每种原语都是可缩放的,因此您可以控制每种原语产生的振动幅度。该比例定义为介于 0 和 1 之间的值,其中 0 实际上对应于用户几乎感觉不到的最小振幅。
在振动原语中创建变体
如果您想为同一基元创建弱版本和强版本,请创建强度比为 1.4 或更高的版本,以便可以轻松感知强度差异。请勿尝试为同一基元创建三个以上的强度级别,因为它们在感知上没有明显的区别。例如,使用 0.5、0.7 和 1.0 的缩放比例来创建低强度、中等强度和高强度的原语版本。
在振动原语之间添加间隙
合成还可以指定要在连续的原语之间添加的延迟。此延迟时间以毫秒为单位表示,从上一个原语结束时开始计算。一般来说,两个原语之间的间隔时间过短(5 到 10 毫秒),无法检测到。如果您想在两个原语之间创建可辨别的间隙,请使用 50 毫秒或更长的间隙。以下是包含延迟的合成示例:
Kotlin
val delayMs = 100
vibrator.vibrate(
    VibrationEffect.startComposition().addPrimitive(
    VibrationEffect.Composition.PRIMITIVE_SPIN, 0.8f
    ).addPrimitive(
    VibrationEffect.Composition.PRIMITIVE_SPIN, 0.6f
    ).addPrimitive(
    VibrationEffect.Composition.PRIMITIVE_THUD, 1.0f, delayMs
    ).compose()
)
Java
int delayMs = 100;
vibrator.vibrate(
    VibrationEffect.startComposition()
        .addPrimitive(VibrationEffect.Composition.PRIMITIVE_SPIN, 0.8f)
        .addPrimitive(VibrationEffect.Composition.PRIMITIVE_SPIN, 0.6f)
        .addPrimitive(
            VibrationEffect.Composition.PRIMITIVE_THUD, 1.0f, delayMs)
        .compose());
查看支持哪些原语
以下 API 可用于验证设备对特定原语的支持情况:
Kotlin
val primitive = VibrationEffect.Composition.PRIMITIVE_LOW_TICK

if (vibrator.areAllPrimitivesSupported(primitive)) {
  vibrator.vibrate(VibrationEffect.startComposition()
        .addPrimitive(primitive).compose())
} else {
  // Play a predefined effect or custom pattern as a fallback.
}
Java
int primitive = VibrationEffect.Composition.PRIMITIVE_LOW_TICK;

if (vibrator.areAllPrimitivesSupported(primitive)) {
  vibrator.vibrate(VibrationEffect.startComposition()
        .addPrimitive(primitive).compose());
} else {
  // Play a predefined effect or custom pattern as a fallback.
}
您还可以检查多个原语,然后根据设备支持级别决定要组合哪些原语:
Kotlin
val effects: IntArray = intArrayOf(
VibrationEffect.Composition.PRIMITIVE_LOW_TICK,
VibrationEffect.Composition.PRIMITIVE_TICK,
VibrationEffect.Composition.PRIMITIVE_CLICK
)
val supported: BooleanArray = vibrator.arePrimitivesSupported(primitives)
Java
int[] primitives = new int[] {
VibrationEffect.Composition.PRIMITIVE_LOW_TICK,
VibrationEffect.Composition.PRIMITIVE_TICK,
VibrationEffect.Composition.PRIMITIVE_CLICK
};
boolean[] supported = vibrator.arePrimitivesSupported(effects);
振动组合示例
以下部分提供了多个振动组合示例,这些示例摘自 GitHub 上的 Haptics 示例应用。
阻力(低刻度)
您可以控制原始振动的振幅,以便为正在进行的操作提供有用的反馈。可以使用间距较小的缩放值来创建基元的平滑渐强效果。还可以根据用户互动动态设置连续原语之间的延迟时间。以下示例展示了由拖动手势控制并增强了触感反馈的视图动画。

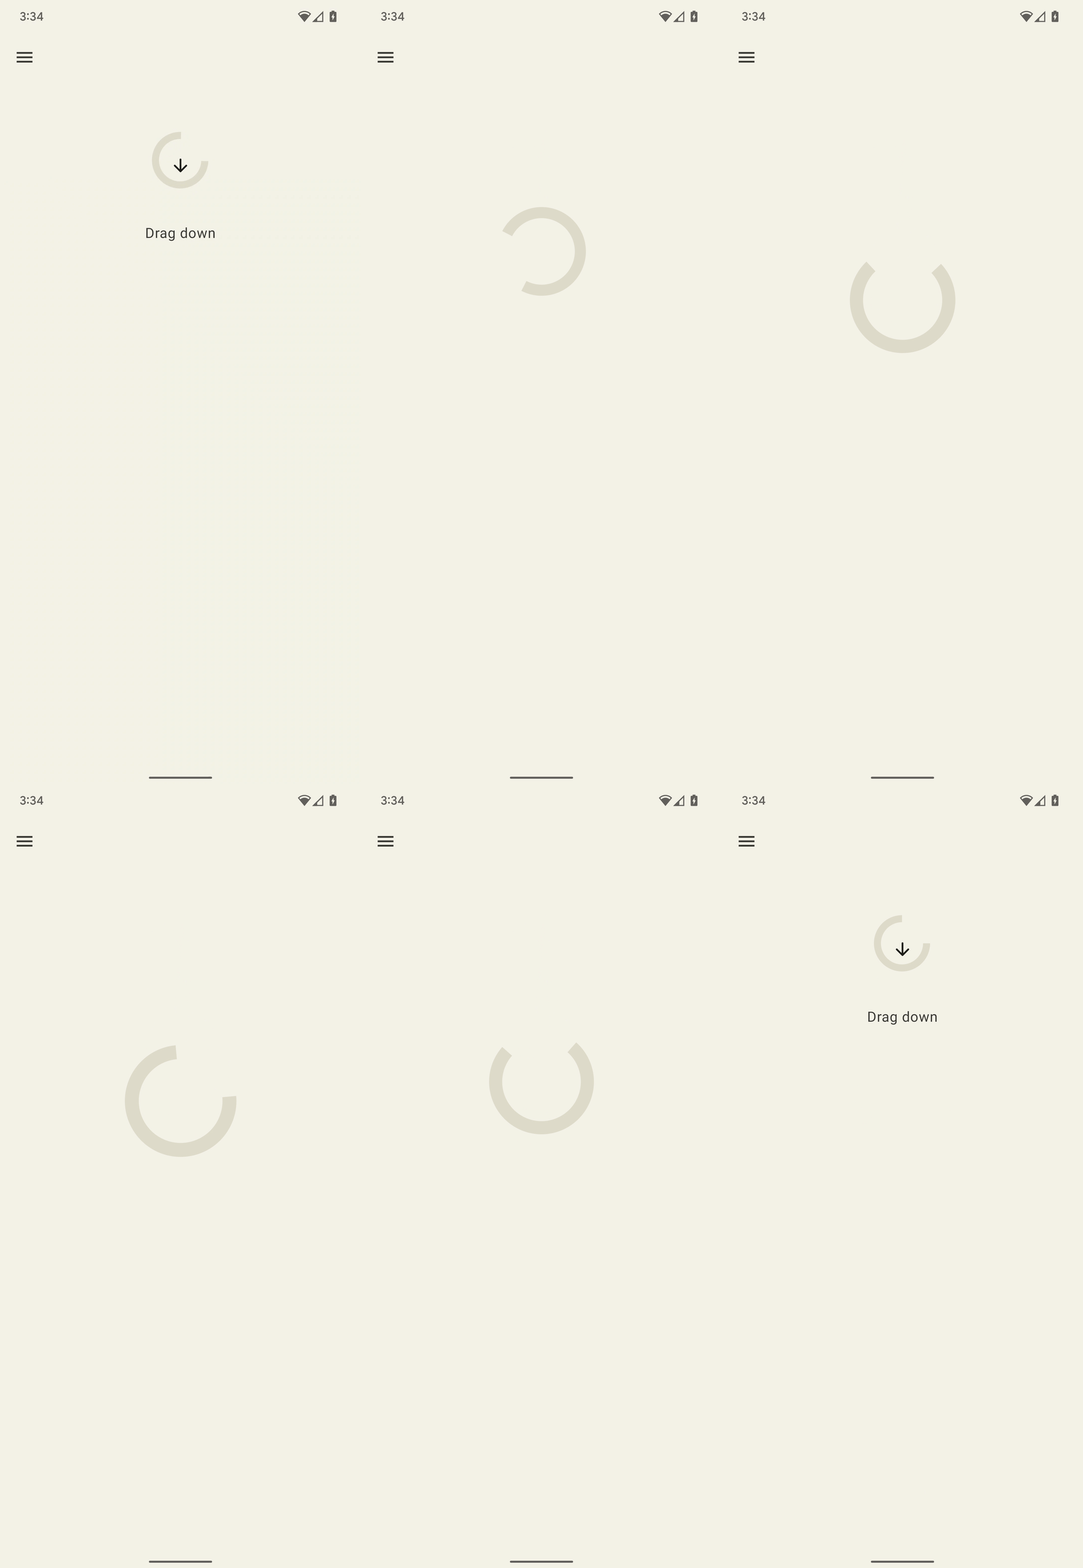
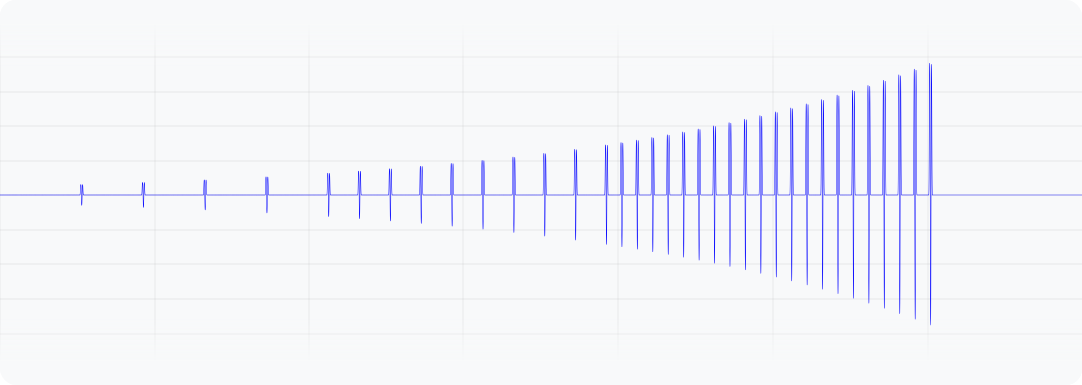
图 1. 此波形表示设备上振动的输出加速度。
Kotlin
@Composable
fun ResistScreen() {
    // Control variables for the dragging of the indicator.
    var isDragging by remember { mutableStateOf(false) }
    var dragOffset by remember { mutableStateOf(0f) }

    // Only vibrates while the user is dragging
    if (isDragging) {
        LaunchedEffect(Unit) {
        // Continuously run the effect for vibration to occur even when the view
        // is not being drawn, when user stops dragging midway through gesture.
        while (true) {
            // Calculate the interval inversely proportional to the drag offset.
            val vibrationInterval = calculateVibrationInterval(dragOffset)
            // Calculate the scale directly proportional to the drag offset.
            val vibrationScale = calculateVibrationScale(dragOffset)

            delay(vibrationInterval)
            vibrator.vibrate(
            VibrationEffect.startComposition().addPrimitive(
                VibrationEffect.Composition.PRIMITIVE_LOW_TICK,
                vibrationScale
            ).compose()
            )
        }
        }
    }

    Screen() {
        Column(
        Modifier
            .draggable(
            orientation = Orientation.Vertical,
            onDragStarted = {
                isDragging = true
            },
            onDragStopped = {
                isDragging = false
            },
            state = rememberDraggableState { delta ->
                dragOffset += delta
            }
            )
        ) {
        // Build the indicator UI based on how much the user has dragged it.
        ResistIndicator(dragOffset)
        }
    }
}
Java
class DragListener implements View.OnTouchListener {
    // Control variables for the dragging of the indicator.
    private int startY;
    private int vibrationInterval;
    private float vibrationScale;

    @Override
    public boolean onTouch(View view, MotionEvent event) {
        switch (event.getAction()) {
        case MotionEvent.ACTION_DOWN:
            startY = event.getRawY();
            vibrationInterval = calculateVibrationInterval(0);
            vibrationScale = calculateVibrationScale(0);
            startVibration();
            break;
        case MotionEvent.ACTION_MOVE:
            float dragOffset = event.getRawY() - startY;
            // Calculate the interval inversely proportional to the drag offset.
            vibrationInterval = calculateVibrationInterval(dragOffset);
            // Calculate the scale directly proportional to the drag offset.
            vibrationScale = calculateVibrationScale(dragOffset);
            // Build the indicator UI based on how much the user has dragged it.
            updateIndicator(dragOffset);
            break;
        case MotionEvent.ACTION_CANCEL:
        case MotionEvent.ACTION_UP:
            // Only vibrates while the user is dragging
            cancelVibration();
            break;
        }
        return true;
    }

    private void startVibration() {
        vibrator.vibrate(
            VibrationEffect.startComposition()
                .addPrimitive(VibrationEffect.Composition.PRIMITIVE_LOW_TICK,
                        vibrationScale)
                .compose());

        // Continuously run the effect for vibration to occur even when the view
        // is not being drawn, when user stops dragging midway through gesture.
        handler.postDelayed(this::startVibration, vibrationInterval);
    }

    private void cancelVibration() {
        handler.removeCallbacksAndMessages(null);
    }
}
展开(含升降)
有两种用于逐步提高感知振动强度的原语:PRIMITIVE_QUICK_RISE 和 PRIMITIVE_SLOW_RISE。两者都可实现相同的目标,但持续时间不同。只有一种用于调低音量的原语,即 PRIMITIVE_QUICK_FALL。这些原语可以更好地协同工作,从而创建强度逐渐增大然后逐渐减弱的波形段。您可以对齐缩放后的原语,以防止它们之间的振幅出现突变,这也有助于延长整体效果持续时间。从感知上来说,人们总是更关注上升部分,因此让上升部分短于下降部分可以使重点转向下降部分。
下面是一个应用此组合来展开和收缩圆形的示例。升起效果可以增强动画播放期间的扩展感。升起和落下效果的组合有助于强调动画结尾的坍塌。
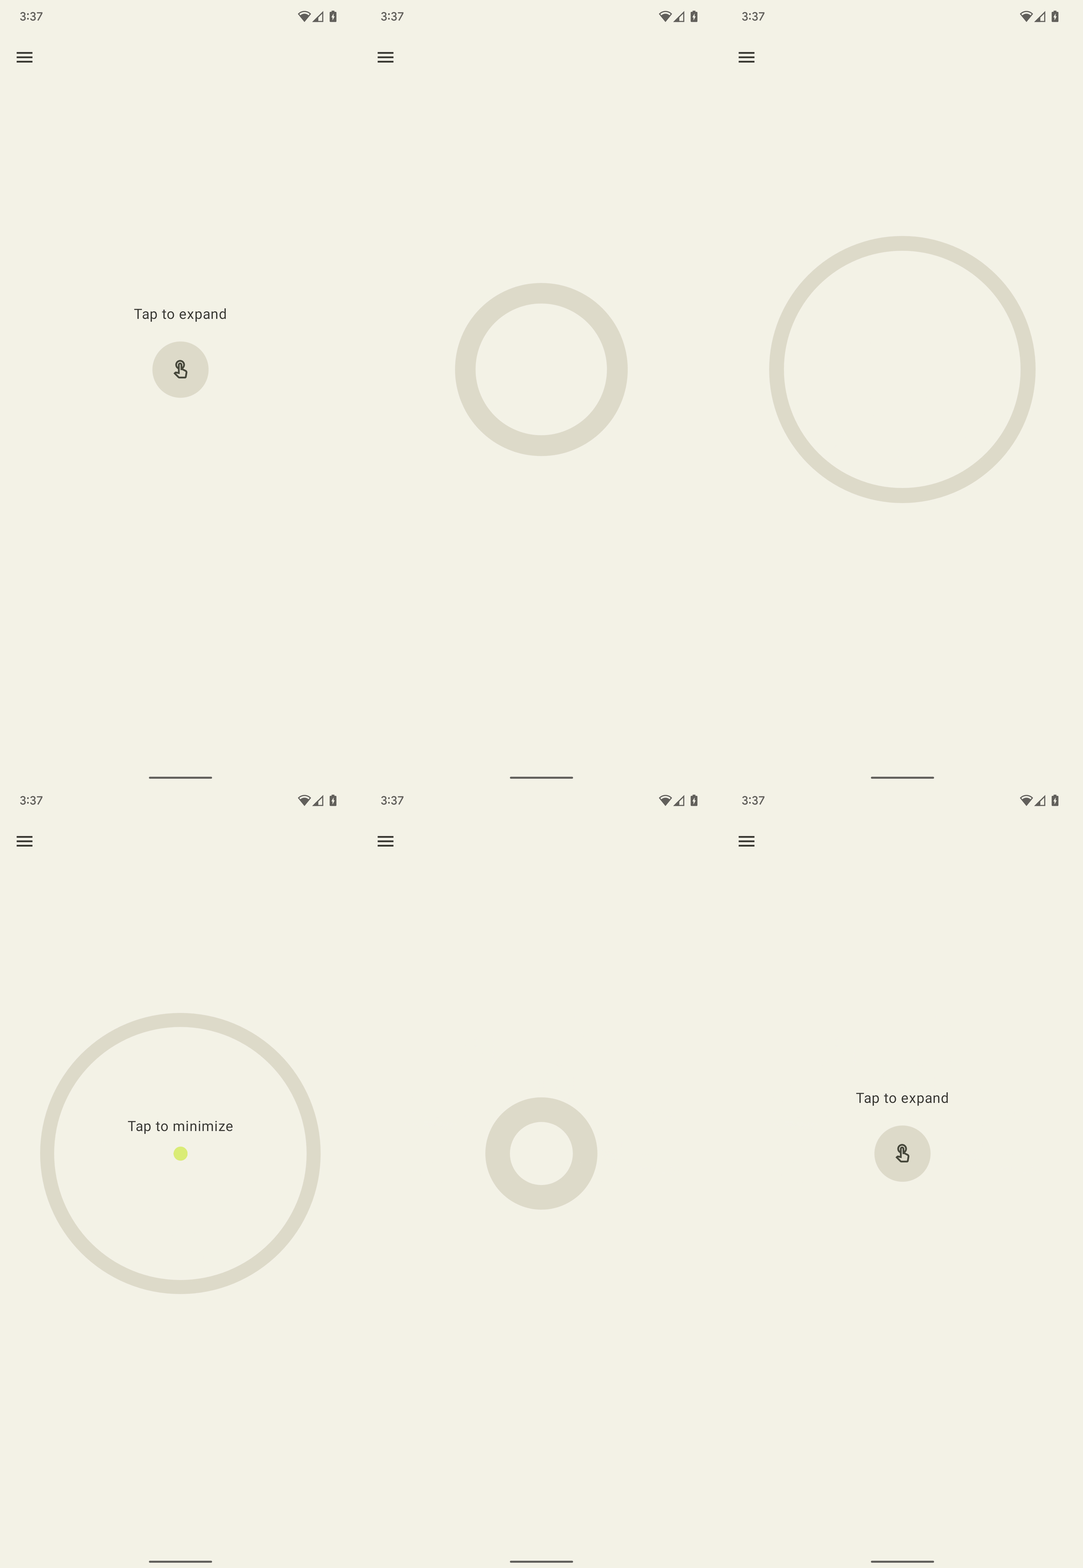
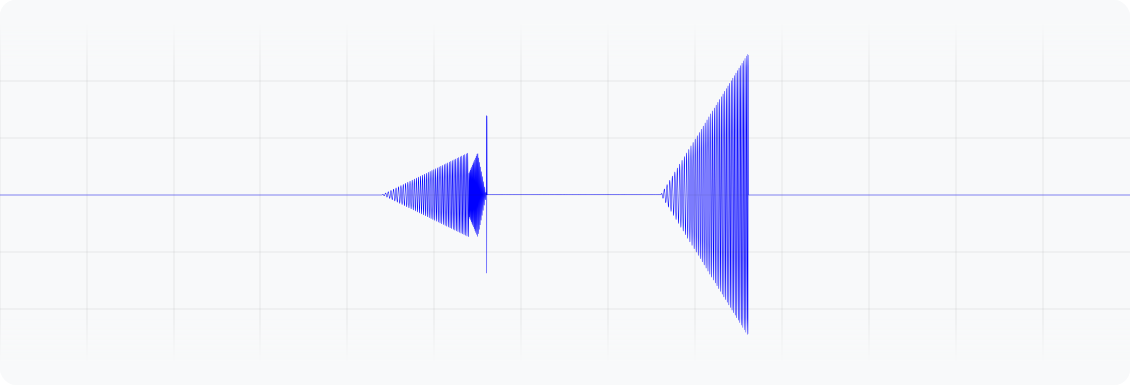
图 2.此波形表示设备的振动输出加速度。
Kotlin
enum class ExpandShapeState {
    Collapsed,
    Expanded
}

@Composable
fun ExpandScreen() {
    // Control variable for the state of the indicator.
    var currentState by remember { mutableStateOf(ExpandShapeState.Collapsed) }

    // Animation between expanded and collapsed states.
    val transitionData = updateTransitionData(currentState)

    Screen() {
        Column(
        Modifier
            .clickable(
            {
                if (currentState == ExpandShapeState.Collapsed) {
                currentState = ExpandShapeState.Expanded
                vibrator.vibrate(
                    VibrationEffect.startComposition().addPrimitive(
                    VibrationEffect.Composition.PRIMITIVE_SLOW_RISE,
                    0.3f
                    ).addPrimitive(
                    VibrationEffect.Composition.PRIMITIVE_QUICK_FALL,
                    0.3f
                    ).compose()
                )
                } else {
                currentState = ExpandShapeState.Collapsed
                vibrator.vibrate(
                    VibrationEffect.startComposition().addPrimitive(
                    VibrationEffect.Composition.PRIMITIVE_SLOW_RISE
                    ).compose()
                )
            }
            )
        ) {
        // Build the indicator UI based on the current state.
        ExpandIndicator(transitionData)
        }
    }
}
Java
class ClickListener implements View.OnClickListener {
    private final Animation expandAnimation;
    private final Animation collapseAnimation;
    private boolean isExpanded;

    ClickListener(Context context) {
        expandAnimation = AnimationUtils.loadAnimation(context, R.anim.expand);
        expandAnimation.setAnimationListener(new Animation.AnimationListener() {

        @Override
        public void onAnimationStart(Animation animation) {
            vibrator.vibrate(
            VibrationEffect.startComposition()
                .addPrimitive(
                    VibrationEffect.Composition.PRIMITIVE_SLOW_RISE, 0.3f)
                .addPrimitive(
                    VibrationEffect.Composition.PRIMITIVE_QUICK_FALL, 0.3f)
                .compose());
        }
        });

        collapseAnimation = AnimationUtils
                .loadAnimation(context, R.anim.collapse);
        collapseAnimation.setAnimationListener(new Animation.AnimationListener() {

            @Override
            public void onAnimationStart(Animation animation) {
                vibrator.vibrate(
                VibrationEffect.startComposition()
                    .addPrimitive(
                        VibrationEffect.Composition.PRIMITIVE_SLOW_RISE)
                    .compose());
            }
        });
    }

    @Override
    public void onClick(View view) {
        view.startAnimation(isExpanded ? collapseAnimation : expandAnimation);
        isExpanded = !isExpanded;
    }
}
摇摆(带旋转)
触感反馈原则之一是让用户感到愉悦。如需以有趣的方式引入令人愉悦的意外振动效果,可以使用 PRIMITIVE_SPIN。当此原语被多次调用时,效果最佳。串联多次旋转可以产生摇摆不定的效果,通过对每个图元应用一定程度的随机缩放,可以进一步增强这种效果。您还可以尝试调整连续自旋原语之间的间隔。两次旋转之间没有任何间隔(0 毫秒),会产生紧凑的旋转感。将旋转间隙从 10 毫秒增加到 50 毫秒会带来更宽松的旋转感,可用于匹配视频或动画的持续时间。
请勿使用超过 100 毫秒的间隙,因为连续旋转不再能很好地整合,而是开始感觉像单独的效果。
以下是一个弹性形状的示例,该形状在被向下拖动然后释放后会弹回。动画通过一对旋转效果得到增强,旋转效果以与弹跳位移成正比的不同强度播放。
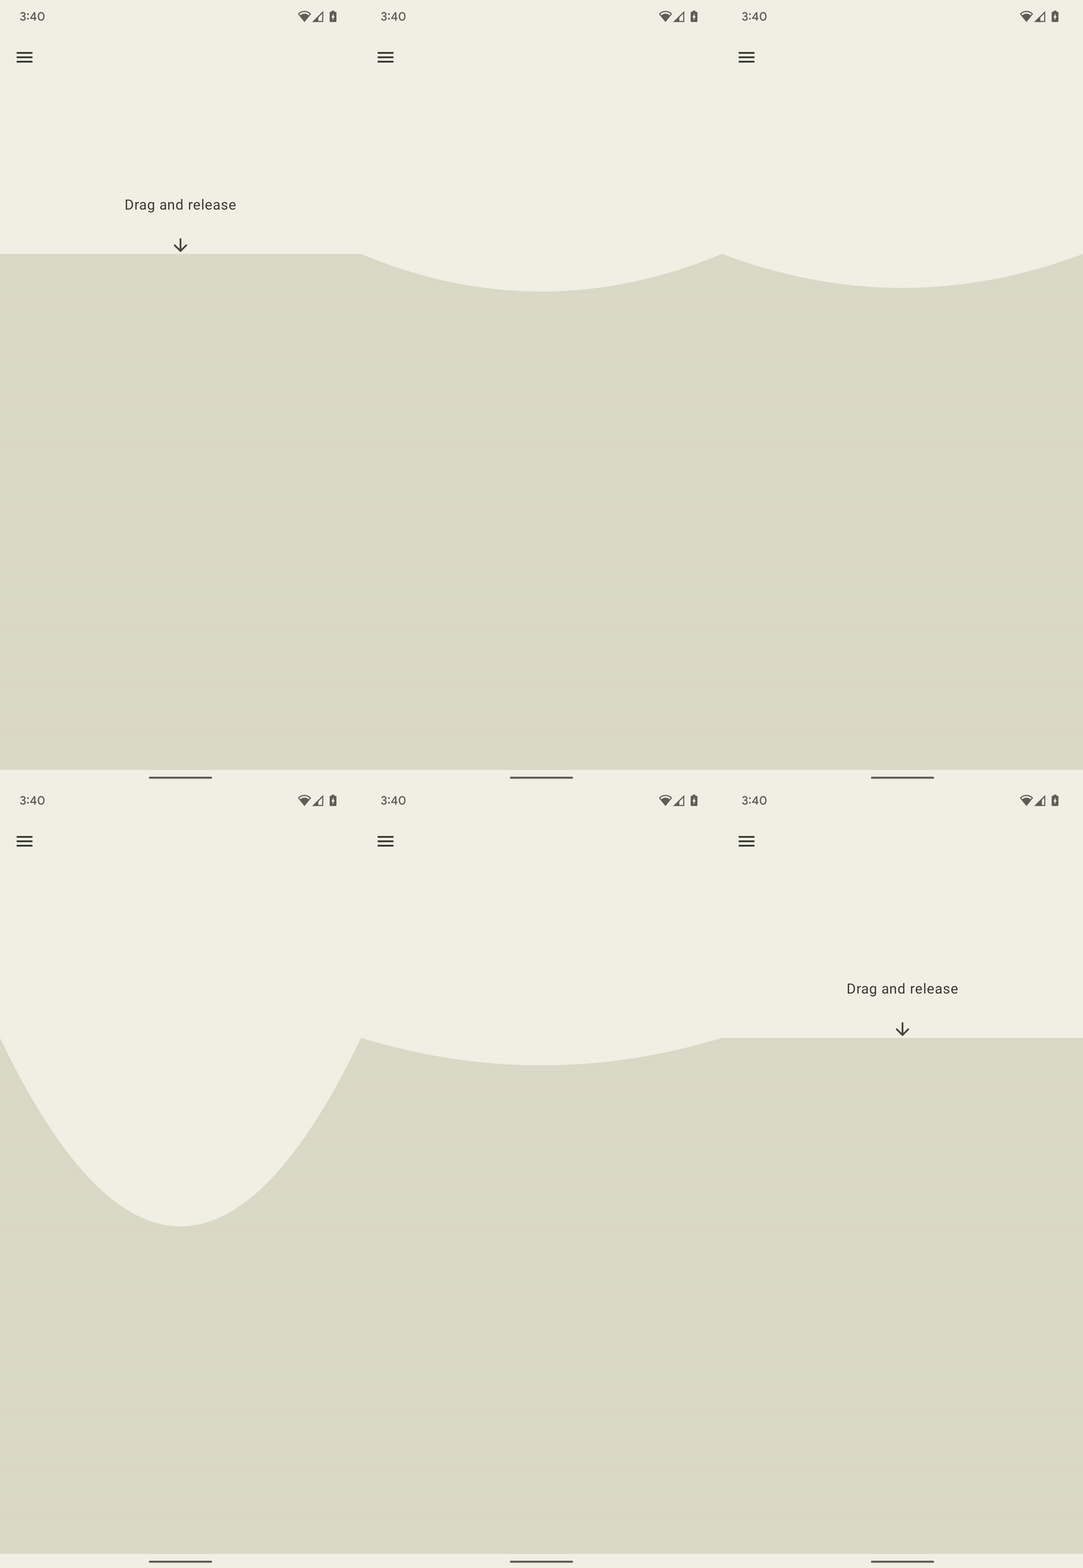
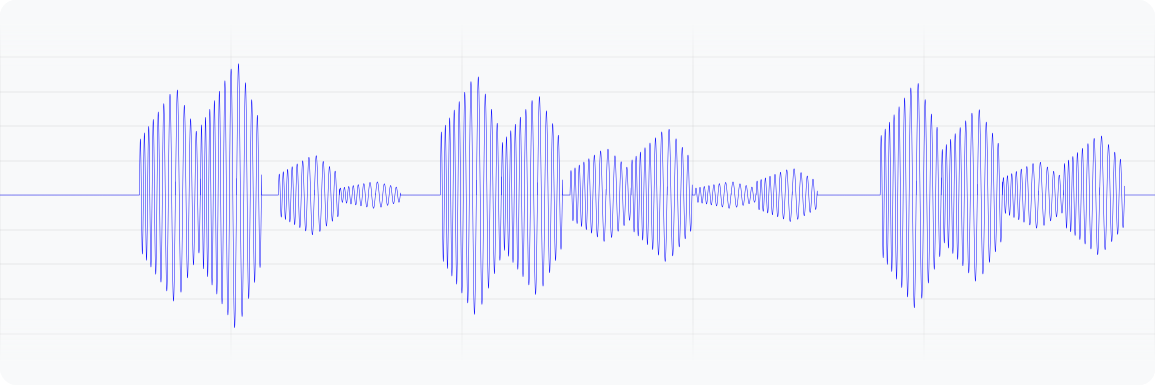
图 3. 此波形表示设备上振动的输出加速度。
Kotlin
@Composable
fun WobbleScreen() {
    // Control variables for the dragging and animating state of the elastic.
    var dragDistance by remember { mutableStateOf(0f) }
    var isWobbling by remember { mutableStateOf(false) }

    // Use drag distance to create an animated float value behaving like a spring.
    val dragDistanceAnimated by animateFloatAsState(
        targetValue = if (dragDistance > 0f) dragDistance else 0f,
        animationSpec = spring(
            dampingRatio = Spring.DampingRatioHighBouncy,
            stiffness = Spring.StiffnessMedium
        ),
    )

    if (isWobbling) {
        LaunchedEffect(Unit) {
            while (true) {
                val displacement = dragDistanceAnimated / MAX_DRAG_DISTANCE
                // Use some sort of minimum displacement so the final few frames
                // of animation don't generate a vibration.
                if (displacement > SPIN_MIN_DISPLACEMENT) {
                    vibrator.vibrate(
                        VibrationEffect.startComposition().addPrimitive(
                            VibrationEffect.Composition.PRIMITIVE_SPIN,
                            nextSpinScale(displacement)
                        ).addPrimitive(
                        VibrationEffect.Composition.PRIMITIVE_SPIN,
                        nextSpinScale(displacement)
                        ).compose()
                    )
                }
                // Delay the next check for a sufficient duration until the
                // current composition finishes. Note that you can use
                // Vibrator.getPrimitiveDurations API to calculcate the delay.
                delay(VIBRATION_DURATION)
            }
        }
    }

    Box(
        Modifier
            .fillMaxSize()
            .draggable(
                onDragStopped = {
                    isWobbling = true
                    dragDistance = 0f
                },
                orientation = Orientation.Vertical,
                state = rememberDraggableState { delta ->
                    isWobbling = false
                    dragDistance += delta
                }
            )
    ) {
        // Draw the wobbling shape using the animated spring-like value.
        WobbleShape(dragDistanceAnimated)
    }
}

// Calculate a random scale for each spin to vary the full effect.
fun nextSpinScale(displacement: Float): Float {
    // Generate a random offset in the range [-0.1, +0.1] to be added to the
    // vibration scale so the spin effects have slightly different values.
    val randomOffset: Float = Random.Default.nextFloat() * 0.2f - 0.1f
    return (displacement + randomOffset).absoluteValue.coerceIn(0f, 1f)
}
Java
class AnimationListener implements DynamicAnimation.OnAnimationUpdateListener {
    private final Random vibrationRandom = new Random(seed);
    private final long lastVibrationUptime;

    @Override
    public void onAnimationUpdate(
        DynamicAnimation animation, float value, float velocity) {
        // Delay the next check for a sufficient duration until the current
        // composition finishes. Note that you can use
        // Vibrator.getPrimitiveDurations API to calculcate the delay.
        if (SystemClock.uptimeMillis() - lastVibrationUptime < VIBRATION_DURATION) {
            return;
        }

        float displacement = calculateRelativeDisplacement(value);

        // Use some sort of minimum displacement so the final few frames
        // of animation don't generate a vibration.
        if (displacement < SPIN_MIN_DISPLACEMENT) {
            return;
        }

        lastVibrationUptime = SystemClock.uptimeMillis();
        vibrator.vibrate(
        VibrationEffect.startComposition()
            .addPrimitive(VibrationEffect.Composition.PRIMITIVE_SPIN,
            nextSpinScale(displacement))
            .addPrimitive(VibrationEffect.Composition.PRIMITIVE_SPIN,
            nextSpinScale(displacement))
            .compose());
    }

    // Calculate a random scale for each spin to vary the full effect.
    float nextSpinScale(float displacement) {
        // Generate a random offset in the range [-0.1,+0.1] to be added to
        // the vibration scale so the spin effects have slightly different
        // values.
        float randomOffset = vibrationRandom.nextFloat() * 0.2f - 0.1f
        return MathUtils.clamp(displacement + randomOffset, 0f, 1f)
    }
}
弹跳(伴有砰砰声)
振动效果的另一项高级应用是模拟物理互动。PRIMITIVE_THUD 可以营造出强劲而回荡的效果,并可与视频或动画中的冲击可视化效果搭配使用,以提升整体体验。
下面是一个球掉落动画的示例,每次球从屏幕底部弹起时都会播放砰然声效果:
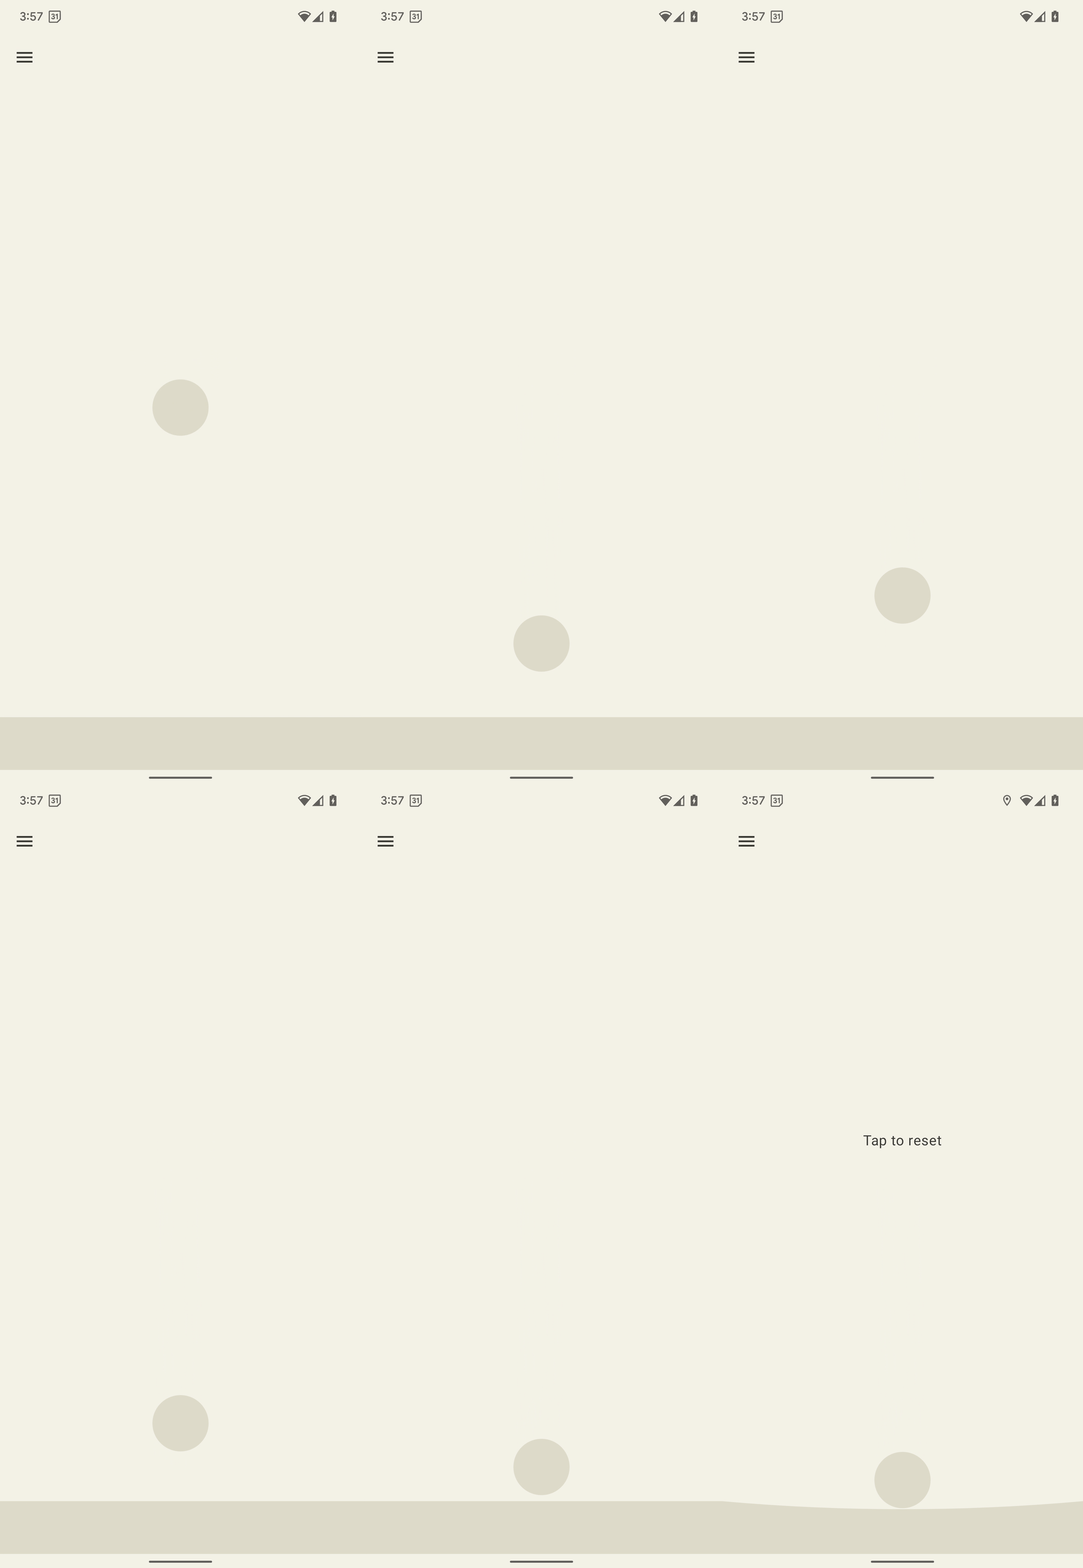
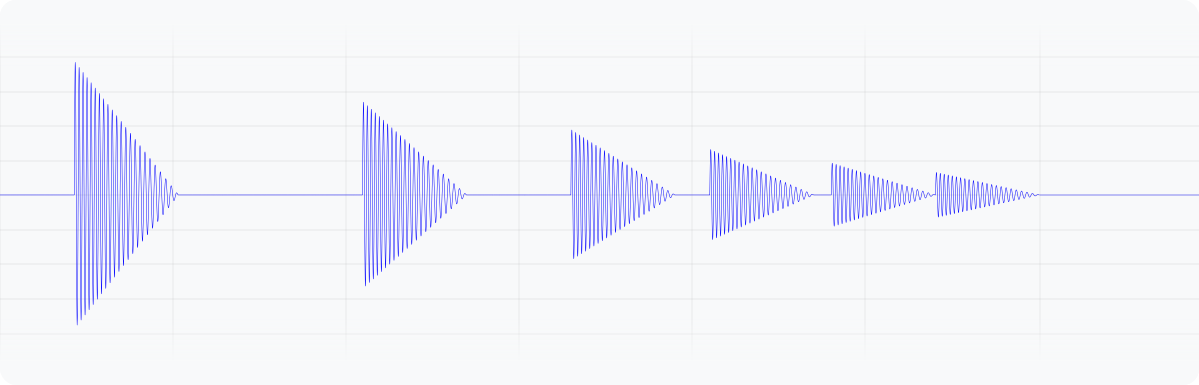
图 4. 此波形表示设备上振动的输出加速度。
Kotlin
enum class BallPosition {
    Start,
    End
}

@Composable
fun BounceScreen() {
    // Control variable for the state of the ball.
    var ballPosition by remember { mutableStateOf(BallPosition.Start) }
    var bounceCount by remember { mutableStateOf(0) }

    // Animation for the bouncing ball.
    var transitionData = updateTransitionData(ballPosition)
    val collisionData = updateCollisionData(transitionData)

    // Ball is about to contact floor, only vibrating once per collision.
    var hasVibratedForBallContact by remember { mutableStateOf(false) }
    if (collisionData.collisionWithFloor) {
        if (!hasVibratedForBallContact) {
        val vibrationScale = 0.7.pow(bounceCount++).toFloat()
        vibrator.vibrate(
            VibrationEffect.startComposition().addPrimitive(
            VibrationEffect.Composition.PRIMITIVE_THUD,
            vibrationScale
            ).compose()
        )
        hasVibratedForBallContact = true
        }
    } else {
        // Reset for next contact with floor.
        hasVibratedForBallContact = false
    }

    Screen() {
        Box(
        Modifier
            .fillMaxSize()
            .clickable {
            if (transitionData.isAtStart) {
                ballPosition = BallPosition.End
            } else {
                ballPosition = BallPosition.Start
                bounceCount = 0
            }
            },
        ) {
        // Build the ball UI based on the current state.
        BouncingBall(transitionData)
        }
    }
}
Java
class ClickListener implements View.OnClickListener {
    @Override
    public void onClick(View view) {
        view.animate()
        .translationY(targetY)
        .setDuration(3000)
        .setInterpolator(new BounceInterpolator())
        .setUpdateListener(new AnimatorUpdateListener() {

            boolean hasVibratedForBallContact = false;
            int bounceCount = 0;

            @Override
            public void onAnimationUpdate(ValueAnimator animator) {
            boolean valueBeyondThreshold = (float) animator.getAnimatedValue() > 0.98;
            if (valueBeyondThreshold) {
                if (!hasVibratedForBallContact) {
                float vibrationScale = (float) Math.pow(0.7, bounceCount++);
                vibrator.vibrate(
                    VibrationEffect.startComposition()
                    .addPrimitive(
                        VibrationEffect.Composition.PRIMITIVE_THUD,
                        vibrationScale)
                    .compose());
                hasVibratedForBallContact = true;
                }
            } else {
                // Reset for next contact with floor.
                hasVibratedForBallContact = false;
            }
            }
        });
    }
}
带包络的振动波形
通过创建自定义振动模式,您可以控制振动幅度,从而实现平稳的升降效果。本部分介绍了如何使用波形包络创建动态触感效果,从而实现对振动幅度和频率随时间变化的精确控制。这样一来,您就可以打造更丰富、更细致的触感体验。
从 Android 16(API 级别 36)开始,系统提供以下 API,用于通过定义一系列控制点来创建振动波形包络:
BasicEnvelopeBuilder:一种创建与硬件无关的触感反馈效果的无障碍方法。WaveformEnvelopeBuilder:一种更高级的触感反馈效果创建方法;需要熟悉触感反馈硬件。
Android 不为信封效果提供回退。如果您需要此支持,请完成以下步骤:
- 使用
Vibrator.areEnvelopeEffectsSupported()检查给定设备是否支持波封效果。 - 停用不受支持的一致体验,或使用自定义振动模式或振动组合作为后备替代方案。
如需创建更基本的波封效果,请使用 BasicEnvelopeBuilder 并搭配以下参数:
- 一个介于 \( [0, 1] \)之间的强度值,表示感知到的振动强度。例如,值 \( 0.5 \)表示感知到的亮度为设备可达到的全局最大亮度的一半。
范围为 \( [0, 1] \)的清晰度值,表示振动的清晰度。值越低,振动越平缓;值越高,振动越强烈。
一个时长值,表示从上一个控制点(即强度和清晰度对)过渡到新控制点所用的时间(以毫秒为单位)。
以下是一个波形示例,它会在 500 毫秒内将强度从低音调逐渐增加到高音调、最大强度的振动,然后在 100 毫秒内逐渐降回\( 0 \) (关闭)。
vibrator.vibrate(VibrationEffect.BasicEnvelopeBuilder()
    .setInitialSharpness(0.0f)
    .addControlPoint(1.0f, 1.0f, 500)
    .addControlPoint(0.0f, 1.0f, 100)
    .build()
)
如果您对触感反馈有更深入的了解,可以使用 WaveformEnvelopeBuilder 定义包络效果。使用此对象时,您可以通过 VibratorFrequencyProfile 访问频次到输出加速度的映射 (FOAM)。
- 范围为 \( [0, 1] \)的振幅值,表示在给定频率下可实现的振动强度,由设备 FOAM 确定。例如,值为 \( 0.5 \) 时,生成的输出加速度为在给定频率下可实现的最大输出加速度的一半。
以赫兹为单位指定的频次值。
一个时长值,表示从上一个控制点过渡到新控制点所用的时间(以毫秒为单位)。
以下代码显示了一个定义 400 毫秒振动效果的示例波形。首先,振幅以恒定的 60 Hz 从关闭状态逐渐增加到最大值,持续 50 ms。然后,频率在接下来的 100 ms 内逐渐增加到 120 Hz,并保持在该水平 200 ms。最后,振幅逐渐减小到 \( 0 \),频率在最后 50 ms 内恢复到 60 Hz:
vibrator.vibrate(VibrationEffect.WaveformEnvelopeBuilder()
    .addControlPoint(1.0f, 60f, 50)
    .addControlPoint(1.0f, 120f, 100)
    .addControlPoint(1.0f, 120f, 200)
    .addControlPoint(0.0f, 60f, 50)
    .build()
)
以下部分提供了多个带包络的振动波形示例。
弹跳的弹簧
之前的示例使用 PRIMITIVE_THUD 来模拟实体反弹互动。基本包络线 API 可提供更精细的控制,让您能够精确调整振动强度和清晰度。这样一来,触感反馈就能更准确地跟随动画事件。
以下示例展示了一个自由落体的弹簧,动画效果通过基本包络效果得到增强,每次弹簧从屏幕底部弹起时都会播放该效果:
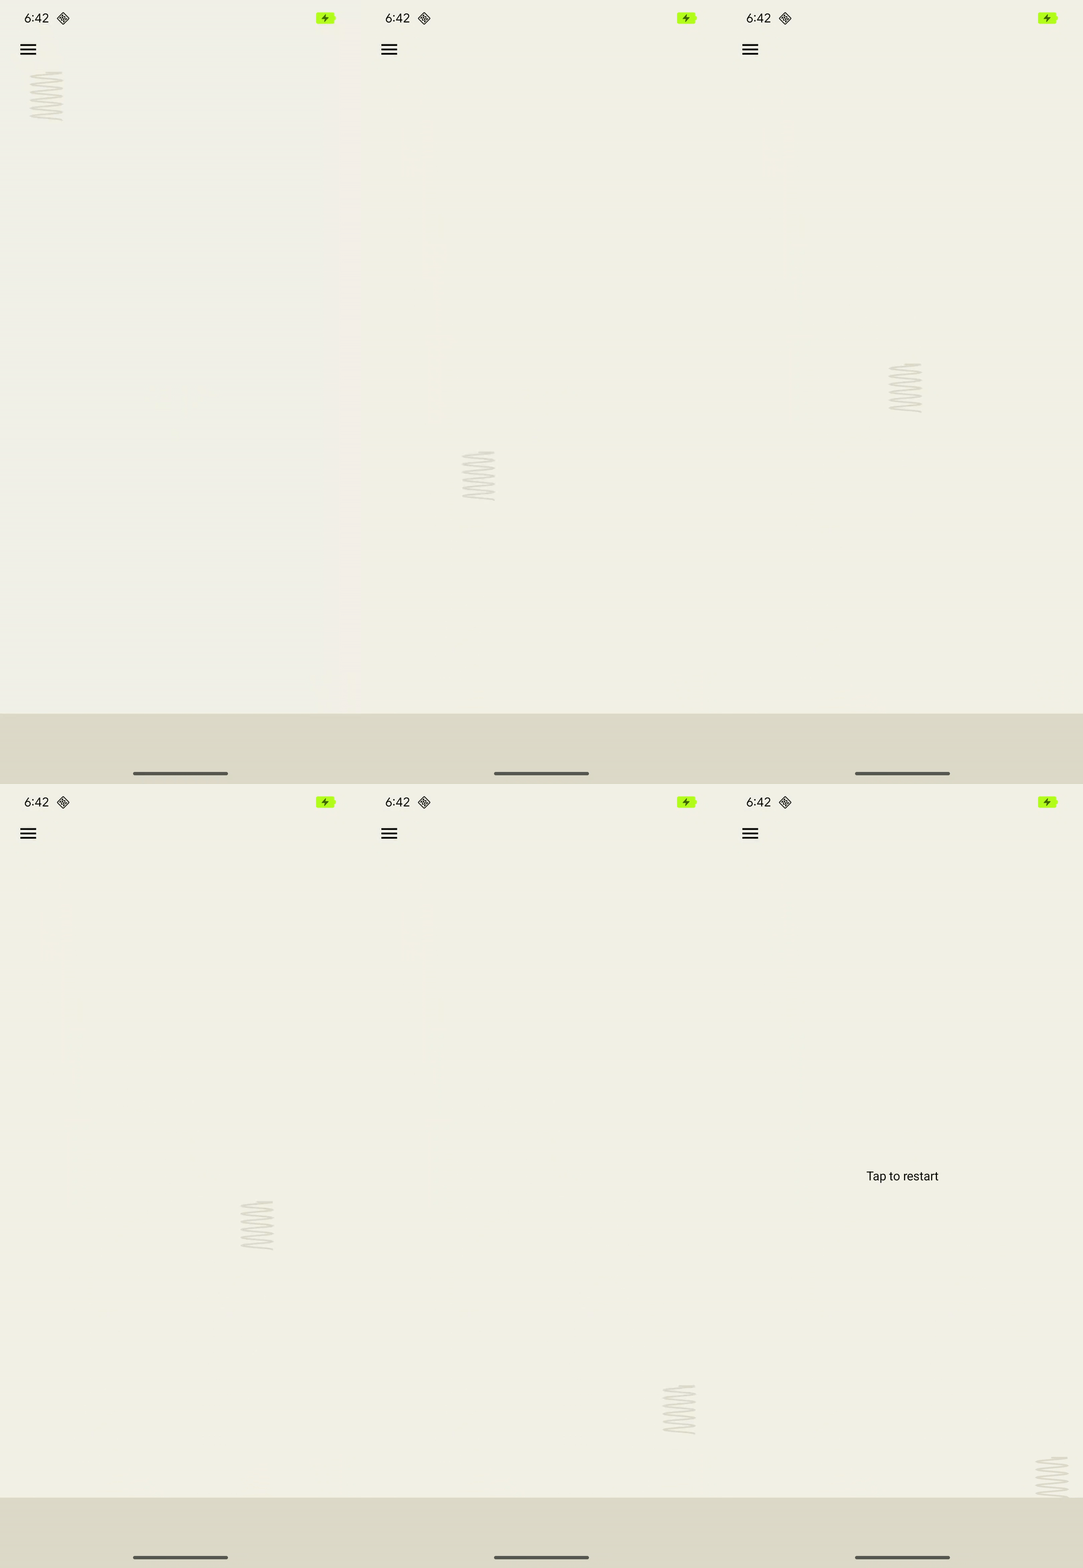
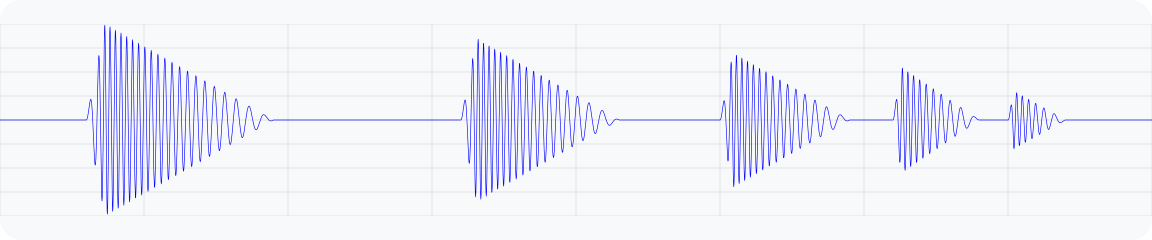
图 5. 一个输出加速度波形图,用于模拟弹簧的振动。
@Composable
fun BouncingSpringAnimation() {
  var springX by remember { mutableStateOf(SPRING_WIDTH) }
  var springY by remember { mutableStateOf(SPRING_HEIGHT) }
  var velocityX by remember { mutableFloatStateOf(INITIAL_VELOCITY) }
  var velocityY by remember { mutableFloatStateOf(INITIAL_VELOCITY) }
  var sharpness by remember { mutableFloatStateOf(INITIAL_SHARPNESS) }
  var intensity by remember { mutableFloatStateOf(INITIAL_INTENSITY) }
  var multiplier by remember { mutableFloatStateOf(INITIAL_MULTIPLIER) }
  var bottomBounceCount by remember { mutableIntStateOf(0) }
  var animationStartTime by remember { mutableLongStateOf(0L) }
  var isAnimating by remember { mutableStateOf(false) }

  val (screenHeight, screenWidth) = getScreenDimensions(context)

  LaunchedEffect(isAnimating) {
    animationStartTime = System.currentTimeMillis()
    isAnimating = true

    while (isAnimating) {
      velocityY += GRAVITY
      springX += velocityX.dp
      springY += velocityY.dp

      // Handle bottom collision
      if (springY > screenHeight - FLOOR_HEIGHT - SPRING_HEIGHT / 2) {
        // Set the spring's y-position to the bottom bounce point, to keep it
        // above the floor.
        springY = screenHeight - FLOOR_HEIGHT - SPRING_HEIGHT / 2

        // Reverse the vertical velocity and apply damping to simulate a bounce.
        velocityY *= -BOUNCE_DAMPING
        bottomBounceCount++

        // Calculate the fade-out duration of the vibration based on the
        // vertical velocity.
        val fadeOutDuration =
            ((abs(velocityY) / GRAVITY) * FRAME_DELAY_MS).toLong()

        // Create a "boing" envelope vibration effect that fades out.
        vibrator.vibrate(
            VibrationEffect.BasicEnvelopeBuilder()
                // Starting from zero sharpness here, will simulate a smoother
                // "boing" effect.
                .setInitialSharpness(0f)

                // Add a control point to reach the target intensity and
                // sharpness very quickly.
                .addControlPoint(intensity, sharpness, 20L)

                // Add a control point to fade out the vibration intensity while
                // maintaining sharpness.
                .addControlPoint(0f, sharpness, fadeOutDuration)
                .build()
        )

        // Decrease the intensity and sharpness of the vibration for subsequent
        // bounces, and reduce the multiplier to create a fading effect.
        intensity *= multiplier
        sharpness *= multiplier
        multiplier -= 0.1f
      }

      if (springX > screenWidth - SPRING_WIDTH / 2) {
        // Prevent the spring from moving beyond the right edge of the screen.
        springX = screenWidth - SPRING_WIDTH / 2
      }

      // Check for 3 bottom bounces and then slow down.
      if (bottomBounceCount >= MAX_BOTTOM_BOUNCE &&
            System.currentTimeMillis() - animationStartTime > 1000) {
        velocityX *= 0.9f
        velocityY *= 0.9f
      }

      delay(FRAME_DELAY_MS) // Control animation speed.

      // Determine if the animation should continue based on the spring's
      // position and velocity.
      isAnimating = (springY < screenHeight + SPRING_HEIGHT ||
            springX < screenWidth + SPRING_WIDTH)
        && (velocityX >= 0.1f || velocityY >= 0.1f)
    }
  }

  Box(
    modifier = Modifier
      .fillMaxSize()
      .noRippleClickable {
        if (!isAnimating) {
          resetAnimation()
        }
      }
      .width(screenWidth)
      .height(screenHeight)
  ) {
    DrawSpring(mutableStateOf(springX), mutableStateOf(springY))
    DrawFloor()
    if (!isAnimating) {
      DrawText("Tap to restart")
    }
  }
}
火箭发射
之前的示例展示了如何使用基本包络 API 来模拟弹簧的弹跳反应。WaveformEnvelopeBuilder 可实现对设备完整频段的精准控制,从而实现高度自定义的触感反馈效果。将此数据与 FOAM 数据相结合,您可以根据特定的频率功能定制振动。
以下示例演示了如何使用动态振动模式模拟火箭发射。效果从支持的最低频率加速度输出 0.1 G 变化到共振频率,始终保持 10% 的振幅输入。这样一来,即使驱动振幅相同,效果也会以相当强的输出开始,并提高感知到的强度和清晰度。达到共振后,效果频率会降回最低值,这会被感知为强度和清晰度下降。 这样会产生初始阻力感,然后释放,模拟发射到太空的感觉。
基本包络 API 无法实现此效果,因为它会抽象出有关设备共振频率和输出加速度曲线的设备特定信息。提高清晰度可能会使等效频率超出共振频率,从而可能导致意外的加速度下降。
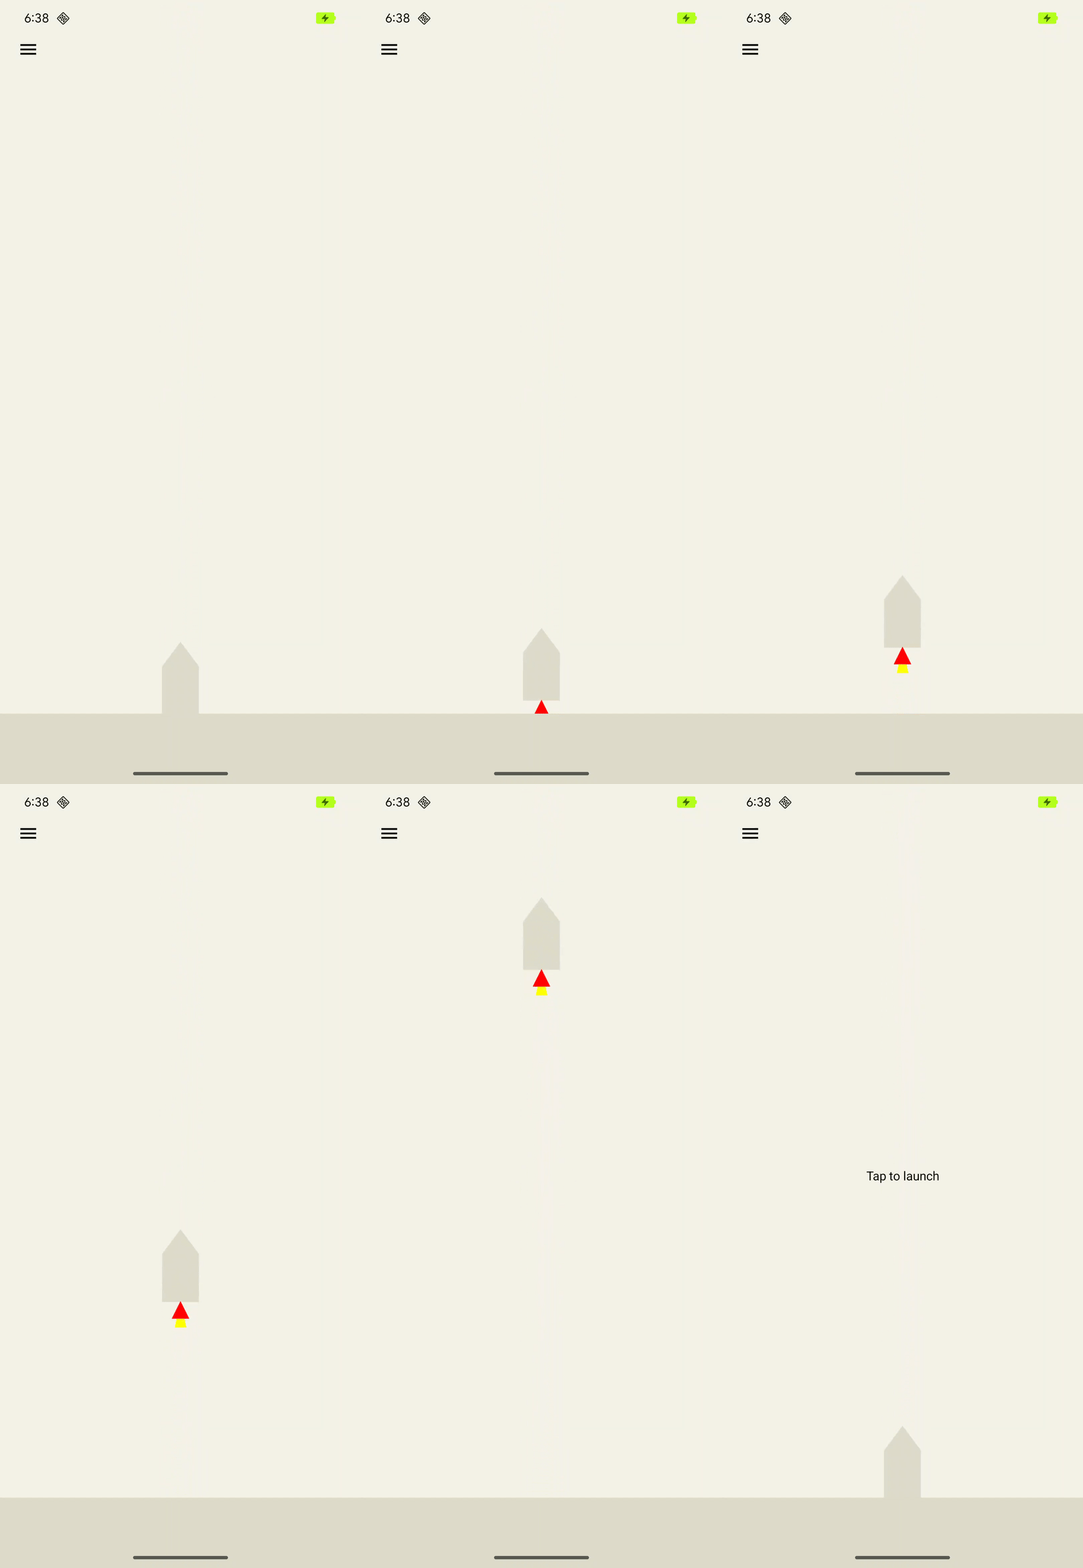
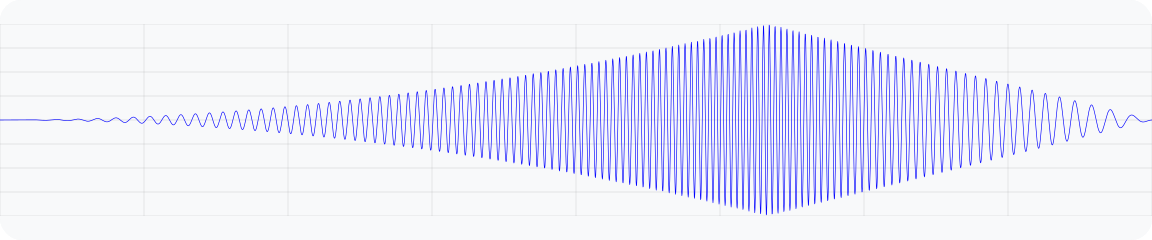
图 6. 一个模拟火箭发射的振动的输出加速度波形图。
@Composable
fun RocketLaunchAnimation() {
  val context = LocalContext.current
  val screenHeight = remember { mutableFloatStateOf(0f) }
  var rocketPositionY by remember { mutableFloatStateOf(0f) }
  var isLaunched by remember { mutableStateOf(false) }
  val animation = remember { Animatable(0f) }

  val animationDuration = 3000
  LaunchedEffect(isLaunched) {
    if (isLaunched) {
      animation.animateTo(
        1.2f, // Overshoot so that the rocket goes off the screen.
        animationSpec = tween(
          durationMillis = animationDuration,
          // Applies an easing curve with a slow start and rapid acceleration
          // towards the end.
          easing = CubicBezierEasing(1f, 0f, 0.75f, 1f)
        )
      ) {
        rocketPositionY = screenHeight.floatValue * value
      }
      animation.snapTo(0f)
      rocketPositionY = 0f;
      isLaunched = false;
    }
  }

  Box(
    modifier = Modifier
      .fillMaxSize()
      .noRippleClickable {
        if (!isLaunched) {
          // Play vibration with same duration as the animation, using 70% of
          // the time for the rise of the vibration, to match the easing curve
          // defined previously.
          playVibration(vibrator, animationDuration, 0.7f)
          isLaunched = true
        }
      }
      .background(Color(context.getColor(R.color.background)))
      .onSizeChanged { screenHeight.floatValue = it.height.toFloat() }
  ) {
    drawRocket(rocketPositionY)
  }
}

private fun playVibration(
  vibrator: Vibrator,
  totalDurationMs: Long,
  riseBias: Float,
  minOutputAccelerationGs: Float = 0.1f,
) {
  require(riseBias in 0f..1f) { "Rise bias must be between 0 and 1." }

  if (!vibrator.areEnvelopeEffectsSupported()) {
    return
  }

  val resonantFrequency = vibrator.resonantFrequency
  if (resonantFrequency.isNaN()) {
    // Device doesn't have or expose a resonant frequency.
    return
  }

  val startFrequency = vibrator.frequencyProfile?.getFrequencyRange(minOutputAccelerationGs)?.lower ?: return

  if (startFrequency >= resonantFrequency) {
    // Vibrator can't generate the minimum required output at lower frequencies.
    return
  }

  val minDurationMs = vibrator.envelopeEffectInfo.minControlPointDurationMillis
  val rampUpDurationMs = (riseBias * totalDurationMs).toLong() - minDurationMs
  val rampDownDurationMs = totalDurationMs - rampUpDuration - minDurationMs

  vibrator.vibrate(
    VibrationEffect.WaveformEnvelopeBuilder()
      // Quickly reach the target output at the start frequency
      .addControlPoint(0.1f, startFrequency, minDurationMs)
      .addControlPoint(0.1f, resonantFrequency, rampUpDurationMs)
      .addControlPoint(0.1f, startFrequency, rampDownDurationMs)

      // Controlled ramp down to zero to avoid ringing after the vibration.
      .addControlPoint(0.0f, startFrequency, minDurationMs)
      .build()
  )
}
LavaBeats
与 Rocket Launch 示例中一样,WaveformEnvelopeBuilder API 通过控制振动中的振幅和频率段,可以设计出许多复杂触感效果。此类设计的另一个示例是模拟更抽象的身体感觉,例如“活力”。
为此,可以使用特定振幅和频率的振动段来表示典型心电图 (ECG) 信号的生物标记。LavaBeats 是一个示例,其中 ECG 记录的两个特征性片段表示为两个由时间延迟分隔的脉冲。第一个特征脉冲是 QRS 波群,它表现为振幅高、持续时间短的尖峰。第二个脉冲是 T 波,其振幅较低、持续时间较长,形状也更平滑(见图 7)。
使用 WaveformEnvelopeBuilder 可构建这两个脉冲的各种重复序列,这些脉冲之间以固定的第一个脉冲到第二个脉冲延迟分隔。第一个脉冲可以是线性调频信号,在短时间内从低频开始,以高频结束。第二个脉冲可以表示为低频正弦波的单个周期。我们可以将这两个脉冲组合成一个节拍,并按照典型的每分钟节拍数 (bpm) 速率,重复该组合多次,并在其间添加延迟。结果是类似于心脏跳动的触感效果。
您可以在 GitHub 上试用我们的触感示例应用中的 LavaBeats,感受触感效果,同时观看与触感效果节奏一致的熔岩灯可视化效果。您还可以通过修改两个脉冲的振幅、频率、时长和延迟时间来更改效果设置,从而营造不同的跳动感。


图 7. 包含 QRS 波群和 T 波的心电图记录片段
@RequiresApi(Build.VERSION_CODES.BAKLAVA)
private fun createEnvelopeEffect(
beatParameters: List<BeatParameter>
):VibrationEffect =
    VibrationEffect.WaveformEnvelopeBuilder()
        .apply {
            repeat(beatParameters.getNumBeats()) {
                // First pulse chirp
                addControlPoint(
                    beatParameters.getFirstPulseAmplitude(),
                    beatParameters.getFirstPulseStartFreq(),
                    ENVELOPE_RAMP_DURATION_MILLIS,
                )
                addControlPoint(
                    beatParameters.getFirstPulseAmplitude(),
                    beatParameters.getFirstPulseEndFreq(),
                    beatParameters.getFirstPulseDurationMillis().toLong(),
                )
                addControlPoint(
                    0f,
                    beatParameters.getFirstPulseEndFreq(),
                    ENVELOPE_RAMP_DURATION_MILLIS,
                )

                // Delay between first and second pulse
                addControlPoint(
                    0f,
                    beatParameters.getFirstPulseEndFreq(),
                    beatParameters.getFirstToSecondPulseDelayMillis().toLong(),
                )

                // Second pulse
                addControlPoint(
                    beatParameters.getSecondPulseAmplitude(),
                    beatParameters.getSecondPulseFreq(),
                    ENVELOPE_RAMP_DURATION_MILLIS,
                )
                addControlPoint(
                    beatParameters.getSecondPulseAmplitude(),
                    beatParameters.getSecondPulseFreq(),
                    (1_000 / (2f * beatParameters.getSecondPulseFreq())).toLong(),
                )
                addControlPoint(
                    0f,
                    beatParameters.getSecondPulseFreq(),
                    ENVELOPE_RAMP_DURATION_MILLIS,
                )
                addControlPoint(
                    0f,
                    beatParameters.getSecondPulseFreq(),
                    beatParameters.getBeatDelayMillis().toLong(),
                )
            }
        }
        .build()

/** A parameter of a haptic beat effect that represents an ECG signal parameter */
@Stable
data class BeatParameter(
    val description: String = "",
    val value: Float = 0f,
    val range: ClosedFloatingPointRange<Float> = 0f..1f,
    val steps: Int = 0,
    val isFrequencyType: Boolean = false,
)